Canon PIXMA MX360 MX360 series Getting Started - Page 13
Close the Scanning Unit Cover gently.
 |
View all Canon PIXMA MX360 manuals
Add to My Manuals
Save this manual to your list of manuals |
Page 13 highlights
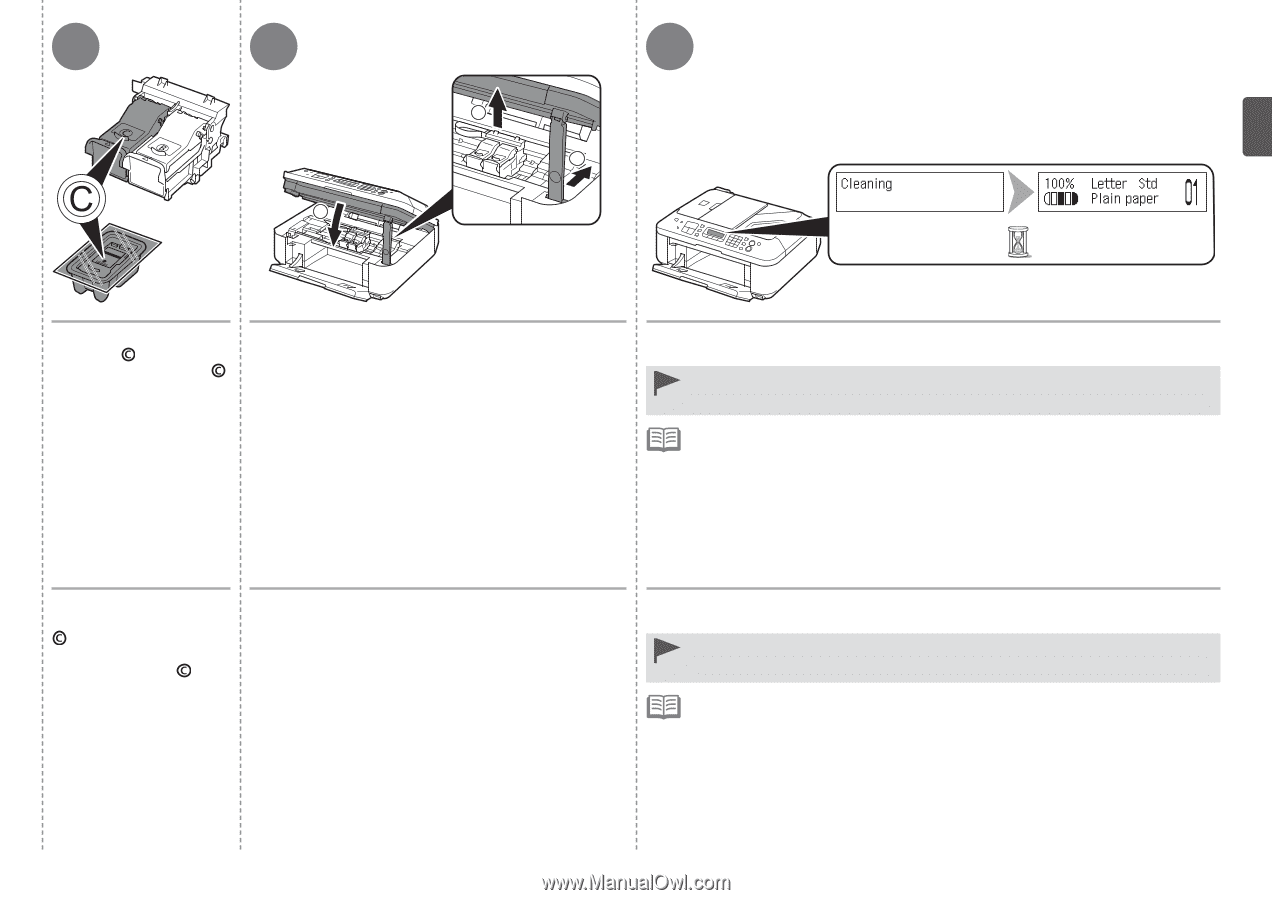
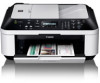
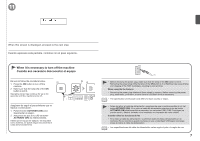
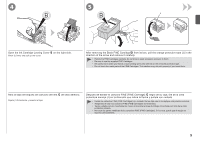
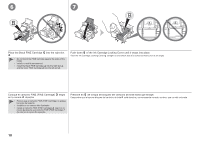
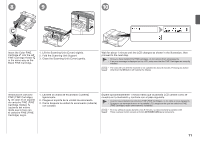
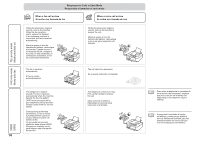
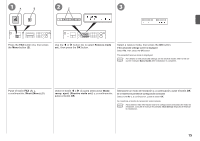
8 9 10 1 2 3 Insert the Color FINE Cartridge into the left FINE Cartridge Holder in the same way as the Black FINE Cartridge. 1. Lift the Scanning Unit (Cover) slightly. 2. Fold the Scanning Unit Support. 3. Close the Scanning Unit (Cover) gently. Wait for about 1 minute until the LCD changes as shown in the illustration, then proceed to the next step. • Once you have installed the FINE Cartridges, do not remove them unnecessarily. • If an error message is displayed on the LCD, make sure that the FINE Cartridges are correctly installed. • The LCD will turn off if the machine is not operated for about 5 minutes. Pressing any button other than the ON button will restore the display. Introduzca el cartucho FINE (FINE Cartridge) de color en el soporte de cartucho FINE (FINE Cartridge Holder) izquierdo del mismo modo que lo hizo con el cartucho FINE (FINE Cartridge) negro. 1. Levante la unidad de escaneado (cubierta) ligeramente. 2. Pliegue el soporte de la unidad de escaneado. 3. Cierre después la unidad de escaneado (cubierta) con cuidado. Espere aproximadamente 1 minuto hasta que la pantalla LCD cambie como se muestra en la ilustración y continúe con el paso siguiente. • Cuando haya instalado los cartuchos FINE (FINE Cartridges), no los retire si no es necesario. • Si aparece un mensaje de error en la pantalla LCD, asegúrese de que los cartuchos FINE (FINE Cartridges) estén correctamente instalados. • Si no se utiliza el equipo durante unos 5 minutos, se desconectará la pantalla LCD. Pulse cualquier botón excepto el botón ACTIVADO (ON) para restaurarla. 11
-
 1
1 -
2
-
3
-
4
-
5
-
6
-
7
-
 8
8 -
 9
9 -
 10
10 -
 11
11 -
 12
12 -
 13
13 -
 14
14 -
 15
15 -
 16
16 -
 17
17 -
 18
18 -
19
-
20
-
21
-
22
-
23
-
24
-
25
-
26
-
27
-
28
-
29
-
30
-
31
-
32
-
33
 |
 |