Canon PIXMA MX432 Configuraci?n del FAX [Spanish Version]
Canon PIXMA MX432 Manual
 |
View all Canon PIXMA MX432 manuals
Add to My Manuals
Save this manual to your list of manuals |
Canon PIXMA MX432 manual content summary:
- Canon PIXMA MX432 | Configuraci?n del FAX [Spanish Version] - Page 1
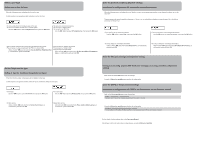
the Setup menu. 2 Use the [] button to select Fax settings, then press the OK button. 3 Use the [] button to select Easy setup, then press the OK button. 4 Use the [] button to select Start setup, then press the OK button. Easy setup starts up. Follow the on-screen instruction to complete the - Canon PIXMA MX432 | Configuraci?n del FAX [Spanish Version] - Page 2
to select Telephone line, then press the OK button. • To connect to an internet telephone • To connect to a xDSL modem • To connect to an ISDN line Use the [] button to select IP telephone line, then press the OK button. Enter the External Answering Machine settings Introduzca la configuraci
-
 1
1 -
 2
2
 |
 |
K10375/K10374
XXXXXXXX
©CANON INC.2012
1
2
ESPAÑOL
Configuración del FAX
Para utilizar las funciones del equipo, puede introducir la
configuración del fax mediante
Configuración fácil (Easy setup)
.
Conecte una clavija de línea telefónica / Conecte un teléfono
En esta figura se muestra un método de conexión básico. Para ver otros métodos de
conexión, consulte el
Manual en pantalla
.
Usuarios en Europa: si utiliza su propio cable de línea telefónica, asegúrese de que es un
cable de línea telefónica de 6 hilos.
•
•
Conecte el equipo a una clavija de línea telefónica con el cable de línea telefónica
suministrado.
El conector lleva la etiqueta
en la parte posterior del equipo.
1
1
Pulse el botón
para mostrar el
Menú Configurar (Setup menu)
.
Utilice el botón
[]
para seleccionar
Configuración fax (Fax settings)
y, a continuación, pulse el botón
OK
.
Utilice el botón
[]
para seleccionar
Configuración fácil (Easy setup)
y, a continuación, pulse el botón
OK
.
Utilice el botón
[]
para seleccionar
Iniciar config. (Start setup)
y, a continuación, pulse el botón
OK
.
Se inicia la
Configuración fácil (Easy setup)
.
Siga las instrucciones en pantalla para finalizar la configuración en función del entorno operativo.
1
1
2
2
3
3
4
4
Información complementaria sobre la configuración del fax utilizando Configuración
fácil (Easy setup)
Uso de Configuración fácil (Easy setup)
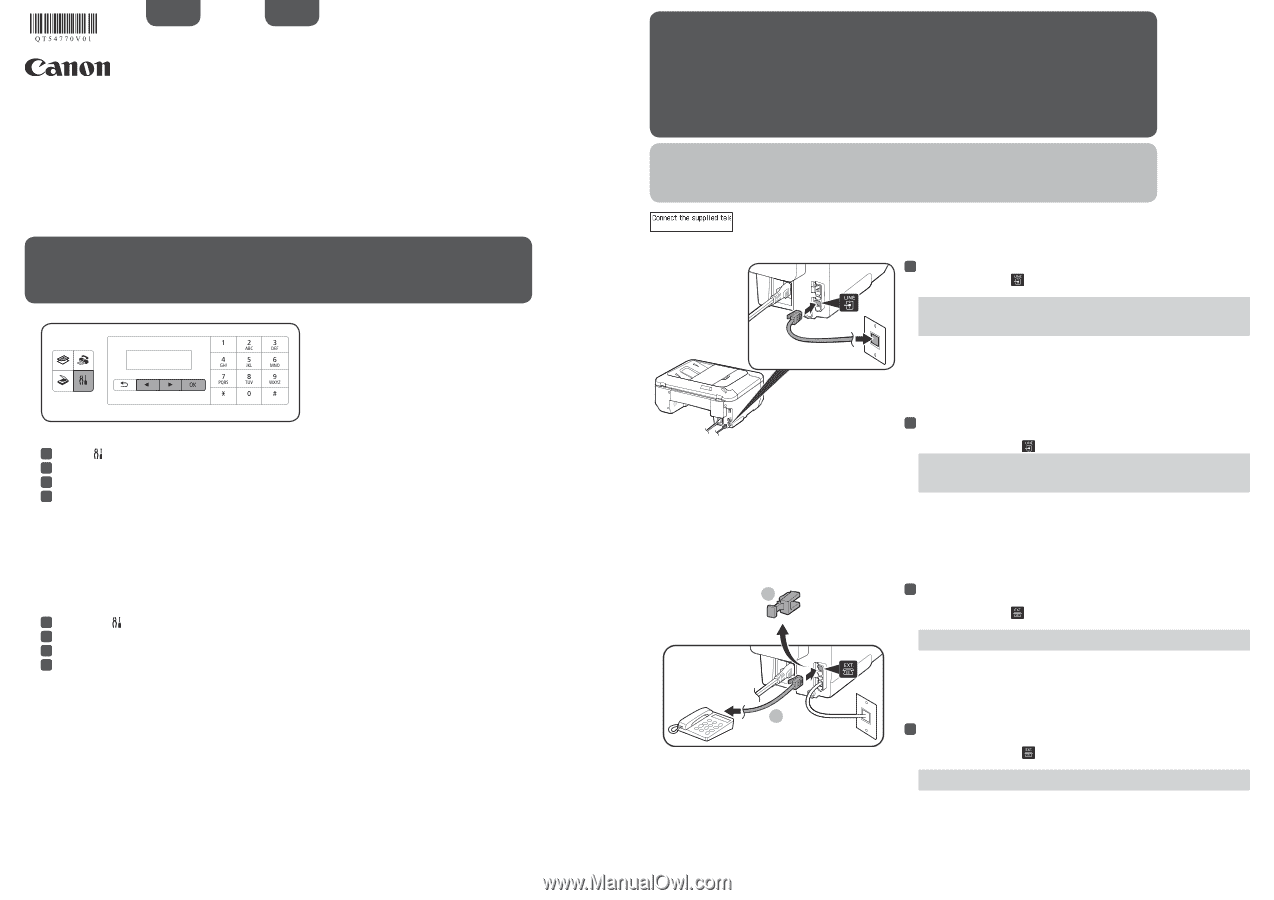
Al conectar un teléfono o un contestador automático, retire la tapa (Cap) y, a continuación,
conecte el teléfono o el contestador automático con un cable de línea telefónica.
El conector lleva la etiqueta
en la parte posterior del equipo.
2
2
No utilice un adaptador de clavija telefónica doble.
Usuarios de Reino Unido: utilice un adaptador de B.T. para la conexión, si fuera necesario.
•
•
Cuando aparezca esta pantalla, realice las siguientes operaciones.
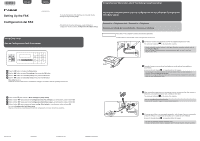
Setting Up the FAX
To use the fax features of the machine, you can enter the fax
settings through the
Easy setup
.
ENGLISH
Press the
button to display the
Setup menu
.
Use the
[]
button to select
Fax settings
, then press the
OK
button.
Use the
[]
button to select
Easy setup
, then press the
OK
button.
Use the
[]
button to select
Start setup
, then press the
OK
button.
Easy setup
starts up.
Follow the on-screen instruction to complete the settings in accordance with the operating environment.
1
1
2
2
3
3
4
4
Connect to a Telephone Jack / Connect to a Telephone
A basic connection method is shown in this figure. For other connection methods, refer to
the
On-screen Manual
.
Users in Europe: If you prepare your own telephone line cable, be sure it is a 6-wire
telephone line cable.
•
•
Connect the machine to a telephone jack with the supplied telephone line cable.
The connector is labeled
on the back of the machine.
1
1
When connecting a telephone or an answering machine, remove the Cap, then connect a
telephone or an answering machine with a telephone line cable.
The connector is labeled
on the back of the machine.
2
2
Do not use a telephone jack line duplexer.
Users in UK: Use a B.T. adapter for connection as required.
•
•
Complementary Information about Fax Setting Using Easy setup
When this screen is displayed, perform the following operations.
Using Easy setup
QT5-4770-V01
PRINTED IN XXXXXXXX