Canon PIXMA MX459 User Manual - Page 82
Maintenance Procedure - printer ink
 |
View all Canon PIXMA MX459 manuals
Add to My Manuals
Save this manual to your list of manuals |
Page 82 highlights
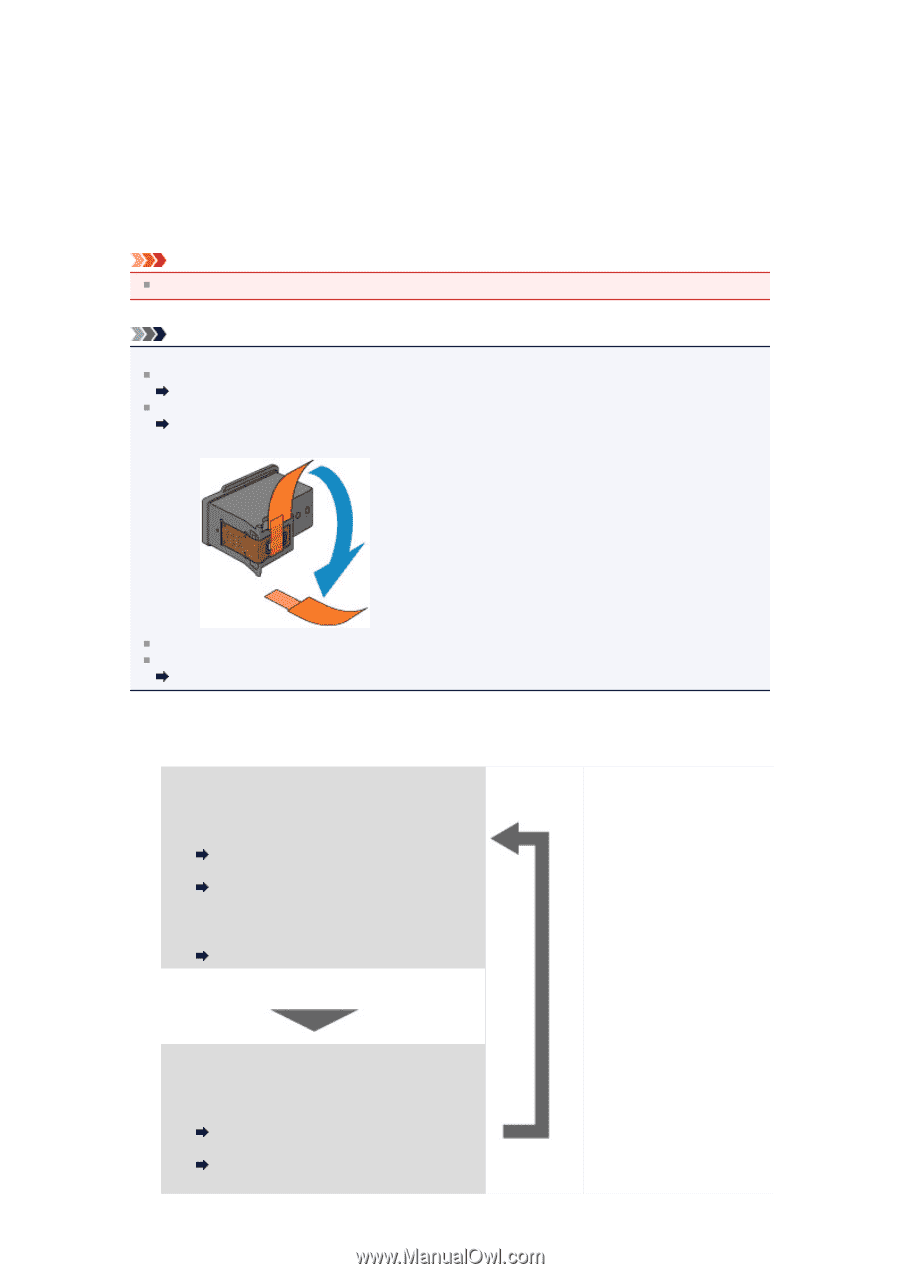
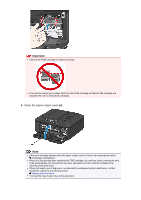
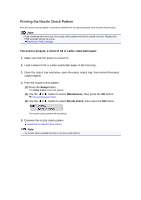
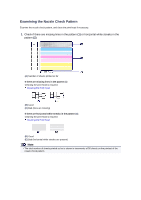
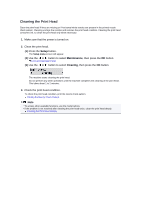
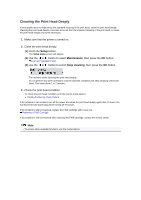
Maintenance Procedure If print results are blurred or colors are not printed correctly, the print head nozzle (FINE cartridge) is probably clogged. Follow the procedure below to print the nozzle check pattern, check the print head nozzle condition, then clean the print head. If printed ruled lines are misaligned or print results are otherwise unsatisfactory, aligning the print head may improve print quality. Important Do not rinse or wipe the FINE cartridge. This can cause trouble with the FINE cartridge. Note Before performing maintenance Check if ink remains in the FINE cartridge. Checking the Ink Status with the LCD on the Machine Check if the FINE cartridge is installed correctly. Replacing Procedure Also check if the protective tape on the bottom of the FINE cartridge is removed. If an error message appears on the LCD, see A Message Is Displayed. Increasing the print quality in the printer driver settings may improve the print result. Changing the Print Quality and Correcting Image Data When the Print Results Are Blurred or Uneven: Step 1 Print the nozzle check pattern. From the machine Printing the Nozzle Check Pattern From the computer Use Your Computer to Print a Nozzle Check Pattern Examine the nozzle check pattern. Examining the Nozzle Check Pattern If there are missing lines or horizontal white streaks in the pattern: After cleaning the print head, print and examine the nozzle check pattern. Step 2 Clean the print head. From the machine Cleaning the Print Head From the computer Cleaning the Print Heads from Your Computer
-
 1
1 -
2
-
3
-
4
-
5
-
6
-
7
-
8
-
9
-
10
-
11
-
12
-
13
-
14
-
15
-
16
-
17
-
18
-
19
-
20
-
21
-
22
-
23
-
24
-
25
-
26
-
27
-
28
-
29
-
30
-
31
-
32
-
33
-
34
-
35
-
36
-
37
-
38
-
39
-
40
-
41
-
42
-
43
-
44
-
45
-
46
-
47
-
48
-
49
-
50
-
51
-
52
-
53
-
54
-
55
-
56
-
57
-
58
-
59
-
60
-
61
-
62
-
63
-
64
-
65
-
66
-
67
-
68
-
69
-
70
-
71
-
72
-
73
-
74
-
75
-
76
-
 77
77 -
 78
78 -
 79
79 -
 80
80 -
 81
81 -
 82
82 -
 83
83 -
 84
84 -
 85
85 -
 86
86 -
 87
87 -
88
-
89
-
90
-
91
-
92
-
93
-
94
-
95
-
96
-
97
-
98
-
99
-
100
-
101
-
102
-
103
-
104
-
105
-
106
-
107
-
108
-
109
-
110
-
111
-
112
-
113
-
114
-
115
-
116
-
117
-
118
-
119
-
120
-
121
-
122
-
123
-
124
-
125
-
126
-
127
-
128
-
129
-
130
-
131
-
132
-
133
-
134
-
135
-
136
-
137
-
138
-
139
-
140
-
141
-
142
-
143
-
144
-
145
-
146
-
147
-
148
-
149
-
150
-
151
-
152
-
153
-
154
-
155
-
156
-
157
-
158
-
159
-
160
-
161
-
162
-
163
-
164
-
165
-
166
-
167
-
168
-
169
-
170
-
171
-
172
-
173
-
174
-
175
-
176
-
177
-
178
-
179
-
180
-
181
-
182
-
183
-
184
-
185
-
186
-
187
-
188
-
189
-
190
-
191
-
192
-
193
-
194
-
195
-
196
-
197
-
198
-
199
-
200
-
201
-
202
-
203
-
204
-
205
-
206
-
207
-
208
-
209
-
210
-
211
-
212
-
213
-
214
-
215
-
216
-
217
 |
 |