Canon PIXMA MX472 User Manual
Canon PIXMA MX472 Manual
 |
View all Canon PIXMA MX472 manuals
Add to My Manuals
Save this manual to your list of manuals |
Canon PIXMA MX472 manual content summary:
- Canon PIXMA MX472 | User Manual - Page 1
MX470 series Online Manual Read Me First Useful Functions Available on the Machine Overview of the Machine English - Canon PIXMA MX472 | User Manual - Page 2
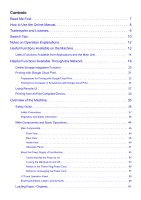
How to Use the Online Manual 8 Trademarks and Licenses for Printing with Google Cloud Print 22 Printing from Computer or Smartphone with Google Cloud Print 25 Using Compliant Device 30 Overview of the Machine 35 Safety Guide 36 Safety Precautions 37 Regulatory and Safety Information 38 - Canon PIXMA MX472 | User Manual - Page 3
Originals on the Platen Glass 84 Loading Documents in the ADF (Auto Document Feeder 86 How to Load Originals for Each Function 88 Originals You Can Load 90 Replacing a FINE Cartridge 92 Replacing a FINE Cartridge 93 Checking the Ink Status 99 Checking the Ink Status with the LCD on the - Canon PIXMA MX472 | User Manual - Page 4
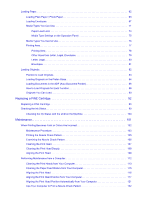
162 Initial Values Set at Factory (Network 163 Connecting the Machine to the Computer Using a USB Cable 164 When Detecting the Printers Have the Same Name during Setup 165 Connecting to Other Computer with LAN/Changing the Connection Method from USB to LAN. . 166 Printing Out Network Setting - Canon PIXMA MX472 | User Manual - Page 5
Screen 214 Connection Performance Measurement Screen 215 Maintenance Screen 217 Network Setup of the Card Slot Screen 218 Associate Port Screen 220 Network Information Screen 221 Appendix for Network Communication 222 Using the Card Slot over a Network 223 When the Printer Driver Is Not - Canon PIXMA MX472 | User Manual - Page 6
Useful Information about Ink 235 Key Points to Successful Printing 236 Be Sure to Make Paper Settings after Loading Paper 237 Canceling a Print Job 238 Key to Enjoying Consistent - Canon PIXMA MX472 | User Manual - Page 7
service center if you find any incorrect or missing information. • In principle, the descriptions in this guide are based on the product at the time of its initial sale. • This guide does not disclose the manuals of all the products sold by Canon. See the manual 2. Select Page Setup... from the File - Canon PIXMA MX472 | User Manual - Page 8
notes for operation and additional explanations. Basic Instructions explaining basic operations of your product. Note • Icons may vary depending on your product. Touch-enabled Device Users For touch actions, you need to replace "right-click" in this document with the action set on the operating - Canon PIXMA MX472 | User Manual - Page 9
registered trademark of Microsoft Corporation in the U.S. and/or other countries. • Mac, Mac OS, AirPort, Safari, Bonjour, iPad, iPhone and iPod touch are trademark of Bluetooth SIG, Inc., U.S.A. and licensed to Canon Inc. Note • The formal name of Windows Vista is Microsoft Windows Vista operating - Canon PIXMA MX472 | User Manual - Page 10
and click (Search). You can search for target pages in this guide. Entry example: "(your product's model name) load paper", window and perform a search • Troubleshooting Errors Enter your product's model name and a support code Example: When the following error screen appears Enter "(your product's - Canon PIXMA MX472 | User Manual - Page 11
: When you want to browse the page referred to by the following sentence on a scanning procedure page Refer to "Color Settings Tab" for your model from Home of the Online Manual for details. Enter "(your product's model name) scan Color Settings Tab" in the search window and perform a search 11 - Canon PIXMA MX472 | User Manual - Page 12
Notes on Operation Explanations In this guide, most of the operations are described based on the windows displayed when Windows 8 operating system (called Windows 8 below) is used. 12 - Canon PIXMA MX472 | User Manual - Page 13
various functions. Helpful Functions Available Through the Network You can print more conveniently through integration with smartphones and other devices or with services on the web. Useful Functions Available from Applications and the Main Unit You can create items such as collages easily or - Canon PIXMA MX472 | User Manual - Page 14
and the main unit. • Print Photos Easily • Connect Wirelessly with Ease • Download Content Materials • Print Photos on Facebook Print Photos Easily photos, Quick Menu automatically selects the photos on your computer and creates recommended items such as collages and cards. The created items - Canon PIXMA MX472 | User Manual - Page 15
Point Mode" The machine supports "access point mode" in which you can connect to the machine wirelessly from a computer or smartphone even in an environment without an access point or wireless LAN router. Switch to "access point mode" with simple steps to enjoy scanning and printing wirelessly. 15 - Canon PIXMA MX472 | User Manual - Page 16
PREMIUM Contents can be printed directly with My Image Garden. To download PREMIUM Contents, make sure that genuine Canon ink tanks/ink cartridges are installed for all colors on a supported printer. Note • The designs of PREMIUM Contents provided in this page are subject to change without - Canon PIXMA MX472 | User Manual - Page 17
Print Photos on Facebook Easily Using a Facebook App "Print Your Days" Use Print Your Days to collect Facebook photos of memories of parties and travel, recent activity of your family and friends, your hobbies, etc., then create and print a work of art. Print Your Days is available from the Print - Canon PIXMA MX472 | User Manual - Page 18
Printer from a Remote Location by Using Remote UI Print easily from your smartphone by using PIXMA Printing Solutions Printing with Windows RT Upload Scanned computer, you can easily upload scanned images to the web. Uploaded images can be utilized from other computers or services supporting Google - Canon PIXMA MX472 | User Manual - Page 19
this product from your computer, smartphone, or tablet device. When the connection is complete, the Canon Inkjet Print Utility software, which allows you to specify detailed print settings, is downloaded automatically. By using Canon Inkjet Print Utility, you can check the printer status and specify - Canon PIXMA MX472 | User Manual - Page 20
Storage Integration Function The machine can integrate with online storage services such as Evernote. Integration with Online Notetaking Service "Evernote" If an Evernote client application is installed on your computer, you can import scanned images into the application and upload them to the - Canon PIXMA MX472 | User Manual - Page 21
from anywhere with applications or services supporting Google Cloud Print. 1. Preparations for Printing with Google Cloud Print 2. Printing from Computer or Smartphone with Google Cloud Print Important • LAN connection with the machine and Internet connection are required to register the machine - Canon PIXMA MX472 | User Manual - Page 22
the web browser on the computer or the mobile device, then connection fees apply. • If the machine's owner changes, delete the machine from Google Cloud Print. 1. Make sure that the machine is turned on If your printer has a LCD monitor 2. From the Home screen, select Setup (or press the Setup button - Canon PIXMA MX472 | User Manual - Page 23
Select Web service setup -> Connection setup -> Google Cloud Print setup (GoogleCloudPrint) -> Register with Google Cloud Print (Register w/ service) Note process on the computer again. If your printer does not have a LCD monitor 2. Remote UI startup 3. Select Google Cloud Print setup -> Register - Canon PIXMA MX472 | User Manual - Page 24
sure that the machine is turned on If your printer has a LCD monitor 2. From the Home screen, select Setup (or press the Setup button on the operation panel) 3. Select Web service setup -> Connection setup -> Google Cloud Print setup (GoogleCloudPrint) -> Delete from Google Cloud Print (Delete from - Canon PIXMA MX472 | User Manual - Page 25
computer or smartphone The figure below is an example of when printing from the web browser corresponding with Google Cloud Print. The screen differs depending on the applications or services supporting is being operated or an error has occurred. To resume printing printer. For information about 25 - Canon PIXMA MX472 | User Manual - Page 26
and start printing manually. Follow the steps below. Important • Depending on your printer model, this function may not be available. 1. Make sure that the machine is turned on 2. From the Home screen, select Setup (or press the Setup button on the operation panel) 3. Select Web service inquiry Note - Canon PIXMA MX472 | User Manual - Page 27
Using Remote UI This service allows you to check printer information and execute utility functions from your computer or smartphone. You can also use the convenient web services presented by Canon. Checking the printer IP address To use this service, first check the IP address of this machine from - Canon PIXMA MX472 | User Manual - Page 28
of A4 size or Letter size plain paper 3. On the printer operation panel, select the Setup button, and then select Device settings -> LAN settings -> Print LAN details IP address printing starts. If your printer does not have a LCD monitor 2. Load one sheet of A4 size or Letter size plain paper - Canon PIXMA MX472 | User Manual - Page 29
status This function displays printer information such as the remaining ink amount, the status, and detailed error information. You can also connect to the ink purchase site or support page, and use Web Services. Utilities This function allows you to set and execute the machine utility functions - Canon PIXMA MX472 | User Manual - Page 30
explains how to use AirPrint to print wirelessly from your iPad, iPhone and iPod touch to a Canon printer. AirPrint enables you to print photos, email, Web pages and documents from your Apple device directly to your printer without installing a driver. Checking Your Environment First, check your - Canon PIXMA MX472 | User Manual - Page 31
model that you are using. Important • Because some app does not support AirPrint, Printer Options may not be displayed. If an app does not let you use printer options, you cannot print from that app. Note • The printer options differ depending on the app and model you are using. Normally, when you - Canon PIXMA MX472 | User Manual - Page 32
the model supports duplex printing, you can select On or Off. • Range: The page range can be used only with specific app and file types (such as PDF files). printer prints according to the specified settings. Paper Size With AirPrint, the paper size is selected automatically according to the app - Canon PIXMA MX472 | User Manual - Page 33
that the machine has enough paper and ink. 4. If your printer has a LCD monitor, check that no error message is displayed on the LCD monitor. If the problem persists, use the printer driver on your computer to execute printing and check whether the document can be printed normally on the machine - Canon PIXMA MX472 | User Manual - Page 34
machine is connected to the wireless LAN, and then try printing. • If Bonjour on the machine is disabled, AirPrint cannot be used. Check the LAN settings on the machine, and enable Bonjour. Note • The windows used in the explanations may differ from those displayed by your Apple product or app. 34 - Canon PIXMA MX472 | User Manual - Page 35
Paper / Originals Loading Paper Loading Originals Replacing a FINE Cartridge Replacing a FINE Cartridge Checking the Ink Status Maintenance When Printing Becomes Faint or Colors Are Incorrect Performing Maintenance from a Computer Cleaning the Machine Changing the Machine Settings Changing Machine - Canon PIXMA MX472 | User Manual - Page 36
Safety Guide Safety Precautions Regulatory and Safety Information 36 - Canon PIXMA MX472 | User Manual - Page 37
specified in the On-screen Manual. • Do not place the Working around the machine (For the multifunction printer) • When loading a thick book on the Platen Glass, do not press hard on the Document Cover. The Platen Glass may break and cause injury. Print Heads/ink tanks and FINE Cartridges • Keep ink - Canon PIXMA MX472 | User Manual - Page 38
according to the local regulations. IMPORTANT SAFETY INSTRUCTIONS SAVE THESE INSTRUCTIONS When using your telephone equipment, basic safety uniquement des conducteurs de télécommunications 26 AWG au de section supérleure." Users in the U.S.A. FCC Notice (U.S.A. Only) For 120V, 60Hz model Model - Canon PIXMA MX472 | User Manual - Page 39
) and must not be colocated or operated with any other antenna or transmitter. Canon U.S.A., Inc. One Canon Park Melville, New York 11747 1-800-652-2666 Pre-Installation Requirements Order Information When ordering service from the telephone company for this equipment, the following may be required - Canon PIXMA MX472 | User Manual - Page 40
connected to a compatible modular jack that is also compliant. See installation instructions for details. Connection to problem is completely resolved. Users should contact their local authorized Canon Facsimile Service Dealer for the servicing of equipment. Information regarding Authorized Service - Canon PIXMA MX472 | User Manual - Page 41
tous les dispositifs n'excède pas 5. Users in New Zealand The grant of a Telepermit that the item complies with minimum conditions for connection to its network. It indicates no endorsement , it provides no assurance that any item will work correctly in all respects with another item of Telepermitted - Canon PIXMA MX472 | User Manual - Page 42
connected equipment that may not respond to incoming ringing when attached to this port. Users in Jordan This printer point, e.g., on an authorized one-for-one basis when you buy a your household waste disposal service. For more information , please visit http://www.canon.co.in/environment/. Also, - Canon PIXMA MX472 | User Manual - Page 43
a longer period of time or not at all. Canon does not recommend extending the Activation Times from the optimum ones set as default. Energy Star® The Energy Star® complies with EN12281 or a similar quality standard. In addition it can support printing on media down to a weight of 64g/m2, lighter - Canon PIXMA MX472 | User Manual - Page 44
Main Components and Basic Operations Main Components About the Power Supply of the Machine LCD and Operation Panel Entering Numbers, Letters, and Symbols 44 - Canon PIXMA MX472 | User Manual - Page 45
Main Components Front View Rear View Inside View Operation Panel 45 - Canon PIXMA MX472 | User Manual - Page 46
Load a document here. The documents loaded in the document tray are scanned automatically one sheet at a time. Loading Documents in the ADF (Auto Document Feeder) (3) document feeder cover Open when clearing jammed documents. (4) document guides Adjust these guides to match the width of document in - Canon PIXMA MX472 | User Manual - Page 47
Flashes: Printing or scanning over wireless LAN. Also flashes while configuring the wireless LAN connection. (9) paper output cover Open to replace the FINE cartridge or remove jammed paper inside the machine. (10) paper guides Align with both sides of the paper stack. (11) front tray Load paper - Canon PIXMA MX472 | User Manual - Page 48
device jack Connect an external device such as telephone or answering machine. (5) USB port Plug in the USB cable to connect the machine with a computer. Important • Do not touch the metal casing. • Do not plug in or unplug the USB cable while the machine is printing or scanning originals with - Canon PIXMA MX472 | User Manual - Page 49
Inside View (1) ink cartridge lock lever Locks the FINE cartridge into place. (2) FINE cartridge (ink cartridges) A replaceable cartridge that integrates print head and ink tank. (3) FINE cartridge holder Install the FINE cartridge. The color FINE cartridge should be installed into the left slot and - Canon PIXMA MX472 | User Manual - Page 50
50 - Canon PIXMA MX472 | User Manual - Page 51
if your machine is connected to a rotary pulse line. This button is also used to enter characters. (11) OK button Finalizes the selection of a menu or setting item. This button is also used to resolve an error or ejects documents in the ADF (Auto Document Feeder). (12) and buttons Used to increase - Canon PIXMA MX472 | User Manual - Page 52
unsent documents stored in the machine's memory. (17) Menu button Displays the Copy menu, Scan menu, or FAX menu screen. Note • The machine makes the beep sound when pressing buttons on the operation panel. The sound volume can be adjusted in Sound control of Dev. user settings. Dev. user settings - Canon PIXMA MX472 | User Manual - Page 53
About the Power Supply of the Machine Confirming that the Power Is On Turning the Machine On and Off Notice for the Power Plug/Power Cord Notice for Unplugging the Power Cord 53 - Canon PIXMA MX472 | User Manual - Page 54
on the machine. • The LCD will turn off if the machine is not operated for about 5 minutes. To restore the display, press any button except the ON button or perform the print operation. The display will be also restored when receiving faxes. You cannot change the wait time before the LCD turns - Canon PIXMA MX472 | User Manual - Page 55
On and Off Turning on the machine 1. Press the ON button to turn on the machine. The POWER lamp flashes and lamp lights up or flashes orange and an error message is displayed on the LCD, see A Message Is Displayed. Turning off the machine 1. Press the ON button to turn off the machine. When the - Canon PIXMA MX472 | User Manual - Page 56
/power cord is split. Caution • If you find anything unusual with the power plug/power cord described above, unplug the power cord and call for service. Using the machine with one of the unusual conditions above may cause a fire or an electric shock. 56 - Canon PIXMA MX472 | User Manual - Page 57
the power cord is unplugged, the date/time settings will be reset and all documents stored in the machine's memory will be lost. Send or print a necessary document before unplugging the power cord. 1. Press the ON button to turn the machine off. 2. Confirm that the POWER lamp is off. 3. Unplug the - Canon PIXMA MX472 | User Manual - Page 58
(A) on the operation panel allows you to switch between the copy mode, scan mode, fax mode, or setup menu screen. Pressing the Menu button (B) in the respective modes shows the menu screen to select various functions or settings. Selecting a Menu or Setting Item On the menu screen or settings - Canon PIXMA MX472 | User Manual - Page 59
when entering information, such as unit name, a recipient's name for memory dial, etc. Switching the Input Mode Each time the Tone button is pressed, the input mode is switched in the following order: lowercase mode (:a), uppercase mode (:A), then numeric mode (:1). The current input mode appears - Canon PIXMA MX472 | User Manual - Page 60
abc ABC 2 2 defëéèê DEFËÉÈÊ 3 3 gh i ï í ì î GH I Ï Í Ì Î 4 4 jkl JKL 5 5 mno MNO 6 6 pqrsþ PQRSÞ 7 7 tuvüúùû TUVÜÚÙÛ 8 8 wxyzý WXYZÝ 9 9 0 0 - . SP*1 2 ~*2 # Switch the input mode. *1 "SP" indicates a space. *2 Displayed only when entering characters in - Canon PIXMA MX472 | User Manual - Page 61
Loading Paper / Originals Loading Paper Loading Originals 61 - Canon PIXMA MX472 | User Manual - Page 62
Loading Paper Loading Plain Paper / Photo Paper Loading Envelopes Media Types You Can Use Media Types You Cannot Use Printing Area 62 - Canon PIXMA MX472 | User Manual - Page 63
trial print, it can cause paper jams. Note • We recommend Canon genuine photo paper for printing photos. For details on the Canon genuine paper, see Media Types You Can Use. • You can use Plus Semi-gloss SG-201, even if the sheet is curled, load one sheet at a time as it is. If you roll up this - Canon PIXMA MX472 | User Manual - Page 64
the paper stack all the way to the back of the front tray. 4. Slide the right paper guide (A) to align the paper guides with both sides of the paper stack. Do not slide the paper guides too hard against the paper. The paper may not be fed properly. Important • Always load paper in - Canon PIXMA MX472 | User Manual - Page 65
Note • Do not overload paper by stacking until the top of the stack touches the paper guides. • Load small size paper, such as 4" x 6" (10 x 15 cm), by pushing it in all the way to the back of the front tray. 5. Open the - Canon PIXMA MX472 | User Manual - Page 66
Important • Be sure to open the paper output tray when printing. If not open, the machine cannot start printing. Note • After loading paper, select the size and type of the loaded paper on the print settings screen of the operation panel or printer driver. 66 - Canon PIXMA MX472 | User Manual - Page 67
The address is automatically rotated and printed according to the envelope's direction by specifying with the printer driver properly. Important • Printing of envelopes from the operation panel is not supported. • Do not use the following envelopes. They could jam in the machine or cause the machine - Canon PIXMA MX472 | User Manual - Page 68
all the way to the back of the front tray. Up to 5 envelopes can be loaded at once. 4. Slide the right paper guide (A) to align the paper guides with both sides of the envelopes. Do not slide the paper guides too hard against the envelopes. The envelopes may not be fed properly. 68 - Canon PIXMA MX472 | User Manual - Page 69
not overload envelopes by stacking until the top of the stack touches the paper guides. 5. Open the output tray extension. 3. Open the paper output tray. 1. Open the paper output tray gently, and extend the paper output support. Important • Be sure to open the paper output tray when printing. If not - Canon PIXMA MX472 | User Manual - Page 70
Note • After loading envelopes, select the size and type of the loaded envelopes on the print settings screen of the printer driver. 70 - Canon PIXMA MX472 | User Manual - Page 71
*2 Canon genuine papers The Model Number of Canon genuine paper is shown in brackets. Refer to the instruction manual supplied from the operation panel is not supported. Paper Load Limit Media Type Settings on the Operation Panel Setting the Media Type with the Printer Driver Page Sizes You can use - Canon PIXMA MX472 | User Manual - Page 72
Note • Printing of envelopes from the operation panel is not supported. Standard sizes: • Letter • Legal • A5 • A4 • B5 • 4" x 6" (10 x 15 cm) • 5" (64 to 105 g /m2) (except for Canon genuine paper) Do not use heavier or lighter paper (except for Canon genuine paper), as it could jam in the machine - Canon PIXMA MX472 | User Manual - Page 73
50 sheets *2 Canon Genuine Papers 10" (20 x 25 cm) 20 sheets: 4" x 6" (10 x 15 cm) Photo Paper Pro Luster *3 Photo Paper Plus Semi-gloss *3 10 sheets: A4 and Letter 10 x 6" (10 x 15 cm) Paper for printing business documents: Media Name High Resolution Paper - Canon PIXMA MX472 | User Manual - Page 74
. *3 When loading paper in stacks, the print side may become marked as it is fed or paper may not feed properly. In this case, load one sheet at a time. 74 - Canon PIXMA MX472 | User Manual - Page 75
Media Type Settings on the Operation Panel Commercially Available Papers Media Name Plain Paper (including recycled paper) Canon Genuine Papers Paper for printing photos: Media Name Photo Paper Pro Platinum Glossy Photo Paper "Everyday Use" Photo Paper Glossy - Canon PIXMA MX472 | User Manual - Page 76
is too thin (weighing less than 17 lb (64 g /m2)) • Paper that is too thick (weighing more than 28 lb (105 g /m2), except for Canon genuine paper) • Paper thinner than a postcard, including plain paper or notepad paper cut to a small size (when printing on paper smaller than A5) • Picture postcards - Canon PIXMA MX472 | User Manual - Page 77
Printing Area Printing Area Other Sizes than Letter, Legal, Envelopes Letter, Legal Envelopes 77 - Canon PIXMA MX472 | User Manual - Page 78
these margins. Recommended printing area : Canon recommends that you print within this area For Borderless Printing, use the following paper: • Photo Paper Pro Platinum • Glossy Photo Paper "Everyday Use" < from the operation panel is not supported. • Borderless Printing is not available - Canon PIXMA MX472 | User Manual - Page 79
Other Sizes than Letter, Legal, Envelopes A5 A4 B5 4" x 6" (10 x 15 cm) 5" x 7" (13 x 18 cm) 8" x 10" (20 x 25 cm) Size Printable Area (width x height) 5.56 x 7.95 inches (141.2 x 202.0 mm) 8.00 x 11.38 inches (203.2 x 289.0 mm) 6.90 x 9.80 inches (175.2 x 249.0 mm) 3.73 x 5.69 inches (94.8 x 144 - Canon PIXMA MX472 | User Manual - Page 80
Letter, Legal Letter Legal Size Printable Area (width x height) 8.00 x 10.69 inches (203.2 x 271.4 mm) 8.00 x 13.69 inches (203.2 x 347.6 mm) Recommended printing area (A) 1.28 inches (32.5 mm) (B) 1.32 inches (33.5 mm) Printable area (C) 0.12 inch (3.0 mm) (D) 0.20 inch (5.0 mm) (E) 0.25 inch - Canon PIXMA MX472 | User Manual - Page 81
Envelopes Envelope DL Envelope Com 10 Size Recommended Printing Area (width x height) 3.88 x 7.06 inches (98.8 x 179.5 mm) 3.68 x 7.90 inches (93.5 x 200.8 mm) Recommended printing area (A) 0.31 inch (8.0 mm) (B) 1.28 inches (32.5 mm) (C) 0.22 inch (5.6 mm) (D) 0.22 inch (5.6 mm) 81 - Canon PIXMA MX472 | User Manual - Page 82
Loading Originals Position to Load Originals Loading Originals on the Platen Glass Loading Documents in the ADF (Auto Document Feeder) How to Load Originals for Each Function Originals You Can Load 82 - Canon PIXMA MX472 | User Manual - Page 83
, type, or usage. Originals You Can Load Loading Documents, Photos, or Book on the platen glass Loading Two or More Sheets of Document of the Same Size and Thickness in the ADF You can also load a sheet of document in the ADF. Note • To scan the original at optimum quality, load it on the - Canon PIXMA MX472 | User Manual - Page 84
the document cover, do not touch the buttons and LCD on the operation panel. Doing so may result in an unexpected operation. 2. Load the original WITH THE SIDE TO SCAN FACING observe the above may cause the scanner to malfunction or the platen glass to break. 2. Close the document cover gently. 84 - Canon PIXMA MX472 | User Manual - Page 85
Important • After loading the original on the platen glass, be sure to close the document cover before starting to copy, fax, or scan. 85 - Canon PIXMA MX472 | User Manual - Page 86
WITH THE SIDE TO SCAN FACING UP in the document tray. Originals You Can Load Note • When you set the alarm to be silent in Sound control of Dev. user settings, the alarm will not beep even if the document is inserted in the document tray. Dev. user settings 3. Adjust the document guides to match the - Canon PIXMA MX472 | User Manual - Page 87
87 - Canon PIXMA MX472 | User Manual - Page 88
mode, ◦ select Auto scan for Document type to scan text documents, magazines, or newspapers ◦ select Document or Photo for Document type and specify a standard size (A4, Letter, etc.) for Scan size to scan originals • With a software application on a computer, ◦ scan text documents, magazines, or - Canon PIXMA MX472 | User Manual - Page 89
◦ select Photo for Document type and specify Auto scan(A) -Singl for Scan size to scan one original • Scan one printed photo, postcard, business card, or disc with a software application on a computer Place the original WITH THE SIDE TO SCAN FACING DOWN, with 0.4 inch (1 cm) or more space between - Canon PIXMA MX472 | User Manual - Page 90
356 mm) - Min. 5.8 x 5.8 inches (148 x 148 mm) Only A4 or Letter-sized documents for 2-on-1 copy and 4-on-1 copy Quantity - A4 or Letter size: Max. 30 sheets (20 g /m2) Note • Make sure any glue, ink, correction fluid, or the like on the document is completely dry before loading it on the platen - Canon PIXMA MX472 | User Manual - Page 91
• Carbon paper or carbon-backed paper • Surface treated paper • Onion skin or thin paper • Photo or thick paper 91 - Canon PIXMA MX472 | User Manual - Page 92
Replacing a FINE Cartridge Replacing a FINE Cartridge Checking the Ink Status 92 - Canon PIXMA MX472 | User Manual - Page 93
of the color FINE cartridge or black FINE cartridge is not installed, an error occurs and the machine cannot print. For information on how to configure this setting, see Setting the Ink Cartridge to be Used. • Color ink may be consumed even when printing a black-and-white document or when black - Canon PIXMA MX472 | User Manual - Page 94
deep cleaning of the print head, which may be necessary to maintain the performance of the machine. When ink runs out, replace the FINE cartridge immediately with a new one. Useful Information about Ink 1. Make sure that the power is turned on, open the front cover (C), then open the paper output - Canon PIXMA MX472 | User Manual - Page 95
, close the paper output cover, then open it again. 3. Remove the empty FINE cartridge. 1. Push down the ink cartridge lock lever until it clicks. 2. Remove the FINE cartridge. Important • Handle the FINE cartridge carefully to avoid staining of clothing or the surrounding area. • Discard the empty - Canon PIXMA MX472 | User Manual - Page 96
spill out and stain your hands and the surrounding area. Handle a FINE cartridge carefully. • Be careful not to stain your hands and the surrounding area with ink on the removed protective tape. • Do not reattach the protective tape once you have removed it. Discard it according to the local laws - Canon PIXMA MX472 | User Manual - Page 97
Push up the ink cartridge lock lever to lock the FINE cartridge into place. The FINE cartridge is locked into place when the ink cartridge lock lever clicks. Important • Check if the FINE cartridge is installed correctly. • The machine cannot print unless both the color FINE cartridge and black FINE - Canon PIXMA MX472 | User Manual - Page 98
Note • If the error message appears after the paper output cover is closed, take appropriate action. A Message Is Displayed • When you start printing after replacing the FINE cartridge, the machine starts cleaning the print head automatically. Do not perform any other operations until the machine - Canon PIXMA MX472 | User Manual - Page 99
Checking the Ink Status Checking the Ink Status with the LCD on the Machine You can also check the ink status on the computer screen. Checking the Ink Status from Your Computer 99 - Canon PIXMA MX472 | User Manual - Page 100
low. Prepare a new ink cartridge. Note • To print the model number of the FINE cartridge, select Ink information from Setup menu, then select Print ink number. • You can also check the ink status on the LCD when you press the COPY, FAX, SCAN, or Setup button. The current remaining ink level will be - Canon PIXMA MX472 | User Manual - Page 101
Maintenance When Printing Becomes Faint or Colors Are Incorrect Performing Maintenance from a Computer Cleaning the Machine 101 - Canon PIXMA MX472 | User Manual - Page 102
When Printing Becomes Faint or Colors Are Incorrect Maintenance Procedure Printing the Nozzle Check Pattern Examining the Nozzle Check Pattern Cleaning the Print Head Cleaning the Print Head Deeply Aligning the Print Head 102 - Canon PIXMA MX472 | User Manual - Page 103
wipe the FINE cartridge. This can cause trouble with the FINE cartridge. Note • Check if ink remains in the FINE cartridge. Checking the Ink Status with cartridge is removed. • If an error message appears on the LCD, see A Message Is Displayed. • Increasing the print quality in the printer driver - Canon PIXMA MX472 | User Manual - Page 104
. Note • If the problem is still not resolved after replacing the FINE cartridge, contact the service center. When the Print Results Are Not Even such as the Ruled Lines Are Misaligned: Step Align the print head. From the machine Aligning the Print Head From the computer Aligning the Print Head - Canon PIXMA MX472 | User Manual - Page 105
output tray, then extend the paper output support. 4. Print the nozzle check pattern. 1. Press the Setup button. The Setup menu screen will appear. 2. Use the or button to select Maintenance, then press the OK button. LCD and Operation Panel 3. Use the or button to select Nozzle check, then press - Canon PIXMA MX472 | User Manual - Page 106
Examining the Nozzle Check Pattern Examine the nozzle check pattern, and clean the print head if necessary. 1. Check if there are missing lines in the pattern (A) or horizontal white streaks in the pattern (B). (C) Number of sheets printed so far If there are missing lines in the pattern (A): - Canon PIXMA MX472 | User Manual - Page 107
ink, so clean the print head only when necessary. 1. Make sure that the power is turned on. 2. Clean the print head. 1. Press the Setup button. The Setup menu screen will appear. 2. Use the or button pattern. Note • If the problem is not resolved after cleaning the print head twice, clean the print - Canon PIXMA MX472 | User Manual - Page 108
and clean the print head deeply again after 24 hours. Do not unplug the power cord when turning off the power. If the problem is still not resolved, replace the FINE cartridge with a new one. If the problem is still not resolved after replacing the FINE cartridge, contact the service center. 108 - Canon PIXMA MX472 | User Manual - Page 109
tray, then extend the paper output support. 4. Print the print head alignment sheet. 1. Press the Setup button. The Setup menu screen will appear. 2. Use the or button to select Maintenance, then press the OK button. LCD and Operation Panel 3. Use the or button to select Head alignment, then press - Canon PIXMA MX472 | User Manual - Page 110
sheet. If the sheet is stained or wrinkled, it may not be scanned properly. • If the print head alignment sheet was not printed correctly, press the Stop button, then redo this procedure from the beginning. 5. Scan the print head alignment sheet to adjust the print head position. 1. Confirm - Canon PIXMA MX472 | User Manual - Page 111
LCD, press the OK button to release the error, then take appropriate action. A Message Is Displayed Note • If the print results are still not satisfactory after adjusting the print head position as described above, adjust the print head position manually from the computer. Aligning the Print Head - Canon PIXMA MX472 | User Manual - Page 112
Cleaning the Print Heads from Your Computer Cleaning the Paper Feed Rollers from Your Computer Aligning the Print Head Aligning the Print Head Position Automatically from Your Computer Aligning the Print Head Position from Your Computer Use Your Computer to Print a Nozzle Check Pattern Cleaning - Canon PIXMA MX472 | User Manual - Page 113
rapidly deplete your printer's ink supply. Consequently, perform cleaning only when necessary. Deep Cleaning Deep Cleaning is more thorough than cleaning. Perform deep cleaning when two Cleaning attempts do not resolve the print head problem. 1. Open the printer driver setup window 2. Click Deep - Canon PIXMA MX472 | User Manual - Page 114
Deep Cleaning consumes a larger amount of ink than Cleaning. Cleaning the print head frequently will rapidly deplete your printer's ink supply. Consequently, perform cleaning only no sign of improvement, see "Ink Is Not Ejected." Related Topic Use Your Computer to Print a Nozzle Check Pattern 114 - Canon PIXMA MX472 | User Manual - Page 115
from Your Computer Cleans the of paper from the front tray. 2. Open the printer driver setup window 3. Click Roller Cleaning on the Maintenance tab roller cleaning After the rollers have stopped, follow the message instructions and load one sheet of plain paper or a cleaning sheet available on the - Canon PIXMA MX472 | User Manual - Page 116
Aligning the Print Head When you perform head position adjustment, errors in the print head adjustment position are corrected and conditions such as color and line streaking are improved position of the print head. On this machine, you can adjust the print head either automatically or manually. 116 - Canon PIXMA MX472 | User Manual - Page 117
supports two head alignment methods: automatic head alignment and manual head alignment. The procedure for performing manual print head alignment is as follows: Print Head Alignment 1. Open the printer driver setup and click Align Print Head. Follow the instruction in the message. 8. Check the - Canon PIXMA MX472 | User Manual - Page 118
When you have entered all the necessary values, click OK. Note • If it is difficult to pick the best pattern, pick the setting that produces the least noticeable vertical streaks. (A) Least noticeable vertical streaks (B) Most noticeable vertical streaks • If it is difficult to pick the best pattern - Canon PIXMA MX472 | User Manual - Page 119
When you have entered all the necessary values, click OK. Note • If it is difficult to pick the best pattern, pick the setting that produces the least noticeable vertical streaks. (A) Least noticeable vertical streaks (B) Most noticeable vertical streaks 11. Confirm the displayed message and click - Canon PIXMA MX472 | User Manual - Page 120
When you have entered all the necessary values, click OK. Note • If it is difficult to pick the best pattern, pick the setting that produces the least noticeable horizontal stripes. (A) Least noticeable horizontal stripes (B) Most noticeable horizontal stripes Note • To print and check the current - Canon PIXMA MX472 | User Manual - Page 121
the printing results of automatic print head alignment are not satisfactory, perform manual head alignment. The procedure for performing automatic print head alignment is as follows: Print Head Alignment 1. Open the printer driver setup window 2. Click Print Head Alignment on the Maintenance tab The - Canon PIXMA MX472 | User Manual - Page 122
the print head is working properly by printing a nozzle check pattern. Print the pattern if printing becomes faint, or if a specific color fails to print. The procedure for printing a nozzle check pattern is as follows: Nozzle Check 1. Open the printer driver setup window 2. Click Nozzle Check - Canon PIXMA MX472 | User Manual - Page 123
bottom plate cleaning is as follows: Bottom Plate Cleaning 1. Open the printer driver setup window 2. Click Bottom Plate Cleaning on the Maintenance tab The Bottom Plate Cleaning dialog box opens. 3. Load paper in the machine As instructed in the dialog box, fold the A4 size or Letter size plain - Canon PIXMA MX472 | User Manual - Page 124
Cleaning the Machine Cleaning the Exterior of the Machine Cleaning the Platen Glass and Document Cover Cleaning the ADF (Auto Document Feeder) Cleaning the Paper Feed Roller Cleaning the Inside of the Machine (Bottom Plate Cleaning) 124 - Canon PIXMA MX472 | User Manual - Page 125
power is turned off. • If the power plug is unplugged, the date/time settings will be reset and all documents stored in the machine's memory will be lost. Send or print a necessary document before unplugging the power cord. • Do not use tissue paper, paper towels, rough-textured cloth, or similar - Canon PIXMA MX472 | User Manual - Page 126
side of the document cover (white sheet) (B) is easily damaged, so wipe it gently. • If any foreign substances such as glue, ink or correction fluid are adhered to the glass of the ADF (C) as shown in the figure above, some black streaks will appear on the scanned image - Canon PIXMA MX472 | User Manual - Page 127
power is turned off. • If the power cord is unplugged, the date/time settings will be reset and all documents stored in the machine's memory will be lost. Send or print a necessary document before unplugging the power cord. • Do not use tissue paper, paper towels, rough-textured cloth, or similar - Canon PIXMA MX472 | User Manual - Page 128
3. With the prepared cloth, wipe off any paper dust from the inside of the document feeder cover (A). 4. After wiping, close the document feeder cover by pushing it until it clicks into place. 5. Close the document tray. 128 - Canon PIXMA MX472 | User Manual - Page 129
, then extend the paper output support. 3. Make sure that Roller cleaning is selected, then press the OK button. The machine starts cleaning. The cleaning will be complete when the paper is ejected. If the problem is not resolved after cleaning the paper feed roller, contact the service center. 129 - Canon PIXMA MX472 | User Manual - Page 130
or Letter-sized plain paper in half widthwise, then unfold the paper. 2. Fold one side of the opened paper in another half, aligning the edge with the center output support. 4. Clean the inside of the machine. 1. Press the Setup button. The Setup menu screen will appear. 2. Use the or button to - Canon PIXMA MX472 | User Manual - Page 131
button. The paper cleans the inside of the machine as it feeds through the machine. Check the folded parts of the ejected paper. If they are smudged with ink, perform Bottom Plate Cleaning again. Note • When performing Bottom Plate Cleaning again, be sure to use a new piece of paper. If the problem - Canon PIXMA MX472 | User Manual - Page 132
Changing the Machine Settings Changing Machine Settings from Your Computer Changing the Machine Settings on the LCD Updating the Firmware of the Machine 132 - Canon PIXMA MX472 | User Manual - Page 133
Changing Machine Settings from Your Computer Changing the Print Options Registering a Frequently Used Printing Profile Setting the Ink Cartridge to be Used Managing the Machine Power Reducing the Machine Noise Changing the Machine Operation Mode 133 - Canon PIXMA MX472 | User Manual - Page 134
for print data that is sent from an application software. Specify this option if you encounter print failures such as part of an image data being cut off. The procedure for changing the print options is as follows: 1. Open the printer driver setup window 2. Click Print Options... on the Page - Canon PIXMA MX472 | User Manual - Page 135
. The procedure for registering a printing profile is as follows: Registering a Printing Profile 1. Open the printer driver setup window 2. Set the necessary items From Commonly Used Settings on the Quick Setup tab, select the printing profile to be used and if necessary, change the settings after - Canon PIXMA MX472 | User Manual - Page 136
check each item. Note • When you re-install the printer driver or upgrade the printer driver version, the print settings that are already registered will be want to delete from the Commonly Used Settings list on the Quick Setup tab. 2. Delete the printing profile Click Delete. When the confirmation - Canon PIXMA MX472 | User Manual - Page 137
new one, you can specify the other FINE cartridge that still has ink and continue printing. The procedure for specifying the FINE cartridge is as follows: Ink Cartridge Settings 1. Open the printer driver setup window 2. Click Ink Cartridge Settings on the Maintenance tab The Ink Cartridge Settings - Canon PIXMA MX472 | User Manual - Page 138
Off function turns off the machine. When you use this function, you will not be able to turn the machine on from the printer driver. 1. Open the printer driver setup window 2. Execute power off Click Power Off on the Maintenance tab. When the confirmation message appears, click OK. The machine power - Canon PIXMA MX472 | User Manual - Page 139
as follows: Quiet Settings 1. Open the printer driver setup window 2. Click Quiet Settings on the scanner driver). No matter how you use to set the quiet mode, the mode is applied when you perform operations from the operation panel of the machine or printing and scanning from the computer - Canon PIXMA MX472 | User Manual - Page 140
Note • The effects of the quiet mode may be less depending on the print quality settings. 140 - Canon PIXMA MX472 | User Manual - Page 141
driver setup window 2. Make sure that the machine is on, and then click Custom Settings on the Maintenance tab The Custom Settings dialog box opens. Note • If the machine is off or if communication between the machine and the computer is disabled, an error message may appear because the computer - Canon PIXMA MX472 | User Manual - Page 142
differs from the width of the paper specified in Page Size on the Page Setup tab, a message is displayed. To use paper width detection when printing from the computer, select the check box. Important • If you are using user-defined paper, use the Custom Paper Size to correctly set the size of the - Canon PIXMA MX472 | User Manual - Page 143
Changing the Machine Settings on the LCD Changing the Machine Settings on the LCD Fax settings Output settings LAN settings Dev. user settings Firmware update Reset setting About Quiet setting Before Using the Machine with the Access Point Mode 143 - Canon PIXMA MX472 | User Manual - Page 144
to select Extended copy amt., then press the OK button. 6. Use the button to select a setting item, then press the OK button. For details on each setting item: Fax settings Output settings LAN settings Dev. user settings Firmware update Reset setting Note • You can reduce the operating noise - Canon PIXMA MX472 | User Manual - Page 145
settings, you can confirm the current settings by printing USER'S DATA LIST. Summary of Reports and Lists Easy setup The machine must be set up depending on your telephone line and use of the faxing function. Follow the procedure according to the instructions on the LCD. Note • You can specify the - Canon PIXMA MX472 | User Manual - Page 146
does not support color faxing. • RX image reduction Enables/disables automatic reduction of incoming faxes so that they fit in the selected paper. If you select ON, you can select the image reduction direction. • Adv. communication ◦ ECM TX Selects whether to send faxes in Error Correction Mode - Canon PIXMA MX472 | User Manual - Page 147
depending on the country or region of purchase. When the telephone line condition or connection is poor, selecting a lower reception start speed may solve reception problems. Auto print settings • Received documents Selects whether to print the received fax automatically when receiving a fax. If you - Canon PIXMA MX472 | User Manual - Page 148
, select Print error only or Print for each RX. • Print when no ink Sets whether to ink has run out. Security control • FAX no. re-entry If you select ON, you can set the machine to send faxes after using the Numeric buttons ID Service to Reject Calls Note • This setting may not be supported depending - Canon PIXMA MX472 | User Manual - Page 149
is selected. Note • If printouts contain margins even though you are copying in Borderless, specifying Amount: Large for this setting may help solve the problem. • Prevent double-feed Select ON to prevent double-feed of plain paper. Important • Select ON only when double-feed of plain paper occurs - Canon PIXMA MX472 | User Manual - Page 150
when you perform settings for wireless LAN using Wi-Fi Protected Setup (WPS). Select Push button method or PIN code method according to the method your access point supports, then follow the on-screen instructions. ◦ Other setup Select Manual setup if you perform settings by entering the access - Canon PIXMA MX472 | User Manual - Page 151
to transfer the scanned data to the computer using WSD. Timeout setting Specifies the timeout length. ◦ Bonjour settings Setting items for LAN using Bonjour for Mac OS. Enab./disab. Bonjour Selecting Active allows you to use Bonjour to perform the network settings. Enter service name Specifies the - Canon PIXMA MX472 | User Manual - Page 152
Dev. user settings • Date/time setting Sets the current date and time. Setting the Sender the country or region of purchase. • Sound control Selects the volume. ◦ Keypad volume Selects the beep volume when pressing the buttons on the operation panel. ◦ Alarm volume Selects the alarm volume. ◦ Line - Canon PIXMA MX472 | User Manual - Page 153
input by pressing and holding down the number of copies, the zoom ratio, etc. button when setting the • Device info sending Selects whether you will send the printer usage information to Canon server. The information sent to Canon will be utilized to develop better products. Select ON to send the - Canon PIXMA MX472 | User Manual - Page 154
the firmware update is displayed on the LCD. • DNS server setup Performs settings for a DNS server. Select Auto setup or Manual setup. If you select Manual setup, follow the display on the LCD to perform settings. • Proxy server setup Performs settings for a proxy server. Follow the display on the - Canon PIXMA MX472 | User Manual - Page 155
machine. • Web service setup Reverts the Web service settings back to the user's name You can delete the registered telephone number or user's name following the procedure below. 1. Display the Unit TEL no. registr. or Unit name registr. screen. Setting the Sender Information 2. Press the Back button - Canon PIXMA MX472 | User Manual - Page 156
the Setup button. The Setup menu screen is displayed. 3. Use the button to select Quiet setting, then press the OK button. 4. Use the button to quiet mode from the operation panel of the machine, the printer driver, or ScanGear (scanner driver). No matter how you use to set the quiet mode, - Canon PIXMA MX472 | User Manual - Page 157
that the machine is turned on. 2. Press the Setup button. The Setup menu screen is displayed. 3. Use the button to select Device settings, then press the OK button. 4. Use the button to select LAN settings, then press the OK button. 5. Use the button to select AP mode settings, then press the - Canon PIXMA MX472 | User Manual - Page 158
point mode, you cannot perform the operations below. -Operations using the operation panel of the machine (ex: copying, scanning, or sending a fax) -Operations necessary to connect the machine to the Internet -Changing the network settings of the machine or displaying the network settings • If the - Canon PIXMA MX472 | User Manual - Page 159
the next procedure. If the current firmware on the machine is the latest one, Your firmware is the latest version; update is not required is displayed on the LCD. Press the OK button to finish the procedure. Note • If Cannot connect to the server; try again is displayed on the LCD, press the - Canon PIXMA MX472 | User Manual - Page 160
, all the stored faxes are deleted and the machine starts the firmware update. 10. Check the message that is displayed, then press the OK button. The firmware update has been complete and the copy standby screen is displayed. Note • If the firmware update is not complete, check the network settings - Canon PIXMA MX472 | User Manual - Page 161
Information about Network Connection Useful Information about Network Connection 161 - Canon PIXMA MX472 | User Manual - Page 162
Useful Information about Network Connection Initial Values Set at Factory (Network) Connecting the Machine to the Computer Using a USB Cable When Detecting the Machines Have the Same Name during Setup Connecting to Other Computer with LAN/Changing the Connection Method from USB to LAN Printing Out - Canon PIXMA MX472 | User Manual - Page 163
Wireless LAN security Disable IP address (IPv4) Auto setup IP address (IPv6) Auto setup Set printer name XXXXXX000000 Enable/disable IPv6 Active Enable/disable WSD Active Timeout setting 1 minute Enab./disab. Bonjour Active Service name (Bonjour settings) Canon MX470 series - Canon PIXMA MX472 | User Manual - Page 164
Connecting the Machine to the Computer Using a USB Cable Connect the machine and the computer using a USB cable as the illustration below. The USB port is located on the rear of the machine. 164 - Canon PIXMA MX472 | User Manual - Page 165
When Detecting the Printers Have the Same Name during Setup When the printer is detected during setup, you may see multiple printers of the same name on the detection result screen. Select a printer with checking the MAC address set to the printer against the MAC address on detection result screen. - Canon PIXMA MX472 | User Manual - Page 166
method between the machine and the computer from USB to LAN, perform setup with the Setup CD-ROM or perform it according to the instructions on our website. Connecting to Other Computer with LAN To add the computer connecting the machine with LAN, perform setup with the Setup CD-ROM or perform it - Canon PIXMA MX472 | User Manual - Page 167
button. The machine starts printing the network setting information. The following information on the machine's network setting is printed out. Item Explanations of the item Setting Wireless LAN Wireless LAN Enable/Disable Connection Status of the Wireless LAN Active/Inactive MAC Address - Canon PIXMA MX472 | User Manual - Page 168
AH/AH Wireless LAN DRX Discontinuous reception (wireless LAN) Enable/Disable Other Settings Other settings - Printer Name Printer name Printer name (Up Service Name Bonjour service name Bonjour service name (Up to 52 characters) DNS Server Getting DNS Server automatically Auto/Manual - Canon PIXMA MX472 | User Manual - Page 169
About Network Communication Changing and Confirming Network Settings Screens for Network Connection of IJ Network Tool Other Screens of IJ Network Tool Appendix for Network Communication 169 - Canon PIXMA MX472 | User Manual - Page 170
Settings Changing the WPA or WPA2 Detailed Settings Changing the Settings in the Wired LAN Sheet Changing the Settings in the Admin Password Sheet Monitoring Wireless Network Status Initializing the Network Settings of the Machine Viewing the Modified Settings 170 - Canon PIXMA MX472 | User Manual - Page 171
the equipment necessary for the connection type, such as an access Canon software is attempting to access the network. If the warning message appears, set the security software to always allow access. • IJ Network Tool has been verified to work on Windows XP, however, it does not support Fast User - Canon PIXMA MX472 | User Manual - Page 172
the Settings in the Wireless LAN Sheet To change the wireless network settings of the printer, connect the printer and the computer with a USB cable temporarily. If you modify the wireless network settings of the computer over wireless connection without USB connection, your computer may not be able - Canon PIXMA MX472 | User Manual - Page 173
encryption method used over the wireless LAN. You can change WEP computer and the access point match that set to the printer. • If you connect to a network that is not protected with security measures, there is a risk of disclosing data such as your personal information to a third party. TCP/IP Setup - Canon PIXMA MX472 | User Manual - Page 174
wireless network settings of the printer, connect the printer and the computer with a USB cable temporarily. If you modify the wireless network settings of the computer over wireless connection without USB connection, your computer : Enter the same key as the one set to the access point. The number - Canon PIXMA MX472 | User Manual - Page 175
Auto. If you want to specify the method manually, select Open System or Shared Key according to the setting of the access point. 7. Click OK. Important • If the printer cannot communicate with the computer after the encryption type of the printer was switched, make sure that encryption types for - Canon PIXMA MX472 | User Manual - Page 176
you are using. To change the wireless network settings of the printer, connect the printer and the computer with a USB cable temporarily. If you modify the wireless network settings of the computer over wireless connection without USB connection, your computer may not be able to communicate with - Canon PIXMA MX472 | User Manual - Page 177
should be a string of 8 to 63 alphanumeric characters or a 64-digit hexadecimal value. If you do not know the access point passphrase, refer to the instruction manual provided with the access point or contact its manufacturer. 9. Click Finish. 177 - Canon PIXMA MX472 | User Manual - Page 178
Important • If the printer cannot communicate with the computer after the encryption type of the printer was switched, make sure that encryption types for the computer and the access point match that set to the printer. Note • Changing the network settings with the USB cable temporarily may switch - Canon PIXMA MX472 | User Manual - Page 179
is displayed. For details on the Wired LAN sheet, see Wired LAN Sheet. 5. Change the settings or confirm. Set the IP address of the printer to be used over the LAN. Specify a value appropriate for your network environment. 6. Click OK. After changing configuration, a screen is displayed asking you - Canon PIXMA MX472 | User Manual - Page 180
Changing the Settings in the Admin Password Sheet 1. Start up IJ Network Tool. 2. Select the printer in Printers:. 3. Select Configuration... from the Settings menu. 4. Click the Admin Password tab. The Admin Password sheet is displayed. For details on the Admin Password sheet, see - Canon PIXMA MX472 | User Manual - Page 181
performance. Important • If the indicated value is low, move your printer closer to the wireless network device. 4. If you measure the connection performance in detail, click Advanced Measurement.... The Connection Performance Measurement screen is displayed. 5. Click Next>. The measurement starts - Canon PIXMA MX472 | User Manual - Page 182
the access point face each other. Connection performance may depend on the orientations of the wireless devices. Replace the access point and the printer in another direction to achieve the best performance. • Check whether other computers are not accessing the printer. If appears in the result of - Canon PIXMA MX472 | User Manual - Page 183
If still appears even if you have tried the above, finish the measurement, then restart the IJ Network Tool to start over the measurement. 7. Click Finish. Note • If any messages appear on Overall Network Performance:, move the machine and access point as instructed to improve the performance. 183 - Canon PIXMA MX472 | User Manual - Page 184
the Setup CD-ROM or perform setup according to the instructions on our website. Note • You can change the network settings of the printer using IJ Network Tool with USB connection after initializing the LAN settings. To change the network settings using Canon IJ Network Tool, activate wireless LAN - Canon PIXMA MX472 | User Manual - Page 185
Viewing the Modified Settings The Confirmation screen is displayed when you modified the printer settings on the Configuration screen. When you click Yes on the Confirmation screen, the following screen is displayed for confirming the modified settings. 185 - Canon PIXMA MX472 | User Manual - Page 186
Screens for Network Connection of IJ Network Tool Canon IJ Network Tool Screen Configuration Screen Wireless LAN Sheet Search Screen WEP Details Screen WPA Details Screen WPA2 Details Screen Authentication Type Confirmation Screen PSK: Passphrase and Dynamic Encryption Setup Screen Setup Information - Canon PIXMA MX472 | User Manual - Page 187
again. Click this button if the target printer is not displayed. Important • To change the printer's network settings using IJ Network Tool, it must be connected via a LAN. • If No Driver is displayed for the name, associate the port with the printer. When the Printer Driver Is Not Associated with - Canon PIXMA MX472 | User Manual - Page 188
status and wireless communication status. Status Screen Refresh Updates and displays the contents of Printers: on the Canon IJ Network Tool screen to the latest information. Important • To change the printer's network settings using IJ Network Tool, it must be connected via a LAN. • If No Driver is - Canon PIXMA MX472 | User Manual - Page 189
to confirm the network settings of the printer and the computer. Network Information Screen Display Warning Automatically Enables or disables automatic display of the instruction screen. When this menu is selected, the instruction screen is displayed if one or more ports are unavailable for printing - Canon PIXMA MX472 | User Manual - Page 190
Configuration Screen You can change the configuration of the printer selected on the Canon IJ Network Tool screen. Click the tab to select the sheet to change the settings. The following screen is the example to change the setting on the Wireless LAN sheet. Note • This screen is not available - Canon PIXMA MX472 | User Manual - Page 191
The Search screen is displayed to select an access point to connect to. Search Screen Note • When IJ Network Tool runs over a LAN, the button is grayed out and cannot be selected. Connect the printer and the computer with a USB cable temporarily to change the settings. 4. Encryption Method: Select - Canon PIXMA MX472 | User Manual - Page 192
automatically assigned by a DHCP server. DHCP server functionality must be enabled on your wireless LAN router or access point. Use next IP address If no DHCP server functionality is available in your setup where you use the printer or you want to use a particular IP address, select this option to - Canon PIXMA MX472 | User Manual - Page 193
printer you are using. The access points detected are listed. 1. Detected Access Points: The signal strength from the access point, encryption type, name of access point, and the radio channel can be confirmed. Important • If you connect SSID in SSID: on the Wireless LAN sheet. Wireless LAN Sheet 193 - Canon PIXMA MX472 | User Manual - Page 194
your target access point, make sure that the access point is turned on. 3. Set Click to set the access point's SSID in SSID: on the Wireless LAN sheet. Note • The WEP Details screen, the WPA Details screen, or the WPA2 Details screen appears if the selected access point is encrypted. In - Canon PIXMA MX472 | User Manual - Page 195
settings. Note • When changing the password (WEP key) of the printer, the same change must be made to the password (WEP key) of the access point. 1. WEP Key: Enter the same key as the one set to the access point. The number of characters and character type that can be entered differ - Canon PIXMA MX472 | User Manual - Page 196
available depending on the printer you are using. Specify the printer WPA settings. The value displayed on the screen differs depending on the present settings. 1. Authentication Type: Displays the type of authentication used for client authentication. This machine supports the PSK authentication - Canon PIXMA MX472 | User Manual - Page 197
available depending on the printer you are using. Specify the printer WPA2 settings. The value displayed on the screen differs depending on the present settings. 1. Authentication Type: Displays the type of authentication used for client authentication. This machine supports the PSK authentication - Canon PIXMA MX472 | User Manual - Page 198
screen is not available depending on the printer you are using. Type of authentication used for client authentication is displayed. 1. Authentication Type Type of authentication used for client authentication is displayed. PSK This machine supports the PSK authentication method. This authentication - Canon PIXMA MX472 | User Manual - Page 199
PSK: Passphrase and Dynamic Encryption Setup Screen Note • This screen is not available depending on the printer you are using. Enter the If you do not know the access point passphrase, refer to the instruction manual provided with the access point or contact its manufacturer. 2. Dynamic Encryption - Canon PIXMA MX472 | User Manual - Page 200
Setup Information Confirmation Screen Note • This screen is not available depending on the printer you are using. Displays the settings used for client authentication. Confirm the settings and click Finish. 200 - Canon PIXMA MX472 | User Manual - Page 201
• This screen is not available depending on the printer you are using. Allows you to set the printer with wired LAN connection. To display the Wired LAN sheet, click the Wired LAN tab on the Configuration screen. 1. TCP/IP Setup: Sets the IP address of the printer to be used over the LAN. Specify - Canon PIXMA MX472 | User Manual - Page 202
Admin Password Sheet Set a password for the printer to allow specific people to perform setup and configurations operation. To display the Admin Password sheet, click the Admin Password tab on the Configuration screen. 1. Use admin password Set a password for the - Canon PIXMA MX472 | User Manual - Page 203
Information Screen Display the network information that is set for the printers and the computers. To display the Network Information screen, select Network Information from the View menu. 1. OK Returns to the Canon IJ Network Tool screen. 2. Copy All Information All network information displayed - Canon PIXMA MX472 | User Manual - Page 204
Access Control Sheet Note • This screen is not available depending on the printer you are using. You can register the MAC addresses or the IP addresses of computers or network devices to allow access. To display the Access Control sheet, click the Access Control tab on the Configuration screen. 1. - Canon PIXMA MX472 | User Manual - Page 205
or a network device from which to access the printer over the network. Important • Add the MAC address of all computers or network devices within the network from which to access the printer. The printer cannot be accessed from a computer or a network device that is not on the list. 5. Delete - Canon PIXMA MX472 | User Manual - Page 206
the network from which to access the printer. The printer cannot be accessed from a computer or a network device that is not on the list. • Up to 16 IP addresses can be registered. IP addresses specified by Range Specification are counted as one address. Use Range Specification when you intend - Canon PIXMA MX472 | User Manual - Page 207
5. Delete Deletes the selected IP address from the list. 207 - Canon PIXMA MX472 | User Manual - Page 208
Address Screen Note • This screen is not available depending on the printer you are using. The example screenshots in this section refer to the Add Accessible MAC Address Screen. 1. MAC Address: Enter the MAC address of a computer or a network device to allow access. 2. Comment: Optionally enter any - Canon PIXMA MX472 | User Manual - Page 209
Screen Note • This screen is not available depending on the printer you are using. The example screenshots in this section refer Address: Enter the first IP address in the range of addresses of the computers or network devices to allow access when you selected Range Specification in Specification - Canon PIXMA MX472 | User Manual - Page 210
Other Screens of IJ Network Tool Canon IJ Network Tool Screen Status Screen Connection Performance Measurement Screen Maintenance Screen Network Setup of the Card Slot Screen Associate Port Screen Network Information Screen 210 - Canon PIXMA MX472 | User Manual - Page 211
again. Click this button if the target printer is not displayed. Important • To change the printer's network settings using IJ Network Tool, it must be connected via a LAN. • If No Driver is displayed for the name, associate the port with the printer. When the Printer Driver Is Not Associated with - Canon PIXMA MX472 | User Manual - Page 212
status and wireless communication status. Status Screen Refresh Updates and displays the contents of Printers: on the Canon IJ Network Tool screen to the latest information. Important • To change the printer's network settings using IJ Network Tool, it must be connected via a LAN. • If No Driver is - Canon PIXMA MX472 | User Manual - Page 213
to confirm the network settings of the printer and the computer. Network Information Screen Display Warning Automatically Enables or disables automatic display of the instruction screen. When this menu is selected, the instruction screen is displayed if one or more ports are unavailable for printing - Canon PIXMA MX472 | User Manual - Page 214
, ranging from 0% to 100%. 4. Advanced Measurement... To examine the connection performance between the printer and the access point or between the printer and the computer. When you click, the Connection Performance Measurement is displayed. Connection Performance Measurement Screen 214 - Canon PIXMA MX472 | User Manual - Page 215
is not available depending on the printer you are using. Displays to execute the connection performance measurement. Connection Performance Measurement Screen (Initial Screen) Connection Performance Measurement Screen (Completion Screen) Connection Performance Measurement Screen (Initial Screen - Canon PIXMA MX472 | User Manual - Page 216
indicates the result of the connection performance measurement between the printer and the access point. : Good connection performance : Unstable connection performance : Cannot connect : Measurement is canceled, or cannot measure 2. Remeasurement Measures the connection performance again. Note • If - Canon PIXMA MX472 | User Manual - Page 217
. Performing initialization when connected over wireless LAN will break the connection, so perform setup with the Setup CD-ROM or perform setup according to the instructions on our website. 2. Network Setup of the Card Slot Note • This item is not available depending on the printer you are using - Canon PIXMA MX472 | User Manual - Page 218
drive on the computer. Displays when you click Setup on the Maintenance screen. Network Setup of the Card Slot Screen (Setup Screen) Network Setup of the Card Slot Screen (Setup Failed Screen) Note • You can change the network settings of the printer using IJ Network Tool with USB connection after - Canon PIXMA MX472 | User Manual - Page 219
without mapping a network drive to the card slot. 2. Retry Returns to Network Setup of the Card Slot screen and re-executes the network drive mapping. 3. Cancel Cancels the card slot setup. When IJ Network Tool is running over LAN, the Cancel button is displayed grayed out and cannot be clicked. 219 - Canon PIXMA MX472 | User Manual - Page 220
with the port. 1. Model: Displays the name of device specified as a destination port. It is blank if the name of device is not detected. 2. Printer: Displays the printer driver installed in the computer. Select the printer for which you want to change the association. 3. OK Performs association. 220 - Canon PIXMA MX472 | User Manual - Page 221
Information Screen Display the network information that is set for the printers and the computers. To display the Network Information screen, select Network Information from the View menu. 1. OK Returns to the Canon IJ Network Tool screen. 2. Copy All Information All network information displayed - Canon PIXMA MX472 | User Manual - Page 222
Appendix for Network Communication Using the Card Slot over a Network When the Printer Driver Is Not Associated with a Port About Technical Terms Restrictions About Firewall 222 - Canon PIXMA MX472 | User Manual - Page 223
Network Note • This screen is not available depending on the printer you are using. Mounting the Card Slot as the Network Drive Start up IJ Network Tool. 3. Select the machine in Printers:. 4. Select Maintenance... on the Settings menu. 5. Click Setup. 6. Specify the drive letter, then click OK. 223 - Canon PIXMA MX472 | User Manual - Page 224
card slot can be shared by multiple computers, if the machine is connected to a network. Multiple computers can read files from a memory card in the card slot at the same time. However, while one computer is writing a file into a memory card, other computers cannot access the same file. • If your - Canon PIXMA MX472 | User Manual - Page 225
When the Printer Driver Is Not Associated with a Port If No Driver is displayed for the printer's name on the Canon IJ Network Tool screen, the printer driver is not associated with a created port. To associate a port with a printer driver, follow the procedure below. 1. Start up IJ Network Tool. 2. - Canon PIXMA MX472 | User Manual - Page 226
point is required. This machine does not support ad-hoc communication. • Admin Password Administration password in IJ Network Tool to restrict access to network users. It must be entered to access the printer and change printer settings. When the printer's network settings are factory default, the - Canon PIXMA MX472 | User Manual - Page 227
using the WEP key that was set for encryption. B • Bonjour A service built into Mac OS X operating system to detect the connectable devices on a network automatically. C • Channel Frequency channel for wireless communication. In the infrastructure mode, the channel is automatically adjusted to match - Canon PIXMA MX472 | User Manual - Page 228
with 802.11b and 802.11g. • Infrastructure Client computer and machine setup where all wireless communications pass through an access point. • IP Address A unique number with four parts separated by dots. Every network device that is connected to the Internet has an IP address. Example: 192 - Canon PIXMA MX472 | User Manual - Page 229
by its manufacturer. MAC addresses are 48 bits long and are written as a hexadecimal number separated by colons, i.e., 11:22:33:44:55:66. O • Operation Status Indicates the status on whether the printer can be used. P • Proxy server A server that links a LAN-connected computer to the Internet - Canon PIXMA MX472 | User Manual - Page 230
Connect Now) Users running Windows Vista or later can obtain the setting information directly via wireless network (WCN-NET). • WEP/WEP Key An encryption method employed by IEEE 802.11. Shared security key used to encrypt and decrypt data sent over wireless networks. This printer supports key - Canon PIXMA MX472 | User Manual - Page 231
This machine supports WPA-PSK wireless network. There are 2 primary methods used in the Wi-Fi Protected Setup: PIN entry: a mandatory method of setup for all WPS certified devices Push button configuration (PBC): an actual push button on the hardware or through a simulated push button in the software - Canon PIXMA MX472 | User Manual - Page 232
set a network key (WEP, WPA, or WPA2) to the access point to encrypt wireless transmission. Wireless communication with a product that does not comply with the Wi-Fi standard cannot be guaranteed. Connecting with too many computers may affect the printer performance, such as printing speed. 232 - Canon PIXMA MX472 | User Manual - Page 233
fixed IP address to the printer, you will need to specify an IP address with which the computer can communicate. Note • For the operation system firewall settings or the security software firewall settings, refer to the instruction manual of the computer or software, or contact its manufacturer. 233 - Canon PIXMA MX472 | User Manual - Page 234
Tips for Ensuring Optimal Printing Quality Useful Information about Ink Key Points to Successful Printing Be Sure to Make Paper Settings after Loading Paper Canceling a Print Job Key to Enjoying Consistent Printing Quality Precautions for Safe Transport of the Machine 234 - Canon PIXMA MX472 | User Manual - Page 235
for nozzle cleaning is limited to a small amount. Does black-and-white printing use color ink? Black-and-white printing may use ink other than black ink depending on the type of printing paper or the settings of the printer driver. So, color ink is consumed even when printing in black-and-white. 235 - Canon PIXMA MX472 | User Manual - Page 236
? After printing large quantities of paper or performing borderless printing, the area where papers go through may get smeared with ink. Clean the inside of your machine with Bottom Plate Cleaning. Check how to load the paper correctly! • Is the paper loaded in the correct orientation? - Canon PIXMA MX472 | User Manual - Page 237
Loading Paper If the media type setting is not the one for the loaded paper, printing results may not be satisfactory printing photos with optimal quality and paper suitable for documents. Each media type has specific preset settings, such as how ink is used and sprayed, distance from nozzles, etc - Canon PIXMA MX472 | User Manual - Page 238
Canceling a Print Job Never press the ON button! If you press the ON button while printing is in progress, the print data sent from the computer queues in the machine and you may not be able to continue to print. Press the Stop button to cancel printing. 238 - Canon PIXMA MX472 | User Manual - Page 239
is turned off! If you press the ON button to turn off the power, the machine caps and all documents stored in the machine's memory will be lost. Send or print a necessary document before unplugging month. Note • Depending on the type of paper, ink may blur if you trace the printed area with a - Canon PIXMA MX472 | User Manual - Page 240
safe transport. • With the FINE cartridge left installed in the machine, press the ON button to turn off the power. This support, then close the paper output tray. Retract the paper support with the output tray extension closed. 4. Close the front cover. 5. Unplug the printer cable from the computer - Canon PIXMA MX472 | User Manual - Page 241
of Images It may be unlawful to make copies of, scan, print, or use reproductions of the following documents. The list provided is non-exhaustive. When in doubt, or other certificates of indebtedness • Stock certificates • Copyrighted works/works of art without permission of copyright owner 241 - Canon PIXMA MX472 | User Manual - Page 242
LAN Port: Wireless LAN: IEEE802.11n / IEEE802.11g / IEEE802.11b *2 *1 A computer that complies with Hi-Speed USB standard is required. Since the Hi-Speed USB interface is fully upwardly compatible with USB 1.1, it can be used at USB 1.1. *2 Setup possible through Standard setup, WPS (Wi-Fi Protected - Canon PIXMA MX472 | User Manual - Page 243
(1 % unit) Scan Specifications Scanner driver Maximum scanning size Scanning resolution Gradation (Input / Output) Windows: TWAIN 1.9 Specification, WIA Mac OS: ICA Platen mode.) Color: Approx. 1 minute/page at 33.6 kbps (Based on Canon COLOR FAX TEST SHEET.) Black: 256 levels Color: 24 bit Full - Canon PIXMA MX472 | User Manual - Page 244
Numeric buttons) Automatic redialing Manual redialing (max. 10 destinations) Activity report (after every 20 transactions) Sequential broadcasting (max. 21 destinations) Rejected numbers (max. 10 destinations) Network Specifications Communication protocol Wireless LAN TCP/IP Supported Standards - Canon PIXMA MX472 | User Manual - Page 245
Space Display Mac OS X v10.6.8 or later Safari 5 or later 1.5 GB Note: For bundled software installation. The necessary amount of hard disk space may be changed without notice. XGA 1024 x 768 Other Supported OS Some functions may not be available with each OS. Refer to the manual or the Canon web
-
 1
1 -
 2
2 -
 3
3 -
 4
4 -
 5
5 -
 6
6 -
 7
7 -
8
-
9
-
10
-
11
-
12
-
13
-
14
-
15
-
16
-
17
-
18
-
19
-
20
-
21
-
22
-
23
-
24
-
25
-
26
-
27
-
28
-
29
-
30
-
31
-
32
-
33
-
34
-
35
-
36
-
37
-
38
-
39
-
40
-
41
-
42
-
43
-
44
-
45
-
46
-
47
-
48
-
49
-
50
-
51
-
52
-
53
-
54
-
55
-
56
-
57
-
58
-
59
-
60
-
61
-
62
-
63
-
64
-
65
-
66
-
67
-
68
-
69
-
70
-
71
-
72
-
73
-
74
-
75
-
76
-
77
-
78
-
79
-
80
-
81
-
82
-
83
-
84
-
85
-
86
-
87
-
88
-
89
-
90
-
91
-
92
-
93
-
94
-
95
-
96
-
97
-
98
-
99
-
100
-
101
-
102
-
103
-
104
-
105
-
106
-
107
-
108
-
109
-
110
-
111
-
112
-
113
-
114
-
115
-
116
-
117
-
118
-
119
-
120
-
121
-
122
-
123
-
124
-
125
-
126
-
127
-
128
-
129
-
130
-
131
-
132
-
133
-
134
-
135
-
136
-
137
-
138
-
139
-
140
-
141
-
142
-
143
-
144
-
145
-
146
-
147
-
148
-
149
-
150
-
151
-
152
-
153
-
154
-
155
-
156
-
157
-
158
-
159
-
160
-
161
-
162
-
163
-
164
-
165
-
166
-
167
-
168
-
169
-
170
-
171
-
172
-
173
-
174
-
175
-
176
-
177
-
178
-
179
-
180
-
181
-
182
-
183
-
184
-
185
-
186
-
187
-
188
-
189
-
190
-
191
-
192
-
193
-
194
-
195
-
196
-
197
-
198
-
199
-
200
-
201
-
202
-
203
-
204
-
205
-
206
-
207
-
208
-
209
-
210
-
211
-
212
-
213
-
214
-
215
-
216
-
217
-
218
-
219
-
220
-
221
-
222
-
223
-
224
-
225
-
226
-
227
-
228
-
229
-
230
-
231
-
232
-
233
-
234
-
235
-
236
-
237
-
238
-
239
-
240
-
241
-
242
-
243
-
244
-
245
 |
 |

MX470 series
Online Manual
Read Me First
Useful Functions Available on the Machine
Overview of the Machine
English