Canon PIXMA MX882 MX882 series Getting Started - Page 17
Fold the Scanning Unit Support F towards the left.
 |
View all Canon PIXMA MX882 manuals
Add to My Manuals
Save this manual to your list of manuals |
Page 17 highlights
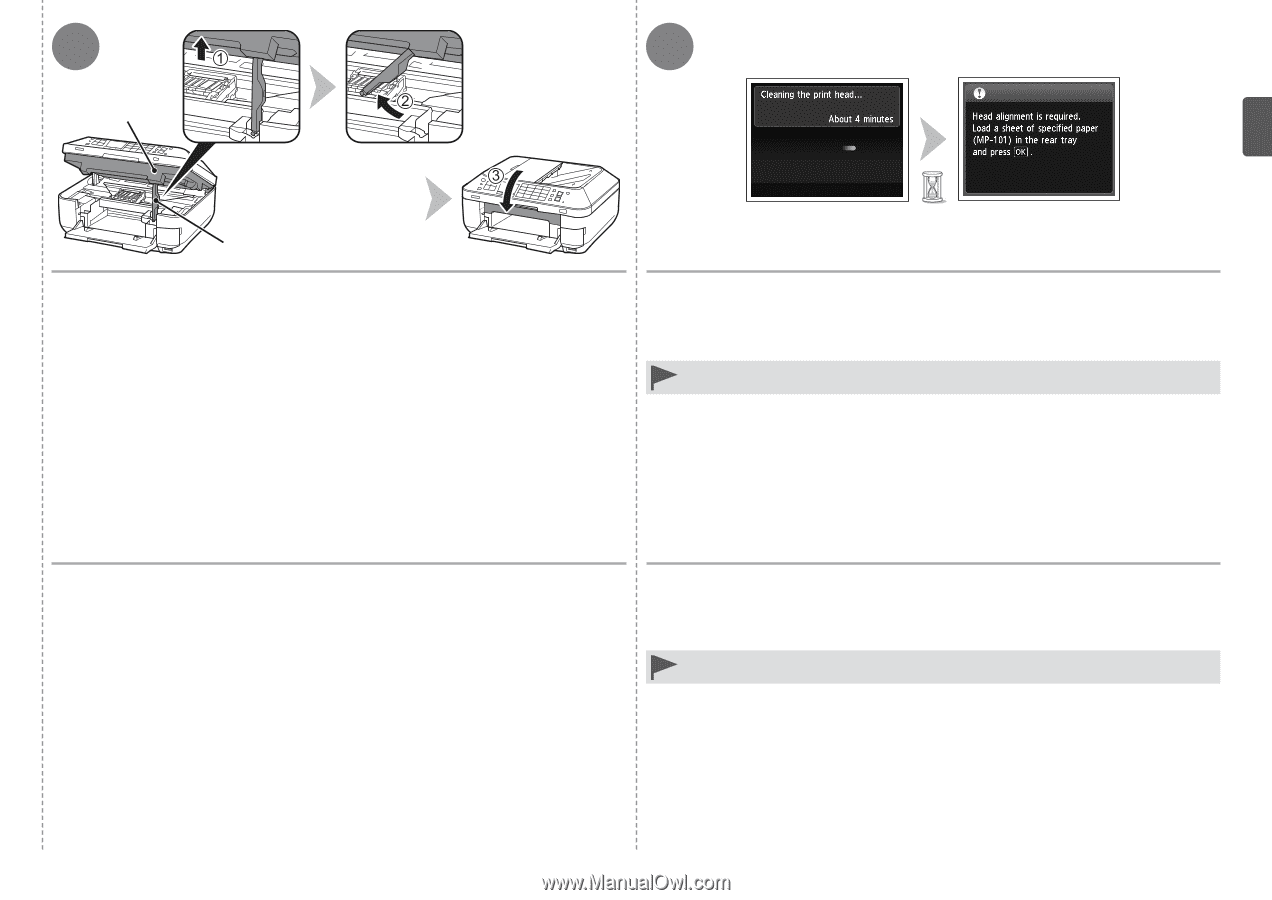
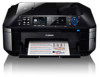
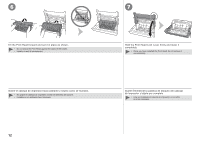
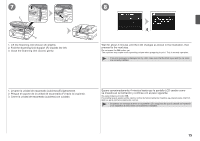
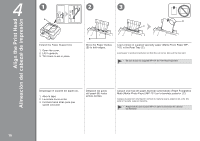
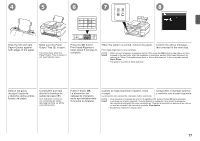
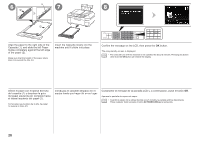
7 E F 1. Lift the Scanning Unit (Cover) (E) slightly. 2. Fold the Scanning Unit Support (F) towards the left. 3. Close the Scanning Unit (Cover) gently. 8 Wait for about 4 minutes until the LCD changes as shown in the illustration, then proceed to the next step. Do not press the OK button yet. The machine may make some operating noises when preparing to print. This is normal operation. • If an error message is displayed on the LCD, make sure that the Print Head and the ink tanks are correctly installed. 1. Levante la unidad de escaneado (cubierta) (E) ligeramente. 2. Pliegue el soporte de la unidad de escaneado (F) hacia la izquierda. 3. Cierre la unidad de escaneado (cubierta) con cuidado. Espere aproximadamente 4 minutos hasta que la pantalla LCD cambie como se muestra en la ilustración y continúe con el paso siguiente. No pulse todavía el botón OK. Es posible que el equipo emita ciertos ruidos de funcionamiento mientras se prepara para imprimir. Esto es parte del funcionamiento normal. • Si aparece un mensaje de error en la pantalla LCD, asegúrese de que el cabezal de impresión y los depósitos de tinta estén correctamente instalados. 15
-
 1
1 -
2
-
3
-
4
-
5
-
6
-
7
-
8
-
9
-
10
-
11
-
 12
12 -
 13
13 -
 14
14 -
 15
15 -
 16
16 -
 17
17 -
 18
18 -
 19
19 -
 20
20 -
 21
21 -
 22
22 -
23
-
24
-
25
-
26
-
27
-
28
-
29
-
30
-
31
-
32
-
33
-
34
-
35
-
36
-
37
-
38
-
39
-
40
-
41
-
42
-
43
-
44
-
45
-
46
-
47
-
48
-
49
-
50
-
51
-
52
-
53
-
54
-
55
-
56
-
57
-
58
-
59
-
60
-
61
-
62
-
63
-
64
-
65
-
66
-
67
-
68
 |
 |