Canon PIXMA iP1700 Easy Setup Instructions
Canon PIXMA iP1700 Manual
 |
View all Canon PIXMA iP1700 manuals
Add to My Manuals
Save this manual to your list of manuals |
Canon PIXMA iP1700 manual content summary:
- Canon PIXMA iP1700 | Easy Setup Instructions - Page 1
from the box. 2 Prepare the Printer Start Here Easy Setup Instructions 3 Install the FINE Cartridges Photo Printer 1 Open the Paper Support and the Front Cover, then remove the Protective Material on the right side. 1 Open the Front Cover. The FINE Cartridge Holder automatically moves to the - Canon PIXMA iP1700 | Easy Setup Instructions - Page 2
and follow the on-screen instructions. 4 Macintosh® Printer Driver Installation Macintosh 7 When the Printer Connection window appears, connect the USB cable to the computer and the other end to the printer. NOTE: ·The screens below refer to Mac ® OS X v.10.4.x installation. Screens may differ
-
 1
1 -
 2
2
 |
 |

Photo Printer
Start Here
Easy Setup Instructions
1
Unpack the Printer
2
Prepare the Printer
3
Install the FINE Cartridges
Carefully remove all items from the box.
Documentation and Software Kit
Power Cord
1
Open the Paper Support and the Front Cover, then remove
the Protective Material on the right side.
Plug the Power Cord into the back of the printer and connect
the other end to a power outlet.
NOTE:
Do NOT connect the USB cable at this stage.
TURN THE PRINTER ON
. The printer will initialize. Wait until
the
POWER
lamp remains fully lit.
3
2
1
Open the Front Cover. The FINE Cartridge Holder automatical-
ly moves to the left.
Write down the serial number. You will need this to register
the product.
Remove the Color FINE Cartridge (CL-41) from its box.
Remove the Protective Tape gently.
NOTE:
·Do not touch the electrical contacts or Print Head Nozzles on
a FINE Cartridge. The printer may not print out properly if you
touch it.
·Do not reattach the Protective Tape once you have removed it.
·Handle the removed Protective Tape carefully to avoid getting
your hands dirty or staining surrounding work area.
Insert the Color FINE Cartridge slightly slanted into the right
slot (C).
5
4
3
2
1
Push up the FINE Cartridge until it clicks into place.
IMPORTANT:
For correct printer operation, make sure the FINE
Cartridge is secure in slots.
Repeat the procedure for the Black FINE Cartridge (PG-40),
inserting it into the left slot (B).
Close the Front Cover.
NOTE:
The printer will perform a Print Head Cleaning after the
cover is closed. Wait until the process is complete before pro-
ceeding.
IMPORTANT:
Wait until the preparatory operation is complete;
this takes about one to two minutes.
8
7
6
Continue with Step 4
on side two.
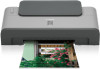
PIXMA iP1700 Photo Printer
Electrical Contacts
Protective Tape
To the FINE Cartridge Holder
Print Head Nozzles
FINE Cartridges
CL-41
PG-40
Power Cord
Protective Material
Serial Number