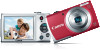
Canon PowerShot A2500 Red User Guide
Canon PowerShot A2500 Red Manual
 |
View all Canon PowerShot A2500 Red manuals
Add to My Manuals
Save this manual to your list of manuals |
Canon PowerShot A2500 Red manual content summary:
- Canon PowerShot A2500 Red | User Guide - Page 1
the beginning of a chapter, click the chapter title at right. From chapter title pages, you can access topics by clicking their titles. 1 Camera Basics 2 Smart Auto Mode 3 Other Shooting Modes 4 P Mode 5 Playback Mode 6 Setting Menu 7 Accessories 8 Appendix Index ©CANON INC. 2013 CDD-E525-010 1 - Canon PowerShot A2500 Red | User Guide - Page 2
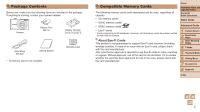
. If anything is missing, contact your camera retailer. Camera Battery Pack NB-11L Battery Charger CB-2LF/CB-2LFE Wrist Strap WS-800 Getting Started • A memory card is not included. Warranty Card Compatible Memory Cards The following memory cards (sold separately) can be used, regardless - Canon PowerShot A2500 Red | User Guide - Page 3
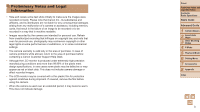
and review some test shots initially to make sure the images were recorded correctly. Please note that Canon Inc., its subsidiaries and affiliates, and its distributors are not liable for any consequential damages arising from any malfunction of a camera or accessory, including memory cards, that - Canon PowerShot A2500 Red | User Guide - Page 4
magnify)> / Lens Shutter button Lamp Power button Microphone Flash Tripod socket Memory card/battery cover DC coupler cable port Strap mount AV OUT (Audio/video output) / DIGITAL terminal • In this guide, icons are used to represent the corresponding camera buttons on which they appear - Canon PowerShot A2500 Red | User Guide - Page 5
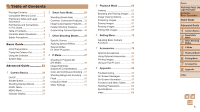
65 Erasing Images 67 Rotating Images 68 Editing Still Images 69 6 Setting Menu 72 Adjusting Basic Camera Functions 73 7 Accessories 79 Optional Accessories 80 Using Optional Accessories..........81 Printing Images 83 Using an Eye-Fi Card 90 8 Appendix 92 Troubleshooting 93 On-Screen - Canon PowerShot A2500 Red | User Guide - Page 6
a date stamp 35 1 View zzView images (Playback Mode 61 images to a computer 18 Cover Preliminary Notes and Legal Information Contents: Basic Operations Basic Guide Advanced Guide 1 Camera Basics 2 Smart Auto Mode 3 Other Shooting Modes 4 P Mode 5 Playback Mode 6 Setting Menu 7 Accessories - Canon PowerShot A2500 Red | User Guide - Page 7
the camera off and remove the battery. If the battery charger becomes wet, unplug it from the outlet and consult your camera retailer or a Canon Customer Support Help Desk. • Use only the recommended battery. • Do not place the battery near or in direct flame. • Unplug the power cord periodically - Canon PowerShot A2500 Red | User Guide - Page 8
may cause deformation of the camera or battery charger casing. Caution Denotes the possibility of damage to the equipment. • Do not aim the camera at bright light sources (such as the sun on a clear day). Doing so may damage the image sensor. • When using the camera on a beach or at a windy - Canon PowerShot A2500 Red | User Guide - Page 9
10 Trying the Camera Out 14 Using the Software 17 System Map 21 Cover Preliminary Notes and Legal Information Contents: Basic Operations Basic Guide Advanced Guide 1 Camera Basics 2 Smart Auto Mode 3 Other Shooting Modes 4 P Mode 5 Playback Mode 6 Setting Menu 7 Accessories 8 Appendix Index - Canon PowerShot A2500 Red | User Guide - Page 10
aligning the ▲ marks on the battery and charger, insert the battery by pushing it in ( ) and down ( ). CB-2LF CB-2LFE 2 Charge the battery. zzCB-2LF: Flip out the plug ( ) and plug the charger into a power outlet ( ). zzCB-2LFE: Plug the power cord into the charger, then plug the other end into - Canon PowerShot A2500 Red | User Guide - Page 11
it. Inserting memory cards facing the wrong way may damage the camera. Cover Preliminary Notes and Legal Information Contents: Basic Operations Basic Guide Advanced Guide 1 Camera Basics 2 Smart Auto Mode 3 Other Shooting Modes 4 P Mode 5 Playback Mode 6 Setting Menu 7 Accessories 8 Appendix Index - Canon PowerShot A2500 Red | User Guide - Page 12
, and it is used when you manage images by shooting date or print images showing the date. You can also add a date stamp to shots, if you wish (=35). 1 Turn the camera on. zzPress the power button. XXThe [Date/Time] screen is displayed. 2 Set the date and time. zzPress the buttons to choose - Canon PowerShot A2500 Red | User Guide - Page 13
in "Setting the Date and Time" (=12) to set the date and time. Cover Preliminary Notes and Legal Information Contents: Basic Operations Basic Guide Advanced Guide 1 Camera Basics 2 Smart Auto Mode 3 Other Shooting Modes 4 P Mode 5 Playback Mode 6 Setting Menu 7 Accessories 8 Appendix Index 13 - Canon PowerShot A2500 Red | User Guide - Page 14
these instructions to turn the camera on, shoot still images or movies, and then view them. Shooting (Smart Auto) For fully automatic selection of the optimal settings for specific scenes, simply let the camera determine the subject and shooting conditions. 1 Turn the camera on. zzPress the power - Canon PowerShot A2500 Red | User Guide - Page 15
After shooting images or movies, you can view them on the screen as follows. Cover Preliminary Notes and Legal Information Contents: Basic Operations Basic Guide Advanced Guide 1 Camera Basics 2 Smart Auto Mode 3 Other Shooting Modes 4 P Mode 5 Playback Mode 6 Setting Menu 7 Accessories 8 Appendix - Canon PowerShot A2500 Red | User Guide - Page 16
the button. • You can also erase all images at once (=67). Cover Preliminary Notes and Legal Information Contents: Basic Operations Basic Guide Advanced Guide 1 Camera Basics 2 Smart Auto Mode 3 Other Shooting Modes 4 P Mode 5 Playback Mode 6 Setting Menu 7 Accessories 8 Appendix Index 16 - Canon PowerShot A2500 Red | User Guide - Page 17
paid separately. Software Guide Refer to this guide when using the software. The guide can be accessed from the help system of software (some software excluded). Advanced Guide 1 Camera Basics 2 Smart Auto Mode 3 Other Shooting Modes 4 P Mode 5 Playback Mode 6 Setting Menu 7 Accessories 8 Appendix - Canon PowerShot A2500 Red | User Guide - Page 18
on computer performance. • Check the Canon website for the latest system requirements, including supported OS versions. Installing the Software Windows 7 and Mac OS X 10.6 are used here for the sake of illustration. What you will need: zzComputer zzUSB cable (camera end: Mini-B) 1 Download the - Canon PowerShot A2500 Red | User Guide - Page 19
zzFor Windows, follow the steps introduced below. zzIn the screen that displays, click the [ ] link to modify the program. zzChoose [Downloads Images From Canon Camera using Canon CameraWindow] and then click [OK]. Cover Preliminary Notes and Legal Information Contents: Basic Operations Basic Guide - Canon PowerShot A2500 Red | User Guide - Page 20
on the computer, in separate folders named by date. zzAfter images are saved, close CameraWindow, press the button to turn the camera off, and unplug the cable. zzFor instructions on viewing images on a computer, refer to the Software Guide (= 17). • In Windows 7, if the screen in step 2 is not - Canon PowerShot A2500 Red | User Guide - Page 21
System Map Included Accessories Wrist Strap WS-800 Battery Pack NB-11L*1 Battery Charger CB-2LF/CB-2LFE*1 USB Cable (camera end: Mini-B)*2 Power AC Adapter Kit ACK-DC90 Memory Card Card Reader Cable Windows/Macintosh Compute AV Cable AVC-DC400 TV/ Video System Flash Unit Canon-brand - Canon PowerShot A2500 Red | User Guide - Page 22
options Cover Preliminary Notes and Legal Information Contents: Basic Operations Basic Guide Advanced Guide 1 Camera Basics 2 Smart Auto Mode 3 Other Shooting Modes 4 P Mode 5 Playback Mode 6 Setting Menu 7 Accessories 8 Appendix Index On/Off 23 Shutter Button 24 Shooting Display Options - Canon PowerShot A2500 Red | User Guide - Page 23
be retracted after about one minute once the camera is in Playback mode. You can turn the camera off when the lens is retracted by pressing the button. Power-Saving Features (Auto Power Down) As a way to conserve battery power, the camera automatically deactivates the screen (Display Off) and - Canon PowerShot A2500 Red | User Guide - Page 24
this manual, images. • For playback display options, see "Switching Display Modes" (=62). Cover Preliminary Notes and Legal Information Contents: Basic Operations Basic Guide Advanced Guide 1 Camera Basics 2 Smart Auto Mode 3 Other Shooting Modes 4 P Mode 5 Playback Mode 6 Setting Menu 7 Accessories - Canon PowerShot A2500 Red | User Guide - Page 25
changes, you can restore the camera's default settings (=78). Cover Preliminary Notes and Legal Information Contents: Basic Operations Basic Guide Advanced Guide 1 Camera Basics 2 Smart Auto Mode 3 Other Shooting Modes 4 P Mode 5 Playback Mode 6 Setting Menu 7 Accessories 8 Appendix Index 25 - Canon PowerShot A2500 Red | User Guide - Page 26
in step 1. Cover Preliminary Notes and Legal Information Contents: Basic Operations Basic Guide Advanced Guide 1 Camera Basics 2 Smart Auto Mode 3 Other Shooting Modes 4 P Mode 5 Playback Mode 6 Setting Menu 7 Accessories 8 Appendix Index • To undo any accidental setting changes, you can restore - Canon PowerShot A2500 Red | User Guide - Page 27
off - Shake or jolt the camera - Open the memory card/battery cover Cover Preliminary Notes and Legal Information Contents: Basic Operations Basic Guide Advanced Guide 1 Camera Basics 2 Smart Auto Mode 3 Other Shooting Modes 4 P Mode 5 Playback Mode 6 Setting Menu 7 Accessories 8 Appendix Index 27 - Canon PowerShot A2500 Red | User Guide - Page 28
Contents: Basic Operations Basic Guide Advanced Guide 1 Camera Basics 2 Smart Auto Mode 3 Other Shooting Modes 4 P Mode 5 Playback Mode 6 Setting Menu 7 Accessories 8 Appendix Index Shooting (Smart Auto 29 Common, Convenient Features 32 Image Customization Features 36 Helpful Shooting - Canon PowerShot A2500 Red | User Guide - Page 29
shot is only displayed until the camera is ready to shoot again. Cover Preliminary Notes and Legal Information Contents: Basic Operations Basic Guide Advanced Guide 1 Camera Basics 2 Smart Auto Mode 3 Other Shooting Modes 4 P Mode 5 Playback Mode 6 Setting Menu 7 Accessories 8 Appendix Index 29 - Canon PowerShot A2500 Red | User Guide - Page 30
beeps twice as recording stops. XXRecording will stop automatically when the memory card becomes full. Still Images/Movies • If the camera is turned on while the button is held down, the camera will no longer sound. To activate sounds again, press the button and choose [Mute] on the [3] tab - Canon PowerShot A2500 Red | User Guide - Page 31
camera will be recorded. • Audio recording is monaural. Scene Icons Still Images Movies In [ ] mode, shooting scenes determined by the camera Operations Basic Guide Advanced Guide 1 Camera Basics 2 Smart Auto Mode 3 Other Shooting Modes 4 P Mode 5 Playback Mode 6 Setting Menu 7 Accessories 8 - Canon PowerShot A2500 Red | User Guide - Page 32
(before the image becomes noticeably grainy), which is then indicated on the screen. 2 Move the zoom lever toward again. XXThe camera zooms in even closer on the subject. 1 Camera Basics 2 Smart Auto Mode 3 Other Shooting Modes 4 P Mode 5 Playback Mode 6 Setting Menu 7 Accessories 8 Appendix - Canon PowerShot A2500 Red | User Guide - Page 33
optical and digital zoom are combined is as follows (35mm film equivalent). 28 - 560 mm (28 - 140 mm with optical zoom alone) Still Images Movies Using Basic Guide Advanced Guide 1 Camera Basics 2 Smart Auto Mode 3 Other Shooting Modes 4 P Mode 5 Playback Mode 6 Setting Menu 7 Accessories 8 - Canon PowerShot A2500 Red | User Guide - Page 34
when the memory card becomes full. • When a delay longer than two seconds is specified, two seconds before the shot, the lamp blinking and self-timer sound will speed up. (The lamp will remain lit in case the flash fires.) Deactivating the Flash Still Images Prepare the camera for shooting - Canon PowerShot A2500 Red | User Guide - Page 35
, adding a date stamp this way to images that already have one may cause it to be printed twice. - Print using printer functions (=83) - Use camera DPOF print settings (=86) to print - Use the software downloaded from the Canon website to print For details, refer to the Software Guide (=17). Using - Canon PowerShot A2500 Red | User Guide - Page 36
as red pupils, for example). • You can also correct existing images (=71). Cover Preliminary Notes and Legal Information Contents: Basic Operations Basic Guide Advanced Guide 1 Camera Basics 2 Smart Auto Mode 3 Other Shooting Modes 4 P Mode 5 Playback Mode 6 Setting Menu 7 Accessories 8 Appendix - Canon PowerShot A2500 Red | User Guide - Page 37
of image quality that will fit on a memory card, see "Recording Time per Memory Card" Image Quality Resolution Frame Rate Details 1280 x 720 25 fps For shooting in HD Guide Advanced Guide 1 Camera Basics 2 Smart Auto Mode 3 Other Shooting Modes 4 P Mode 5 Playback Mode 6 Setting Menu 7 Accessories - Canon PowerShot A2500 Red | User Guide - Page 38
restore the original setting, repeat this process but choose [On]. Cover Preliminary Notes and Legal Information Contents: Basic Operations Basic Guide Advanced Guide 1 Camera Basics 2 Smart Auto Mode 3 Other Shooting Modes 4 P Mode 5 Playback Mode 6 Setting Menu 7 Accessories 8 Appendix Index 38 - Canon PowerShot A2500 Red | User Guide - Page 39
enhanced with unique image effects or captured using special functions Cover Preliminary Notes and Legal Information Contents: Basic Operations Basic Guide Advanced Guide 1 Camera Basics 2 Smart Auto Mode 3 Other Shooting Modes 4 P Mode 5 Playback Mode 6 Setting Menu 7 Accessories 8 Appendix Index - Canon PowerShot A2500 Red | User Guide - Page 40
. • [ ] mode resolution is [ ] (2304 x 1728) and cannot be changed. Cover Preliminary Notes and Legal Information Contents: Basic Operations Basic Guide Advanced Guide 1 Camera Basics 2 Smart Auto Mode 3 Other Shooting Modes 4 P Mode 5 Playback Mode 6 Setting Menu 7 Accessories 8 Appendix Index 40 - Canon PowerShot A2500 Red | User Guide - Page 41
[!]. Cover Preliminary Notes and Legal Information Contents: Basic Operations Basic Guide Advanced Guide 1 Camera Basics 2 Smart Auto Mode 3 Other Shooting Modes 4 P Mode 5 Playback Mode 6 Setting Menu 7 Accessories 8 Appendix Index • When using a tripod, shoot in [ ] mode. • [ ] mode resolution - Canon PowerShot A2500 Red | User Guide - Page 42
Still Images Movies Posterized shots (Poster Effect) zzShots that resemble an old poster or illustration. Still Images Shooting with a Fish-Eye Lens Effect Basic Guide Advanced Guide 1 Camera Basics 2 Smart Auto Mode 3 Other Shooting Modes 4 P Mode 5 Playback Mode 6 Setting Menu 7 Accessories 8 - Canon PowerShot A2500 Red | User Guide - Page 43
image resolution of [ ] is selected (=44). These quality settings cannot be changed. Cover Preliminary Notes and Legal Information Contents: Basic Operations Basic Guide Advanced Guide 1 Camera Basics 2 Smart Auto Mode 3 Other Shooting Modes 4 P Mode 5 Playback Mode 6 Setting Menu 7 Accessories - Canon PowerShot A2500 Red | User Guide - Page 44
a color tone, and then press the button. XXA preview is shown of how your shot will look with the effect applied. 3 Shoot. Standard Shots resemble toy camera images. Warm Images have a warmer tone than with [Standard]. Cool Images have a cooler tone than with [Standard]. • Try taking - Canon PowerShot A2500 Red | User Guide - Page 45
for Other Purposes Using the Face Self-Timer Still Images The camera will shoot about two seconds after detecting that Basic Operations Basic Guide Advanced Guide 1 Camera Basics 2 Smart Auto Mode 3 Other Shooting Modes 4 P Mode 5 Playback Mode 6 Setting Menu 7 Accessories 8 Appendix Index 45 - Canon PowerShot A2500 Red | User Guide - Page 46
• On-screen image brightness in step case, set the flash to [!] and shoot again (=56). Cover Preliminary Notes and Legal Information Contents: Basic Operations Basic Guide Advanced Guide 1 Camera Basics 2 Smart Auto Mode 3 Other Shooting Modes 4 P Mode 5 Playback Mode 6 Setting Menu 7 Accessories - Canon PowerShot A2500 Red | User Guide - Page 47
in your preferred shooting style • Instructions in this chapter apply to the camera when set to [G] mode. • Guide Advanced Guide 1 Camera Basics 2 Smart Auto Mode 3 Other Shooting Modes 4 P Mode 5 Playback Mode 6 Setting Menu 7 Accessories 8 Appendix Index Shooting in Program AE ([P] Mode 48 Image - Canon PowerShot A2500 Red | User Guide - Page 48
in orange. In this case, try adjusting the ISO speed shooting still images, press locked. Cover Preliminary Notes and Legal Information Contents: Basic Operations Basic Guide Advanced Guide 1 Camera Basics 2 Smart Auto Mode 3 Other Shooting Modes 4 P Mode 5 Playback Mode 6 Setting Menu 7 Accessories - Canon PowerShot A2500 Red | User Guide - Page 49
Still Images Locking Image Brightness/Exposure (AE Lock) Before shooting, you can lock the exposure, or you can specify focus and exposure separately. 1 Deactivate the flash (=34). 2 Lock the exposure. zzAim the camera at the subject to shoot with the exposure locked. With the shutter button pressed - Canon PowerShot A2500 Red | User Guide - Page 50
cause images to appear grainy. • You can also correct existing images (=70). Cover Preliminary Notes and Legal Information Contents: Basic Operations Basic Guide Advanced Guide 1 Camera Basics 2 Smart Auto Mode 3 Other Shooting Modes 4 P Mode 5 Playback Mode 6 Setting Menu 7 Accessories 8 Appendix - Canon PowerShot A2500 Red | User Guide - Page 51
if you change camera settings after recording white balance data. Cover Preliminary Notes and Legal Information Contents: Basic Operations Basic Guide Advanced Guide 1 Camera Basics 2 Smart Auto Mode 3 Other Shooting Modes 4 P Mode 5 Playback Mode 6 Setting Menu 7 Accessories 8 Appendix Index 51 - Canon PowerShot A2500 Red | User Guide - Page 52
exposure are locked at camera on a tripod and shooting with the camera set to [[] (=33). Cover Preliminary Notes and Legal Information Contents: Basic Operations Basic Guide Advanced Guide 1 Camera Basics 2 Smart Auto Mode 3 Other Shooting Modes 4 P Mode 5 Playback Mode 6 Setting Menu 7 Accessories - Canon PowerShot A2500 Red | User Guide - Page 53
Still Images Movies camera cannot focus when you press the shutter button halfway. Cover Preliminary Notes and Legal Information Contents: Basic Operations Basic Guide Advanced Guide 1 Camera Basics 2 Smart Auto Mode 3 Other Shooting Modes 4 P Mode 5 Playback Mode 6 Setting Menu 7 Accessories - Canon PowerShot A2500 Red | User Guide - Page 54
the way down (Focus Lock). Still Images Shooting with Servo AF This mode helps avoid missing shots of subjects in motion, because the camera continues to focus on the Guide Advanced Guide 1 Camera Basics 2 Smart Auto Mode 3 Other Shooting Modes 4 P Mode 5 Playback Mode 6 Setting Menu 7 Accessories - Canon PowerShot A2500 Red | User Guide - Page 55
focuses on subjects until you press the shutter button halfway. Off Conserves battery power, because the camera does not focus constantly. Still Images Shooting with the AF Lock Movies The focus can be locked. After you lock the focus, the focal position will not change even when you release - Canon PowerShot A2500 Red | User Guide - Page 56
In this case, [(] is no longer displayed. 3 Compose the shot and shoot. Cover Preliminary Notes and Legal Information Contents: Basic Operations Basic Guide Advanced Guide 1 Camera Basics 2 Smart Auto Mode 3 Other Shooting Modes 4 P Mode 5 Playback Mode 6 Setting Menu 7 Accessories 8 Appendix Index - Canon PowerShot A2500 Red | User Guide - Page 57
you to conserve battery power in Shooting mode. When the camera is not in use, the screen quickly darkens to reduce battery consumption. 1 lens is still out, press the shutter button halfway. zzTo restore the original setting, choose [ ] in step 1. Other Settings Displaying Grid Lines Still Images - Canon PowerShot A2500 Red | User Guide - Page 58
the button, choose [Digital Zoom] on the [4] tab, and then choose [Off] (=26). Magnifying the Area in Focus Still Images You can check the Operations Basic Guide Advanced Guide 1 Camera Basics 2 Smart Auto Mode 3 Other Shooting Modes 4 P Mode 5 Playback Mode 6 Setting Menu 7 Accessories 8 - Canon PowerShot A2500 Red | User Guide - Page 59
Changing the Image Display Period After Shots 1 Access the [Review image after shooting] screen. zzPress the button, choose [Review image after shooting Basic Guide Advanced Guide 1 Camera Basics 2 Smart Auto Mode 3 Other Shooting Modes 4 P Mode 5 Playback Mode 6 Setting Menu 7 Accessories 8 - Canon PowerShot A2500 Red | User Guide - Page 60
Basic Guide Advanced Guide 1 Camera Basics 2 Smart Auto Mode 3 Other Shooting Modes 4 P Mode 5 Playback Mode 6 Setting Menu 7 Accessories 8 Appendix Index Viewing 61 Editing Still Images 69 Browsing and Filtering Images 62 Image Viewing Options 64 Protecting Images 65 Erasing Images 67 - Canon PowerShot A2500 Red | User Guide - Page 61
choose [Resume] and then [Last shot]. • To change the transition shown between images, press the button, choose [Transition] on the [1] tab, and then press Basic Guide Advanced Guide 1 Camera Basics 2 Smart Auto Mode 3 Other Shooting Modes 4 P Mode 5 Playback Mode 6 Setting Menu 7 Accessories 8 - Canon PowerShot A2500 Red | User Guide - Page 62
the button to view the selected image in single-image display. Cover Preliminary Notes and Legal Information Contents: Basic Operations Basic Guide Advanced Guide 1 Camera Basics 2 Smart Auto Mode 3 Other Shooting Modes 4 P Mode 5 Playback Mode 6 Setting Menu 7 Accessories 8 Appendix Index 62 - Canon PowerShot A2500 Red | User Guide - Page 63
Conditions Find desired images quickly on a memory card full of images by filtering image display according to your specified conditions. You can also protect (=65) or delete (=67) these images all at once. Shot Date Displays the images shot on a specific date. Still image/Movie Displays only - Canon PowerShot A2500 Red | User Guide - Page 64
mode (=63), only images matching search conditions are played. Cover Preliminary Notes and Legal Information Contents: Basic Operations Basic Guide Advanced Guide 1 Camera Basics 2 Smart Auto Mode 3 Other Shooting Modes 4 P Mode 5 Playback Mode 6 Setting Menu 7 Accessories 8 Appendix Index 64 - Canon PowerShot A2500 Red | User Guide - Page 65
, press the button. Protecting Images Still Images Movies Protect important images to prevent accidental erasure by the camera (= 67). zzPress the button Guide Advanced Guide 1 Camera Basics 2 Smart Auto Mode 3 Other Shooting Modes 4 P Mode 5 Playback Mode 6 Setting Menu 7 Accessories - Canon PowerShot A2500 Red | User Guide - Page 66
• Protected images on a memory card will be erased if you format the card (=74). • Protected images cannot be erased using the camera's erasure function. To erase them this way, first cancel protection. Choosing Images Individually 1 Choose [Select]. zzFollowing step 2 in "Using the Menu" (=65), - Canon PowerShot A2500 Red | User Guide - Page 67
" (=66), [ ] is displayed. zzTo cancel selection, press the button again. [ ] is no longer displayed. zzRepeat this process to specify other images. Advanced Guide 1 Camera Basics 2 Smart Auto Mode 3 Other Shooting Modes 4 P Mode 5 Playback Mode 6 Setting Menu 7 Accessories 8 Appendix Index 67 - Canon PowerShot A2500 Red | User Guide - Page 68
]. zzPress the button and choose [Rotate] on the [1] tab (=26). Cover Preliminary Notes and Legal Information Contents: Basic Operations Basic Guide Advanced Guide 1 Camera Basics 2 Smart Auto Mode 3 Other Shooting Modes 4 P Mode 5 Playback Mode 6 Setting Menu 7 Accessories 8 Appendix Index 68 - Canon PowerShot A2500 Red | User Guide - Page 69
Preliminary Notes and Legal Information Contents: Basic Operations Basic Guide Advanced Guide 1 Camera Basics 2 Smart Auto Mode 3 Other Shooting Modes 4 P Mode 5 Playback Mode 6 Setting Menu 7 Accessories 8 Appendix Index 4 Save the new image. zzPress the buttons to choose [OK], and then - Canon PowerShot A2500 Red | User Guide - Page 70
results, try correcting images using [Low], [Medium], or [High]. Cover Preliminary Notes and Legal Information Contents: Basic Operations Basic Guide Advanced Guide 1 Camera Basics 2 Smart Auto Mode 3 Other Shooting Modes 4 P Mode 5 Playback Mode 6 Setting Menu 7 Accessories 8 Appendix Index 70 - Canon PowerShot A2500 Red | User Guide - Page 71
this case, the original image will be erased. • Protected images cannot be overwritten. Cover Preliminary Notes and Legal Information Contents: Basic Operations Basic Guide Advanced Guide 1 Camera Basics 2 Smart Auto Mode 3 Other Shooting Modes 4 P Mode 5 Playback Mode 6 Setting Menu 7 Accessories - Canon PowerShot A2500 Red | User Guide - Page 72
or adjust basic camera functions for greater convenience Cover Preliminary Notes and Legal Information Contents: Basic Operations Basic Guide Advanced Guide 1 Camera Basics 2 Smart Auto Mode 3 Other Shooting Modes 4 P Mode 5 Playback Mode 6 Setting Menu 7 Accessories 8 Appendix Index Adjusting - Canon PowerShot A2500 Red | User Guide - Page 73
Basic Guide Advanced Guide Screen Brightness Adjust screen brightness as follows. zzChoose [LCD Brightness], and then press the buttons to adjust the brightness. 1 Camera Basics 2 Smart Auto Mode 3 Other Shooting Modes 4 P Mode 5 Playback Mode 6 Setting Menu 7 Accessories 8 Appendix - Canon PowerShot A2500 Red | User Guide - Page 74
screen may be less than the advertised capacity. Low-Level Formatting Perform low-level formatting in these cases: [Memory card error] is displayed, the camera is not working correctly, card image reading/writing is slower, continuous shooting is slower, or movie recording suddenly stops. Low-level - Canon PowerShot A2500 Red | User Guide - Page 75
from 0001, use an empty (or formatted (=74)) memory card. • Refer to the Software Guide (=17) for information on the card folder structure and image formats. Date-Based Image Storage Instead of saving images in folders created each month, you can have the camera create folders each day you shoot to - Canon PowerShot A2500 Red | User Guide - Page 76
adjust it as needed. • To conserve battery power, you should normally choose [On] for [Auto Power Down] and [1 min.] or less for Guide Advanced Guide 1 Camera Basics 2 Smart Auto Mode 3 Other Shooting Modes 4 P Mode 5 Playback Mode 6 Setting Menu 7 Accessories 8 Appendix Index • Adjusting the date - Canon PowerShot A2500 Red | User Guide - Page 77
on the [3] tab. • [Video System] (=81) • [Eye-Fi Settings] (=90) Cover Preliminary Notes and Legal Information Contents: Basic Operations Basic Guide Advanced Guide 1 Camera Basics 2 Smart Auto Mode 3 Other Shooting Modes 4 P Mode 5 Playback Mode 6 Setting Menu 7 Accessories 8 Appendix Index 77 - Canon PowerShot A2500 Red | User Guide - Page 78
white balance data you have recorded (=51) - Shooting mode (=40) Cover Preliminary Notes and Legal Information Contents: Basic Operations Basic Guide Advanced Guide 1 Camera Basics 2 Smart Auto Mode 3 Other Shooting Modes 4 P Mode 5 Playback Mode 6 Setting Menu 7 Accessories 8 Appendix Index 78 - Canon PowerShot A2500 Red | User Guide - Page 79
Contents: Basic Operations Basic Guide Advanced Guide 1 Camera Basics 2 Smart Auto Mode 3 Other Shooting Modes 4 P Mode 5 Playback Mode 6 Setting Menu 7 Accessories 8 Appendix Index Optional Accessories 80 Using Optional Accessories....81 Printing Images 83 Using an Eye-Fi Card 90 79 - Canon PowerShot A2500 Red | User Guide - Page 80
Optional Accessories The following camera accessories are sold separately. Note that availability varies by area, and some accessories may no longer be available. Power Supplies Battery Pack NB-11L zzRechargeable lithium-ion battery Battery Charger CB-2LF/CB-2LFE zzCharger for Battery Pack NB-11L • - Canon PowerShot A2500 Red | User Guide - Page 81
Accessories Movies Playback on a TV Still Images Movies Connecting the camera to a TV with the AV Cable AVC-DC400 (sold separately) enables you to view your shots on the larger screen of the TV as you control the camera. For details on connection or how to switch inputs, refer to the TV manual - Canon PowerShot A2500 Red | User Guide - Page 82
Still Images Movies Powering the Camera with Household Power Powering the camera with AC Adapter Kit ACK-DC90 (sold separately) eliminates the need to monitor the remaining battery level. 1 Make sure the camera is off. 2 Open the cover. zzFollow step 2 in "Inserting the Battery and Memory Card" - Canon PowerShot A2500 Red | User Guide - Page 83
off and disconnect the cable. Cover Preliminary Notes and Legal Information Contents: Basic Operations Basic Guide Advanced Guide 1 Camera Basics 2 Smart Auto Mode 3 Other Shooting Modes 4 P Mode 5 Playback Mode 6 Setting Menu 7 Accessories 8 Appendix Index • For Canon-brand PictBridge-compatible - Canon PowerShot A2500 Red | User Guide - Page 84
Advanced Guide 1 Camera Basics 2 Smart Auto Mode 3 Other Shooting Modes 4 P Mode 5 Playback Mode 6 Setting Menu 7 Accessories 8 Appendix Index • Cropping may not be possible at small image sizes, or at some aspect ratios. • Dates may not be printed correctly if you crop images shot with [Date Stamp - Canon PowerShot A2500 Red | User Guide - Page 85
from 3.5 x 5 in., postcard, or wide-format prints. Printing ID Photos Still Images 1 Choose [ID Photo]. zzFollowing steps 1 - 4 in "Choosing Paper Size and Layout Guide Advanced Guide 1 Camera Basics 2 Smart Auto Mode 3 Other Shooting Modes 4 P Mode 5 Playback Mode 6 Setting Menu 7 Accessories - Canon PowerShot A2500 Red | User Guide - Page 86
prints from a photo development service can be set up on the camera. Choose up to 998 images on a memory card and configure relevant settings, such as the number of copies, as follows. The printing information you prepare this way will conform to DPOF (Digital Print Order Format) standards. Still - Canon PowerShot A2500 Red | User Guide - Page 87
the file number. - All image print list settings are cleared after printing. - • Not all of your DPOF settings may be applied in printing by the printer or photo development service, in some cases. • [ ] may be displayed on the camera to warn you that the memory card has print settings that were - Canon PowerShot A2500 Red | User Guide - Page 88
warn you that the memory card has print settings that were configured on another camera. Changing the print settings using this camera may overwrite all previous settings. • After importing images to your computer, also refer to the Software Guide (=17) and the printer manual for further information - Canon PowerShot A2500 Red | User Guide - Page 89
to choose [OK], and then press the button. Still Images Removing All Images from a Photobook zzFollowing the procedure in "Choosing a Selection Method" Basic Guide Advanced Guide 1 Camera Basics 2 Smart Auto Mode 3 Other Shooting Modes 4 P Mode 5 Playback Mode 6 Setting Menu 7 Accessories 8 - Canon PowerShot A2500 Red | User Guide - Page 90
to the card's user manual. - Poor Eye-Fi connections may cause image transfer to take a long time, and transfer may be interrupted in some cases. - Eye-Fi cards may become hot, due to their transfer functions. - Battery power will be consumed faster than in normal use. - Camera operation may become - Canon PowerShot A2500 Red | User Guide - Page 91
Eye-Fi card if the write-protect tab is in the locked position. Cover Preliminary Notes and Legal Information Contents: Basic Operations Basic Guide Advanced Guide 1 Camera Basics 2 Smart Auto Mode 3 Other Shooting Modes 4 P Mode 5 Playback Mode 6 Setting Menu 7 Accessories 8 Appendix Index - Canon PowerShot A2500 Red | User Guide - Page 92
when using the camera Troubleshooting 93 On-Screen Messages 95 On-Screen Information 97 Functions and Menu Tables.....99 Handling Precautions 103 Specifications 103 Cover Preliminary Notes and Legal Information Contents: Basic Operations Basic Guide Advanced Guide 1 Camera Basics 2 Smart Auto - Canon PowerShot A2500 Red | User Guide - Page 93
not solve your problem, contact a Canon Customer Support Help Desk. Power Nothing happens when the power button is pressed. • Confirm that the battery is charged (=10). • Confirm that the battery is inserted facing the correct way (=11). • Confirm that the memory card/battery cover is fully closed - Canon PowerShot A2500 Red | User Guide - Page 94
red-eye. For best results, have subjects look at the red-eye reduction lamp. Also try increasing the lighting in indoor scenes and shooting at closer range. • Edit images using red-eye correction (=71). Recording to the memory card takes too long, or continuous shooting is slower. • Use the camera - Canon PowerShot A2500 Red | User Guide - Page 95
a memory card in the camera. To shoot, insert a memory card facing the correct way (=11). Memory card error (=74) • If the same error message is displayed even after you have formatted a supported memory card (=2) and have inserted it facing the correct way, contact a Canon Customer Support Help - Canon PowerShot A2500 Red | User Guide - Page 96
the memory card (=74). Lens Error • This error may occur if the lens is held while it is moving, or when the camera is used in dusty or sandy locations. • Frequent display of this error message may indicate camera damage. In this case, contact a Canon Customer Support Help Desk. A camera error was - Canon PowerShot A2500 Red | User Guide - Page 97
Scene icon (=31) Flash mode (=34, 56) Red-eye correction (= 36) Date stamp (= 35) ISO speed (=50) i-Contrast (=50) Grid lines (=57) AE lock (=49), FE lock (=56) Shutter speed Aperture value Zoom bar (=97) Blink detection (= 37) Time zone (=76) Battery Level An on-screen icon or message indicates - Canon PowerShot A2500 Red | User Guide - Page 98
56) Focusing range (=52, 53) File size Still images: Resolution (=104) Movies: Playback time (=104) Protection (=65) Red-eye correction (=36, 71) i-Contrast (=50, 70) Shooting date/time (= 12) • Some information may not be displayed when viewing images on a TV (= 81). Summary of Movie Control Panel - Canon PowerShot A2500 Red | User Guide - Page 99
to [Z] in some cases. *2 FE lock not available in [!] flash mode. Cover Preliminary Notes and Legal Information Contents: Basic Operations Basic Guide Advanced Guide 1 Camera Basics 2 Smart Auto Mode 3 Other Shooting Modes 4 P Mode 5 Playback Mode 6 Setting Menu 7 Accessories 8 Appendix Index 99 - Canon PowerShot A2500 Red | User Guide - Page 100
with the resolution setting and is automatically set (=43). Cover Preliminary Notes and Legal Information Contents: Basic Operations Basic Guide Advanced Guide 1 Camera Basics 2 Smart Auto Mode 3 Other Shooting Modes 4 P Mode 5 Playback Mode 6 Setting Menu 7 Accessories 8 Appendix Index 100 - Canon PowerShot A2500 Red | User Guide - Page 101
mode. *2 [On] when subject movement is detected in [ ] mode. Cover Preliminary Notes and Legal Information Contents: Basic Operations Basic Guide Advanced Guide 1 Camera Basics 2 Smart Auto Mode 3 Other Shooting Modes 4 P Mode 5 Playback Mode 6 Setting Menu 7 Accessories 8 Appendix Index 101 - Canon PowerShot A2500 Red | User Guide - Page 102
Movie Image Search Slideshow Ref. Page = 88 = 86 Ref. Page = 61 = 63 = 64 Cover Preliminary Notes and Legal Information Contents: Basic Operations Basic Guide Advanced Guide 1 Camera Basics 2 Smart Auto Mode 3 Other Shooting Modes 4 P Mode 5 Playback Mode 6 Setting Menu 7 Accessories 8 Appendix - Canon PowerShot A2500 Red | User Guide - Page 103
the battery and memory card) Approx. 110 g (approx. 3.88 oz.; camera body only) Cover Preliminary Notes and Legal Information Contents: Basic Operations Basic Guide Advanced Guide 1 Camera Basics 2 Smart Auto Mode 3 Other Shooting Modes 4 P Mode 5 Playback Mode 6 Setting Menu 7 Accessories - Canon PowerShot A2500 Red | User Guide - Page 104
on measurement guidelines of the Camera & Imaging Products Association (CIPA). • Under some shooting conditions, the number of shots and recording time may be less than mentioned above. • Number of shots/time with a fully charged battery. Number of Shots per Memory Card Recording Pixels Number of - Canon PowerShot A2500 Red | User Guide - Page 105
Approx. 13 g (approx. 0.46 oz.) Battery Charger CB-2LF/CB-2LFE Rated Input: 100 - 240 V AC ( Canon. • Camera specifications or appearance are subject to change without notice. USA and Canada only: The Lithium ion/polymer battery that powers the product is recyclable. Please call 1-800-8-BATTERY - Canon PowerShot A2500 Red | User Guide - Page 106
Index A Accessories 80 AE lock 49 AF frames 53 AF lock 55 AUTO mode (shooting mode)......... 14, 29 AV cable 81 B Batteries" Date/time (date/time battery) Power saving 23 Battery Charging 10 Level 97 Power saving 23 Battery charger 2 Blink detection 37 C Camera Reset all 78 Center (AF - Canon PowerShot A2500 Red | User Guide - Page 107
Protecting 65 P (shooting mode 48 R Red-eye correction 36, 71 Reset all 78 Resizing images 69 Resolution (image size 36 Rotating 68 S Screen Display language 14 Icons 97, 98 Menu" FUNC. menu, Menu SD/SDHC/SDXC memory cards " Memory cards Searching 63 Self-timer 33 2-second self-timer 33 - Canon PowerShot A2500 Red | User Guide - Page 108
manual. If such changes or modifications should be made, you could be required to stop operation of the equipment. Canon U.S.A., Inc. One Canon Park, Melville, New York 11747, U.S.A. Tel No. 1-800-OK-CANON (1-800-652-2666). Battery Charger CB-2LF IMPORTANT SAFETY INSTRUCTIONSSAVE THESE INSTRUCTIONS - Canon PowerShot A2500 Red | User Guide - Page 109
, Canon accepts no liability for damages due to mistaken operation of the products. Cover Preliminary Notes and Legal Information Contents: Basic Operations Basic Guide Advanced Guide 1 Camera Basics 2 Smart Auto Mode 3 Other Shooting Modes 4 P Mode 5 Playback Mode 6 Setting Menu 7 Accessories
-
 1
1 -
 2
2 -
 3
3 -
 4
4 -
 5
5 -
 6
6 -
 7
7 -
8
-
9
-
10
-
11
-
12
-
13
-
14
-
15
-
16
-
17
-
18
-
19
-
20
-
21
-
22
-
23
-
24
-
25
-
26
-
27
-
28
-
29
-
30
-
31
-
32
-
33
-
34
-
35
-
36
-
37
-
38
-
39
-
40
-
41
-
42
-
43
-
44
-
45
-
46
-
47
-
48
-
49
-
50
-
51
-
52
-
53
-
54
-
55
-
56
-
57
-
58
-
59
-
60
-
61
-
62
-
63
-
64
-
65
-
66
-
67
-
68
-
69
-
70
-
71
-
72
-
73
-
74
-
75
-
76
-
77
-
78
-
79
-
80
-
81
-
82
-
83
-
84
-
85
-
86
-
87
-
88
-
89
-
90
-
91
-
92
-
93
-
94
-
95
-
96
-
97
-
98
-
99
-
100
-
101
-
102
-
103
-
104
-
105
-
106
-
107
-
108
-
109
 |
 |
Camera User Guide
ENGLISH
©CANON INC. 2013
CDD-E525-010
•
Click the buttons in the lower right to access other pages.
: Next page
: Previous page
: Page before you clicked a link
•
To jump to the beginning of a chapter, click the chapter
title at right.
From chapter title pages, you can access topics by
clicking their titles.
•
Make sure you read this guide, including the “Safety
Precautions” section, before using the camera.
•
Reading this guide will help you learn to use the camera
properly.
•
Store this guide safely so that you can use it in the
future.
1
1
2
3
4
5
6
7
8
Cover
Preliminary Notes and
Legal Information
Contents:
Basic Operations
Advanced Guide
Camera Basics
Smart Auto
Mode
Other Shooting
Modes
P Mode
Setting Menu
Accessories
Appendix
Index
Basic Guide
Playback Mode