Canon PowerShot A2600 User Guide
Canon PowerShot A2600 Manual
 |
View all Canon PowerShot A2600 manuals
Add to My Manuals
Save this manual to your list of manuals |
Canon PowerShot A2600 manual content summary:
- Canon PowerShot A2600 | User Guide - Page 1
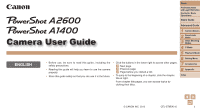
Guide Advanced Guide Camera User Guide 1 Camera Basics 2 Smart Auto Mode 3 Other Shooting Modes 4 P Mode 5 Playback Mode ENGLISH • Before use, be sure to read this guide, including the safety precautions. • Reading this guide will help you learn to use the camera properly. • Store this guide - Canon PowerShot A2600 | User Guide - Page 2
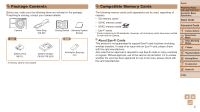
, contact your camera retailer. Camera A2600 Wrist Strap WS-800 Getting Started Warranty System Booklet A1400 Battery Pack NB-11L Battery Charger CB-2LF/CB-2LFE • A memory card is not included. AA Alkaline Batteries (x2) Compatible Memory Cards The following memory cards (sold separately - Canon PowerShot A2600 | User Guide - Page 3
and review some test shots initially to make sure the images were recorded correctly. Please note that Canon Inc., its subsidiaries and affiliates, and its distributors are not liable for any consequential damages arising from any malfunction of a camera or accessory, including memory cards, that - Canon PowerShot A2600 | User Guide - Page 4
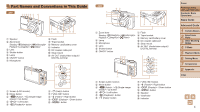
This Guide A2600 Speaker Zoom lever Shooting: / Playback: / Lens Shutter button Lamp ON/OFF button Microphone Flash Tripod socket Memory card/battery cover Indicator DC coupler cable port Strap mount AV OUT (Audio/video output) / DIGITAL - Canon PowerShot A2600 | User Guide - Page 5
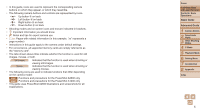
related information (in this example, "xx" represents a page number) • Instructions in this guide apply to the camera under default settings. • For convenience, all supported memory cards are simply referred to as the "memory card". • The tabs shown above titles indicate whether the function is - Canon PowerShot A2600 | User Guide - Page 6
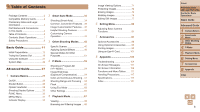
Initial Preparations 12 Trying the Camera Out 18 Using the Software 21 System Map 26 Advanced Guide 27 1 Camera Basics 27 On/Off 28 Shutter Button 29 Optical Viewfinder 29 Shooting Display Options 30 FUNC. Menu 30 MENU Menu 31 Indicator Display 32 Specific Scenes 46 Applying Special - Canon PowerShot A2600 | User Guide - Page 7
68 c Print Print pictures 93 Save Save images to a computer 24 Cover Preliminary Notes and Legal Information Contents: Basic Operations Basic Guide Advanced Guide 1 Camera Basics 2 Smart Auto Mode 3 Other Shooting Modes 4 P Mode 5 Playback Mode 6 Setting Menu 7 Accessories 8 Appendix Index 7 - Canon PowerShot A2600 | User Guide - Page 8
or foreign objects come into contact with the camera interior, immediately turn the camera off and remove the battery/batteries. A2600 If the battery charger becomes wet, unplug it from the outlet and consult your camera retailer or a Canon Customer Support Help Desk. A1400 • Do not look through the - Canon PowerShot A2600 | User Guide - Page 9
are left inside the camera, damage caused by leakage may occur. • Before you discard the battery/batteries, cover the terminals with tape or other insulators. Contacting other metal materials may lead to fire or explosions. A2600 • Unplug the battery charger from the power outlet after charging is - Canon PowerShot A2600 | User Guide - Page 10
to the camera. Doing so may cause malfunctions or damage the screen. Cover Preliminary Notes and Legal Information Contents: Basic Operations Basic Guide Advanced Guide 1 Camera Basics 2 Smart Auto Mode 3 Other Shooting Modes 4 P Mode 5 Playback Mode 6 Setting Menu 7 Accessories 8 Appendix Index - Canon PowerShot A2600 | User Guide - Page 11
12 Trying the Camera Out 18 Using the Software 21 System Map 26 Cover Preliminary Notes and Legal Information Contents: Basic Operations Basic Guide Advanced Guide 1 Camera Basics 2 Smart Auto Mode 3 Other Shooting Modes 4 P Mode 5 Playback Mode 6 Setting Menu 7 Accessories 8 Appendix Index 11 - Canon PowerShot A2600 | User Guide - Page 12
Information Contents: Basic Operations Basic Guide Advanced Guide 1 Camera Basics 2 Smart Auto Mode 3 Other Shooting Modes 4 P Mode 5 Playback Mode 6 Setting Menu 7 Accessories 8 Appendix Index 3 Remove the battery. After unplugging the battery charger, remove the battery by pushing it in ( ) and - Canon PowerShot A2600 | User Guide - Page 13
continuously for more than 24 hours. • For battery chargers that use a power cord, do not attach the charger or cord to other objects. Doing so could result in Basic Guide Advanced Guide 1 Camera Basics 2 Smart Auto Mode 3 Other Shooting Modes 4 P Mode 5 Playback Mode 6 Setting Menu 7 Accessories 8 - Canon PowerShot A2600 | User Guide - Page 14
with various batteries, see "Number of Shots/Recording Time, Playback Time" (= 118). Cover Preliminary Notes and Legal Information Contents: Basic Operations Basic Guide Advanced Guide 1 Camera Basics 2 Smart Auto Mode 3 Other Shooting Modes 4 P Mode 5 Playback Mode 6 Setting Menu 7 Accessories - Canon PowerShot A2600 | User Guide - Page 15
then slowly release the memory card. The memory card will pop up. Cover Preliminary Notes and Legal Information Contents: Basic Operations Basic Guide Advanced Guide 1 Camera Basics 2 Smart Auto Mode 3 Other Shooting Modes 4 P Mode 5 Playback Mode 6 Setting Menu 7 Accessories 8 Appendix Index 15 - Canon PowerShot A2600 | User Guide - Page 16
time, the [Date/Time] screen will be displayed each time you turn the camera on. Specify the correct information. • To set daylight saving time (1 Guide Advanced Guide 1 Camera Basics 2 Smart Auto Mode 3 Other Shooting Modes 4 P Mode 5 Playback Mode 6 Setting Menu 7 Accessories 8 Appendix Index 16 - Canon PowerShot A2600 | User Guide - Page 17
displayed. Cover Preliminary Notes and Legal Information Contents: Basic Operations Basic Guide Advanced Guide 1 Camera Basics 2 Smart Auto Mode 3 Other Shooting Modes 4 P Mode 5 Playback Mode 6 Setting Menu 7 Accessories 8 Appendix Index • You can also change the display language by pressing - Canon PowerShot A2600 | User Guide - Page 18
Movies Follow these instructions to turn the camera on, shoot still images or movies, and then view them. Shooting (Smart Auto) For fully automatic selection at optimal settings for specific scenes, simply let the camera determine the subject and shooting conditions. 1 Turn the camera on. Press - Canon PowerShot A2600 | User Guide - Page 19
Movies are identified by a [ To play movies, go to step 3. ] icon. Cover Preliminary Notes and Legal Information Contents: Basic Operations Basic Guide Advanced Guide 1 Camera Basics 2 Smart Auto Mode 3 Other Shooting Modes 4 P Mode 5 Playback Mode 6 Setting Menu 7 Accessories 8 Appendix Index 19 - Canon PowerShot A2600 | User Guide - Page 20
the button. • You can also erase all images at once (=74). Cover Preliminary Notes and Legal Information Contents: Basic Operations Basic Guide Advanced Guide 1 Camera Basics 2 Smart Auto Mode 3 Other Shooting Modes 4 P Mode 5 Playback Mode 6 Setting Menu 7 Accessories 8 Appendix Index 20 - Canon PowerShot A2600 | User Guide - Page 21
download from the Canon website is introduced below, with instructions for installation and saving images to a computer. Software After downloading the software from the Canon website and installing it, you can do the following things on your computer. CameraWindow Import images and change camera - Canon PowerShot A2600 | User Guide - Page 22
. • Check the Canon website for the latest system requirements, including supported OS versions. Installing the Software Windows 7 and Mac OS X 10.6 are used here for the sake of illustration. What you will need: Computer USB cable (camera end: Mini-B) 1 Download the software. With a computer - Canon PowerShot A2600 | User Guide - Page 23
larger plug of the USB cable in the computer's USB port. For details about USB connections on the computer, refer to the computer user manual. 4 Install the files. Turn the camera on, and follow the on-screen instructions to complete the installation process. The software will connect to the - Canon PowerShot A2600 | User Guide - Page 24
button to turn the camera off, and unplug the cable. For instructions on viewing images on a computer, refer to the Software Guide (= 21). Cover Preliminary Notes and Legal Information Contents: Basic Operations Basic Guide Advanced Guide 1 Camera Basics 2 Smart Auto Mode 3 Other Shooting Modes - Canon PowerShot A2600 | User Guide - Page 25
provided by the software may not be available, such as movie editing. Cover Preliminary Notes and Legal Information Contents: Basic Operations Basic Guide Advanced Guide 1 Camera Basics 2 Smart Auto Mode 3 Other Shooting Modes 4 P Mode 5 Playback Mode 6 Setting Menu 7 Accessories 8 Appendix Index - Canon PowerShot A2600 | User Guide - Page 26
Map A2600 Included Accessories Wrist Strap WS-800 Battery Pack NB-11L*1 Battery Charger CB-2LF/CB-2LFE*1 USB Cable (camera end: Mini-B)*2 Power Memory Card Card Reader Cable Windows/ Macintosh Computer AC Adapter Kit ACK-DC90 AV Cable AVC-DC400 TV/Video System Flash Unit Canon-brand - Canon PowerShot A2600 | User Guide - Page 27
.......30 FUNC. Menu 30 MENU Menu 31 Indicator Display 32 Cover Preliminary Notes and Legal Information Contents: Basic Operations Basic Guide Advanced Guide 1 Camera Basics 2 Smart Auto Mode 3 Other Shooting Modes 4 P Mode 5 Playback Mode 6 Setting Menu 7 Accessories 8 Appendix Index 27 - Canon PowerShot A2600 | User Guide - Page 28
off when the lens is retracted by pressing the button. Power-Saving Features (Auto Power Down) As a way to conserve battery power, the camera automatically deactivates the screen (Display Off) and then turns itself off after a specific period of inactivity. Power Saving in Shooting Mode The - Canon PowerShot A2600 | User Guide - Page 29
time required for the shot. It may take longer in some shooting scenes, and images will be blurry if you move the camera (or the subject moves) before the shutter sound ends. A1400 Optical Viewfinder To conserve battery power when shooting, you can use the optical viewfinder instead of the screen - Canon PowerShot A2600 | User Guide - Page 30
button. To return to the menu items, press the button. Cover Preliminary Notes and Legal Information Contents: Basic Operations Basic Guide Advanced Guide 1 Camera Basics 2 Smart Auto Mode 3 Other Shooting Modes 4 P Mode 5 Playback Mode 6 Setting Menu 7 Accessories 8 Appendix Index 30 - Canon PowerShot A2600 | User Guide - Page 31
, you can switch between tabs by pressing the buttons. Cover Preliminary Notes and Legal Information Contents: Basic Operations Basic Guide Advanced Guide 1 Camera Basics 2 Smart Auto Mode 3 Other Shooting Modes 4 P Mode 5 Playback Mode 6 Setting Menu 7 Accessories 8 Appendix Index 31 - Canon PowerShot A2600 | User Guide - Page 32
memory card. - Turn the camera off - Shake or jolt the camera A2600 - Open the memory card/battery cover A1400 - Open the memory card/battery cover Cover Preliminary Notes and Legal Information Contents: Basic Operations Basic Guide Advanced Guide 1 Camera Basics 2 Smart Auto Mode 3 Other Shooting - Canon PowerShot A2600 | User Guide - Page 33
42 Helpful Shooting Features ......44 Customizing Camera Operation 44 Cover Preliminary Notes and Legal Information Contents: Basic Operations Basic Guide Advanced Guide 1 Camera Basics 2 Smart Auto Mode 3 Other Shooting Modes 4 P Mode 5 Playback Mode 6 Setting Menu 7 Accessories 8 Appendix Index - Canon PowerShot A2600 | User Guide - Page 34
(Smart Auto) Movies For fully automatic selection at optimal settings for specific scenes, simply let the camera determine the subject and shooting conditions. 1 Turn the camera on. Press the ON/OFF button. The startup screen is displayed. 2 Enter [ ] mode. Press the button repeatedly - Canon PowerShot A2600 | User Guide - Page 35
will be automatically adjusted. Still Images/Movies Finish shooting. Press the movie button again to stop shooting. The camera beeps twice as recording stops. Recording will stop automatically when the memory card becomes full. • If the camera is turned on while the button is held down - Canon PowerShot A2600 | User Guide - Page 36
made by the camera will be recorded. • Audio recording is monaural. Cover Preliminary Notes and Legal Information Contents: Basic Operations Basic Guide Advanced Guide 1 Camera Basics 2 Smart Auto Mode 3 Other Shooting Modes 4 P Mode 5 Playback Mode 6 Setting Menu 7 Accessories 8 Appendix Index 36 - Canon PowerShot A2600 | User Guide - Page 37
, as when mounted on a tripod. Cover Preliminary Notes and Legal Information Contents: Basic Operations Basic Guide Advanced Guide 1 Camera Basics 2 Smart Auto Mode 3 Other Shooting Modes 4 P Mode 5 Playback Mode 6 Setting Menu 7 Accessories 8 Appendix Index • Try shooting in mode (=53) if - Canon PowerShot A2600 | User Guide - Page 38
the image becomes noticeably grainy), which is then indicated on the screen. 2 Move the zoom lever toward again. The camera zooms in even closer on the subject. 1 Camera Basics 2 Smart Auto Mode 3 Other Shooting Modes 4 P Mode 5 Playback Mode 6 Setting Menu 7 Accessories 8 Appendix Index 38 - Canon PowerShot A2600 | User Guide - Page 39
some resolution settings (=42), the maximum zoom factor can be achieved by following step 1. • Focal length when optical and digital zoom are combined is as follows Guide Advanced Guide 1 Camera Basics 2 Smart Auto Mode 3 Other Shooting Modes 4 P Mode 5 Playback Mode 6 Setting Menu 7 Accessories - Canon PowerShot A2600 | User Guide - Page 40
effect. Cover Preliminary Notes and Legal Information Contents: Basic Operations Basic Guide Advanced Guide 1 Camera Basics 2 Smart Auto Mode 3 Other Shooting Modes 4 P Mode 5 Playback Mode 6 Setting Menu 7 Accessories 8 Appendix Index • When you specify multiple shots, image brightness and white - Canon PowerShot A2600 | User Guide - Page 41
choose [Off] in step 1. Cover Preliminary Notes and Legal Information Contents: Basic Operations Basic Guide Advanced Guide 1 Camera Basics 2 Smart Auto Mode 3 Other Shooting Modes 4 P Mode 5 Playback Mode 6 Setting Menu 7 Accessories 8 Appendix Index • Date stamps cannot be edited or removed. 41 - Canon PowerShot A2600 | User Guide - Page 42
print settings (=97) to print - Use the software downloaded from the Canon website to print For details, refer to the Software Guide (=21). Using Eco Mode Still Images Movies This function allows you to conserve battery power in Shooting mode. When the camera is not in use, the screen quickly - Canon PowerShot A2600 | User Guide - Page 43
in HD For shooting in standard definition Cover Preliminary Notes and Legal Information Contents: Basic Operations Basic Guide Advanced Guide 1 Camera Basics 2 Smart Auto Mode 3 Other Shooting Modes 4 P Mode 5 Playback Mode 6 Setting Menu 7 Accessories 8 Appendix Index • In [ ] mode, black bars - Canon PowerShot A2600 | User Guide - Page 44
[Display Time] (=65). Customizing Camera Operation Customize shooting functions on the [4] tab of the menu as follows. For instructions on menu functions, see "MENU Guide Advanced Guide 1 Camera Basics 2 Smart Auto Mode 3 Other Shooting Modes 4 P Mode 5 Playback Mode 6 Setting Menu 7 Accessories - Canon PowerShot A2600 | User Guide - Page 45
Special Effects .........48 Special Modes for Other Purposes 51 Cover Preliminary Notes and Legal Information Contents: Basic Operations Basic Guide Advanced Guide 1 Camera Basics 2 Smart Auto Mode 3 Other Shooting Modes 4 P Mode 5 Playback Mode 6 Setting Menu 7 Accessories 8 Appendix Index 45 - Canon PowerShot A2600 | User Guide - Page 46
Shoot fireworks (Fireworks) Vivid shots of fireworks. • In [t] mode, mount the camera on a tripod or take other measures to keep it still and prevent camera Basic Guide Advanced Guide 1 Camera Basics 2 Smart Auto Mode 3 Other Shooting Modes 4 P Mode 5 Playback Mode 6 Setting Menu 7 Accessories 8 - Canon PowerShot A2600 | User Guide - Page 47
Notes and Legal Information Contents: Basic Operations Basic Guide Advanced Guide 1 Camera Basics 2 Smart Auto Mode 3 Other Shooting Modes 4 P Mode 5 Playback Mode 6 Setting Menu 7 Accessories 8 Appendix Index • When using a tripod, shoot in [ ] mode (=33). • [ ] mode resolution is [ ] (2304 x 1728 - Canon PowerShot A2600 | User Guide - Page 48
first, to make sure you obtain the desired results. Advanced Guide 1 Camera Basics 2 Smart Auto Mode 3 Other Shooting Modes 4 P Mode 5 Playback Mode 6 Setting Menu 7 Accessories 8 Appendix Index • In [ ] and [ ] modes, try taking some test shots first, to make sure you obtain the desired results - Canon PowerShot A2600 | User Guide - Page 49
sec. • The zoom is not available when shooting movies. Be sure to set the zoom before shooting. • Try taking some test shots first, to make sure you obtain the Basic Guide Advanced Guide 1 Camera Basics 2 Smart Auto Mode 3 Other Shooting Modes 4 P Mode 5 Playback Mode 6 Setting Menu 7 Accessories 8 - Canon PowerShot A2600 | User Guide - Page 50
3 Shoot. B/W Sepia Blue Black and white shots. Sepia tone shots. Blue and white shots. Cover Preliminary Notes and Legal Information Contents: Basic Operations Basic Guide Advanced Guide 1 Camera Basics 2 Smart Auto Mode 3 Other Shooting Modes 4 P Mode 5 Playback Mode 6 Setting Menu 7 Accessories - Canon PowerShot A2600 | User Guide - Page 51
. [Blink Detection] (=44) is only available for the final shot. Cover Preliminary Notes and Legal Information Contents: Basic Operations Basic Guide Advanced Guide 1 Camera Basics 2 Smart Auto Mode 3 Other Shooting Modes 4 P Mode 5 Playback Mode 6 Setting Menu 7 Accessories 8 Appendix Index 51 - Canon PowerShot A2600 | User Guide - Page 52
Long Exposures (Long Shutter) Specify a shutter speed of 1 - 15 seconds to shoot long exposures. In this case, mount the camera on a tripod or take other measures to prevent camera shake. 1 Choose [N]. Follow step 1 in "Specific Scenes" (=46) and choose [N]. 2 Choose the shutter speed. Press the - Canon PowerShot A2600 | User Guide - Page 53
4 P Mode More discerning shots, in your preferred shooting style • Instructions in this chapter apply to the camera when set to mode. • : Program AE Basic Guide Advanced Guide 1 Camera Basics 2 Smart Auto Mode 3 Other Shooting Modes 4 P Mode 5 Playback Mode 6 Setting Menu 7 Accessories 8 - Canon PowerShot A2600 | User Guide - Page 54
recording a movie, [&] is displayed, and the exposure is locked. Cover Preliminary Notes and Legal Information Contents: Basic Operations Basic Guide Advanced Guide 1 Camera Basics 2 Smart Auto Mode 3 Other Shooting Modes 4 P Mode 5 Playback Mode 6 Setting Menu 7 Accessories 8 Appendix Index 54 - Canon PowerShot A2600 | User Guide - Page 55
[ ] (Spot AE Point frame), displayed in the center of the screen. Cover Preliminary Notes and Legal Information Contents: Basic Operations Basic Guide Advanced Guide 1 Camera Basics 2 Smart Auto Mode 3 Other Shooting Modes 4 P Mode 5 Playback Mode 6 Setting Menu 7 Accessories 8 Appendix Index 55 - Canon PowerShot A2600 | User Guide - Page 56
to appear grainy. • You can also correct existing images (=78). Cover Preliminary Notes and Legal Information Contents: Basic Operations Basic Guide Advanced Guide 1 Camera Basics 2 Smart Auto Mode 3 Other Shooting Modes 4 P Mode 5 Playback Mode 6 Setting Menu 7 Accessories 8 Appendix Index 56 - Canon PowerShot A2600 | User Guide - Page 57
if you change camera settings after recording white balance data. Cover Preliminary Notes and Legal Information Contents: Basic Operations Basic Guide Advanced Guide 1 Camera Basics 2 Smart Auto Mode 3 Other Shooting Modes 4 P Mode 5 Playback Mode 6 Setting Menu 7 Accessories 8 Appendix Index 57 - Canon PowerShot A2600 | User Guide - Page 58
the camera on a tripod and shooting with the camera set to [[] (=40). Cover Preliminary Notes and Legal Information Contents: Basic Operations Basic Guide Advanced Guide 1 Camera Basics 2 Smart Auto Mode 3 Other Shooting Modes 4 P Mode 5 Playback Mode 6 Setting Menu 7 Accessories 8 Appendix - Canon PowerShot A2600 | User Guide - Page 59
if the camera cannot focus when you press the shutter button halfway. Cover Preliminary Notes and Legal Information Contents: Basic Operations Basic Guide Advanced Guide 1 Camera Basics 2 Smart Auto Mode 3 Other Shooting Modes 4 P Mode 5 Playback Mode 6 Setting Menu 7 Accessories 8 Appendix Index - Canon PowerShot A2600 | User Guide - Page 60
AF frame is displayed with [ ] if the camera cannot focus when you press the shutter button halfway. Note that AF-point zooming (=65) is not possible. • To Basic Guide Advanced Guide 1 Camera Basics 2 Smart Auto Mode 3 Other Shooting Modes 4 P Mode 5 Playback Mode 6 Setting Menu 7 Accessories 8 - Canon PowerShot A2600 | User Guide - Page 61
, because the camera constantly focuses on subjects until you press the shutter button halfway. Off Conserves battery power, because the camera does not focus constantly. 1 Camera Basics 2 Smart Auto Mode 3 Other Shooting Modes 4 P Mode 5 Playback Mode 6 Setting Menu 7 Accessories 8 Appendix - Canon PowerShot A2600 | User Guide - Page 62
Advanced Guide 1 Camera Basics 2 Smart Auto Mode 3 Other Shooting Modes 4 P Mode 5 Playback Mode 6 Setting Menu 7 Accessories 8 Appendix Index • Even after the flash fires, ensure that the main subject does not move until the shutter sound is finished playing. • Mount the camera on a tripod or - Canon PowerShot A2600 | User Guide - Page 63
battery power in Shooting mode. When the camera is not in use, the screen quickly darkens to reduce battery consumption turns off. The camera turns off after approximately three minutes of inactivity. 2 Shoot. To activate the screen and prepare for shooting when the screen is off but the lens - Canon PowerShot A2600 | User Guide - Page 64
button, choose [Digital Zoom] on the [4] tab, and then choose [Off] (=31). Cover Preliminary Notes and Legal Information Contents: Basic Operations Basic Guide Advanced Guide 1 Camera Basics 2 Smart Auto Mode 3 Other Shooting Modes 4 P Mode 5 Playback Mode 6 Setting Menu 7 Accessories 8 Appendix - Canon PowerShot A2600 | User Guide - Page 65
the shutter button halfway. Off No image display after shots. Cover Preliminary Notes and Legal Information Contents: Basic Operations Basic Guide Advanced Guide 1 Camera Basics 2 Smart Auto Mode 3 Other Shooting Modes 4 P Mode 5 Playback Mode 6 Setting Menu 7 Accessories 8 Appendix Index 65 - Canon PowerShot A2600 | User Guide - Page 66
button, you can do the following operations. - Protection (=72) Cover Preliminary Notes and Legal Information Contents: Basic Operations Basic Guide Advanced Guide 1 Camera Basics 2 Smart Auto Mode 3 Other Shooting Modes 4 P Mode 5 Playback Mode 6 Setting Menu 7 Accessories 8 Appendix Index 66 - Canon PowerShot A2600 | User Guide - Page 67
4 5 Playback Mode Have fun reviewing your shots, and browse or edit them in many ways • To prepare the camera for these operations, press the Operations Basic Guide Advanced Guide 1 Camera Basics 2 Smart Auto Mode 3 Other Shooting Modes 4 P Mode 5 Playback Mode 6 Setting Menu 7 Accessories 8 - Canon PowerShot A2600 | User Guide - Page 68
[1] tab, and then press the buttons to choose the effect. Cover Preliminary Notes and Legal Information Contents: Basic Operations Basic Guide Advanced Guide 1 Camera Basics 2 Smart Auto Mode 3 Other Shooting Modes 4 P Mode 5 Playback Mode 6 Setting Menu 7 Accessories 8 Appendix Index 68 - Canon PowerShot A2600 | User Guide - Page 69
the button to view the selected image in single-image display. Cover Preliminary Notes and Legal Information Contents: Basic Operations Basic Guide Advanced Guide 1 Camera Basics 2 Smart Auto Mode 3 Other Shooting Modes 4 P Mode 5 Playback Mode 6 Setting Menu 7 Accessories 8 Appendix Index 69 - Canon PowerShot A2600 | User Guide - Page 70
is displayed, and the images that were found are no longer shown. Cover Preliminary Notes and Legal Information Contents: Basic Operations Basic Guide Advanced Guide 1 Camera Basics 2 Smart Auto Mode 3 Other Shooting Modes 4 P Mode 5 Playback Mode 6 Setting Menu 7 Accessories 8 Appendix Index 70 - Canon PowerShot A2600 | User Guide - Page 71
back images from a memory card as follows. Each image button to stop the slideshow. • The camera's power-saving functions (=28) are deactivated during slideshows. Guide Advanced Guide 1 Camera Basics 2 Smart Auto Mode 3 Other Shooting Modes 4 P Mode 5 Playback Mode 6 Setting Menu 7 Accessories - Canon PowerShot A2600 | User Guide - Page 72
Images Still Images Movies Protect important images to prevent accidental erasure by the camera (= 74). Press the button, and then choose [:] in the Basic Guide Advanced Guide 1 Camera Basics 2 Smart Auto Mode 3 Other Shooting Modes 4 P Mode 5 Playback Mode 6 Setting Menu 7 Accessories 8 - Canon PowerShot A2600 | User Guide - Page 73
memory card will be erased if you format the card (=82, 83). • Protected images cannot be erased using the camera switch to Shooting mode or turn the camera off before Guide Advanced Guide 1 Camera Basics 2 Smart Auto Mode 3 Other Shooting Modes 4 P Mode 5 Playback Mode 6 Setting Menu 7 Accessories - Canon PowerShot A2600 | User Guide - Page 74
Method" (see above), choose [Select] and press the button. Cover Preliminary Notes and Legal Information Contents: Basic Operations Basic Guide Advanced Guide 1 Camera Basics 2 Smart Auto Mode 3 Other Shooting Modes 4 P Mode 5 Playback Mode 6 Setting Menu 7 Accessories 8 Appendix Index 74 - Canon PowerShot A2600 | User Guide - Page 75
image is rotated 90°. Press the button to complete the setting. Cover Preliminary Notes and Legal Information Contents: Basic Operations Basic Guide Advanced Guide 1 Camera Basics 2 Smart Auto Mode 3 Other Shooting Modes 4 P Mode 5 Playback Mode 6 Setting Menu 7 Accessories 8 Appendix Index 75 - Canon PowerShot A2600 | User Guide - Page 76
already rotated will be displayed in the original orientation. Cover Preliminary Notes and Legal Information Contents: Basic Operations Basic Guide Advanced Guide 1 Camera Basics 2 Smart Auto Mode 3 Other Shooting Modes 4 P Mode 5 Playback Mode 6 Setting Menu 7 Accessories 8 Appendix Index 76 - Canon PowerShot A2600 | User Guide - Page 77
• Image editing (=77 - 79) is only available when the memory card has sufficient free space. Still Images Resizing Images Save a copy of Operations Basic Guide Advanced Guide 1 Camera Basics 2 Smart Auto Mode 3 Other Shooting Modes 4 P Mode 5 Playback Mode 6 Setting Menu 7 Accessories 8 Appendix - Canon PowerShot A2600 | User Guide - Page 78
the steps in "Magnifying Images" (= 71). 4 Save as a new image and review. Press the buttons to choose [New File], and then press the Basic Guide Advanced Guide 1 Camera Basics 2 Smart Auto Mode 3 Other Shooting Modes 4 P Mode 5 Playback Mode 6 Setting Menu 7 Accessories 8 - Canon PowerShot A2600 | User Guide - Page 79
image will be erased. • Protected images cannot be overwritten. Cover Preliminary Notes and Legal Information Contents: Basic Operations Basic Guide Advanced Guide 1 Camera Basics 2 Smart Auto Mode 3 Other Shooting Modes 4 P Mode 5 Playback Mode 6 Setting Menu 7 Accessories 8 Appendix Index 79 - Canon PowerShot A2600 | User Guide - Page 80
for greater convenience Adjusting Basic Camera Functions 81 Cover Preliminary Notes and Legal Information Contents: Basic Operations Basic Guide Advanced Guide 1 Camera Basics 2 Smart Auto Mode 3 Other Shooting Modes 4 P Mode 5 Playback Mode 6 Setting Menu 7 Accessories 8 Appendix Index 80 - Canon PowerShot A2600 | User Guide - Page 81
Advanced Guide Screen Brightness Adjust screen brightness as follows. Choose [LCD Brightness], and then press the buttons to adjust the brightness. 1 Camera Basics 2 Smart Auto Mode 3 Other Shooting Modes 4 P Mode 5 Playback Mode 6 Setting Menu 7 Accessories 8 Appendix • For maximum - Canon PowerShot A2600 | User Guide - Page 82
in another device, you should format the card with this camera. Formatting erases all data on a memory card. Before formatting, copy images on the memory card to a computer, or take other steps to back them up. An Eye-Fi card (=101) contains software on the card itself. Before formatting an Eye-Fi - Canon PowerShot A2600 | User Guide - Page 83
(or formatted (=82)) memory card. • Refer to the Software Guide (=21) for information on the card folder structure and image formats. Cover Preliminary Notes and Legal Information Contents: Basic Operations Basic Guide Advanced Guide 1 Camera Basics 2 Smart Auto Mode 3 Other Shooting Modes 4 P Mode - Canon PowerShot A2600 | User Guide - Page 84
power-saving functions are not available when you have set Eco mode (=42, 63) to [ ]. Cover Preliminary Notes and Legal Information Contents: Basic Operations Basic Guide Advanced Guide 1 Camera Basics 2 Smart Auto Mode 3 Other Shooting Modes 4 P Mode 5 Playback Mode 6 Setting Menu 7 Accessories - Canon PowerShot A2600 | User Guide - Page 85
change the Date/ Time setting manually. Before using the world clock, as described in "Setting the Date and Time" (=16). 1 Specify your destination. Choose [Time Zone Guide Advanced Guide 1 Camera Basics 2 Smart Auto Mode 3 Other Shooting Modes 4 P Mode 5 Playback Mode 6 Setting Menu 7 Accessories - Canon PowerShot A2600 | User Guide - Page 86
settings [Date/Time] (=16), [Language ] (=17), [Time Zone] (=85), and [Video System] (=90) - Custom white balance data you have recorded (=57) - Shooting mode (=46) Cover Preliminary Notes and Legal Information Contents: Basic Operations Basic Guide Advanced Guide 1 Camera Basics 2 Smart Auto Mode - Canon PowerShot A2600 | User Guide - Page 87
optional Canon accessories and other compatible accessories sold separately Optional Accessories 88 Using Optional Accessories....90 Printing Images 93 Using an Eye-Fi Card 101 Cover Preliminary Notes and Legal Information Contents: Basic Operations Basic Guide Advanced Guide 1 Camera Basics - Canon PowerShot A2600 | User Guide - Page 88
Optional Accessories The following camera accessories are sold separately. Note that availability varies by area, and some accessories may no longer be available. Power Supplies A2600 Battery Pack NB-11L Rechargeable lithium-ion battery Battery Charger CB-2LF/CB-2LFE Charger for Battery Pack - Canon PowerShot A2600 | User Guide - Page 89
for traveling, which may damage the battery. Flash Unit High-Power Flash HF-DC2 External flash for illuminating subjects that are out of range of the built-in flash. High-Power Flash HF-DC1 can also be used. Other Accessories AV Cable AVC-DC400 Connect the camera to a TV to enjoy playback on - Canon PowerShot A2600 | User Guide - Page 90
, press the button and choose [Video System] on the [3] tab. Cover Preliminary Notes and Legal Information Contents: Basic Operations Basic Guide Advanced Guide 1 Camera Basics 2 Smart Auto Mode 3 Other Shooting Modes 4 P Mode 5 Playback Mode 6 Setting Menu 7 Accessories 8 Appendix Index 90 - Canon PowerShot A2600 | User Guide - Page 91
the coupler cable. Insert one end of the power cord into the compact power adapter, and then plug the other end into a power outlet. Turn the camera on and use it as desired. When finished, turn the camera off and unplug the power cord from the outlet. Advanced Guide 1 Camera Basics 2 Smart - Canon PowerShot A2600 | User Guide - Page 92
Basic Guide 5 Connect the power cord. Insert the adapter plug into the end of the coupler cable. Insert one end of the power cord into the compact power adapter, and then plug the other end into a power outlet. Turn the camera on and use it as desired. When finished, turn the camera off - Canon PowerShot A2600 | User Guide - Page 93
. When you are finished printing, turn the camera and printer off and disconnect the cable. Advanced Guide 1 Camera Basics 2 Smart Auto Mode 3 Other Shooting Modes 4 P Mode 5 Playback Mode 6 Setting Menu 7 Accessories 8 Appendix Index • For Canon-brand PictBridge-compatible printers (sold - Canon PowerShot A2600 | User Guide - Page 94
a desired image area to print (=94). - Specify the paper size, layout, and other details (=95). Still Images Cropping Images Before 93) to print. Advanced Guide 1 Camera Basics 2 Smart Auto Mode 3 Other Shooting Modes 4 P Mode 5 Playback Mode 6 Setting Menu 7 Accessories 8 Appendix Index 94 - Canon PowerShot A2600 | User Guide - Page 95
] selected. Still Images Choosing Paper Size and Layout Before Printing 1 Choose [ Size Choose the print size. Choose from 3.5 x 5 in., postcard, or wide-format prints. Advanced Guide 1 Camera Basics 2 Smart Auto Mode 3 Other Shooting Modes 4 P Mode 5 Playback Mode 6 Setting Menu 7 Accessories - Canon PowerShot A2600 | User Guide - Page 96
Images 1 Choose [ID Photo]. Following steps 1 - 4 in "Choosing Paper Size and Layout Before Printing" (=95), choose [ID Photo] and press the button Basic Guide Advanced Guide 1 Camera Basics 2 Smart Auto Mode 3 Other Shooting Modes 4 P Mode 5 Playback Mode 6 Setting Menu 7 Accessories 8 - Canon PowerShot A2600 | User Guide - Page 97
Adding Images to the Print List (DPOF) Batch printing (=99) and ordering prints from a photo development service can be set up on the camera. Choose up to 998 images on a memory card and configure relevant settings, such as the number of copies, as follows. The printing information you prepare this - Canon PowerShot A2600 | User Guide - Page 98
the buttons to choose [OK], and then press the button. Cover Preliminary Notes and Legal Information Contents: Basic Operations Basic Guide Advanced Guide 1 Camera Basics 2 Smart Auto Mode 3 Other Shooting Modes 4 P Mode 5 Playback Mode 6 Setting Menu 7 Accessories 8 Appendix Index 98 - Canon PowerShot A2600 | User Guide - Page 99
warn you that the memory card has print settings that were configured on another camera. Changing the print settings using this camera may overwrite all previous settings. • After importing images to your computer, also refer to the Software Guide (=21) and the printer manual for further information - Canon PowerShot A2600 | User Guide - Page 100
the buttons to choose [OK], and then press the button. Cover Preliminary Notes and Legal Information Contents: Basic Operations Basic Guide Advanced Guide 1 Camera Basics 2 Smart Auto Mode 3 Other Shooting Modes 4 P Mode 5 Playback Mode 6 Setting Menu 7 Accessories 8 Appendix Index 100 - Canon PowerShot A2600 | User Guide - Page 101
to the card's user manual. - Poor Eye-Fi connections may cause image transfer to take a long time, and transfer may be interrupted in some cases. - Eye-Fi cards may become hot, due to their transfer functions. - Battery power will be consumed faster than in normal use. - Camera operation may become - Canon PowerShot A2600 | User Guide - Page 102
Eye-Fi card if the write-protect tab is in the locked position. Cover Preliminary Notes and Legal Information Contents: Basic Operations Basic Guide Advanced Guide 1 Camera Basics 2 Smart Auto Mode 3 Other Shooting Modes 4 P Mode 5 Playback Mode 6 Setting Menu 7 Accessories 8 Appendix Index - Canon PowerShot A2600 | User Guide - Page 103
when using the camera Troubleshooting 104 On-Screen Messages 107 On-Screen Information ..........109 Functions and Menu Tables 111 Handling Precautions 117 Specifications 117 Cover Preliminary Notes and Legal Information Contents: Basic Operations Basic Guide Advanced Guide 1 Camera Basics - Canon PowerShot A2600 | User Guide - Page 104
not solve your problem, contact a Canon Customer Support Help Desk. Power Nothing happens when the ON/OFF button is pressed. A2600 • Confirm that the battery is charged (=12). • Confirm that the battery is inserted facing the correct way (=13). • Confirm that the memory card/battery cover is fully - Canon PowerShot A2600 | User Guide - Page 105
-eye. For best results, have subjects look at the red-eye reduction lamp. Also try increasing the lighting in indoor scenes and shooting at closer range. • Edit images using red-eye correction (=78). Recording to the memory card takes too long, or continuous shooting is slower. • Use the camera to - Canon PowerShot A2600 | User Guide - Page 106
the following measures. • Use the camera to perform low-level formatting of the memory card (=83). • Lower the image quality (=43). • Switch to a memory card that supports high-speed recording (=119). Zooming is not possible. • Zooming is not possible when shooting movies in [ ] mode (=49). Playback - Canon PowerShot A2600 | User Guide - Page 107
the memory card (=82). Lens Error • This error may occur if the lens is held while it is moving, or when the camera is used in dusty or sandy locations. • Frequent display of this error message may indicate camera damage. In this case, contact a Canon Customer Support Help Desk. A camera error was - Canon PowerShot A2600 | User Guide - Page 108
a Canon Customer Support Help Desk to request assistance with ink absorber replacement. Cover Preliminary Notes and Legal Information Contents: Basic Operations Basic Guide Advanced Guide 1 Camera Basics 2 Smart Auto Mode 3 Other Shooting Modes 4 P Mode 5 Playback Mode 6 Setting Menu 7 Accessories - Canon PowerShot A2600 | User Guide - Page 109
of power. Display Details (Blinking red) [Change the batteries] Nearly depleted - prepare replacement batteries Depleted - replace the batteries Cover Preliminary Notes and Legal Information Contents: Basic Operations Basic Guide Advanced Guide 1 Camera Basics 2 Smart Auto Mode 3 Other Shooting - Canon PowerShot A2600 | User Guide - Page 110
File size Still images: Resolution (=118) Movies: Playback time (=119) Protection (=72) Red-eye correction (=43, 78) i-Contrast (=56, 78) Shooting date/time (= 16) • Guide Advanced Guide 1 Camera Basics 2 Smart Auto Mode 3 Other Shooting Modes 4 P Mode 5 Playback Mode 6 Setting Menu 7 Accessories - Canon PowerShot A2600 | User Guide - Page 111
Flash (=41, 62) Shooting Mode G I PtN Basic Guide Advanced Guide h Z ! AE Lock/FE Lock (=55, 63)*2 OOOOOOOOOOOOOO - - - OO - OO - OOOOOOO - O *1 O O - - - - - - - - - - - - - OOOOOOOOOOOOOOOO -O 1 Camera Basics 2 Smart Auto Mode 3 Other Shooting Modes AF Lock (=62 - Canon PowerShot A2600 | User Guide - Page 112
-O Cover Preliminary Notes and Legal Information Contents: Basic Operations Basic Guide Advanced Guide 1 Camera Basics 2 Smart Auto Mode 3 Other Shooting Modes 4 P Mode 5 Playback Mode 6 Setting Menu 7 Accessories 8 Appendix Index *1 Settings [Dark - Light]. *2 Cannot be set to 0 seconds - Canon PowerShot A2600 | User Guide - Page 113
1 Camera Basics 2 Smart Auto Mode 3 Other Shooting Modes e u - OOOO - OOOOOOOO - O 4 P Mode *1 Synchronizes with the resolution setting and is automatically set (=42). 5 O Available or set automatically. - Not available. Playback Mode 6 Setting Menu 7 Accessories 8 Appendix - Canon PowerShot A2600 | User Guide - Page 114
Digital Zoom (=38) On Off AF-Point Zoom (=65) On Off Servo AF (=61) On Off*2 Continuous AF (=61) On Off Lamp Setting (=44) On Off Red-Eye Corr. (=43) On Off Shooting Guide Advanced Guide 1 Camera Basics 2 Smart Auto Mode 3 Other Shooting Modes 4 P Mode 5 Playback Mode 6 Setting Menu 7 Accessories - Canon PowerShot A2600 | User Guide - Page 115
Function Review image after shooting (=65) Shooting Mode G I PtN Preliminary Notes and Legal Information Contents: Basic Operations Display Time Display Info Off/Quick/2 sec./4 sec./8 sec./Hold Off Detailed OOOOOOOOOOOOOOOO OOOOOOOOOOOOOOOO - OOOOOOOOOOOOOOO Basic Guide Advanced Guide - Canon PowerShot A2600 | User Guide - Page 116
Lens Retract Power Saving LCD Brightness Start-up Image Ref. Page = 81 = 81 = 81 = 16 = 85 = 84 =28, 84 = 81 = 82 Item Format File Numbering Create Folder Video Guide Advanced Guide 1 Camera Basics 2 Smart Auto Mode 3 Other Shooting Modes 4 P Mode 5 Playback Mode 6 Setting Menu 7 Accessories - Canon PowerShot A2600 | User Guide - Page 117
in this state may damage it. Remove the battery/batteries and memory card, and wait until the moisture has evaporated before resuming use. A2600 • Before long-term battery storage, use up the battery's remaining charge, remove it from the camera, and store it in a plastic bag or similar container - Canon PowerShot A2600 | User Guide - Page 118
change depending on the subject, memory card and camera settings. Cover Preliminary Notes and Legal Information Contents: Basic Operations Basic Guide Advanced Guide 1 Camera Basics 2 Smart Auto Mode 3 Other Shooting Modes 4 P Mode 5 Playback Mode 6 Setting Menu 7 Accessories 8 Appendix Index 118 - Canon PowerShot A2600 | User Guide - Page 119
size reaches 4 GB, or when the recording time reaches approximately 29 minutes and 59 seconds when shooting in [ ], or approximately 1 hour when shooting in [ ]. • Recording may stop even if the maximum clip length has not been reached on some memory cards. SD Speed Class 6 or higher memory cards - Canon PowerShot A2600 | User Guide - Page 120
A2600 Battery Charger CB-2LF/CB-2LFE Rated Input: 100 tests by Canon. • Camera specifications or appearance are subject to change without notice. Cover Preliminary Notes and Legal Information Contents: Basic Operations Basic Guide Advanced Guide 1 Camera Basics 2 Smart Auto Mode 3 Other Shooting - Canon PowerShot A2600 | User Guide - Page 121
shooting mode 48 Power AC adapter kit Batteries Battery Battery and charger kit Cover Preliminary Notes and Legal Information Contents: Basic Operations Basic Guide Advanced Guide 1 Camera Basics 2 Smart Auto Mode 3 Other Shooting Modes 4 P Mode 5 Playback Mode 6 Setting Menu 7 Accessories - Canon PowerShot A2600 | User Guide - Page 122
Power saving 28 Printing 93 Program AE 54 Protecting 72 P (shooting mode 54 R Red-eye correction 43, 78 Reset all 86 Resizing images 77 Resolution (image size 42 Rotating 75 S Screen Display language 17 Icons 109, 110 Menu FUNC. menu, Menu SD/SDHC/SDXC memory cards Memory cards - Canon PowerShot A2600 | User Guide - Page 123
INCORRECT TYPE. DISPOSE OF USED BATTERIES ACCORDING TO LOCAL REGULATION. Trademark Acknowledgments • The SDXC logo is a trademark of SD-3C, LLC. • This Basic Guide Advanced Guide 1 Camera Basics 2 Smart Auto Mode 3 Other Shooting Modes 4 P Mode 5 Playback Mode 6 Setting Menu 7 Accessories 8 Appendix
-
 1
1 -
 2
2 -
 3
3 -
 4
4 -
 5
5 -
 6
6 -
 7
7 -
8
-
9
-
10
-
11
-
12
-
13
-
14
-
15
-
16
-
17
-
18
-
19
-
20
-
21
-
22
-
23
-
24
-
25
-
26
-
27
-
28
-
29
-
30
-
31
-
32
-
33
-
34
-
35
-
36
-
37
-
38
-
39
-
40
-
41
-
42
-
43
-
44
-
45
-
46
-
47
-
48
-
49
-
50
-
51
-
52
-
53
-
54
-
55
-
56
-
57
-
58
-
59
-
60
-
61
-
62
-
63
-
64
-
65
-
66
-
67
-
68
-
69
-
70
-
71
-
72
-
73
-
74
-
75
-
76
-
77
-
78
-
79
-
80
-
81
-
82
-
83
-
84
-
85
-
86
-
87
-
88
-
89
-
90
-
91
-
92
-
93
-
94
-
95
-
96
-
97
-
98
-
99
-
100
-
101
-
102
-
103
-
104
-
105
-
106
-
107
-
108
-
109
-
110
-
111
-
112
-
113
-
114
-
115
-
116
-
117
-
118
-
119
-
120
-
121
-
122
-
123
 |
 |
1
1
2
3
4
5
6
7
8
Cover
Preliminary Notes
and Legal Information
Contents: Basic
Operations
Advanced Guide
Camera Basics
Smart Auto
Mode
Other Shooting
Modes
Playback Mode
Setting Menu
Accessories
Appendix
Index
Basic Guide
P Mode
Camera User Guide
ENGLISH
© CANON INC. 2013
CEL-ST9EA210
•
Click the buttons in the lower right to access other pages.
: Next page
: Previous page
: Page before you clicked a link
•
To jump to the beginning of a chapter, click the chapter
title at right.
From chapter title pages, you can access topics by
clicking their titles.
•
Before use, be sure to read this guide, including the
safety precautions.
•
Reading this guide will help you learn to use the camera
properly.
•
Store this guide safely so that you can use it in the future.