Canon PowerShot A470 PowerShot A470 Getting Started
Canon PowerShot A470 Manual
 |
View all Canon PowerShot A470 manuals
Add to My Manuals
Save this manual to your list of manuals |
Canon PowerShot A470 manual content summary:
- Canon PowerShot A470 | PowerShot A470 Getting Started - Page 1
ENGLISH Getting Started CDI-E356-010 © CANON INC. 2008 PRINTED IN CHINA Ensure that you read the Safety Precautions (p. 32). - Canon PowerShot A470 | PowerShot A470 Getting Started - Page 2
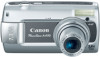
size Alkaline Batteries (x2) c Memory Card (32MB) d Interface Cable IFC-400PCU e AV Cable AVC-DC300 f Wrist Strap WS-800 g Canon Digital Camera h Warranty Card Solution Disk i User Guides Getting Started (This guide) "Canon Customer Support" Leaflet Please also refer to the PDF manuals on the - Canon PowerShot A470 | PowerShot A470 Getting Started - Page 3
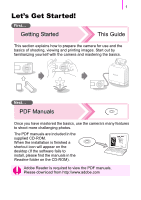
included in the supplied CD-ROM. When the installation is finished a shortcut icon will appear on the desktop (If the software fails to install, please find the manuals in the Readme folder on the CD-ROM). Adobe Reader is required to view the PDF manuals. Please download from http://www.adobe.com - Canon PowerShot A470 | PowerShot A470 Getting Started - Page 4
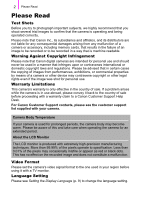
arising from any malfunction of a camera or accessory, including memory cards, that results in the failure of an image to be recorded or to be recorded in a way that is machine readable. Warning Against Copyright Infringement Please note that Canon digital cameras are intended for personal use and - Canon PowerShot A470 | PowerShot A470 Getting Started - Page 5
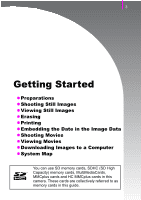
Image Data z Shooting Movies z Viewing Movies z Downloading Images to a Computer zSystem Map You can use SD memory cards, SDHC (SD High Capacity) memory cards, MultiMediaCards, MMCplus cards and HC MMCplus cards in this camera. These cards are collectively referred to as memory cards in this guide. - Canon PowerShot A470 | PowerShot A470 Getting Started - Page 6
Getting Started 4 Capture Your Best Memories Capture Your Best Memories - Canon PowerShot A470 | PowerShot A470 Getting Started - Page 7
Memory Card a Slide the battery cover lock in the direction of the arrow (a) and hold it there while moving the entire cover in the direction of the arrow (b) and opening it up in the direction of the arrow (c). Hold lock open a Battery Cover Lock c b Be sure to hold the battery cover lock open - Canon PowerShot A470 | PowerShot A470 Getting Started - Page 8
the battery terminals for the correct orientation. c Insert the memory card until it clicks into place. Caution! Check the memory card for the correct orientation. Back Only SD and SDHC memory cards Write Protect Tab Confirm that the write protect tab is unlocked. Front The camera may fail - Canon PowerShot A470 | PowerShot A470 Getting Started - Page 9
7 d Close the cover (a), and press downward as you slide it until it clicks into place (b). a b To Remove the Memory Card • Push the memory card with your finger until the memory card clicks and then release it. It is recommended to use the wrist strap to avoid dropping the camera during use - Canon PowerShot A470 | PowerShot A470 Getting Started - Page 10
. 2. Use the S or T button to set the value. c Press the FUNC./SET button. „ To Change a Previously Set Date/Time Perform Steps b-c above after using the following procedures to display the Date/Time settings window. 1. Press the MENU button. 2. Use the W or X button to select the (Set up) menu - Canon PowerShot A470 | PowerShot A470 Getting Started - Page 11
Getting Started Preparations 9 Setting the Display Language You can change the language displayed in the LCD monitor menus and messages. a bd Button Mode Dial c b Button / / / Buttons a Set the mode dial to (Playback). b Hold down the - Canon PowerShot A470 | PowerShot A470 Getting Started - Page 12
Camera Shake Keep your arms tight against your body while holding the camera firmly by the sides. Using a tripod is also effective. d Press the shutter button lightly (press halfway) to set the focus. • When the camera focuses, it beeps twice and the indicator lights green (orange when the flash - Canon PowerShot A470 | PowerShot A470 Getting Started - Page 13
Review). You can also shoot while the image is displayed. * You can change the interval for which images are displayed by configuring the [Review record to the memory card. To Shoot Images in Focus The camera automatically sets the focus green blinks green (orange when the flash fires) AF frames - Canon PowerShot A470 | PowerShot A470 Getting Started - Page 14
], the last image viewed will display (Resume Playback). z The following actions will display the most recent image regardless of the [Resume] settings. Shooting an image, changing the memory card, or editing an image on the memory - Canon PowerShot A470 | PowerShot A470 Getting Started - Page 15
Getting Started Erasing a Erasing 13 Mode Dial b c Button / Buttons b Button a Set the mode dial to (Playback). b Use the W or X button to select an image to erase and press the button. c Confirm that [Erase] is selected and press the FUNC./ SET button. • To exit instead of erasing, select [ - Canon PowerShot A470 | PowerShot A470 Getting Started - Page 16
into the connector. • See the printer's user guide for connection instructions. • Since this camera uses a standard protocol (PictBridge), you can use it with other PictBridge-compliant printers in addition to Canon-brand printers. Please see the Direct Print User Guide for more information. b Turn - Canon PowerShot A470 | PowerShot A470 Getting Started - Page 17
and press the FUNC./SET button. Printing Images in a Print List This explanation is based on the use of a Canon SELPHY ES series or SELPHY CP series printer. a Connect the camera to a printer. Number of copies to print b Print. 1. Use the S or T button to select [Print now]. • You can use the W or - Canon PowerShot A470 | PowerShot A470 Getting Started - Page 18
images as they are recorded (Date Stamp). • The date stamp cannot be deleted from the image data once it has been embedded. Ensure that the camera's date/time is set correctly beforehand (p. 8). • The image size is fixed to the 2M (1600 x 1200) setting and the compression to Fine (appropriate for - Canon PowerShot A470 | PowerShot A470 Getting Started - Page 19
] option to [On] in [Print Settings] in the (Print) menu. • Connect the camera to a printer and imprint the date. See the Direct Print User Guide. • Insert a memory card into the printer and imprint the date. See your printer user guide. • Use the supplied software. See the Software Starter Guide. - Canon PowerShot A470 | PowerShot A470 Getting Started - Page 20
Button b Indicator Mode Dial a Press the power button. b Select a shooting mode. 1. Set the mode dial to (Movie). • Confirm that the camera is set to (Standard). c Aim the camera at the subject. z Do not touch the microphone while recording. z Do not press any buttons other than the shutter, or - Canon PowerShot A470 | PowerShot A470 Getting Started - Page 21
green when the camera focuses. • The exposure, focus and white balance are automatically set when you press the button halfway. e Without changing anything else, press and the data will be recorded onto the memory card. • Recording will stop automatically when the maximum recording time elapses, or the - Canon PowerShot A470 | PowerShot A470 Getting Started - Page 22
(Play) and press the FUNC./ SET button. • The movie will start playing. • If you press the FUNC./SET button during playback, you can pause and restart the movie. • You can adjust the playback volume with the S or T button. - Canon PowerShot A470 | PowerShot A470 Getting Started - Page 23
to download images to your computer. Items to Prepare • Camera and computer • Canon Digital Camera Solution Disk supplied with the camera • Interface cable supplied with the camera System Requirements Please install the software on a computer meeting the following minimum requirements. „ Windows - Canon PowerShot A470 | PowerShot A470 Getting Started - Page 24
Images to a Computer Preparing to Download Images Windows 2000 users must install the software before connecting the camera to the computer. a Installing the software. „ Windows 1. Place the Canon Digital Camera Solution Disk in the computer's CD-ROM drive. 2. Click [Easy Installation]. Follow - Canon PowerShot A470 | PowerShot A470 Getting Started - Page 25
connector. USB Port DIGITAL Terminal Interface Cable c Preparing to download images to the computer. 1. Set the camera's mode dial to (Playback) and press the power button. Power Button If the Digital Signature Not Found window appears, click [Yes]. The USB driver will automatically finish - Canon PowerShot A470 | PowerShot A470 Getting Started - Page 26
bottom of the desktop). Preparations for downloading images are now finished. Please proceed to the Downloading Images Using the Camera (Direct Transfer) section (p. 25) (except Windows 2000). z Please refer to the Software Starter Guide regarding how to download images using the computer. z If you - Canon PowerShot A470 | PowerShot A470 Getting Started - Page 27
(except Windows 2000). Install the software before downloading images via the Direct Transfer method for the first time (p. 22). a Button / / / Buttons Button b Button a Confirm that the Direct Transfer menu is displayed on the camera's LCD monitor. • The button will light blue. • Press - Canon PowerShot A470 | PowerShot A470 Getting Started - Page 28
Trans. Images 1. Confirm that the Direct Transfer menu is displayed on the camera's LCD monitor. 2. Use the S or T button to select , or and press the button. • The images will download. The button will blink blue while downloading is in progress. • The display will return to the Direct Transfer - Canon PowerShot A470 | PowerShot A470 Getting Started - Page 29
the next time the Direct Transfer menu is displayed. The image selection screen will appear directly when the [Select & Transfer] or the [Wallpaper] option was last selected. Click at the bottom right of the window to close the CameraWindow and the downloaded images will display on the computer - Canon PowerShot A470 | PowerShot A470 Getting Started - Page 30
Started Wrist Strap WS-800 AV Cable AVC-DC300*1 AA-size Alkaline Batteries (×2) Battery and Charger Kit CBK4-300*6 Interface Cable IFC-400PCU*1 Memory Card (32MB) Canon Digital Camera Solution Disk High-Power Flash HF-DC1 AC Adapter Kit ACK800 „ Battery Charger CB-5AH/CB-5AHE „ AA-size NiMH - Canon PowerShot A470 | PowerShot A470 Getting Started - Page 31
Card Reader Video IN Terminal Audio IN Terminal TV/Video Canon Brand Camera Direct Compatible Printer Direct Print Compatible Bubble Jet Printers*4 (PIXMA series) Compact Photo Printers*2 *3 (SELPHY Series) USB Port PC Card Slot *1 Also available for purchase separately. *2 See the user guide - Canon PowerShot A470 | PowerShot A470 Getting Started - Page 32
batteries separately. „ Other Accessories • SD Memory Card SD memory cards are used to store images recorded by the camera. Canon brand memory cards are available in 128 MB and 512 MB capacities. • Interface Cable IFC-400PCU Use this cable to connect the camera to a computer, Compact Photo Printer - Canon PowerShot A470 | PowerShot A470 Getting Started - Page 33
and easily by connecting them to the camera with a single cable and operating the camera's controls. • Compact Photo Printers (SELPHY series) • Bubble Jet Printers (PIXMA series) For more information, visit your nearest Canon retailer. Use of genuine Canon accessories is recommended. This product is - Canon PowerShot A470 | PowerShot A470 Getting Started - Page 34
Camera User Guide. Warnings • Do not trigger the flash in close proximity batteries which are not specified for this camera. • The compact power adapter output terminals have been designed exclusively for this equipment. Do not use them for other products. For CA, USA only Included lithium battery - Canon PowerShot A470 | PowerShot A470 Getting Started - Page 35
in accordance with the instructions, may cause harmful digital camera must be used with this equipment in order to comply with Class B limits in Subpart B of Part 15 of the FCC rules. Do not make any changes or modifications to the equipment unless otherwise specified in the manual. If such changes
-
 1
1 -
 2
2 -
 3
3 -
 4
4 -
 5
5 -
 6
6 -
 7
7 -
8
-
9
-
10
-
11
-
12
-
13
-
14
-
15
-
16
-
17
-
18
-
19
-
20
-
21
-
22
-
23
-
24
-
25
-
26
-
27
-
28
-
29
-
30
-
31
-
32
-
33
-
34
-
35
 |
 |
Getting Started
CDI-E356-010
© CANON INC. 2008
PRINTED IN CHINA
ENGLISH
Ensure that you read the Safety Precautions (p. 32).