Canon PowerShot ELPH 520 HS User Guide - Page 153
Choose [My Colors]., Choose an image., Choose an option., Save as a new image and review.
 |
View all Canon PowerShot ELPH 520 HS manuals
Add to My Manuals
Save this manual to your list of manuals |
Page 153 highlights
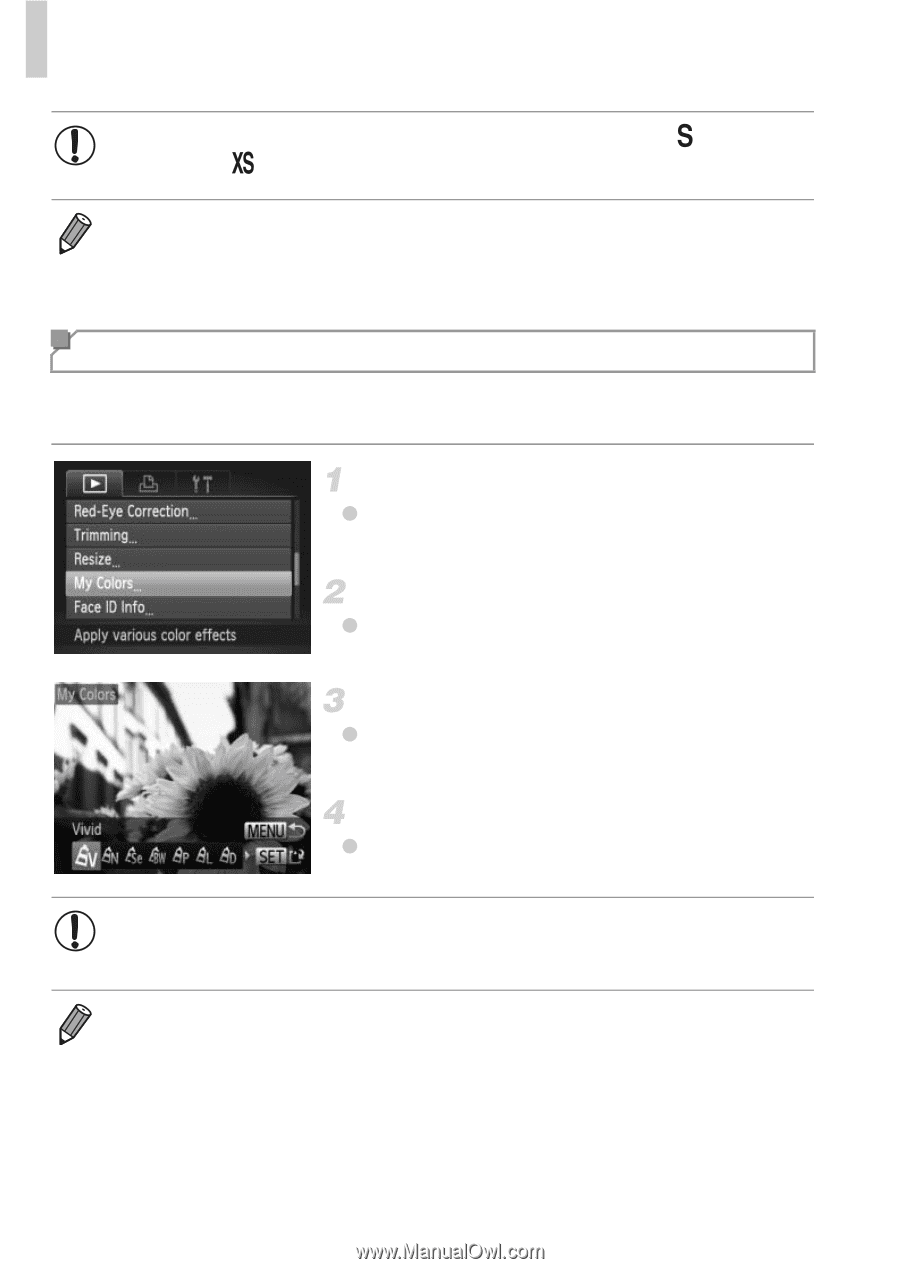
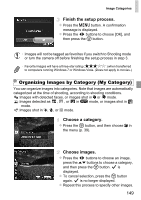
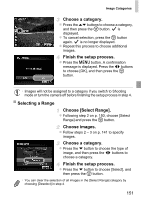
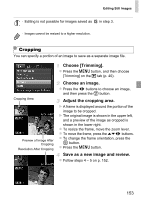
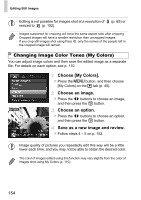
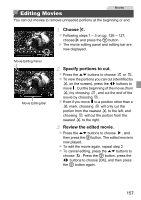
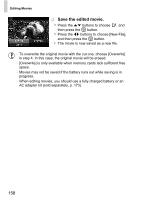
Editing Still Images • Editing is not possible for images shot at a resolution of (p. 69) or resized to (p. 152). • Images supported for cropping will have the same aspect ratio after cropping. • Cropped images will have a smaller resolution than uncropped images. • If you crop still images shot using Face ID, only the names of the people left in the cropped image will remain. Changing Image Color Tones (My Colors) You can adjust image colors and then save the edited image as a separate file. For details on each option, see p. 110. Choose [My Colors]. z Press the n button, and then choose [My Colors] on the 1 tab (p. 40). Choose an image. z Press the qr buttons to choose an image, and then press the m button. Choose an option. z Press the qr buttons to choose an option, and then press the m button. Save as a new image and review. z Follow steps 4 - 5 on p. 152. • Image quality of pictures you repeatedly edit this way will be a little lower each time, and you may not be able to obtain the desired color. • The color of images edited using this function may vary slightly from the color of images shot using My Colors (p. 110). 154
-
 1
1 -
2
-
3
-
4
-
5
-
6
-
7
-
8
-
9
-
10
-
11
-
12
-
13
-
14
-
15
-
16
-
17
-
18
-
19
-
20
-
21
-
22
-
23
-
24
-
25
-
26
-
27
-
28
-
29
-
30
-
31
-
32
-
33
-
34
-
35
-
36
-
37
-
38
-
39
-
40
-
41
-
42
-
43
-
44
-
45
-
46
-
47
-
48
-
49
-
50
-
51
-
52
-
53
-
54
-
55
-
56
-
57
-
58
-
59
-
60
-
61
-
62
-
63
-
64
-
65
-
66
-
67
-
68
-
69
-
70
-
71
-
72
-
73
-
74
-
75
-
76
-
77
-
78
-
79
-
80
-
81
-
82
-
83
-
84
-
85
-
86
-
87
-
88
-
89
-
90
-
91
-
92
-
93
-
94
-
95
-
96
-
97
-
98
-
99
-
100
-
101
-
102
-
103
-
104
-
105
-
106
-
107
-
108
-
109
-
110
-
111
-
112
-
113
-
114
-
115
-
116
-
117
-
118
-
119
-
120
-
121
-
122
-
123
-
124
-
125
-
126
-
127
-
128
-
129
-
130
-
131
-
132
-
133
-
134
-
135
-
136
-
137
-
138
-
139
-
140
-
141
-
142
-
143
-
144
-
145
-
146
-
147
-
 148
148 -
 149
149 -
 150
150 -
 151
151 -
 152
152 -
 153
153 -
 154
154 -
 155
155 -
 156
156 -
 157
157 -
 158
158 -
159
-
160
-
161
-
162
-
163
-
164
-
165
-
166
-
167
-
168
-
169
-
170
-
171
-
172
-
173
-
174
-
175
-
176
-
177
-
178
-
179
-
180
-
181
-
182
-
183
-
184
-
185
-
186
-
187
-
188
-
189
-
190
-
191
-
192
-
193
-
194
-
195
-
196
-
197
-
198
-
199
-
200
-
201
-
202
-
203
-
204
-
205
-
206
-
207
-
208
-
209
-
210
-
211
-
212
-
213
-
214
-
215
-
216
-
217
 |
 |