Canon PowerShot S10 PowerShot S10/S20 Camera User Guide
Canon PowerShot S10 Manual
 |
View all Canon PowerShot S10 manuals
Add to My Manuals
Save this manual to your list of manuals |
Canon PowerShot S10 manual content summary:
- Canon PowerShot S10 | PowerShot S10/S20 Camera User Guide - Page 1
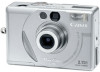
Camera User Guide Please read this guide before using your PowerShot S10 for the first time. Please see the Software Starter Guide for instructions for connecting to a computer. - Canon PowerShot S10 | PowerShot S10/S20 Camera User Guide - Page 2
to a mistaken operation or malfunction of the camera, the software, the CompactFlash™ cards (CF cards), personal computers, peripheral devices, or use of non-Canon CF cards. Trademark Acknowledgments Canon and PowerShot are trademarks of Canon Inc. CompactFlash is a trademark of SanDisk Corporation - Canon PowerShot S10 | PowerShot S10/S20 Camera User Guide - Page 3
Digital Camera in accordance with the instructions, may cause harmful interference the equipment off and on, the user is encouraged to try to correct the manual. If such changes or modifications should be made, you could be required to stop operation of the equipment. Canon U.S.A. Inc. One Canon - Canon PowerShot S10 | PowerShot S10/S20 Camera User Guide - Page 4
of Contents Read This First 5 Preparing the Camera Guide to Components 11 Front View 11 Back View 12 Operation Panel 13 Mode Dial 14 Display Panel 15 Indicators 15 Preparing the Battery pack 16 Charging the Battery pack 16 Installing the Battery 17 Using the AC Adapter 19 Installing - Canon PowerShot S10 | PowerShot S10/S20 Camera User Guide - Page 5
Shooting in Manual Mode 35 Shooting in Image Mode 36 Shooting in Stitch Assist Mode 37 How to Frame a Subject 38 Camera Positioning 38 Settings 47 Switching the Digital Zoom On/Off ....... 47 Switching the Review Feature On/Off ... 48 Resetting the File Number 48 Replaying Magnifying - Canon PowerShot S10 | PowerShot S10/S20 Camera User Guide - Page 6
the Language 66 Appendices Replacing the Button Battery 67 Camera Maintenance 68 Camera Body 68 Lens 68 Optical Viewfinder 68 LCD Monitor 68 Troubleshooting 69 List of Message Codes 73 List of Messages 74 List of Functions 76 Specifications 77 Index 80 Canon Customer Support 82 4 - Canon PowerShot S10 | PowerShot S10/S20 Camera User Guide - Page 7
to confirm that you are operating the camera correctly. Please note that Canon, Inc., its subsidiaries and affiliates, and distributors of its digital cameras are not liable for any consequential damages arising from any malfunction of a PowerShot camera or CompactFlash™ card (CF card) resulting in - Canon PowerShot S10 | PowerShot S10/S20 Camera User Guide - Page 8
the following pages are intended to instruct you in the safe and correct operation of the camera and its accessories to prevent injuries or damage to of the reach of children and infants. Accidental damage to the camera or batteries by a child could result in serious injury. In addition, placement - Canon PowerShot S10 | PowerShot S10/S20 Camera User Guide - Page 9
guide. Disassembly or alteration may result in high-voltage electrical shock. Internal inspections, alterations and repairs should be conducted by qualified service personnel authorized by your camera distributor or a Canon Customer Support the camera's mode dial to Off and remove the camera battery - Canon PowerShot S10 | PowerShot S10/S20 Camera User Guide - Page 10
fire, electrical shock or other hazards. Use only the recommended power accessories. • Power down the computer and unplug the power cord before injury. • Do not attempt to disassemble, alter or apply heat to the batteries. There is serious risk of injury due to an explosion. Immediately flush with - Canon PowerShot S10 | PowerShot S10/S20 Camera User Guide - Page 11
from both the camera and electrical outlet after recharging and when the camera is not in use to avoid fires and other hazards. • The camera terminal of the compact power cord is designed for exclusive use with the PowerShot S10. Do not use it with other products or batteries. There is a risk - Canon PowerShot S10 | PowerShot S10/S20 Camera User Guide - Page 12
or corrupt image data. Avoid Condensation Related Problems Moving the equipment rapidly between hot and cold Camera Stop using the camera immediately if you detect condensation. Continued use may damage the equipment. Remove the CF card and battery or power cord (if connected) from the camera - Canon PowerShot S10 | PowerShot S10/S20 Camera User Guide - Page 13
Terminal (p. 25) • Button Battery Holder (p. 67) • DIGITAL Terminal* • DIGITAL Terminal Cover * Used when the camera is connected to a computer. Open the cover and connect the interface cable to the camera's digital terminal and the computer. See the Software Starter Guide for additional information - Canon PowerShot S10 | PowerShot S10/S20 Camera User Guide - Page 14
• CF Card Slot Cover (p. 20) • Lock for CF Card Slot Cover (p. 20) • Strap Holder (p. 24) • DC Coupler Cable Cover • Battery Cover (p. 17) • Battery Cover Lock (p. 17) • Tripod Socket • LCD Monitor* (p. 27) * The LCD monitor is produced with extremely highprecision manufacturing techniques. More - Canon PowerShot S10 | PowerShot S10/S20 Camera User Guide - Page 15
Operation Panel • Mode Dial (p. 14) • Indicators (p. 15) • Shutter Button (p. 28) Preparing the Camera • Omni Selector Button, (Telephoto) / (Wide Angle) Button (p. 29) • (Exposure/White Balance) Button (pp. 43, 44) • MENU / SET Button • DISPLAY Button (pp. 27, 52) • (Macro) /Jump - Canon PowerShot S10 | PowerShot S10/S20 Camera User Guide - Page 16
camera is not being used. The lens cover will close and the camera will power down. (p. 26) • Auto Mode A recording mode in which the camera automatically selects most of the settings. (p. 30) • Manual for exchanging image files with a connected computer. (See the Software Starter Guide) • "PC" will - Canon PowerShot S10 | PowerShot S10/S20 Camera User Guide - Page 17
: Single Mode : Continuous Mode : Self-Timer Mode : White Balance On : Low Battery : Exposure Compensation On : Beep On : Super Fine : Fine : Normal : Large . • Operating codes and error codes may also appear in the display panel. (p. 73) Preparing the Camera Indicators The indicators shine or - Canon PowerShot S10 | PowerShot S10/S20 Camera User Guide - Page 18
To confirm the package contents, see the back of the System Map packaged with your camera. Charging the Battery Pack Use the procedures below to fully charge Battery Pack NB-5H. To AC Electrical Outlet AC Power Cord Battery Pack NB-5H Compact Power Adapter CA-PS100/100E CHARGING Indicator 16 • The - Canon PowerShot S10 | PowerShot S10/S20 Camera User Guide - Page 19
. This will shorten the battery life. Remove it from the camera during extended periods of disuse. Place it into the case provided and store it in a cool, dry place. Be sure to charge it fully before using it after a period of extended storage. • Repeated recharging before the charge is completely - Canon PowerShot S10 | PowerShot S10/S20 Camera User Guide - Page 20
an image is being written to, or read from, the CF card. Do not open the battery cover while this is in process. • Remove the battery from the camera when the camera is not in active use. • Use the rechargeable Battery Pack NB5H or the AC adapter (sold separately in some regions) when you use the - Canon PowerShot S10 | PowerShot S10/S20 Camera User Guide - Page 21
adapter will shine red when it is powering the camera. • Always remove the plug from the electrical outlet when you have finished using the camera. • Battery Pack NB-5H cannot be charged while the compact power adapter is used to power the camera. • Do not use the compact power adapter to power - Canon PowerShot S10 | PowerShot S10/S20 Camera User Guide - Page 22
the open position and open the cover. 3 Insert the CF card with the label facing up and the arrow pointing in as viewed from the camera back, pushing it gently in until the slot's eject button is fully extended. Arrow Label CF Card Eject Button (Push to eject) 4 Close the CF - Canon PowerShot S10 | PowerShot S10/S20 Camera User Guide - Page 23
- Locations subject to high humidity and high temperatures Preparing the Camera CF Cards and Estimated Capacities FC-8M 4 12 24 7 95 209 384 * These figures reflect standard shooting conditions established by Canon. Actual totals may vary according to the subject and shooting conditions. * - Canon PowerShot S10 | PowerShot S10/S20 Camera User Guide - Page 24
. The procedures are described below. Please consult your computer manufacturer if you are uncertain about these procedures. How to Remove the Windows Standard Driver 1. Insert the CF card (with adapter) into the PC card slot. Right-click the [My computer] icon and select [Properties]. 2. The System - Canon PowerShot S10 | PowerShot S10/S20 Camera User Guide - Page 25
, or position. The Set Date/ Time menu will display the first time the camera is turned on. The factory default for the date format may differ from that in which messages are displayed. The language menu may appear differently on cameras in some regions. 1 Turn the Mode Dial to the position. 2 Press - Canon PowerShot S10 | PowerShot S10/S20 Camera User Guide - Page 26
plastic part of the strap. Strap holder 2 Pass the other end of the wrist strap through the small loop. • Be careful not to wave the camera about or to catch it on other items when holding it by the wrist strap. 24 - Canon PowerShot S10 | PowerShot S10/S20 Camera User Guide - Page 27
now record or play images using the regular procedures and the resultant images will display on the TV screen. If you are recording with the camera and the LCD monitor is off, press the DISPLAY button to have images display on the TV screen. • The TV connection cannot be used for - Canon PowerShot S10 | PowerShot S10/S20 Camera User Guide - Page 28
each procedure as you read along. Before Shooting Turning the Power On/Off 1 Turn the Mode Dial to any position other than to power the camera. The camera power is off when the Mode Dial is set to and on in any other position. Power Save Function • Shooting Mode When the LCD - Canon PowerShot S10 | PowerShot S10/S20 Camera User Guide - Page 29
LCD Monitor Use the LCD monitor to compose close-up images in macro mode. Viewfinder LCD Monitor 1 Look through the viewfinder to align the camera with the primary subject. The square brackets (autofocus metering field) in the viewfinder should be placed on the primary subject. Square Brackets in - Canon PowerShot S10 | PowerShot S10/S20 Camera User Guide - Page 30
in Memory Display , , • The last on/off setting of the LCD monitor is saved when the power is manually shut off. The camera will automatically restore the LCD monitor to the last setting at startup. • However, until the battery is replaced, the LCD monitor will not turn on automatically if a low - Canon PowerShot S10 | PowerShot S10/S20 Camera User Guide - Page 31
sufficient built-in memory free, the next image can be recorded immediately after the previous and the digital zoom function (p. 47) has been turned on in the recording menu. The digital zoom range is indicated by the blue portion (information view). • Double-click the button with the lens zoomed out - Canon PowerShot S10 | PowerShot S10/S20 Camera User Guide - Page 32
number of pixels) is preset to Large and the compression to Fine and cannot be changed. 1 Turn the Mode Dial to the position. 2 Point the camera at the center of the subject. 3 Choose how close you wish the subject to appear with the or button. 4 Press the shutter button halfway and - Canon PowerShot S10 | PowerShot S10/S20 Camera User Guide - Page 33
also use the self-timer with the Mode Dial set to the , or position. Auto Flash Red-Eye Reduction On Off Auto • - -• Manual • • •• Image • • •• Stitch Assist - - ◊ ◊ Note: ◊ indicates modes in which the flash setting can only be adjusted for the first image. 2 Press the button - Canon PowerShot S10 | PowerShot S10/S20 Camera User Guide - Page 34
edges of a composition into focus or when the subject is not suited to autofocus photography. 1 Turn the Mode Dial to the , , or position. 2 Aim the camera directly at the subject so that it is centered in the viewfinder. 3 Press the shutter button halfway and wait until the two beeps sound. 4 Keep - Canon PowerShot S10 | PowerShot S10/S20 Camera User Guide - Page 35
Replaying Images Photographed images can be viewed in play mode on the LCD monitor. 1 Turn the Mode Dial to the position. 3 Press the button. Nine images are shown at once (multi image replay). Each press of the button cycles the display between the single and multi image replay modes. Selected - Canon PowerShot S10 | PowerShot S10/S20 Camera User Guide - Page 36
Erasing Single Images 1 Turn the Mode Dial to the position. 2 Press the MENU button. 3 Use the button to select the [Single Erase]. Press the SET button. 4 Use the and buttons to select an image. Press the SET button. 5 Select [OK] with the button. Press the SET button. To erase additional images, - Canon PowerShot S10 | PowerShot S10/S20 Camera User Guide - Page 37
and sharpness) and the AE lock. • The camera remembers these settings, except for the macro, self-timer and continuous mode settings, even when the Mode Dial is turned to another position or the battery is replaced. Functions Available only in manual mode AE Lock (p. 45) Exposure Metering Mode - Canon PowerShot S10 | PowerShot S10/S20 Camera User Guide - Page 38
Shooting in Image Mode In image mode, the camera automatically optimizes its shooting settings for specific circumstances, such as landscapes, moving objects, night scenes and black and white images. Landscape: for recording broad expanses - Canon PowerShot S10 | PowerShot S10/S20 Camera User Guide - Page 39
Shooting Shooting in Stitch Assist Mode In Stitch Assist mode, you can shoot images that overlap for later merging into a panorama with software on a computer. Images can be photographed in horizontal, vertical or 2 x 2 arrangements. • Please use the supplied PhotoStitch program to merge the images - Canon PowerShot S10 | PowerShot S10/S20 Camera User Guide - Page 40
What is the Stitch Function? • Stitching is the process of merging digital camera images so that the seams are invisible. Expansive scenes can be dynamically presented in their entirety. How to Frame a Subject The stitch function detects the - Canon PowerShot S10 | PowerShot S10/S20 Camera User Guide - Page 41
or down. Documents To record close-ups of documents, shift the camera above the document, keeping it parallel to the document. Shooting Select from the following image arrangements. Right: left to right in a horizontal plane Left: right - Canon PowerShot S10 | PowerShot S10/S20 Camera User Guide - Page 42
zoom, flash on/off, exposure compensation, white balance and resolution settings can only be set for the first image in the series. • The digital zoom, image quality (gain, sharpness and contrast) and continuous, auto flash, red-eye reduction, AE lock, and exposure metering modes cannot be adjusted - Canon PowerShot S10 | PowerShot S10/S20 Camera User Guide - Page 43
(Image Size) (Large): 1600 x 1200 pixels (Middle): 1280 x 960 pixels (Small): 800 x 600 pixels Compression (Image Quality) : Superfine : Fine : Normal Approximate File Size of One Image Resolution (pixels) (1600 x 1200) (1280 x 960) (800 x 600) 1458 KB 986 KB 480 KB Compression 580 KB 402 - Canon PowerShot S10 | PowerShot S10/S20 Camera User Guide - Page 44
of 4.7 to 18 in. (12 to 46 cm) from the tip of the lens. Always use the LCD monitor in macro mode to check the image composition and camera's built-in memory becomes full, the interval between shots will be a little longer. * These figures reflect standard shooting conditions established by Canon - Canon PowerShot S10 | PowerShot S10/S20 Camera User Guide - Page 45
Adjusting the Exposure Compensation Use the exposure compensation feature when a backlit object appears too dark or lights are too bright in a night scene. 1 Turn the Mode Dial to the , or position. 2 Press the button to display the exposure compensation settings bar. 3 Use the and buttons to - Canon PowerShot S10 | PowerShot S10/S20 Camera User Guide - Page 46
conditions when you are recording outdoors or under artificial illumination. Auto: for recording with the settings automatically selected by the camera Daylight: for recording outdoors on a bright day Cloudy: for recording under overcast, shaded, dusk or evening skies Tungsten: for recording - Canon PowerShot S10 | PowerShot S10/S20 Camera User Guide - Page 47
asterisk (*) close to its center. The exposure setting will now be maintained even if you release the shutter button. 4 Compose the image and shoot. • The camera will focus on the object at the center of the viewfinder. • The AE lock will release if you press a button other than the shutter button - Canon PowerShot S10 | PowerShot S10/S20 Camera User Guide - Page 48
the SET button to make the setting effective. • In the spot mode, a frame indicating the metering field is shown in the LCD monitor. The camera measures the light in the area covered by this frame. • You can record anytime by pressing the shutter button. Adjusting Image Quality Settings The gain - Canon PowerShot S10 | PowerShot S10/S20 Camera User Guide - Page 49
shutter speed. • Raising the gain may increase the "noise" in the image. To obtain the clearest image, set the gain to 0. Recording Settings Switching the Digital Zoom On/Off 1 Turn the Mode Dial to the , , position. Press the DISPLAY button to turn on the LCD monitor. • The setting cannot be - Canon PowerShot S10 | PowerShot S10/S20 Camera User Guide - Page 50
can also erase the image immediately if you wish (p. 60). Cancel the review feature by pressing the shutter button halfway. Resetting the File Number Select the way image file numbers are assigned with this feature. On: The next file number assigned is reset to the initial value (100-0001) each time - Canon PowerShot S10 | PowerShot S10/S20 Camera User Guide - Page 51
• Press the MENU button to close the menu. • Recording with the File No. Reset option set to Off is convenient when the image files are downloaded to a computer because duplicate file names can be avoided. Shooting File Number Conventions A photographed image is assigned a number ranging from 0001 - Canon PowerShot S10 | PowerShot S10/S20 Camera User Guide - Page 52
Replaying This section explains the various replay features, including how to magnify and rotate the image in the LCD monitor or show images in slide shows. It also discusses DPOF print settings. Magnifying an Image (Single Image Replay) 1 Turn the Mode Dial to the position. 2 Press the button. - Canon PowerShot S10 | PowerShot S10/S20 Camera User Guide - Page 53
0° (Original) 90° Jumping Images The display can be jumped forward or back. 1 Turn the Mode Dial to the position. 2 Press the JUMP button. Replaying 270° • Press the MENU button to end the Rotate feature. • Rotating images in the display has no effect on the recorded images. Single Image Replay - Canon PowerShot S10 | PowerShot S10/S20 Camera User Guide - Page 54
button is pressed. The detail display is not available in multi image replay mode. • The following information is shown in the simple display mode. -File number; Shooting date/time; Protection status ( ). • The following information is also shown in the detailed display mode. -Image mode Macro mode - Canon PowerShot S10 | PowerShot S10/S20 Camera User Guide - Page 55
slide show will start. • Press the SET button to pause or restart it. • When a slide show is paused, or the Play Time is set to Manual, you can use the and buttons to view the previous or next slide. • Press the MENU button to stop a slide show. Selecting Slide Show Images - Canon PowerShot S10 | PowerShot S10/S20 Camera User Guide - Page 56
the Play Time You can set the number of seconds that an image is shown. The available options are 3-10, 15 and 30 seconds and manual. 1 Display the Slide Show menu. 2 Use the , , and buttons to select [Setup]. Press the SET button. 3 Use the and buttons to select [Play Time]. 4 Use - Canon PowerShot S10 | PowerShot S10/S20 Camera User Guide - Page 57
edited with the supplied software, ZoomBrowser EX (Windows) or PowerShot Browser (Macintosh). Print Settings (DPOF Settings) Images can be marked for printing with Digital Print Order Format (DPOF) compliant digital printers or at photo developing service outlets. Selecting Images for Printing - Canon PowerShot S10 | PowerShot S10/S20 Camera User Guide - Page 58
3 Use the and buttons to select [Order]. Press the SET button. 4 Specify the number of prints. Mark Selected Images Specify one of the following for the print type. (p. 57) For the Standard or Both options, use the and buttons to select an image and the and buttons to specify the number of copies. - Canon PowerShot S10 | PowerShot S10/S20 Camera User Guide - Page 59
for printing. • Please note that the print settings created on a CF card by a DPOFcompliant camera other than a PowerShot S10 may be overwritten when used in a PowerShot S10. • Some printers or photo developing services may not be able to handle the print settings. Selecting the Print Type The - Canon PowerShot S10 | PowerShot S10/S20 Camera User Guide - Page 60
MENU button to close the Setup menu. • The date printout will be in the style selected in the Set Date/Time option. (p. 65) Setting the File Number Print Function 1 Display the Print Order menu. 2 Use the and buttons to select [Setup]. Press the SET button. 3 Use the and buttons to select - Canon PowerShot S10 | PowerShot S10/S20 Camera User Guide - Page 61
Replaying Resetting Print Settings This procedure deletes all the image print settings, including the date and file number print settings. 1 Display the Print Order menu. 2 Use the and buttons to select [Reset]. Press the SET button. 3 Use the and buttons to select [OK]. Press the SET button. 59 - Canon PowerShot S10 | PowerShot S10/S20 Camera User Guide - Page 62
to protect important images from accidental erasure. Erasing the Displayed Image The camera buttons can be used to delete the displayed image directly when in the single image replay (p. 33), multi image replay (p. 33) or review mode (p. 48). 1 Hold the SET button and press the button. 2 Use - Canon PowerShot S10 | PowerShot S10/S20 Camera User Guide - Page 63
, select Cancel. • Protected images are not erased. • Please note that erased images cannot be recovered. Please exercise adequate caution before erasing a file. Protecting Images You can protect important images to prevent their accidental erasure. 1 Turn the Mode Dial to the position. Press the - Canon PowerShot S10 | PowerShot S10/S20 Camera User Guide - Page 64
Protected images will be shown with the icon. Protected Icon • The image protection is removed if the SET button is pressed a second time after Step 3. • Press the button to switch between the single image replay and multi image replay modes to select images. • Press the MENU button to close the - Canon PowerShot S10 | PowerShot S10/S20 Camera User Guide - Page 65
Settings This section explains about the camera settings, such as the beep, the date and time and CF card formatting. Displaying the Setup Menu 1 Turn the Mode Dial to the , , , or position. 2 - Canon PowerShot S10 | PowerShot S10/S20 Camera User Guide - Page 66
Setting the Beep On/Off The beep sounds when the shutter button or another button is pressed during a menu operation. 1 Display the Setup menu (p. 63). 2 Use the and buttons to select [Beep]. 3 Use the and buttons to select [On] or [Off]. Adjusting the LCD Monitor Brightness The LCD monitor can be - Canon PowerShot S10 | PowerShot S10/S20 Camera User Guide - Page 67
Setup menu (p. 63). 2 Use the and buttons to select [Format]. Press the SET button. 3 Use the and buttons to select [OK]. Press the SET button. Camera Settings • Use the and buttons to select a field, such as the year, month, day, hour, minute and date format. • Use the and buttons to adjust - Canon PowerShot S10 | PowerShot S10/S20 Camera User Guide - Page 68
note that formatting a CF card erases all the data on the card, including protected images, sound files and print settings. • When a non-Canon brand card is malfunctioning, reformatting it may solve the problem. Setting the Language 1 Display the Setup menu (p. 63). 2 Use the and buttons to select - Canon PowerShot S10 | PowerShot S10/S20 Camera User Guide - Page 69
information on how to maintain and care for your PowerShot S10 camera. Troubleshooting, error and function lists are included. Replacing the Button Battery If the date/time settings menu displays when the camera power is turned on, the button battery has lost its charge and the date/time setting - Canon PowerShot S10 | PowerShot S10/S20 Camera User Guide - Page 70
cloth or an eyeglass lens wiper. Lens Use a lens blower to remove dust and dirt. • Never wipe anything directly on the lens, even a soft cloth or eyeglass lens wiper. If particularly stubborn dirt accumulates, contact your camera retailer or the closest Canon Customer Support Help Desk. 68 Optical - Canon PowerShot S10 | PowerShot S10/S20 Camera User Guide - Page 71
Troubleshooting Problem Camera will not operate Cause(s) Battery cover is open 2CR5 lithium battery inserted upside down Insufficient battery voltage (Display panel flashes "Lb") Incorrect battery type Camera will not record Poor contact between battery and camera terminals Mode Dial is set - Canon PowerShot S10 | PowerShot S10/S20 Camera User Guide - Page 72
Problem Camera will not record Lens after Mode Dial turned to Battery cover opened immediately after Mode the slot cover. • Replace the CF card. • Download and then erase all or some of the card's damaged. Please consult the nearest Canon Customer Support Help Desk. • After closing the CF card - Canon PowerShot S10 | PowerShot S10/S20 Camera User Guide - Page 73
. Appendices Camera is running off the compact • The battery pack won't charge when the power adapter camera is running Camera moved Subject is out of focal range • Be careful not to move the camera when pressing the shutter button. • Ensure that there is at least 18 in. (46 cm) between the lens - Canon PowerShot S10 | PowerShot S10/S20 Camera User Guide - Page 74
Problem Image is blurred Subject is too dark Subject is too bright Flash will not fire 72 Cause(s) Solution(s) Camera is set to the slow shutter • Set the camera to a mode other than mode Slow Shutter Insufficient light for recording • Change the flash setting to Flash On. Subject is too - Canon PowerShot S10 | PowerShot S10/S20 Camera User Guide - Page 75
the battery cover is open. Close the cover securely. PC: Camera connected in PC mode to a computer. Exx: (xx: number) Camera malfunction. Set Mode Dial to Off, then reset it to a recording or play mode. Problem exists if error code reappears. Note the number and contact Canon Customer Support - Canon PowerShot S10 | PowerShot S10/S20 Camera User Guide - Page 76
panel. Busy...: No CF card: Cannot Record!: CF card error!: CF card full!: Naming error!: No Image: Image too large: Image is recording on CF file could not be created because there is a file with the same name as the directory that the camera is attempting to create, or the highest possible file - Canon PowerShot S10 | PowerShot S10/S20 Camera User Guide - Page 77
orders.: Cannot complete!: Cannot edit!: You attempted to view an incompatible JPEG file. You attempted to view an image with corrupted data You attempted to magnify an image that was photographed with another camera, recorded in a different format, or edited on a computer. You attempted to rotate - Canon PowerShot S10 | PowerShot S10/S20 Camera User Guide - Page 78
listed below. Recording Functions Recording Mode Digital Zoom Auto Auto • •* Manual Image • •* • •(1) Stitch functions that reset to the default setting when the Mode Dial is turned or the camera is powered down. Flash Recording Method Red-Eye Reduction On Off Single Continuous Self- - Canon PowerShot S10 | PowerShot S10/S20 Camera User Guide - Page 79
manual Mechanical + electronic 2 to 1/1,000 sec. (2-sec. for Slow Shutter or Night Scene mode) Built-in (Auto, On, Off, Red-Eye Reduction) 6.7 in. - 10.8 ft. (17 cm - 3.3 m) (wide angle), 6.7 in. - 7.5 ft. (17 cm - 2.3 m) (telephoto) CompactFlash™ card (Type I or Type II) Design rule for Camera File - Canon PowerShot S10 | PowerShot S10/S20 Camera User Guide - Page 80
600 x 1,200 pixels (Large) / 1,280 x 960 pixels (Middle) / 800 x 600 pixels (Small) AUTO / MANUAL / IMAGE / STITCH ASSIST / PLAY / PC USB / RS-232C / CF Slot (Type I, II) / Video Out 2CR5 lithium battery Nickel-hydride Battery Pack NB-5H Compact Power Adapter CA-PS100 / 100E (with DC Coupler DR-100A - Canon PowerShot S10 | PowerShot S10/S20 Camera User Guide - Page 81
Camera power supply: 18 to 20 VA (100 to 240 V) Operating Temperature: 32˚ to 104˚ F (0˚ to 40˚ C) Dimentions: 3.0 x 4.0 x 1.5 in. (75 x 102 x 39 mm) Weight: Approx. 6.3 oz. (180 g) Battery All data is based on Canon's standard testing methods. Subject to change without notice. Appendices 79 - Canon PowerShot S10 | PowerShot S10/S20 Camera User Guide - Page 82
F Fast Shutter 36, 76 File Number 48, 49 Flash 30 Focus Lock 32 G Gain 46 I Image Information 52 Image Mode 36 Indicators 13, 15 J Jump 51 L Landscape 36 Language 23, 66 LCD Monitor 12, 27 Brightness 64 Lithium Battery 17, 18 M Macro Mode 42 Magnified Image 50 Manual Mode 35 Menu Button 13 - Canon PowerShot S10 | PowerShot S10/S20 Camera User Guide - Page 83
55 Selecting Images 55 Date/Time 57 File Number 58 Number of Prints 56 Print Type 57 Reset 59 Protecting Images 61 Recording Review 48 Video Out 25 R Red-Eye Reduction Mode 30 Replay Single 33 Multi 33 Resolution 41 Review 48 Rotate 50 S Safety Instructions 5 Self-Timer 31 Setup Menu 63 Sharpness - Canon PowerShot S10 | PowerShot S10/S20 Camera User Guide - Page 84
Hotline: (1) 41 99 70 70 Tél: (1) 41 99 77 77 Télécopie: (1) 41 99 79 51 Canon S.A.V. Photo Vidéo France Hotline: (01) 41 30 16 16 Télécopie: (01) 41 30 16 00 Canon Deutschland GmbH Canon-Hotline-Service Customer-Support: 02151/349-555 Telefax: 02151/349-588 Info-Desk Tel: 02151/349-566 Info-Desk - Canon PowerShot S10 | PowerShot S10/S20 Camera User Guide - Page 85
Road, Central, Hong Kong Phone: 852-2739-0802 Fax: 852-2369-7701 Canon Marketing Services No.1 Jalan Kilang Timor, #09-00, Pacific Tech Centre, Singapore 159303 Phone: (65) 799 8888 Fax: (65) 273 3317 Canon Marketing (Malaysia) Sdn. Bhd. Wisma General Lumber, Block D, Peremba Square, Saujana Resort - Canon PowerShot S10 | PowerShot S10/S20 Camera User Guide - Page 86
84 - Canon PowerShot S10 | PowerShot S10/S20 Camera User Guide - Page 87
Art Direction: Yoshisuke Kuramoto, CDS Inc., Tokyo, Japan Design: Sumio Koike, J-Cat Communications, Vancouver, Canada Jun Koike, CDS Inc., Tokyo, Japan Photography: Hideyuki Igarashi, Yoshisuke Kuramoto, CDS Inc., Tokyo, Japan Writing: Mineko Sahara, CDS Inc., Tokyo, Japan English Writing: - Canon PowerShot S10 | PowerShot S10/S20 Camera User Guide - Page 88
H-IE-027-V1 0999CH5.2 © 1999 CANON INC. PRINTED IN JAPAN
-
 1
1 -
 2
2 -
 3
3 -
 4
4 -
 5
5 -
 6
6 -
 7
7 -
8
-
9
-
10
-
11
-
12
-
13
-
14
-
15
-
16
-
17
-
18
-
19
-
20
-
21
-
22
-
23
-
24
-
25
-
26
-
27
-
28
-
29
-
30
-
31
-
32
-
33
-
34
-
35
-
36
-
37
-
38
-
39
-
40
-
41
-
42
-
43
-
44
-
45
-
46
-
47
-
48
-
49
-
50
-
51
-
52
-
53
-
54
-
55
-
56
-
57
-
58
-
59
-
60
-
61
-
62
-
63
-
64
-
65
-
66
-
67
-
68
-
69
-
70
-
71
-
72
-
73
-
74
-
75
-
76
-
77
-
78
-
79
-
80
-
81
-
82
-
83
-
84
-
85
-
86
-
87
-
88
 |
 |
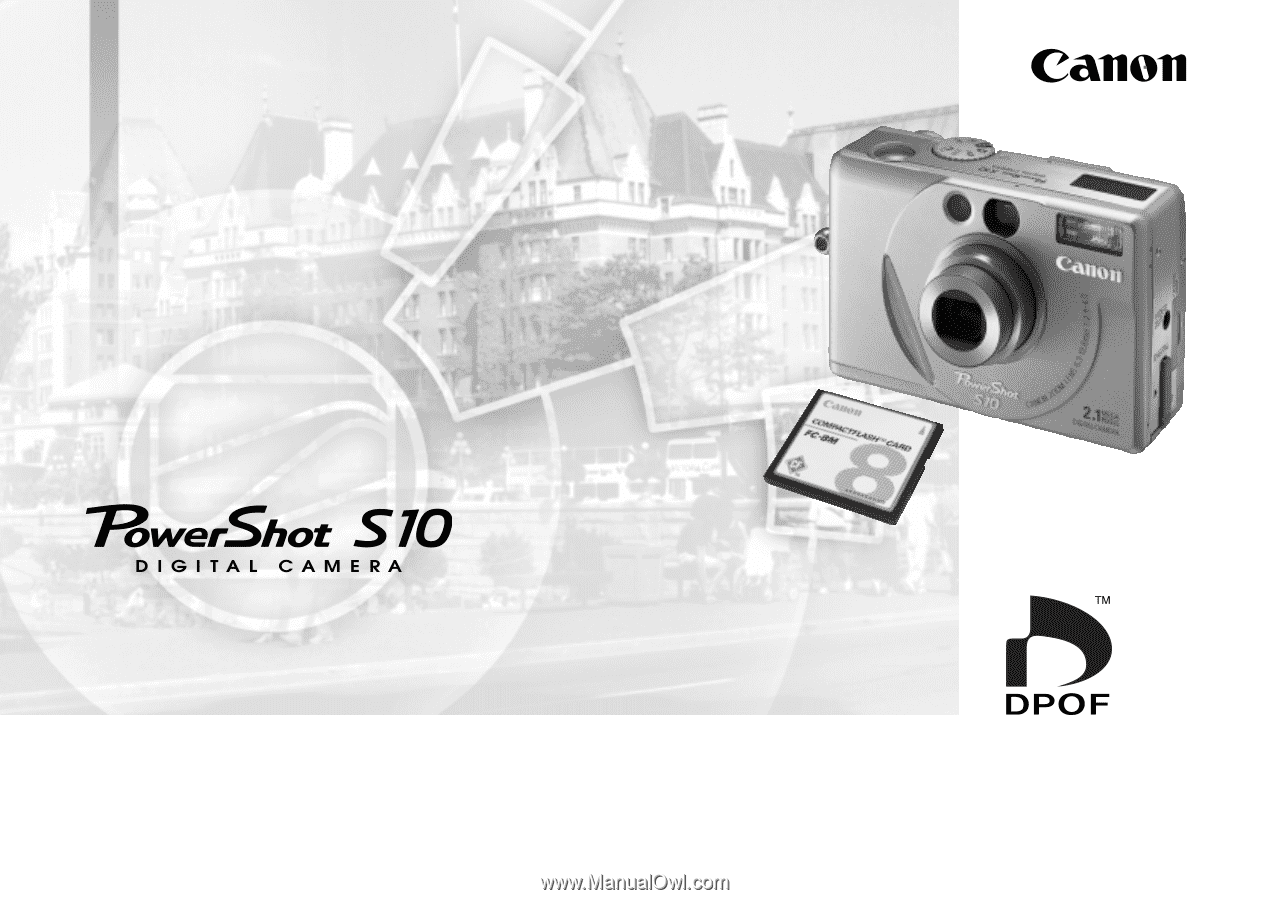
Please read this guide before using your PowerShot S10 for the first time.
Please see the Software Starter Guide for instructions for connecting to a computer.
Camera User Guide
Camera User Guide