Canon PowerShot SX260 HS PowerShot SX260 HS / SX240 HS Camera User Guide - Page 163
Erasing Images
 |
View all Canon PowerShot SX260 HS manuals
Add to My Manuals
Save this manual to your list of manuals |
Page 163 highlights
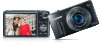
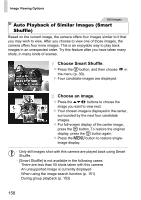
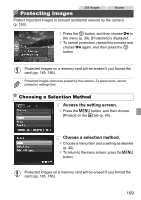
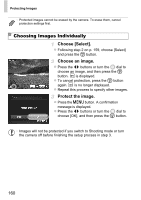
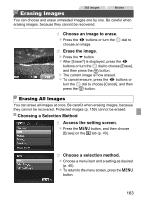
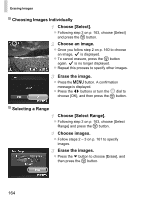
Erasing Images Still Images Movies You can choose and erase unneeded images one by one. Be careful when erasing images, because they cannot be recovered. Choose an image to erase. z Press the qr buttons or turn the 5 dial to choose an image. Erase the image. z Press the p button. z After [Erase?] is displayed, press the qr buttons or turn the 5 dial to choose [Erase], and then press the m button. X The current image is now erased. z To cancel erasure, press the qr buttons or turn the 5 dial to choose [Cancel], and then press the m button. Erasing All Images You can erase all images at once. Be careful when erasing images, because they cannot be recovered. Protected images (p. 159) cannot be erased. Choosing a Selection Method Access the setting screen. z Press the n button, and then choose [Erase] on the 1 tab (p. 40). Choose a selection method. z Choose a menu item and a setting as desired (p. 40). z To return to the menu screen, press the n button. 163
-
 1
1 -
2
-
3
-
4
-
5
-
6
-
7
-
8
-
9
-
10
-
11
-
12
-
13
-
14
-
15
-
16
-
17
-
18
-
19
-
20
-
21
-
22
-
23
-
24
-
25
-
26
-
27
-
28
-
29
-
30
-
31
-
32
-
33
-
34
-
35
-
36
-
37
-
38
-
39
-
40
-
41
-
42
-
43
-
44
-
45
-
46
-
47
-
48
-
49
-
50
-
51
-
52
-
53
-
54
-
55
-
56
-
57
-
58
-
59
-
60
-
61
-
62
-
63
-
64
-
65
-
66
-
67
-
68
-
69
-
70
-
71
-
72
-
73
-
74
-
75
-
76
-
77
-
78
-
79
-
80
-
81
-
82
-
83
-
84
-
85
-
86
-
87
-
88
-
89
-
90
-
91
-
92
-
93
-
94
-
95
-
96
-
97
-
98
-
99
-
100
-
101
-
102
-
103
-
104
-
105
-
106
-
107
-
108
-
109
-
110
-
111
-
112
-
113
-
114
-
115
-
116
-
117
-
118
-
119
-
120
-
121
-
122
-
123
-
124
-
125
-
126
-
127
-
128
-
129
-
130
-
131
-
132
-
133
-
134
-
135
-
136
-
137
-
138
-
139
-
140
-
141
-
142
-
143
-
144
-
145
-
146
-
147
-
148
-
149
-
150
-
151
-
152
-
153
-
154
-
155
-
156
-
157
-
 158
158 -
 159
159 -
 160
160 -
 161
161 -
 162
162 -
 163
163 -
 164
164 -
 165
165 -
 166
166 -
 167
167 -
 168
168 -
169
-
170
-
171
-
172
-
173
-
174
-
175
-
176
-
177
-
178
-
179
-
180
-
181
-
182
-
183
-
184
-
185
-
186
-
187
-
188
-
189
-
190
-
191
-
192
-
193
-
194
-
195
-
196
-
197
-
198
-
199
-
200
-
201
-
202
-
203
-
204
-
205
-
206
-
207
-
208
-
209
-
210
-
211
-
212
-
213
-
214
-
215
-
216
-
217
-
218
-
219
-
220
-
221
-
222
-
223
-
224
-
225
-
226
-
227
-
228
-
229
-
230
-
231
-
232
-
233
-
234
-
235
-
236
-
237
-
238
-
239
-
240
-
241
-
242
-
243
-
244
-
245
-
246
 |
 |