Canon PowerShot SX40 HS PowerShot SX40 HS Camera User Guide - Page 46
Indicator
 |
View all Canon PowerShot SX40 HS manuals
Add to My Manuals
Save this manual to your list of manuals |
Page 46 highlights
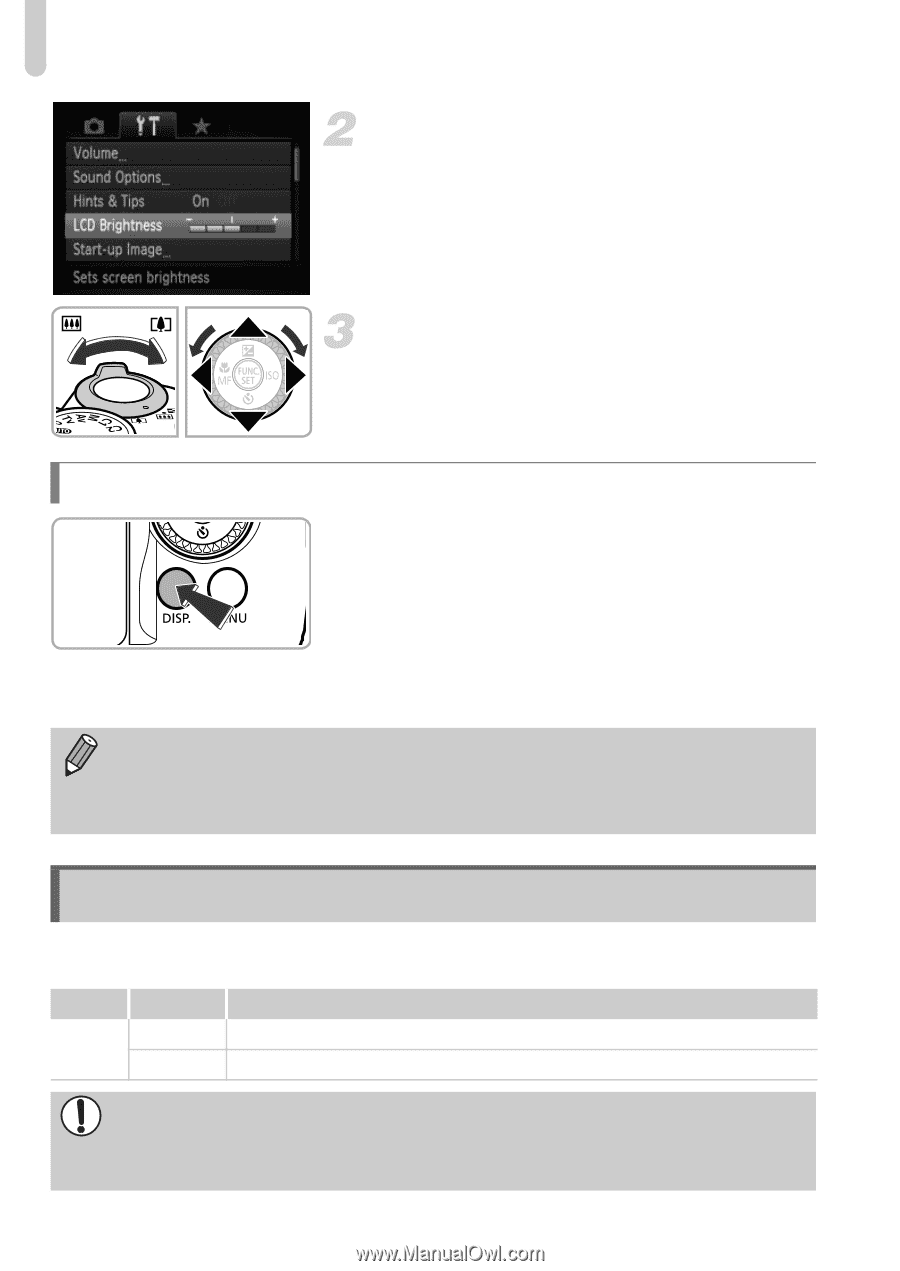
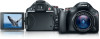
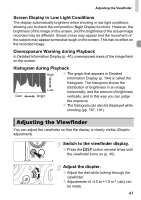
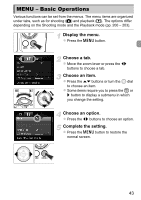
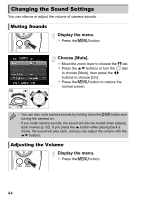
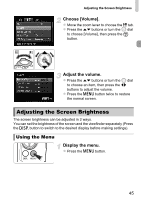
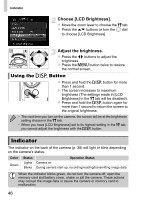
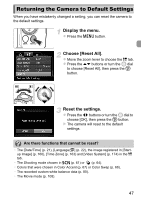
Indicator Choose [LCD Brightness]. z Move the zoom lever to choose the 3 tab. z Press the op buttons or turn the 5 dial to choose [LCD Brightness]. Adjust the brightness. z Press the qr buttons to adjust the brightness. z Press the n button twice to restore the normal screen. Using the l Button z Press and hold the l button for more than 1 second. X The screen increases to maximum brightness (The settings made in [LCD Brightness] in the 3 tab will be disabled). z Press and hold the l button again for more than 1 second to return the screen to the original brightness. • The next time you turn on the camera, the screen will be at the brightness setting chosen in the 3 tab. • When you have [LCD Brightness] set to its highest setting in the 3 tab, you cannot adjust the brightness with the l button. Indicator The indicator on the back of the camera (p. 39) will light or blink depending on the camera's status. Color Green Status Lights Blinks Operation Status Camera on During camera start-up, recording/reading/transmitting image data When the indicator blinks green, do not turn the camera off, open the memory card slot/battery cover, shake or jolt the camera. These actions may corrupt the image data or cause the camera or memory card to malfunction. 46
-
 1
1 -
2
-
3
-
4
-
5
-
6
-
7
-
8
-
9
-
10
-
11
-
12
-
13
-
14
-
15
-
16
-
17
-
18
-
19
-
20
-
21
-
22
-
23
-
24
-
25
-
26
-
27
-
28
-
29
-
30
-
31
-
32
-
33
-
34
-
35
-
36
-
37
-
38
-
39
-
40
-
 41
41 -
 42
42 -
 43
43 -
 44
44 -
 45
45 -
 46
46 -
 47
47 -
 48
48 -
 49
49 -
 50
50 -
 51
51 -
52
-
53
-
54
-
55
-
56
-
57
-
58
-
59
-
60
-
61
-
62
-
63
-
64
-
65
-
66
-
67
-
68
-
69
-
70
-
71
-
72
-
73
-
74
-
75
-
76
-
77
-
78
-
79
-
80
-
81
-
82
-
83
-
84
-
85
-
86
-
87
-
88
-
89
-
90
-
91
-
92
-
93
-
94
-
95
-
96
-
97
-
98
-
99
-
100
-
101
-
102
-
103
-
104
-
105
-
106
-
107
-
108
-
109
-
110
-
111
-
112
-
113
-
114
-
115
-
116
-
117
-
118
-
119
-
120
-
121
-
122
-
123
-
124
-
125
-
126
-
127
-
128
-
129
-
130
-
131
-
132
-
133
-
134
-
135
-
136
-
137
-
138
-
139
-
140
-
141
-
142
-
143
-
144
-
145
-
146
-
147
-
148
-
149
-
150
-
151
-
152
-
153
-
154
-
155
-
156
-
157
-
158
-
159
-
160
-
161
-
162
-
163
-
164
-
165
-
166
-
167
-
168
-
169
-
170
-
171
-
172
-
173
-
174
-
175
-
176
-
177
-
178
-
179
-
180
-
181
-
182
-
183
-
184
-
185
-
186
-
187
-
188
-
189
-
190
-
191
-
192
-
193
-
194
-
195
-
196
-
197
-
198
-
199
-
200
-
201
-
202
-
203
-
204
-
205
-
206
-
207
-
208
-
209
-
210
-
211
-
212
-
213
-
214
-
215
-
216
-
217
-
218
-
219
-
220
 |
 |