Canon PowerShot SX40 HS Software Guide for Windows - Page 31
Converting RAW Images – Digital Photo Professional, Edit] and [Digital Photo - best settings
 |
View all Canon PowerShot SX40 HS manuals
Add to My Manuals
Save this manual to your list of manuals |
Page 31 highlights
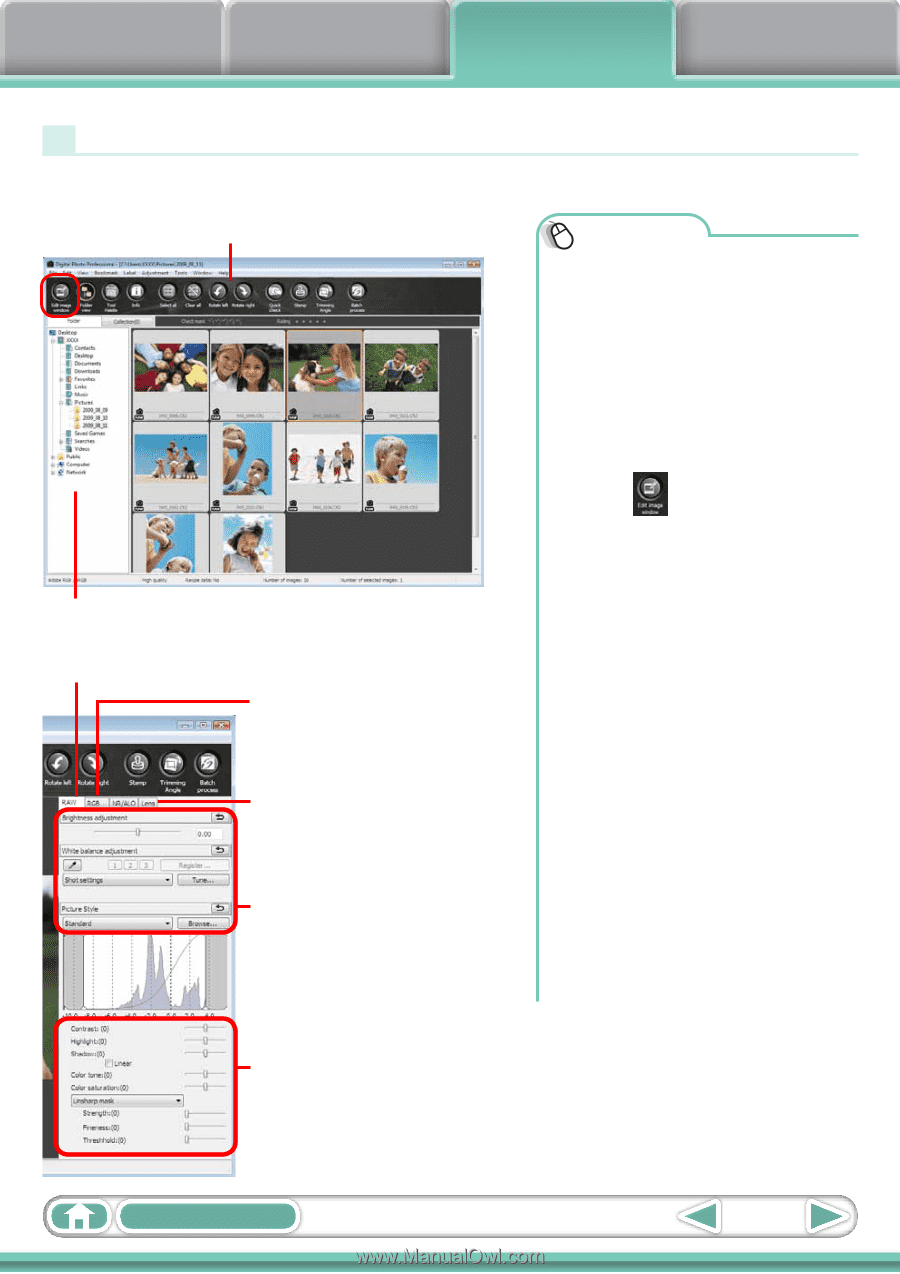
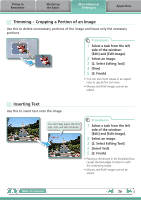
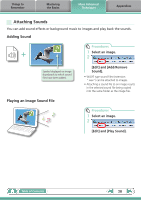
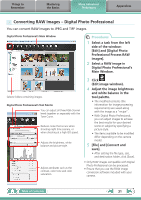
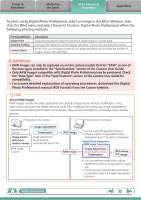
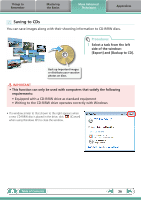
Things to Remember Mastering the Basics More Advanced Techniques Appendices Converting RAW Images - Digital Photo Professional You can convert RAW images to JPEG and TIFF images. Digital Photo Professional's Main Window Procedures 1 Select a task from the left side of the window: [Edit] and [Digital Photo Professional Process RAW Images]. 2 Select a RAW image in Digital Photo Professional's Main Window. Selects folders containing images. Digital Photo Professional's Tool Palette You can adjust all three RGB channel levels together or separately with the Tone Curve. Reduces noise that occurs when shooting night time scenery, or when shooting at a high ISO speed. Adjusts the brightness, white balance and picture style. Adjusts attributes such as the contrast, color tone and color saturation. 3 Click (Edit image window). 4 Adjust the image brightness and white balance in the tool palette. • The modified contents (the information for image processing requirements) are saved along with the image as a "recipe". • With Digital Photo Professional, you can adjust images to achieve the best results for your desired scene or subject by specifying a picture style. • The items available to be modified differ depending on the camera model. 5 [File] and [Convert and save]. • After setting the file type, size, and destination folder, click [Save]. • Only RAW images compatible with Digital Photo Professional can be processed. • Ensure that you use the RAW image conversion software included with your camera. Table of Contents 31
-
 1
1 -
2
-
3
-
4
-
5
-
6
-
7
-
8
-
9
-
10
-
11
-
12
-
13
-
14
-
15
-
16
-
17
-
18
-
19
-
20
-
21
-
22
-
23
-
24
-
25
-
 26
26 -
 27
27 -
 28
28 -
 29
29 -
 30
30 -
 31
31 -
 32
32 -
 33
33 -
 34
34 -
 35
35 -
 36
36 -
37
-
38
-
39
-
40
-
41
-
42
-
43
-
44
-
45
-
46
-
47
-
48
-
49
-
50
-
51
-
52
-
53
-
54
-
55
-
56
-
57
-
58
-
59
-
60
-
61
-
62
 |
 |