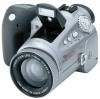
Canon Pro90 PowerShot Pro90IS Camera User Guide
Canon Pro90 - PowerShot 2.6 MP IS Camera Manual
 |
UPC - 082966162275
View all Canon Pro90 manuals
Add to My Manuals
Save this manual to your list of manuals |
Canon Pro90 manual content summary:
- Canon Pro90 | PowerShot Pro90IS Camera User Guide - Page 1
DIGITAL CAMERA Camera User Guide Camera User Guide CDI-E010-000 0900CH21.3 © 2000 CANON INC. PRINTED IN JAPAN Flowchart and Reference Guides This Guide Shooting with the Camera Software Starter Guide Installing the Software This Guide Connecting the Camera to a Computer Software Starter Guide - Canon Pro90 | PowerShot Pro90IS Camera User Guide - Page 2
due to a mistaken operation or malfunction of the camera, the software, the CompactFlash™ cards (CF cards), personal computers, peripheral devices, or use of nonCanon CF cards. Trademark Acknowledgements • Canon and PowerShot are trademarks of Canon, Inc. • CompactFlash is a trademark of SanDisk - Canon Pro90 | PowerShot Pro90IS Camera User Guide - Page 3
Components Guide 10 Front View 10 Back View 11 Controls 12 Main Dial / Mode Dial 13 Display Panel 15 Viewfinder / LCD Monitor 16 Preparing the Camera 19 Charging the Battery Pack 19 Installing the Battery Pack 21 Using a Household Power Source 23 Using a Charge Adapter / Car Battery Cable - Canon Pro90 | PowerShot Pro90IS Camera User Guide - Page 4
52 Self-Timer 53 Continuous Mode 54 Digital Zoom 55 Shooting - Selecting Particular Effects Metering Modes 73 Shooting Problem Subjects for the Autofocus 74 Manually Setting Image Characteristics 77 (Slide Show 86 Protecting Images 90 Erasing 91 Erasing Images Singly 91 Erasing All Images 92 - Canon Pro90 | PowerShot Pro90IS Camera User Guide - Page 5
112 Downloading Directly from a CF Card 112 Using the Supplied Interface Cables 115 Appendices 121 Replacing the Button Battery 121 Camera Care and Maintenance 123 Troubleshooting 124 List of Error / Message Codes 126 List of Messages 127 Specifications 129 Index 134 Canon Customer Support - Canon Pro90 | PowerShot Pro90IS Camera User Guide - Page 6
of a camera or accessory, including CompactFlash™ cards, that results in the failure of an image to be recorded or to be recorded in a format that is unreadable. Warning Against Copyright Infringement Please note that Canon digital cameras are intended for personal use and should never be used in - Canon Pro90 | PowerShot Pro90IS Camera User Guide - Page 7
button batteries used in the camera and wireless guide. Disassembly or alteration may result in high-voltage electrical shock. Internal inspections, alterations and repairs should be conducted by qualified service personnel authorized by your camera distributor or the closest Canon Customer Support - Canon Pro90 | PowerShot Pro90IS Camera User Guide - Page 8
equipment, fire, electrical shock or other hazards. Use only the recommended power accessories. • Always turn off the computer and unplug the camera from the DC plug before attaching or detaching any interface cables (except for USB cables). The cables carry high-voltage currents and there is a risk - Canon Pro90 | PowerShot Pro90IS Camera User Guide - Page 9
letting it adjust to temperature changes slowly before removing it from the bag. If Condensation Forms Inside the Camera Stop using the camera immediately if you detect condensation. Continued use may damage the equipment. Remove the CF card and battery or Compact Power Adapter CA-560 (if connected - Canon Pro90 | PowerShot Pro90IS Camera User Guide - Page 10
turned to . Charge the battery. The battery is charged (approximately 90%) when the orange indicator on the back panel stops flashing and orange. After charging, detach the compact power adapter's DC plug from the Orange camera (p. 19). Indicator 3 Install the CF card. Open the CF card slot - Canon Pro90 | PowerShot Pro90IS Camera User Guide - Page 11
) to the desired shooting mode. The easiest way to snap an image is to select the mode (p. 40). 7 Compose the image and focus. Aim the camera and lightly press the shutter button halfway. Two beeps will sound when the autofocus is set (p. 36). 8 Shoot. Press the shutter button all the way - Canon Pro90 | PowerShot Pro90IS Camera User Guide - Page 12
DC IN Terminal (p. 19) * To connect the camera to the computer with the USB interface, attach the supplied USB cable to the camera's Digital terminal. To connect to a serial port, the separately sold serial cable (IFC-200PCS for Windows and IFC-200MC for Macintosh) is required. 10 Components Guide - Canon Pro90 | PowerShot Pro90IS Camera User Guide - Page 13
Back View Viewfinder (pp. 16, 41) Diopter Adjustment Dial (p. 41) Strap Eyelet (p. 29) CF Card Slot Cover (p. 27) Battery Cover (p. 19) Tripod Socket Components Guide 11 - Canon Pro90 | PowerShot Pro90IS Camera User Guide - Page 14
complete (100%)* • Flashing Green: Recording to CF card / Reading CF card / Erasing from CF card • Orange: Battery charge adequate (approximately 90%)* • Flashing Orange: Charging battery (the frequency of the flashes varies with the charging state)* *Only appears when the compact power adapter - Canon Pro90 | PowerShot Pro90IS Camera User Guide - Page 15
connection) mode is used to download and view images on a computer when the camera is connected via the interface cable. Please read Using the Supplied Interface Cables (p. 115) for connection instructions. The Software Starter Guide, a separate manual, describes how to download and view the images - Canon Pro90 | PowerShot Pro90IS Camera User Guide - Page 16
automatically selects all settings. • Image Zone Select a mode to match your subject type then let the camera select the settings. : Pan Focus (p. 46) : Portrait (p. 46) : Landscape (p. 47) : Speed-Priority AE (p. 60) : Aperture-Priority AE (p. 62) : Manual Exposure (p. 64) 14 Components Guide - Canon Pro90 | PowerShot Pro90IS Camera User Guide - Page 17
On / Flash Off Red-Eye Reduction Flash Exposure Compensation Self-Timer / Wireless Controller Manual Focus Battery Charge State Remaining Image Capacity / Message Code / Error Code White at once. Normally, only the icons applicable to the selected mode and camera state appear. Components Guide 15 - Canon Pro90 | PowerShot Pro90IS Camera User Guide - Page 18
center of the viewfinder or LCD monitor in low light conditions while the camera is preparing to shoot. When this icon appears, use the flash or fix the camera to a tripod to shoot. • The display mode [on (no information so that it can be seen from in front of the camera) (p. 35). 16 Components Guide - Canon Pro90 | PowerShot Pro90IS Camera User Guide - Page 19
camera settings, remaining image capacity and shooting date/ time. Shooting Shooting Mode p. 14 Aperture Setting MF (Manual Complete in Manual Focus Mode Image Stabilizer Camera Shake Warning Manual Focus Digital Zoom Setting manual focus is selected) are displayed as in the example to the - Canon Pro90 | PowerShot Pro90IS Camera User Guide - Page 20
p. 73 Flash Exposure Compensation p. 70 * In addition to the above, the ISO speed, shutter speed and aperture setting are displayed as in the example to the left an unrecognized format is attached. A JPEG file not supported by "Design rule for Camera File system" standards. 18 Components Guide - Canon Pro90 | PowerShot Pro90IS Camera User Guide - Page 21
Preparing the Camera Charging the Battery Pack Use the following procedures to charge the battery pack the first time orange while the battery pack is charging and change to steady orange when it is approximately 90% charged. If it is charged for approximately two more hours, it will become fully - Canon Pro90 | PowerShot Pro90IS Camera User Guide - Page 22
current will power the camera. • This is a lithium ion battery pack so there is no need to completely use or discharge it before state of approximately 90% (adequate charge for use). It takes approximately two more hours to charge it fully (based on standard Canon testing criteria). Charge it - Canon Pro90 | PowerShot Pro90IS Camera User Guide - Page 23
Battery Pack BP-511 (supplied) into the camera as follows. Use a household power source to power the camera for extended periods (p. 23). 1 Turn the arrow and pull the battery pack out. • Charge the battery pack before using it the first time (p. 19). • The flashing green indicator signals that the - Canon Pro90 | PowerShot Pro90IS Camera User Guide - Page 24
improved by warming the battery pack in a pocket before use. Shooting: Room temperature (23° C, 73° F), alternating maximum wide angle and maximum telephoto shots at 20-second intervals with flash fired once every four shots and camera power turned off and on every eighth shot. CF - Canon Pro90 | PowerShot Pro90IS Camera User Guide - Page 25
compact power adapter. • Battery Pack BP-511 cannot be charged while the compact power adapter is being used to run the camera (main dial is set to any position other than Off). • Do not use Compact Power Adapter CA-560 to power to any device other than one for which Battery Pack BP - Canon Pro90 | PowerShot Pro90IS Camera User Guide - Page 26
socket. • Be sure to have the engine running when you unplug it too. 4 Turn the camera on. • Always ensure that the car's engine is running when you use Charge Adapter / Car Battery Cable Kit CR-560. Use of the kit without the engine running may flatten the car battery. Always unplug the kit before - Canon Pro90 | PowerShot Pro90IS Camera User Guide - Page 27
Lighter Socket With the engine running, plug the car battery cable into the cigarette lighter socket. Indicator 3 Attach the battery placed in the charge adapter simultaneously. • Either slot, A or B, can be used to charge a single battery pack. When two are placed in the charge adapter Camera 25 - Canon Pro90 | PowerShot Pro90IS Camera User Guide - Page 28
the Compact Power Adapter Battery packs can also be charged in the charge adapter using a household power source by attaching Compact Power Adapter CA-560 in place of the car battery cable. This allows you to use the camera while your other battery packs are charging. Connect to an electrical outlet - Canon Pro90 | PowerShot Pro90IS Camera User Guide - Page 29
display as "999" since the display panel can only show up to three digits. • For movies, time figures are displayed as if the movies were shot continuously. A movie file, however, has a maximum length of approximately 30 seconds. • These figures reflect standard shooting conditions established by - Canon Pro90 | PowerShot Pro90IS Camera User Guide - Page 30
a large capacity and a low price per megabyte of capacity. However, they are relatively more susceptible to vibrations and shocks than CF cards, which use durable flash memories. Please be careful, therefore, not to subject the camera to vibrations or shocks when using a microdrive, especially while - Canon Pro90 | PowerShot Pro90IS Camera User Guide - Page 31
. Take the slack out of the strap above and below the fastener to prevent it from slipping. • Avoid waving the camera about or catching it on other items when suspending it from the strap. Attaching the Lens Cap Pinch the lens cap between your fingers and - Canon Pro90 | PowerShot Pro90IS Camera User Guide - Page 32
Using the Semi-Hard Case (Optional) The semi-hard case protects the camera from shocks and dirt. Attach it with the following procedures. Case Holder Semi-Hard Case 1 Screw the case holder screw into the tripod socket on the bottom of the camera. 2 Fasten the snap on the bottom of the semi-hard - Canon Pro90 | PowerShot Pro90IS Camera User Guide - Page 33
a warning message on the computer screen approximately 5 minutes after a control is last accessed. The camera will power down if no controls are used after 1 additional minute. • Please note that the camera continues to consume a minimal amount of power even when the power save function shuts it - Canon Pro90 | PowerShot Pro90IS Camera User Guide - Page 34
Time (Rec.) Menu. 1 Turn the main dial to or . • The camera will power up. 2 Press the Menu button. • The [ (Rec.)] or adjusting the settings, press the Menu button to close the menu window. • If the Set Date/Time menu appears when the camera is turned on, it means that the date battery (button - Canon Pro90 | PowerShot Pro90IS Camera User Guide - Page 35
Switching between Shooting and Replaying Shooting • Turn the main dial to . Replaying • Open the LCD monitor and turn the main dial to . Basic Functions 33 - Canon Pro90 | PowerShot Pro90IS Camera User Guide - Page 36
forward 180 degrees toward the lens or backward 90 degrees. • The LCD monitor will automatically turn off when it clicks shut against the camera body. For protection, always close the LCD monitor after use. • Be careful not to let the AV cable or interface cable touch the LCD monitor. • If the LCD - Canon Pro90 | PowerShot Pro90IS Camera User Guide - Page 37
and reversed so that it appears correctly from in front of the lens. 2 Fold the LCD monitor back against the camera body. • Fold it until it clicks into place against the camera body. If it is not fully closed, the image will appear reversed and icons and messages will not display. • Icons - Canon Pro90 | PowerShot Pro90IS Camera User Guide - Page 38
two beeps sound and a green shows in the LCD monitor or viewfinder. In manual focus mode, a yellow will show instead. Pressing Fully • You will hear the onto the CF card. • Images are first saved into the camera's internal memory before being recorded onto the CF card, allowing the next images to - Canon Pro90 | PowerShot Pro90IS Camera User Guide - Page 39
the Image Stabilizer Function The image stabilizer function can be used to reduce the effects of camera shake when you are shooting a distant subject at full zoom or shooting in low light. The default setting for this function is On. To Shoot - Canon Pro90 | PowerShot Pro90IS Camera User Guide - Page 40
Selecting Menus and Settings Menus are used to adjust shooting, replaying, and camera settings. Watch the LCD monitor or viewfinder while performing the following procedures. 1 Press the Menu button. • In mode, the [ (Rec.)] menu will appear. In mode, - Canon Pro90 | PowerShot Pro90IS Camera User Guide - Page 41
Format JPEG* / RAW p. 58 ISO Speed 50* / 100 / 200 / 400 / AUTO p. 77 Digital Zoom Off* / 2x / 4x p. 55 Rec. Menu (Red) Review Off / 2 sec.*/ 10 sec Protect Rotate Slide Show Turns image protection on and off p. 90 Rotates the image in the display p. 85 Replays selected images as - Canon Pro90 | PowerShot Pro90IS Camera User Guide - Page 42
, all you have to do is press the shutter button and let the camera do everything else. 1 Turn the mode dial to . 2 Turn the Red-Eye Reduction Auto* / Auto / Off - Drive Method: Single* / Self-Timer - Digital Zoom: Off* / 2x / 4x - Review: Off / 2 sec.* / 10 sec. - File No. Reset: Off* / On - Canon Pro90 | PowerShot Pro90IS Camera User Guide - Page 43
subject. The approximate area metered by the autofocus is shown by the dotted line. • Use the diopter adjustment dial to adjust the viewfinder so that the information it displays is in focus. For example, the (camera shake) icon shows in the viewfinder when the image stabilizer function is on. Turn - Canon Pro90 | PowerShot Pro90IS Camera User Guide - Page 44
the duration changed to 10 seconds. 1 In the [ (Rec.)] menu, select [Review]. • See Selecting Menus and Settings (p. 38). 2 Select a Review setting and press the Menu button. • With the [Off] option, the image will even while the last is displayed. 42 Shooting - Letting the Camera Select Settings - Canon Pro90 | PowerShot Pro90IS Camera User Guide - Page 45
Zoom • An image already zoomed with the optical zoom lens can be further zoomed digitally by 2 or 4 times (p. 55) and shot. • The digital zoom combines the optical zoom with a digital teleconverter function. The resolution is coarser than with pure optical magnification. Shooting - Letting the - Canon Pro90 | PowerShot Pro90IS Camera User Guide - Page 46
9). • To close the flash, press it down with your fingers. Built-in Flash Settings The flash cannot be used with some shooting modes. (Auto) q q* q q q q (Red-eye reduction, Auto) q* q q* the first image. - Setting selection is not possible. 44 Shooting - Letting the Camera Select Settings - Canon Pro90 | PowerShot Pro90IS Camera User Guide - Page 47
adjust its output in the and modes. • The flash setting is saved when the camera is turned off in the , , and shooting modes. • The flash will fire and will be followed by the main flash. The pre-flash is used by the camera to obtain the subject's exposure data so that the main flash can - Canon Pro90 | PowerShot Pro90IS Camera User Guide - Page 48
metering method, manual focus, file format (RAW), and image adjustment (ISO speed, contrast , sharpness and saturation) settings cannot be adjusted in this mode. • Subjects can be shot from a range of 60 cm (23.6 in) (maximum wide angle) to infinity in this mode. Portrait Mode Use - Canon Pro90 | PowerShot Pro90IS Camera User Guide - Page 49
(p. 9). • The AE lock, FE lock, metering method, file format (RAW), and image adjustment (ISO speed, contrast, sharpness and saturation) settings cannot be adjusted in this mode. • Always use a tripod to prevent camera shake in this mode. • Warn people to stay still for a few seconds after the flash - Canon Pro90 | PowerShot Pro90IS Camera User Guide - Page 50
described in steps 6-8 in the Quick Start section (p. 9). • The white balance, AEB mode, AE lock, FE Lock, metering method, file format (RAW), and image adjustment (ISO speed, contrast, sharpness and saturation) settings cannot be adjusted in this mode. 48 Shooting - Letting the - Canon Pro90 | PowerShot Pro90IS Camera User Guide - Page 51
for merging into a large image on the computer. Horizontal Vertical 2 x 2 • Please use the supplied PhotoStitch program to merge the images on a computer. Framing a Subject PhotoStitch detects item (landmark, etc.) in the overlapping portions. Shooting - Letting the Camera Select Settings 49 - Canon Pro90 | PowerShot Pro90IS Camera User Guide - Page 52
stitch images that include both distant and close items. Objects may appear warped or doubled up. To Shoot a Distant Subject As shown below, move the camera around its axis to take successive shots. Horizontal: move left to right or vice versa Vertical: move up and down or vice versa To Shoot - Canon Pro90 | PowerShot Pro90IS Camera User Guide - Page 53
. • Minor discrepancies in the overlap can be corrected with the software. • An image can be retaken. Press the or arrow of the omni selector to return to that frame. 5 Use the same procedures to shoot the remaining frames. • A maximum of 26 images can be recorded either horizontally or vertically - Canon Pro90 | PowerShot Pro90IS Camera User Guide - Page 54
Use maximum movie length is approximately 30 seconds (15 frames / second). Shooting automatically stops after 30 seconds, or when the internal memory file format (RAW), and image adjustment (ISO speed, contrast, sharpness and saturation) Canon Digital Camera Solution Disk. 52 Shooting - Letting the - Canon Pro90 | PowerShot Pro90IS Camera User Guide - Page 55
gets faster 2 seconds before the shutter activates. • The shooting procedures are the same as those described in steps 6-8 in the Quick Start section (p. 9). • Turning the camera off cancels the setting. Shooting - Letting the - Canon Pro90 | PowerShot Pro90IS Camera User Guide - Page 56
figure reflects standard shooting conditions established by Canon. Actual figures may vary according to in this mode. • The built-in flash can be used, but the interval between images will lengthen to accommodate the flash memory gets full. • Turning the camera off cancels the setting. 54 Shooting - Canon Pro90 | PowerShot Pro90IS Camera User Guide - Page 57
and shooting modes or for the RAW file format. • The digital zoom combines the image captured by the optical zoom lens with a digital teleconverter function. The more the image is zoomed, the coarser it 2x and once more to turn the digital zoom off. Shooting - Letting the Camera Select Settings 55 - Canon Pro90 | PowerShot Pro90IS Camera User Guide - Page 58
Shooting - Selecting Particular Effects The various camera settings, such as the resolution, compression, shutter speed, and aperture value, can be freely selected to shoot images. • After you have changed the settings, the - Canon Pro90 | PowerShot Pro90IS Camera User Guide - Page 59
KB 417 KB 174 KB 88 KB • This figure reflects standard shooting conditions established by Canon. Actual figures may vary according to the subject and shooting conditions. • Please see the list of settings are saved when the camera is turned off. Shooting - Selecting Particular Effects 57 - Canon Pro90 | PowerShot Pro90IS Camera User Guide - Page 60
image data as captured by the camera's CCD without further processing. RAW original data can be used in special software* to adjust the image driver software is required to open or adjust RAW images on a computer. Please see the separate Software Starter Guide. ** As measured by standard Canon test - Canon Pro90 | PowerShot Pro90IS Camera User Guide - Page 61
Use the following methods to shoot. - Use the flash. - Adjust the exposure using spot metering, exposure compensation or flash exposure compensation. - Switch the shooting mode to (Manual Image Adjustment (ISO Speed, Contrast, Sharpness and Saturation) Settings - Metering Method - Manual Focus - - Canon Pro90 | PowerShot Pro90IS Camera User Guide - Page 62
shutter speed in the shutter speed-priority AE mode, the camera automatically selects an aperture setting to match the brightness. Faster the image is under- or overexposed (insufficient light). Adjust the shutter speed using the or arrow on the omni selector until the flashing stops or the aperture - Canon Pro90 | PowerShot Pro90IS Camera User Guide - Page 63
• At a shutter speed of 1/1000 second, the aperture presets to a value between F4.0 and F8.0. Shutter Speed Display The shutter speeds from 1000 to 4 in the display are actually the denominator of a fraction of a second. For example, 160 indicates a speed of 1/160 second. For slower speeds, quote - Canon Pro90 | PowerShot Pro90IS Camera User Guide - Page 64
aperture-priority AE mode, the camera automatically selects a shutter speed to selected when the focal length has been set to the maximum telephoto setting. • If the shutter speed is flashing or overexposed (insufficient light). Adjust the aperture value using the or arrow on the omni selector until - Canon Pro90 | PowerShot Pro90IS Camera User Guide - Page 65
Aperture Setting Display The larger the aperture value, the smaller the lens aperture. F2.8 F3.2 F3.5 F4.0 F4.5 F5.0 F5.6 F6.3 F7.1 F8.0 The display of aperture settings differs between the display panel and LCD monitor or viewfinder. Aperture Value Display Panel LCD Monitor/Viewfinder F2.8 . . - Canon Pro90 | PowerShot Pro90IS Camera User Guide - Page 66
Setting the Shutter Speed and Aperture You can manually set the shutter speed and aperture to achieve a particular effect. This is convenient for shooting fireworks and other images for which it is difficult to - Canon Pro90 | PowerShot Pro90IS Camera User Guide - Page 67
can only be adjusted for the first image. • The selected shooting mode will determine whether or not the exposure compensation setting is cancelled when the camera is turned off (p. 79). Shooting - Selecting Particular Effects 65 - Canon Pro90 | PowerShot Pro90IS Camera User Guide - Page 68
light setting according to the circumstances. (Auto) (Daylight) (Cloudy) (Tungsten) (Fluorescent) (Flash) (Custom) Settings are automatically set by the camera For recording outdoors on a bright day For recording under overcast, shady or twilight skies For recording under tungsten lighting For - Canon Pro90 | PowerShot Pro90IS Camera User Guide - Page 69
Setting a Custom White Balance You can set a custom white balance to obtain the optimal setting for the shooting conditions by having the camera evaluate a subject such as a white piece of paper or white cloth. 1 Press the button twice. • The current white balance mode will appear in the display - Canon Pro90 | PowerShot Pro90IS Camera User Guide - Page 70
use ). • It is also desirable to zoom in to the maximum telephoto setting. • Since a custom white balance setting cannot red-eye-reduction auto, use the flash when you go to shoot too. The correct cannot be obtained unless the flash is used consistently. To ensure consistency, set the flash - Canon Pro90 | PowerShot Pro90IS Camera User Guide - Page 71
be selected in the , or modes. • When exposure compensation is set to , the AEB exposure sequence is 0, - and + according to the camera's exposure meter. • The AEB mode cannot be used for flash photography. If the flash fires, only one image gets recorded. • The setting is not cancelled when the - Canon Pro90 | PowerShot Pro90IS Camera User Guide - Page 72
be adjusted for the first image. • The selected shooting mode will determine whether or not the flash exposure compensation setting is cancelled when the camera is turned off (p. 79). • The flash exposure compensation mode only functions with the built-in flash or an externally mounted EX series - Canon Pro90 | PowerShot Pro90IS Camera User Guide - Page 73
. • This setting can only be selected in the , or mode. • AE lock cannot be set when the built-in or the externally mounted flash is used. Flash Exposure Lock (FE Lock) is available in these situations (p. 72). Shooting - Selecting Particular Effects 71 - Canon Pro90 | PowerShot Pro90IS Camera User Guide - Page 74
flash to or . • If you are using an externally mounted flash, please refer to its manual for setting instructions. 2 Center the subject on which you want can be shot at the correct exposure if the FE lock is set when the camera is aimed at a non-backlit portion of the subject. • This setting can only - Canon Pro90 | PowerShot Pro90IS Camera User Guide - Page 75
center of the LCD monitor or viewfinder. The area within the frame at the center of the LCD monitor or viewfinder is metered. This is useful when the subject's surroundings are bright, such as when it is backlit. Metering Frame 1 Press the button. • The icon and the metering frame will appear - Canon Pro90 | PowerShot Pro90IS Camera User Guide - Page 76
Shooting Problem Subjects for the Autofocus The autofocus may not work well on the following To shoot these subjects, first aim the camera at an object at a similar distance, lock the focus and recompose the image with the desired subject, or use the manual focus. • When shooting through glass, - Canon Pro90 | PowerShot Pro90IS Camera User Guide - Page 77
Mode The focus can be manually set. MF Indicator 1 Press and hold the MF button and press the or arrow on the omni selector. • The MF indicator is a 5m 16 ft. rough approximation 3m 9.8 ft. of the focusing range. 1m 3.3 ft. Use the number to the left as a rough 0.5m 1.6 ft. estimate - Canon Pro90 | PowerShot Pro90IS Camera User Guide - Page 78
2 Shoot the image. • When metering is complete, a yellow shows in the LCD monitor or viewfinder. • This setting cannot be adjusted in the and shooting modes. • You can magnify an image afterward to check that it was shot in focus (p. 81). 76 Shooting - Selecting Particular Effects - Canon Pro90 | PowerShot Pro90IS Camera User Guide - Page 79
, 100, 200, 400 and AUTO. • The default setting is ISO 50. • When AUTO is selected, the camera automatically adjusts ISO between 50 and 100 only. • Higher ISO speeds increase the image noise. To take clean images, use as low an ISO speed as possible. Contrast • Select from - (Weak), 0 (Neutral) and - Canon Pro90 | PowerShot Pro90IS Camera User Guide - Page 80
the [File No. Reset] to [Off] is useful for avoiding file name duplication when images are downloaded to a computer. About File Numbers • Images are assigned 9802 9899 9900 Folder numbers cannot contain 99 in the last two digits. 200 0001 0002 0099 0100 Since images shot in continuous mode - Canon Pro90 | PowerShot Pro90IS Camera User Guide - Page 81
) Manual Focus Large Resolution Medium Small Superfine Compression Fine Normal File Format JPEG RAW ISO Speed Digital Zoom Area) Setting remains in effect even when the power is turned off. (1) The ISO speed is automatically set between the equivalent of 50 and 100. (2) [AUTO] cannot - Canon Pro90 | PowerShot Pro90IS Camera User Guide - Page 82
can change the language displayed on the LCD monitor if you hold the Set button and press the Jump button (p. 104). • The viewfinder cannot be used to replay images. 80 Replaying - Canon Pro90 | PowerShot Pro90IS Camera User Guide - Page 83
button. • The display cycles to the next magnification mode (approximately 2.5 times, approximately 5 times, off) each time the button is pressed. • Use the / / / arrows on the omni selector to move the magnified area around the image. Magnified approximately 5 times Approximate position • Movie - Canon Pro90 | PowerShot Pro90IS Camera User Guide - Page 84
and display the selected image in single view. • Press the Display button to show the data for the displayed image (p. 17). • The viewfinder cannot be used to replay images. 82 Replaying - Canon Pro90 | PowerShot Pro90IS Camera User Guide - Page 85
Jumping between Images You can jump between images in single or index view. Jump Bar Jump Bar 1 Turn the main dial to and select either single or index view. 2 Press the Jump button. • The jump bar will display. 3 The displayed image(s) will change. Single Replay • Press the or arrow on the omni - Canon Pro90 | PowerShot Pro90IS Camera User Guide - Page 86
the movie and display the previous or next image or movie. • Movie images recorded on other cameras may not replay correctly. The "Unidentified image" message will display. • The volume at which movies replay viewing movie files on a TV. • The viewfinder cannot be used to replay movie images. 84 Replaying - Canon Pro90 | PowerShot Pro90IS Camera User Guide - Page 87
to rotate and press the Set button. • The image cycles to the next orientation (90º © 270º © original) each time the Set button is pressed. 3 Press When images are downloaded to a computer, the orientation of images rotated by the camera will depend upon the software used to download the images. Replaying - Canon Pro90 | PowerShot Pro90IS Camera User Guide - Page 88
Automated Playback (Slide Show) Starting a Slide Show All images, or a selection of images, can be displayed one-by-one in an automated slide show. All Images Plays all the images on the CF card in order Slide Show 1 - 3 Plays the images selected for each show in order (p. 88) 1 In the [ ( - Canon Pro90 | PowerShot Pro90IS Camera User Guide - Page 89
they were recorded regardless of the time set in the slide show settings. • The power save function is disabled while a slide show plays on the camera (p. 31). Replaying 87 - Canon Pro90 | PowerShot Pro90IS Camera User Guide - Page 90
Selecting Images for Slide Shows You can mark images for inclusion in slide shows 1-3. Up to 100 images may be marked per slide show. Images display in the order of their selection. 88 Replaying 1 Display the slide show menu. 2 Press the or arrow on the omni selector to select [Program]. Press the - Canon Pro90 | PowerShot Pro90IS Camera User Guide - Page 91
show is displayed. The options are any one of 3-10 seconds, 15 seconds, 30 seconds and Manual. Sets whether the slide show stops when all the slides have been displayed or continues to display be easily edited on a computer with the supplied software. See the Software Starter Guide. Replaying 89 - Canon Pro90 | PowerShot Pro90IS Camera User Guide - Page 92
make the selection of images easier by toggling between single replay and index view with the button. 3 Press the Menu button. • The protect window will close. • Please note that formatting (initializing) a CF card erases all its data, including protected images and other types of data. Please check - Canon Pro90 | PowerShot Pro90IS Camera User Guide - Page 93
images, repeat steps 2 - 3. • To cancel instead of erasing, select [Cancel] and press the Set button. 4 Press the Menu button. • The erase window will close. • Please note that erased images cannot be recovered. Exercise adequate caution before erasing a file. • Images can be quickly deleted while - Canon Pro90 | PowerShot Pro90IS Camera User Guide - Page 94
Set button. • Please note that erased images cannot be recovered. Exercise adequate caution before erasing a file. • Protected images cannot be erased with the erase function (p. 90). 92 Erasing - Canon Pro90 | PowerShot Pro90IS Camera User Guide - Page 95
a CF card before formatting it. • When a non-Canon brand CF card is malfunctioning, reformatting it may solve the problem. • CF cards formatted in another camera, computer or peripheral device may not operate correctly. When that happens, reformat the CF card with your PowerShot Pro90 IS. Erasing 93 - Canon Pro90 | PowerShot Pro90IS Camera User Guide - Page 96
have had print marks set by another DPOFcompliant camera. These settings will be overwritten by any set by your camera. • Print settings cannot be set for movie images or RAW images. • The output of some digital printers or photo lab services may not reflect the specified print settings. Selecting - Canon Pro90 | PowerShot Pro90IS Camera User Guide - Page 97
mark or remove marks from images with the and arrow. • You can use the same procedures to select images in index view (3 images). Press When [Index] is selected, the print settings can be deleted. For the instructions for changing settings, please reread Step 3 from the beginning. • Selecting [Clear - Canon Pro90 | PowerShot Pro90IS Camera User Guide - Page 98
Images are printed in order from oldest to newest by the shooting date. • A maximum of 998 images can be marked per CF card. • When [Both] is selected, Index] setting. • Print settings can also be assigned to images with the supplied software programs on a computer. 96 Print Settings (DPOF Settings) - Canon Pro90 | PowerShot Pro90IS Camera User Guide - Page 99
Setting the Print Style The following print settings can be selected. Print Type Date File No. Standard Index Both Prints one image per page Prints the selected images together at a reduced size in an index format Prints the images in both the standard and index formats Adds the date to the - Canon Pro90 | PowerShot Pro90IS Camera User Guide - Page 100
File No. • Press the or arrow on the omni selector to select [On] or [Off]. 5 Press the Menu button. • The set up menu will close. • The [Date] and [File No.] options cannot both be set to [On] when the print type is set to [index]. • The date prints as the date and time in the format specified in - Canon Pro90 | PowerShot Pro90IS Camera User Guide - Page 101
Resetting the Print Settings The print settings can all be removed at once. The print type is reset to [Standard] and the date and file number options are set to [Off]. 1 Display the Print Order menu. 2 Press the or arrow on the omni selector to select [Reset] and press the Set button. 3 Press the - Canon Pro90 | PowerShot Pro90IS Camera User Guide - Page 102
Page p. 56 Compression Sets the relative compression ratio used p. 56 to record images to CF cards. • Superfine • Fine • Normal File Format Sets the file format used to record p. 58 images to CF cards. • JPEG • RAW ISO Speed Digital Zoom Sets the sensitivity at which images are - Canon Pro90 | PowerShot Pro90IS Camera User Guide - Page 103
Item Review File No. Reset Contrast Sharpness Saturation Menu Screen Settings Content Sets the duration images display in the LCD monitor or viewfinder after the shutter button - Canon Pro90 | PowerShot Pro90IS Camera User Guide - Page 104
... Slide Show... Rotates images 90 or 270 degrees p. 85 clockwise in the display. Plays images in an automated slide show. p. 86 Print Order... Sets the images that will be printed on a p. 94 DPOF-compatible printer or at a photo lab service, the number of copies and other parameters - Canon Pro90 | PowerShot Pro90IS Camera User Guide - Page 105
(4) • (5) Adjusts the sound volume when a movie is p. 84 played. • (Off) • (1) • (2) • (3) • (4) • (5) Sets whether or not the camera p. 31 automatically powers down after a specified period of time elapses without something being pressed. • On • Off List of Menu Options 103 - Canon Pro90 | PowerShot Pro90IS Camera User Guide - Page 106
Sets the date, time and date format. Reference Page p. 32 Format... Formats (initializes) a CF card. p. 93 Language... Video System Sets the language used in the menus and messages in the LCD monitor or viewfinder. The menu may appear differently in some regions. • English • Deutsch • Fran - Canon Pro90 | PowerShot Pro90IS Camera User Guide - Page 107
usual. • No image will display in the LCD monitor or viewfinder when the camera is connected to a TV monitor. • The video output signal can be the AV cable into either one (left or right) of the TV's audio in jacks. Please consult the TV's manual for details. • A TV monitor cannot be used in mode. - Canon Pro90 | PowerShot Pro90IS Camera User Guide - Page 108
Install the button battery (CR2025) into Wireless Controller WL-DC100 before use. • Be particularly careful to keep the button batteries out of it in the direction of the arrow. If you should dispose of your camera, first remove the button battery for recycling according to the recycling system of - Canon Pro90 | PowerShot Pro90IS Camera User Guide - Page 109
Shooting / Replaying Remote Sensor The wireless controller can be used to shoot or replay. Use within approximately 5 m (16.4 ft.) of the remote sensor. Transmitter Shooting Press the button on the camera until the icon appears in the display panel, then shoot with the wireless controller. - Canon Pro90 | PowerShot Pro90IS Camera User Guide - Page 110
, 380EX, 420EX or 550EX. Non-Canon brand flashes may not fire. Please check the manual for your flash. (Certain functions noted in the manuals for the Speedlite 220EX, 380EX, 420EX and 550EX cannot be performed when mounted on this camera. Please read this guide before using one of these flashes on - Canon Pro90 | PowerShot Pro90IS Camera User Guide - Page 111
recorded. • Please note that proprietary high-voltage flashes with multi contacts or flash accessories made by other manufacturers may cause a camera malfunction. • A Canon Speedlite 480EG cannot be used with this camera because the flash will not fire when mounted. • The following functions can be - Canon Pro90 | PowerShot Pro90IS Camera User Guide - Page 112
to set the camera to manual mode and set the shutter speed and aperture to appropriate settings in this case. • Filters or lens hoods cannot be attached to the wide converter lens. • When the built-in flash is used, a portion of the image may be blocked and appear darker. • Use the wide converter - Canon Pro90 | PowerShot Pro90IS Camera User Guide - Page 113
flash when the close-up lens is attached to the camera. The image will be improperly recorded and the flash will not adjust its output correctly. • Use the close-up lens with the focal length set to the maximum telephoto setting. Lens Hood LH-DC58 This lens hood features a 58 mm thread. It - Canon Pro90 | PowerShot Pro90IS Camera User Guide - Page 114
from the camera and place it in a CF card reader connected to the computer. • Some computers or CF card readers require the power to be off when the CF card is inserted. Since this requirement varies between models, please consult the manual for your equipment. 112 Downloading Images to a Computer - Canon Pro90 | PowerShot Pro90IS Camera User Guide - Page 115
Images Please refer to the Software Starter Guide for downloading instructions. 1 Double-click the driver software is required. • Viewing Movies Downloaded to a Computer - If you attempt to view a movie file (.AVI extension) by double-clicking it in the Windows Explorer, you may cause the Windows - Canon Pro90 | PowerShot Pro90IS Camera User Guide - Page 116
of each "X" in the file names. • Do not open or delete files in folders other than [XXXCANON]. Those files are required for image management. 114 Downloading Images to a Computer - Canon Pro90 | PowerShot Pro90IS Camera User Guide - Page 117
or higher QuickTime 3 or higher. * The USB interface is only supported for genuine Apple Computer brand models with built-in USB ports. The supplied interface cables can be used to connect the camera to a computer to download the images. First install the supplied software and then connect to the - Canon Pro90 | PowerShot Pro90IS Camera User Guide - Page 118
lacking a built-in USB port (p. 119) A serial cable is not supplied with the camera. Please arrange to purchase one to use the serial interface. • Windows (The separately sold Interface Cable IFC-200PCS is required) Serial Cable Connector Shapes Computer Serial Port Camera End Computer End - Canon Pro90 | PowerShot Pro90IS Camera User Guide - Page 119
occurs, leave the camera connected to the USB port and try to revive the computer. Some computers cannot be properly restored from standby or sleep mode when the USB cable is subsequently detached. Please consult the manual for your computer regarding the standby or sleep mode. Downloading Images to - Canon Pro90 | PowerShot Pro90IS Camera User Guide - Page 120
USB Cable 2. Align the arrows to insert the cable into the camera. 2 Turn the camera's main dial to . • Always press the PUSH button on the connector to detach the cable from the camera's Digital terminal. PUSH Button Please consult the separate Software Starter Guide for the remaining downloading - Canon Pro90 | PowerShot Pro90IS Camera User Guide - Page 121
the computer's power off and turn the camera's main dial to . 2 Connect the camera to the computer. Windows • Attach interface cable IFC-200PCS (optional) to the computer's serial port and the camera's Digital terminal. • Please consult the computer's manual for the position of the serial port - Canon Pro90 | PowerShot Pro90IS Camera User Guide - Page 122
on the computer. 4 Turn the camera's main dial to . • Always press the PUSH button on the connector to detach the cable from the camera's Digital terminal. PUSH Button Please consult the separate Software Starter Guide for the remaining downloading procedures. 120 Downloading Images to a Computer - Canon Pro90 | PowerShot Pro90IS Camera User Guide - Page 123
with the following procedures. The button battery is preinstalled at the factory and may therefore expire earlier than its rated lifespan after the camera has been purchased. • Be particularly careful to keep the button batteries out of the reach of children. Seek medical assistance immediately if - Canon Pro90 | PowerShot Pro90IS Camera User Guide - Page 124
5 Place a fresh battery into the holder with the negative (-) terminal facing up. 6 Replace the holder in the camera and close the CF card slot cover. If you should dispose of your camera, first remove the button battery for recycling according to the recycling system of your country. Bij dit - Canon Pro90 | PowerShot Pro90IS Camera User Guide - Page 125
use synthetic cleansers on the camera body or lens. If dirt remains, contact the nearest Canon Customer Support Help Desk (see the back of this guide). Viewfinder / LCD monitor Use to other problems. • Never use thinners, benzene, synthetic cleansers or water to clean the camera. These - Canon Pro90 | PowerShot Pro90IS Camera User Guide - Page 126
Troubleshooting Problem Camera will not operate Camera use a household power ([Lb] flashes in display panel) source. Poor contact between camera CF card. • If required, download the images to a computer and be damaged. Contact the nearest Canon Customer Support Help Desk. Battery pack capacity - Canon Pro90 | PowerShot Pro90IS Camera User Guide - Page 127
is at least 10 cm (3.9 in) between the camera lens and subject at maximum wide angle and at least 1 m (3.3 ft.) at maximum telephoto. Subject is too Insufficient light for dark shooting • Set the built-in flash to on. • Use a high-output externally mounted flash. Subject dark in comparison - Canon Pro90 | PowerShot Pro90IS Camera User Guide - Page 128
the error code appears repeatedly, there is a problem. Note the error code number and take the camera in for servicing. If an error code appears immediately after a battery as soon as possible to use for any length of time. : Battery charge low, camera will not operate. Immediately recharge or - Canon Pro90 | PowerShot Pro90IS Camera User Guide - Page 129
because there is a file with the same name as the directory that the camera is attempting to create, or the highest possible file number has already been reached the battery pack: Battery charge is insufficient to operate the camera. Replace it immediately with a charged battery pack or recharge it - Canon Pro90 | PowerShot Pro90IS Camera User Guide - Page 130
: Cannot mark image: Cannot complete!: Cannot edit: You attempted to replay an image that was recorded in a special format (proprietary format used by the camera of another manufacturer, etc.). You attempted to erase a protected image. Too many images have been marked for printing or for inclusion - Canon Pro90 | PowerShot Pro90IS Camera User Guide - Page 131
PowerShot Pro90 IS Image sensor: Approx. 3.34 million-pixel (total), 1/1.8 inch CCD (Effective number of pixels: approx. 3.24 million, recording pixels: approx. 2.58 million) Lens: 7 (W) - 70 (T) mm (35 mm equivalent: 37-370 mm) F2.8 (W) - F3.5 (T) Digital tele-converter: 2x, 4x (Maximum - Canon Pro90 | PowerShot Pro90IS Camera User Guide - Page 132
Aperture priority and Manual Pan-focus, Portrait USB connection only. Exclusive software program is included in the camera camera kit) 2. AC adapter (included in the camera kit) 3. Car battery adapter (Optional Charge Adapter/Car Battery Cable Kit CR-560 is required) 0 - 40º C (32 - 104º F) 10 - 90 - Canon Pro90 | PowerShot Pro90IS Camera User Guide - Page 133
AC 100 - 240 V (50/60 Hz) Rated output: 9.5 V / 2.7 A Operating temperatures: 0 - 40º C (32 - 104º F) Dimensions: 57 x 28 x 104 mm (2.2 x 1.1 x 4.1 in.) (camera body only) Weight: Approx. 180 g (6.3 oz.) Wireless Controller WL-DC100 Power supply: Lithium button battery CR2025 Operating - Canon Pro90 | PowerShot Pro90IS Camera User Guide - Page 134
1.6 A Operating temperatures: 0 - 40º C (32 - 104º F) Dimensions: 93 x 36 x 71 mm (3.7 x 1.4 x 2.8 in.) Weight: Approx. 140 g (5.0 oz.) • Car Battery Cable CB-560 Supported vehicles: Fuse: Length: Weight: Cigarette lighter socket powered by a negative ground, DC 12 V or 24 V car battery 125 - Canon Pro90 | PowerShot Pro90IS Camera User Guide - Page 135
to a PowerShot Pro90 IS) 58 mm, standard filter thread Approx. ø 60 x 10.5 mm (ø 2.4 x 0.4 in.) Approx. 60 g (2.1 oz.) Lens Hood LH-DC58 (Optional) 58 mm, standard filter thread Approx. ø 82 x 33.6 mm (ø 3.2 x 1.3 in.) Approx. 24 g (0.8 oz.) • All data is based on Canon's standard testing methods - Canon Pro90 | PowerShot Pro90IS Camera User Guide - Page 136
Compact Power Adapter 23 Components Guide 10 Compression 56, 100 Computer 112 Downloading 112, 113 Interfaces 115, 116 System Requirements 115 Continuous Mode ( ) 54 Contrast 77, 101 Creative Zone 14 D Date/Time 32 Date Battery 121 DC Cable 23 DC IN Terminal 10, 19 Digital Print Order Format (DPOF - Canon Pro90 | PowerShot Pro90IS Camera User Guide - Page 137
Cables 115, 116 CF Card 116 Serial 116, 119 USB 115, 117 ISO Speed 77, 100 J Jump 83 L Landscape Mode ( ) 47 Language Settings 104 LCD Monitor Brightness 103 Using 13 Play 80 Portrait Mode ( ) 46 Program AE ( ) 59 Protect 90, 102 Print Settings 94 Selecting Images 94 Print Style 97 Resetting 99 Power - Canon Pro90 | PowerShot Pro90IS Camera User Guide - Page 138
Troubleshooting 124 U USB Port 117, 118 V Video System 104 Viewfinder LCD Monitor 12, 16, 34 Volume Replay 103 Shooting 103 W WAV Files 18 White Balance 66 Wide Angle 43 Wide Converter 110 Wireless controller 106 Installing / Removing the Battery 106 Replay 107 Shooting 107 Z Zoom 43 Digital - Canon Pro90 | PowerShot Pro90IS Camera User Guide - Page 139
France S.A. Hotline : 01.41.99.70.70 Tél : 01.41.99.77.77 Télécopie : 01.41.99.79.51 Canon Photo Vidéo France S.A. Support Client : 01.41.30.15.15 Fax : 01.41.30.15.05 Canon Deutschland GmbH Canon-Hotline-Service: Customer Support: (02151) 349-555 Info Desk: (02151) 349-566 Fax: (02151) 349-588 - Canon Pro90 | PowerShot Pro90IS Camera User Guide - Page 140
Canon Australia Pty. Ltd. Info-Line: (02) 9805 2864 Canon New Zealand Ltd. Info-Line: 0900-522666 ASIA Canon Canon Marketing Services No.1 Jalan Kilang Timor, #09-00, Pacific Tech Centre, Singapore 159303 Phone: (65) 799 8888 Fax: (65) 273 3317 Canon 745 0505 Canon Marketing (Thailand) 9910 Canon
-
 1
1 -
 2
2 -
 3
3 -
 4
4 -
 5
5 -
 6
6 -
 7
7 -
8
-
9
-
10
-
11
-
12
-
13
-
14
-
15
-
16
-
17
-
18
-
19
-
20
-
21
-
22
-
23
-
24
-
25
-
26
-
27
-
28
-
29
-
30
-
31
-
32
-
33
-
34
-
35
-
36
-
37
-
38
-
39
-
40
-
41
-
42
-
43
-
44
-
45
-
46
-
47
-
48
-
49
-
50
-
51
-
52
-
53
-
54
-
55
-
56
-
57
-
58
-
59
-
60
-
61
-
62
-
63
-
64
-
65
-
66
-
67
-
68
-
69
-
70
-
71
-
72
-
73
-
74
-
75
-
76
-
77
-
78
-
79
-
80
-
81
-
82
-
83
-
84
-
85
-
86
-
87
-
88
-
89
-
90
-
91
-
92
-
93
-
94
-
95
-
96
-
97
-
98
-
99
-
100
-
101
-
102
-
103
-
104
-
105
-
106
-
107
-
108
-
109
-
110
-
111
-
112
-
113
-
114
-
115
-
116
-
117
-
118
-
119
-
120
-
121
-
122
-
123
-
124
-
125
-
126
-
127
-
128
-
129
-
130
-
131
-
132
-
133
-
134
-
135
-
136
-
137
-
138
-
139
-
140
 |
 |

Flowchart and Reference Guides
This Guide
Shooting with the Camera
Software Starter Guide
Installing the Software
This Guide
Connecting the Camera to a Computer
Software Starter Guide
Downloading Images to a Computer
Camera User Guide
Please start by reading the Precaution on the reverse side of this cover.
ENGLISH
DIGITAL CAMERA
Camera User Guide
CDI-E010-000
0900CH21.3
© 2000 CANON INC.
PRINTED IN JAPAN