Canon S10 Software Starter Guide
Canon S10 - PowerShot S10 2MP Digital Camera Manual
 |
UPC - 082966161926
View all Canon S10 manuals
Add to My Manuals
Save this manual to your list of manuals |
Canon S10 manual content summary:
- Canon S10 | Software Starter Guide - Page 1
both PowerShot S10 and PowerShot S20 digital cameras. This guide explains the installation method and features of the software for loading and processing images on a computer that have been shot with a Canon PowerShot S10 or PowerShot S20 digital camera. Read the agreement in this guide before using - Canon S10 | Software Starter Guide - Page 2
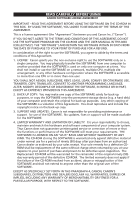
and include the copyright notice on the back-up copy. 3. SUPPORT AND UPDATES: Canon is not responsible for providing maintenance or support for use of the SOFTWARE. No updates, fixes or support will be made available for the SOFTWARE. 4. LIMITED WARRANTY AND LIMITATION OF LIABILITY: It is your - Canon S10 | Software Starter Guide - Page 3
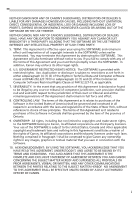
OR INCIDENTAL LOSS OR DAMAGE INCLUDING LOSS OF PROFITS, EXPENSE OR INCONVENIENCE HOWSOEVER CAUSED OR ARISING OUT OF THE SOFTWARE OR THE USE THEREOF. NEITHER CANON, NOR ANY OF CANON'S SUBSIDIARIES, DISTRIBUTORS OR DEALERS SHALL HAVE ANY OBLIGATION TO INDEMNIFY YOU AGAINST ANY CLAIM OR SUIT BROUGHT BY - Canon S10 | Software Starter Guide - Page 4
This guide explains the software used with both the PowerShot S10 and PowerShot S20. All instructions apply to both models unless otherwise noted. The screen examples in this guide were taken with a PowerShot S10 connected unless otherwise noted. Disclaimer • While every effort has been made to - Canon S10 | Software Starter Guide - Page 5
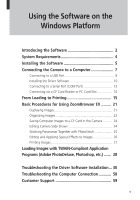
Using the Software on the Windows Platform Introducing the Software 2 System Requirements 4 Installing the Software 5 Connecting the Camera to a Computer 7 Connecting to a USB Port 8 Installing the Driver Software 10 Connecting to a Serial Port (COM Port 13 Connecting via a CF Card Reader or - Canon S10 | Software Starter Guide - Page 6
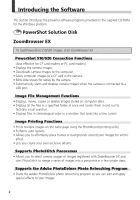
CD-ROM for the Windows platform. PowerShot Solution Disk ZoomBrowser EX To load PowerShot S10/S20 images, start ZoomBrowser EX. PowerShot S10/S20 Connection Functions (Also effective for CF card readers or PC card readers) • Displays the camera images. • Downloads camera images to the computer - Canon S10 | Software Starter Guide - Page 7
and Photoshop, to load camera images directly into the application program. (The USB TWAIN Driver is for use with a USB interface. The RS-232C TWAIN Driver is for use with a serial port interface.) Neither TWAIN Driver can be used as a stand-alone software program. Adobe PhotoDeluxe (separate - Canon S10 | Software Starter Guide - Page 8
to pre-installed Windows 98 systems) RS-232C (Serial/COM port) •Free Hard Disk Space PowerShot Utilities ZoomBrowser EX: 120 MB or more (Including the PhotoRecord printing utility) PhotoStitch: 40 MB or more PowerShot USB TWAIN Driver: 15 MB or more PowerShot RS-232C TWAIN Driver: 15 MB or - Canon S10 | Software Starter Guide - Page 9
Windows Installing the Software Installing from the PowerShot Solution Disk 1. Close any application programs that are running. 2. Place the supplied Solution Disk in the CD-ROM drive. The installer panel will automatically display. • If the installer panel does not automatically display, use the - Canon S10 | Software Starter Guide - Page 10
Guide] in the window that displays. The serial number shown during installation will be required for the user registration process. If You Will Be Connecting via a USB Port You must install a separate USB driver and the PowerShot USB TWAIN Driver. Please see page 10 for installation instructions - Canon S10 | Software Starter Guide - Page 11
Windows Connecting the Camera to a Computer There are three interfaces that can be used to connect the camera to a computer. Once a connection is established using one of the three interfaces, you can start the software and begin to load the camera images. ( p. 15 or 28) Connecting to a USB Port - Canon S10 | Software Starter Guide - Page 12
Connecting to a USB Port Requirements for the USB Interface • The USB interface can only be used to connect the camera to computers purchased with Windows 98 preinstalled (clean installation). The USB ports on computers running versions of Windows 98 upgraded from Windows 3.1 or Windows 95 may not - Canon S10 | Software Starter Guide - Page 13
Windows 1. Attach the supplied USB cable to a USB port directly on the computer and to the DIGITAL terminal of the PowerShot S10/S20 as shown below. • There is no need to turn the camera or computer power off when attaching or detaching the USB cables. • Please consult your computer's manual for - Canon S10 | Software Starter Guide - Page 14
time the camera is connected via the USB interface. It is not required from the second time onward. • Your computer may prompt you to insert the CD-ROM containing your Windows system software during the installation. Have the Windows disk handy in case it is required. 1. Attach the PowerShot S10/S20 - Canon S10 | Software Starter Guide - Page 15
Windows 3. Select the [Search for the best driver for your device (Recommended)] option and click the [Next] button. The dialog will change to one that allows you to specify the search location. 4. Select the [CD-ROM drive] option. 5. Place the PowerShot Solution Disk in the CD-ROM drive and click - Canon S10 | Software Starter Guide - Page 16
Windows system software into the CD-ROM drive. See the box below. 7. Read the dialog and click the [Finish] button. The [PowerShot S10 Event] or [PowerShot for the Windows System Disk during the Driver File Copying Process If prompted for the Windows system disk, replace the PowerShot Solution Disk - Canon S10 | Software Starter Guide - Page 17
Windows Connecting to a Serial Port (COM Port) 1. Shut down the computer and turn the camera's mode dial to the Off position. 2. Attach the supplied serial cable to a serial port on the computer and to the camera's DIGITAL terminal as shown below. • Please consult your computer's manual for the - Canon S10 | Software Starter Guide - Page 18
Card Slot To load images directly from a CF card to a computer, eject the card from the camera, place it in a separately sold PC card adapter (PCMCIA card adapter) and insert the assembly into differ according to the product. Please consult the manuals accompanying your equipment. Insert into Slot 14 - Canon S10 | Software Starter Guide - Page 19
will automatically display. Read these tips to quickly understand operating procedures. Canon PowerShot Icon 4. Use one of the three interfaces to display the camera window. USB Interface The [PowerShot S10 Event] or [PowerShot S20 Event] dialog will appear so that you can select an application - Canon S10 | Software Starter Guide - Page 20
first displaying the [PowerShot S10 Event] or [PowerShot S20 Event] dialog. 1. Open the [My Computer] window while the camera is connected to the computer via the USB interface. 2. Open the [Control Panel] and select [Scanners and Cameras] and either [PowerShot S10] or [PowerShot S20]. 3. Click the - Canon S10 | Software Starter Guide - Page 21
Interface Click the [IMPORT IMAGES] button and select [From Dcim]. Thumbnail images will display in the camera window. ZoomBrowser EX Camera Window The camera window will open when a connection to a camera or CF card is initiated. Thumbnail (small) images will display. Thumbnail The image of the - Canon S10 | Software Starter Guide - Page 22
and input a folder name. Explorer View 2. Select the renamed folder. Click the renamed folder in the explorer view. 3. Select the images that you wish to download from the camera window and click the [DOWNLOAD] button. Click the thumbnail(s) you wish to select. Thumbnail 18 - Canon S10 | Software Starter Guide - Page 23
Windows The downloaded images will display in the browser area. Browser Area To disconnect the camera, click the close box at the upper right of the camera window. The camera window will close. 19 - Canon S10 | Software Starter Guide - Page 24
a page layout. 2. Adjust the print settings if you wish to change the page layout. Please refer to page 27 or the PhotoRecord Help file for instructions. 3. Click the PhotoRecord [PRINT] button. The Print dialog will display. 4. Click the [OK] button to start printing. 20 - Canon S10 | Software Starter Guide - Page 25
provides a simple explanation of the basic procedures for using ZoomBrowser EX. Please refer to the ZoomBrowser EX Help Frame of the Folder Click this button to go back to a folder one level higher. Windows (b) Selecting a Folder in the Explorer View You can also zoom a folder in or out with - Canon S10 | Software Starter Guide - Page 26
Images in Chronological Order Select a folder or some images, click the [View] menu and select [TimeTunnel]. • The selected image(s) will display in a time tunnel window. • Please refer to the TimeTunnel Help file for more details on how to operate this function. Drag the tab up or down to move - Canon S10 | Software Starter Guide - Page 27
the folder. The selected folder will appear in the explorer view as a new library. Refresh the Contents of a Library If you have used another program, such as Windows Explorer or Adobe PhotoDeluxe, to move or edit images that are registered with ZoomBrowser EX, you should click the [View] menu and - Canon S10 | Software Starter Guide - Page 28
] button. The selected image will be saved onto the camera's CF card. Editing Camera Slide Shows 1. Open the camera window. ( p. 15) 2. Click the [EDIT SLIDESHOW] button. The Edit Slide Show window will display. • The camera images will display on the left side. Images registered in the selected - Canon S10 | Software Starter Guide - Page 29
in the guidance window to merge the images. • Please refer to the PhotoStitch Help file for more details. Follow the instructions to merge the images. Images Shot in Stitch Assist Mode PhotoStitch automatically arranges images shot with the Stitch Assist mode of PowerShot digital cameras into the - Canon S10 | Software Starter Guide - Page 30
browser area of ZoomBrowser EX. 3. Click the [Edit] menu and select [Edit Image using Adobe PhotoDeluxe Home Edition] Please refer to the Adobe PhotoDeluxe Help file and electronic guide (Getting Started.pdf) for instructions for this program. 4. Edit and apply special effects to the image. • Once - Canon S10 | Software Starter Guide - Page 31
image(s) for printing from the browser area or camera window and click the [PRINT] button to start the PhotoRecord program. The selected images will automatically display in a page layout. Please refer to the PhotoRecord Help file for more details. Use these buttons to arrange the layout for each - Canon S10 | Software Starter Guide - Page 32
window. 2. Click [Get Photo] from the dialog that displays and select [Cameras]. 3. Click the [1 Camera] tab. • Confirm that [Canon PowerShot RS-232C] is selected as the [Camera Models] option. 4. Click the [Open Camera] button. • TWAIN Driver will start. Steps 5 and 6 are for Serial Interface Users - Canon S10 | Software Starter Guide - Page 33
Guide to the TWAIN Driver Window This button does not appear in the USB version of TWAIN Driver. Settings Button Rotate 90 Degrees Buttons Rotates the selected image left or right 90 degrees. Help Button Display Style Buttons Windows Main Buttons These buttons control the main commands for - Canon S10 | Software Starter Guide - Page 34
Troubleshooting the Driver Software Installation Confirm the Following Conditions: 1. Is the camera connected to the computer correctly? (p. 7) 2. Is the camera's mode dial in the position? 3. Is the battery charge sufficient? You are recommended to use the AC adapter when connecting to a computer. - Canon S10 | Software Starter Guide - Page 35
Windows What to Do if [PowerShot S10] or [PowerShot S20] Is Not in the Scanners and Cameras Properties Device List or if the [Scanners and Cameras] Icon Is Not in the Control Panel 1. Open the [System Properties] dialog and check the [Device Manager] tab. 1. Double-click the [System] icon in the - Canon S10 | Software Starter Guide - Page 36
in the Windows folder, click Canon.IncCanon_DC] file. Skip this step if this file is not present in the [Other] folder within the [Inf] folder. 10. Reconnect the camera to the computer and reset its mode dial to the position. The [Add New Hardware Wizard] will appear. 11. Install the driver software - Canon S10 | Software Starter Guide - Page 37
What to Do if the [Inf] Folder Does Not Appear in the [Windows] Folder Follow the procedures below to select the [Show all files] option. 1) Click the [View] menu and select [Folder Options]. 2) Click the [View] tab. 3) Click - Canon S10 | Software Starter Guide - Page 38
and Cameras Properties device list and click the [Remove] button. 2. Click the [OK] button and close the [Scanners and Cameras Properties] dialog. 3. Using Steps 3 to 11 on starting on page 31, delete the [Drvdata.bin], [Drvidx.bin] and [Canon.IncCanon_DC] items, and reinstall the driver software - Canon S10 | Software Starter Guide - Page 39
38 Installing the Software 39 Connecting the Camera to a Computer 40 Connecting to a USB Port 41 Connecting to a Serial Port (Printer or Modem Port 43 Connecting via a CF Card Reader or PC Card Slot 44 From Loading to Printing 45 Basic Procedures for Using PowerShot Browser ..... 50 Displaying - Canon S10 | Software Starter Guide - Page 40
CD-ROM for Macintosh computers. PowerShot Solution Disk PowerShot Browser To load PowerShot S10/S20 images, start PowerShot Browser. PowerShot S10/S20 Connection Functions (Also effective for CF card readers or PC card readers) • Displays the camera images. • Downloads camera images to the computer - Canon S10 | Software Starter Guide - Page 41
about in all directions. PowerShot Plug-In Module This is the driver utility required to load images from a camera into a Plug-In compliant application program, such as Adobe PhotoDeluxe or Photoshop. Plug-In Module cannot be used as a stand-alone software program. Adobe PhotoDeluxe (separate - Canon S10 | Software Starter Guide - Page 42
brand models with a built-in USB interface • iMacs running System Software 8.1 require installation of "iMac Update 1.0"and "iMac Firmware Update 1.0" RS-422 Printer or modem port •Free Hard Disk Space PowerShot Utilities PowerShot Browser: PhotoStitch: PowerShot Plug-In Module: Adobe PhotoDeluxe - Canon S10 | Software Starter Guide - Page 43
] if you wish to install only the minimum required programs. Software Installed with the Easy Install Option PowerShot Browser, PhotoStitch, PowerShot Plug-In Module 6. Select a folder and proceed according to the on-screen instructions. 7. Restart the computer after the installation is complete if - Canon S10 | Software Starter Guide - Page 44
There are three interfaces that can be used to connect the camera to a computer. Once a connection is established using one of the three interfaces, you can start the software and begin to load the camera images. ( p. 45 or 55) Connecting to a USB Port ( p. 41) If your computer is equipped - Canon S10 | Software Starter Guide - Page 45
disconnect the USB cable from the camera or computer. Try to revive the computer. If the USB cable is detached while the computer is in sleep mode, some Macintosh models may not return to active mode correctly. For instructions regarding the sleep mode, please consult the manual accompanying your - Canon S10 | Software Starter Guide - Page 46
on the computer and to the DIGITAL terminal on the PowerShot S10/S20 as shown below. • There is no need to turn the camera or computer power off when attaching or detaching the USB cables. • Please consult your computer's manual for the location of the USB ports. • The camera can be connected to any - Canon S10 | Software Starter Guide - Page 47
the Off position. 2. Attach the supplied Macintosh cable to the printer or modem port on the computer and to the camera's DIGITAL terminal as shown below. • Please consult your computer's manual for the port locations. Printer Port Modem Port Macintosh Cable Macintosh Cable 3. Turn on the computer - Canon S10 | Software Starter Guide - Page 48
Card Slot To load images directly from a CF card to a computer, eject the card from the camera, place it in a separately sold PC card adapter (PCMCIA card adapter) and insert the assembly into differ according to the product. Please consult the manuals accompanying your equipment. Insert into Slot 44 - Canon S10 | Software Starter Guide - Page 49
2. Turn the camera's mode dial to the position. For Serial Interface Users • If you are connected to an AppleTalk network via the printer or modem port, choose the (Apple) menu, select [Chooser] and set AppleTalk to [Inactive]. 3. Start PowerShot Browser. • Double-click the [Canon PowerShot] icon on - Canon S10 | Software Starter Guide - Page 50
4. Use one of the three interfaces to display the camera window. USB Interface When you connect the camera to the computer, PowerShot Browser will automatically start and display its [Communication Settings] dialog. Confirm that the [USB port] option and either the [PowerShot S10] or [PowerShot S20] - Canon S10 | Software Starter Guide - Page 51
to display the subfolders and double-click [DCIM]. Thumbnail images will display in the Camera window. ( p. 47) Explorer View PowerShot Browser Camera Window The camera window will open when a connection to a camera or CF card is initiated. Thumbnail (small) images will display. Thumbnail The image - Canon S10 | Software Starter Guide - Page 52
from the Camera 1. Select the [PowerShot Browser Folder]. Click the arrow to the left of the folder in the explorer view and display the contents of the [PowerShot Browser Folder]. Click the arrow to show the folder's contents. Explorer View 2. Create a new folder within the PowerShot Browser Folder - Canon S10 | Software Starter Guide - Page 53
] button. Click the thumbnail(s) you wish to select. Thumbnail The downloaded images will display in the browser area. Browser Area To disconnect the camera, click the close box at the upper left of the camera window. The camera window will close. Printing Images 1. Select the image(s) you wish to - Canon S10 | Software Starter Guide - Page 54
simple explanation of the basic procedures for using PowerShot Browser. Please refer to the PowerShot Browser Help file for more details. [Switch to TimeTunnel]. • The selected image(s) will display in a time tunnel window. • Please refer to the TimeTunnel Help file for more details on how to - Canon S10 | Software Starter Guide - Page 55
Drag and Drop a Folder within the Explorer View. Browser Area Macintosh Refresh the Contents of the Browser Area If you have used the Macintosh Finder or another program to move or edit images that are registered with PowerShot Browser, you should click the [Display] menu and select [Refresh]. 51 - Canon S10 | Software Starter Guide - Page 56
] button. The selected image will be saved onto the camera's CF card. Editing Camera Slide Shows 1. Open the camera window. ( p. 46) 2. Click the [EDIT SLIDESHOW] button. The SlideShowMaker window will display. • The camera images will display on the left side. Images registered in the selected - Canon S10 | Software Starter Guide - Page 57
in the guidance window to merge the images. • Please refer to the PhotoStitch Help file for more details. Follow the instructions to merge the images. Images Shot in Stitch Assist Mode PhotoStitch automatically arranges images shot with the Stitch Assist mode of PowerShot digital cameras into the - Canon S10 | Software Starter Guide - Page 58
PowerShot Browser. 3. Click the [Edit] menu and select [Adobe PhotoDeluxe]. Please refer to the Adobe PhotoDeluxe Help file and electronic guide and select [Send to] and [File Format] and save the image. • PowerShot Browser supports the BMP, JPEG, PICT and TIFF file formats. • Click the [Display] - Canon S10 | Software Starter Guide - Page 59
2. Copy the [Canon PowerShot] file to the [Acquire/Export] folder, which can be found by opening the [Adobe PhotoDeluxe] and [Plug-ins] folders. Starting the Software If PowerShot Browser has been installed, it will start automatically when the camera is connected to the computer via a USB port. To - Canon S10 | Software Starter Guide - Page 60
] dialog. This will prevent the [PowerShot Browser not found] dialog from appearing again when the camera is connected. * The [Settings for USB connection] dialog can also be opened by choosing the (Apple) menu and selecting [Control Panels] and [Canon USB Camera]. ( p. 46) Click here to close - Canon S10 | Software Starter Guide - Page 61
Guide to the Plug-In Module Window Display Style Button Settings Buttons Use these buttons to set the communications and preference settings for the camera. Rotate 90 Degrees Buttons Rotates selected image left or right 90 degrees. Image Information Button Macintosh Main Buttons These buttons - Canon S10 | Software Starter Guide - Page 62
Troubleshooting the Computer Connection Double-Check: 1. Is the cable between the camera and computer correctly attached? ( p. 7 or p. 40) 2. Is the camera's mode dial turned to the position? ( p. 10 or p. 45) 3. Is the battery charge sufficient? You are recommended to use the AC adapter when - Canon S10 | Software Starter Guide - Page 63
: 01.41.99.70.70 Tél : 01.41.99.77.77 Télécopie : 01.41.99.79.51 Canon Photo Vidéo France S.A. Hotline : 01.49.04.01.00 Télécopie : 01.49.04.01.01 Canon Deutschland GmbH Canon-Hotline-Service Customer-Support: (02151) 349-555 Telefax: (02151) 349-588 Info-Desk Tel: (02151) 349-566 Info-Desk - Canon S10 | Software Starter Guide - Page 64
Road, Central, Hong Kong Phone: 852-2739-0802 Fax: 852-2369-7701 Canon Marketing Services No.1 Jalan Kilang Timor, #09-00, Pacific Tech Centre, Singapore 159303 Phone: (65) 799 8888 Fax: (65) 273 3317 Canon Marketing (Malaysia) Sdn. Bhd. Wisma General Lumber, Block D, Peremba Square, Saujana Resort - Canon S10 | Software Starter Guide - Page 65
To view information on the support options available from Adobe: Windows 1. Use the Microsoft windows Explorer to open the [Support] folder in the PhotoDeluxe Home Edition CD-ROM. 2. Double-click the folder that corresponds to your geographic location. Inside, you will find a file that contains - Canon S10 | Software Starter Guide - Page 66
- Canon S10 | Software Starter Guide - Page 67
- Canon S10 | Software Starter Guide - Page 68
H-IE-034-V1 0100CH4.2 © 2000 CANON INC. PRINTED IN JAPAN
-
 1
1 -
 2
2 -
 3
3 -
 4
4 -
 5
5 -
 6
6 -
 7
7 -
8
-
9
-
10
-
11
-
12
-
13
-
14
-
15
-
16
-
17
-
18
-
19
-
20
-
21
-
22
-
23
-
24
-
25
-
26
-
27
-
28
-
29
-
30
-
31
-
32
-
33
-
34
-
35
-
36
-
37
-
38
-
39
-
40
-
41
-
42
-
43
-
44
-
45
-
46
-
47
-
48
-
49
-
50
-
51
-
52
-
53
-
54
-
55
-
56
-
57
-
58
-
59
-
60
-
61
-
62
-
63
-
64
-
65
-
66
-
67
-
68
 |
 |
Macintosh
Windows
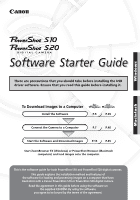
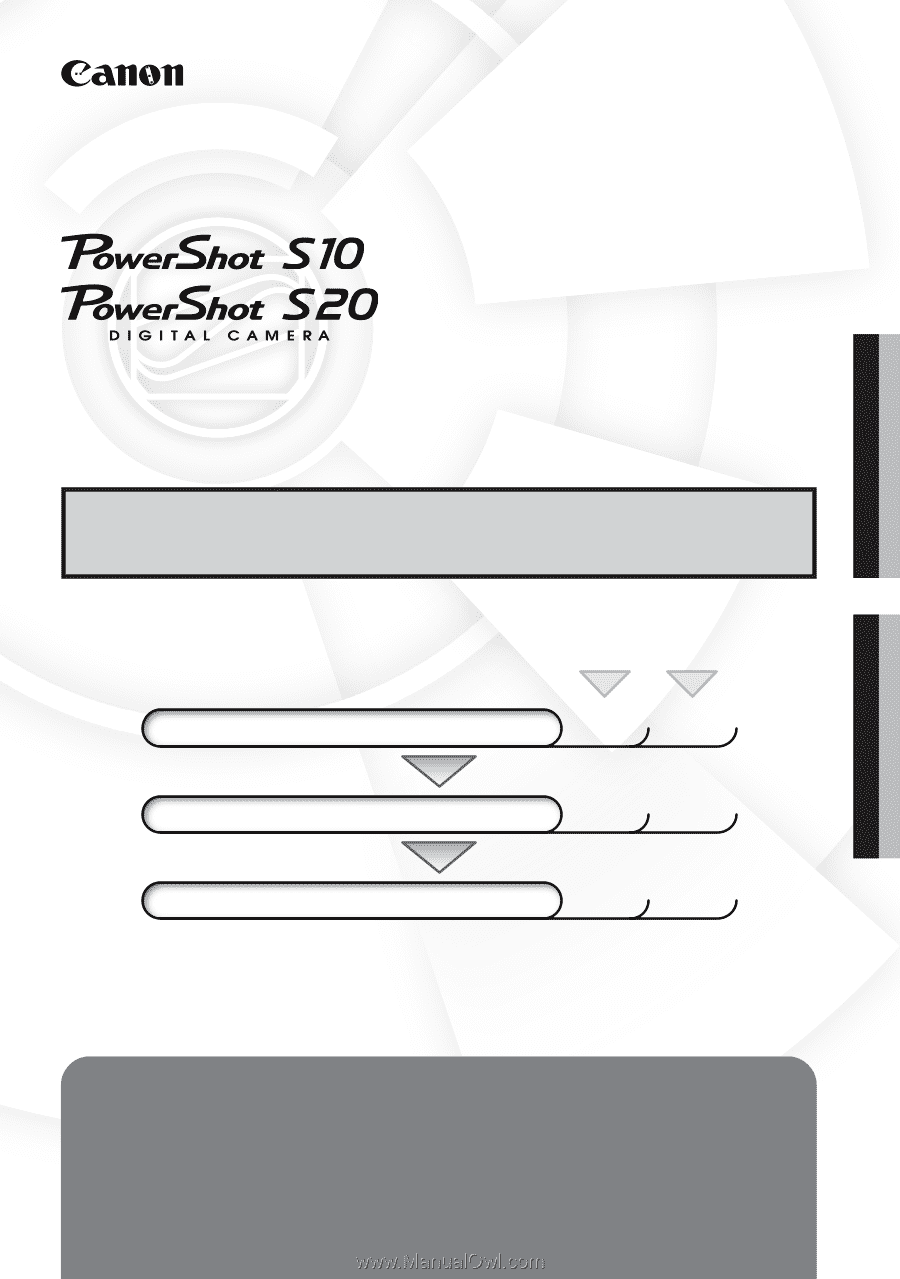
Software Starter Guide
To Download Images to a Computer
for
Windows
for
Macintosh
Install the Software
P.5
P.39
Connect the Camera to a Computer
P.7
P.40
Start the Software and Download Images
P.15
P.45
Start ZoomBrowser EX (Windows) or PowerShot Browser (Macintosh
computers) and load images onto the computer.
This is the software guide for both PowerShot S10 and PowerShot S20 digital cameras.
This guide explains the installation method and features of
the software for loading and processing images on a computer that have
been shot with a Canon PowerShot S10 or PowerShot S20 digital camera.
Read the agreement in this guide before using the software on
the supplied CD-ROM. By using the software,
you agree to be bound by the terms of the agreement.
There are precautions that you should take before installing the USB
driver software. Ensure that you read this guide before installing it.
Software Starter Guide