Canon S520 S520 Quick Start Guide
Canon S520 - S 520 Color Inkjet Printer Manual
 |
View all Canon S520 manuals
Add to My Manuals
Save this manual to your list of manuals |
Canon S520 manual content summary:
- Canon S520 | S520 Quick Start Guide - Page 1
S520 Color Bubble Jet™ Printer Quick Start Guide - Canon S520 | S520 Quick Start Guide - Page 2
, in whole or in part, without the prior written consent of Canon U.S.A., Inc. © 2001 Canon U.S.A., Inc. Disclaimer Canon U.S.A., Inc. has reviewed this manual thoroughly in order that it will be an easy-to-use guide to your Canon S520 Color Bubble Jet Printer. All statements, technical information - Canon S520 | S520 Quick Start Guide - Page 3
9 Adjusting Print Quality 9 Adjusting Color Balance, Intensity and Brightness 12 Changing the Page Setup 14 Saving and Recalling Driver Settings 17 Chapter 3: Printing Maintenance Monitoring Ink Levels 19 Replacing Ink Tanks 20 Printing a Nozzle Check Pattern 20 Cleaning the Printhead 22 - Canon S520 | S520 Quick Start Guide - Page 4
Contents iv - Canon S520 | S520 Quick Start Guide - Page 5
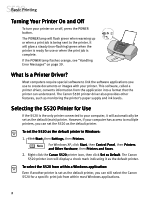
For detailed information, you can view the S520 User's Guide on the Setup Software & User's Guide CDROM. While in the printer driver interface, you can also access online help by pressing F1 in Windows® or turning on Balloon help in Mac® OS. Windows driver features and screen shots described in this - Canon S520 | S520 Quick Start Guide - Page 6
. It will glow a steady (non-flashing) green when the printer is ready for use or when the print job is complete. If the POWER lamp flashes orange, see "Handling Error Messages" on page 39. What Is a Printer Driver? Most computers require special software to link the software applications you use to - Canon S520 | S520 Quick Start Guide - Page 7
page 9.) General Business Printing For everyday paper printing, use plain paper (17 to 28 lb.). Use standard #10 envelopes with your S520 printer. Specialty Media For optimum results, Canon recommends that you use genuine Canon media with your S520 printer. Follow the instructions that come with any - Canon S520 | S520 Quick Start Guide - Page 8
on loading and handling specialty media, see the instructions that come with that media type. Media to Avoid Do not use the following types of media with your S520 as they could produce poor quality print images, or jam or damage the printer: • Paper that is folded, excessively curled, wrinkled or - Canon S520 | S520 Quick Start Guide - Page 9
to 20 sheets up to 30 sheets up to 10 envelopes 1 sheet (print up to 6 sheets) 1 sheet Paper Thickness Canon media: 1. Make sure the paper thickness lever is set correctly for the media used. Print side 2. Slide the paper guide completely to the left. 3. Fan the edges of the sheets to remove - Canon S520 | S520 Quick Start Guide - Page 10
down 5. Slide the paper guide to the edge of the envelopes until firmly in place. 6. From the printer driver interface, select the correct paper size (see "To manually adjust print quality settings in Windows:" on page 10 or "To manually adjust print quality settings in Mac OS:" on page 11). 6 - Canon S520 | S520 Quick Start Guide - Page 11
icon on the taskbar and the dialog box will open. 2. Click Cancel Printing. The print job will be canceled and the paper ejected. To cancel a print job from the S520 print dialog box: When a job is printing on the S520, a print status dialog box displays on your screen. Click Cancel at any time - Canon S520 | S520 Quick Start Guide - Page 12
Settings, then Printers. For Windows XP, click Start, then Control Panel, then Printers and Other Hardware, then Printers and Faxes. 2. Double-click Canon S520, click the print job, then press the Delete key. The print job will be canceled and the paper ejected. To cancel a print job in Mac OS when - Canon S520 | S520 Quick Start Guide - Page 13
Canon media and inks for this printer. The printer driver has a variety of settings that can be used to creatively enhance the colors and output of your documents and graphic presentations. Many of these features are covered in this chapter. For more detailed information, see the S520 User's Guide - Canon S520 | S520 Quick Start Guide - Page 14
and so on). You can also customize the print quality settings if desired. To manually adjust print quality settings in Windows: 1. From an application File menu, click Print. 2. With Canon S520 as the selected printer, click Properties. The Canon S520 Properties dialog box will open to the Main tab - Canon S520 | S520 Quick Start Guide - Page 15
an application File menu, click Print. 2. With Canon S520 as the selected printer, click Properties. The S520 Properties window will open to the Main tab. 3. Click the Print Advisor button, and the wizard dialog box will appear. 4. Follow the on-screen instructions to select the optimum output type - Canon S520 | S520 Quick Start Guide - Page 16
tab. Adjusting Color Balance, Intensity and Brightness You can enhance color printing by adjusting the color balance, intensity (saturation) and brightness. To manually adjust color settings in Windows: 1. From an application File menu, click Print. 2. With Canon S520 as the selected printer, click - Canon S520 | S520 Quick Start Guide - Page 17
how light or dark the image will appear when printed. 10. When done, click OK. To print in black only, select the Grayscale Printing box. This will convert color images to grayscale when printing without changing the original colors in the document. To automatically optimize the image in Windows - Canon S520 | S520 Quick Start Guide - Page 18
. Changing the Page Setup You can change how the image is printed without affecting the original image file. To change page setup in Windows: 1. From an application File menu, click Print. 2. With Canon S520 as the selected printer, click Properties. 3. Click the Page Setup tab. From this tab, you - Canon S520 | S520 Quick Start Guide - Page 19
Printer Paper Size. Scaled Printing Set the scale of the printed image down to 20% or up to 400% of the original. Page Layout Printing Set the number of pages to print want to print a border around each page. Poster Printing Print an oversized image on multiple pages that can then be manually joined - Canon S520 | S520 Quick Start Guide - Page 20
the Save Settings check box. 5. When done, click Print. To change page layout and print order in Mac OS: 1. Make sure that S520 is the selected printer. (Click the Apple icon, click Chooser, then click S520). 2. From an application File menu, click Print. 3. Click Options. You can enter or change - Canon S520 | S520 Quick Start Guide - Page 21
for future use on similar print jobs. To save driver settings in Windows: 1. From an application File menu, click Print. 2. With Canon S520 as the selected printer, click Properties. 3. Make the desired printer driver setting changes. 4. Without exiting the Properties window, click the Profiles tab - Canon S520 | S520 Quick Start Guide - Page 22
then click Default. See the S520 User's Guide on the Setup Software & User's Guide CD-ROM for instructions on removing manual settings and restoring default settings. 6. When done, click Close. To retrieve driver settings in Mac OS: 1. From an application File menu, click Print. 2. Click Apply, then - Canon S520 | S520 Quick Start Guide - Page 23
driver allows you to monitor the level of ink in each ink tank. To check ink levels in Windows: 1. With the printer on, click Start, then Settings, then Printers. For Windows XP, click Start, then Control Panel, then Printers and Other Hardware, then Printers and Faxes. 2. Right-click the Canon S520 - Canon S520 | S520 Quick Start Guide - Page 24
Printing is Off. Replacing Ink Tanks To replace an empty ink tank: 1. With the printer on, open the front cover. The printhead holder will automatically move to the center. 2. Press the tab on the front of the empty ink tank, then remove and discard the empty tank. 3. Remove the new ink tank - Canon S520 | S520 Quick Start Guide - Page 25
tab may vary for Windows NT 4.0, Windows 2000 and Windows XP. 3. Right-click the Canon S520 printer icon and click Properties. 4. Click the Maintenance tab, then click the Nozzle Check button. 5. Click OK to start the nozzle test. The nozzle test pattern will print. 6. When done, click Close - Canon S520 | S520 Quick Start Guide - Page 26
The Canon S520 Printer Utility window will appear. 4. Select Test Print from the drop-down menu. 5. Click the Nozzle Check button. When prompted, click OK. The nozzle test pattern will print. 6. When done, click Close. 7. Examine the printed nozzle check pattern to verify that the ink is consistent - Canon S520 | S520 Quick Start Guide - Page 27
, replace it. See "Monitoring Ink Levels" on page 19. To clean the printhead in Mac OS: 1. Make sure the printer is on. 2. From an application File menu, click Page Setup. 3. Click Utilities. The Canon S520 Printer Utility dialog box will appear. 4. Click the Cleaning button. 5. Select the colors to - Canon S520 | S520 Quick Start Guide - Page 28
tab may vary for Windows NT 4.0, Windows 2000 and Windows XP. Follow the instructions when prompted. 3. Right-click the Canon S520 printer icon, then click Properties. 4. Click the Maintenance tab, then click Print Head Alignment. 5. When asked to start printhead alignment, click OK. 6. Follow - Canon S520 | S520 Quick Start Guide - Page 29
Chapter 4: Using Your Photo Applications Several photo applications come with your Canon S520 that make it easy to organize, view, manipulate and print color photographs. • A browser (ZoomBrowser EX for Windows and ImageBrowser for Mac OS) provides easy viewing of photos and other images stored on - Canon S520 | S520 Quick Start Guide - Page 30
utilities will not be fully functional until your computer has been restarted. To install ImageBrowser and PhotoStitch in Mac OS: 1. Close any open applications. 2. Insert the Setup Software & User's Guide CD-ROM in the CD-ROM drive. Double-click the Canon_BJ icon on your desktop, then double-click - Canon S520 | S520 Quick Start Guide - Page 31
help, or consult the Photo Application Guide on your CD-ROM. To open ImageBrowser in Mac OS: 1. Make sure the images you want to view are on your hard drive or other accessible media. 2. Double-click the Canon ImageBrowser icon on the desktop. 3. From this window - Canon S520 | S520 Quick Start Guide - Page 32
Windows PhotoRecord is a software application that lets you create fun and unique photo albums with the click of your mouse. You can import your photos or graphics from your hard disk, digital camera Programs, then Canon PhotoRecord, then PhotoRecord. 2. By default, the PhotoRecord Print Modes wizard - Canon S520 | S520 Quick Start Guide - Page 33
click the PhotoStitch 3.1 Merge Images icon. The main window will appear. 4. Follow the on-screen instructions to open files, and to arrange, stitch, rotate, enlarge or reduce your images. 5. Once an image is saved, you can preview and/or print it. For a full description of all features and options - Canon S520 | S520 Quick Start Guide - Page 34
your S520 is the Canon Photo Paper Pro for Borderless Printing 4" x 6" media. This paper is designed to let you print images that cover the entire surface of the card without a white border. This media is intended for use with PhotoRecord for Windows, version 1.2 or later, or ImageBrowser for Mac OS - Canon S520 | S520 Quick Start Guide - Page 35
the ZoomBrowser EX for Windows or ImageBrowser for Mac OS, select the photo to be printed. 3. From the Print button pop-up menu, click Layout. The Print Modes wizard will appear. 4. Select the desired printer, then select Borderless Printing (Tiled photo) from the Print Mode options. The Borderless - Canon S520 | S520 Quick Start Guide - Page 36
Using Your Photo Applications 32 - Canon S520 | S520 Quick Start Guide - Page 37
getting an error message from the software (displayed on the screen) or the printer (indicated by flashing lamps). Customer Care Center Canon offers a full range of customer technical support options. If you encounter difficulties during installation or operation of your Canon S520 printer, quickly - Canon S520 | S520 Quick Start Guide - Page 38
. For Windows XP, click Start, then Control Panel, then Printers and Other Hardware, then Printers and Faxes. 2. Double-click msetup.exe. If you install the printer driver by clicking Start, then Run, specify the correct CD-ROM drive and file name (D:\msetup.exe, where D is the CD-ROM drive). Mac OS - Canon S520 | S520 Quick Start Guide - Page 39
will prompt you when to turn the printer back on. Also see the S520 User's Guide on the Setup Software & User's Guide CD-ROM for more information. CD-ROM drive not working properly Windows Use Windows Explorer to confirm that the CD-ROM is operating normally: 1. From the Desktop, double-click My - Canon S520 | S520 Quick Start Guide - Page 40
a print job. If the POWER lamp flashes orange, or green and orange alternately, see "Handling Error Messages" on page 39. Printer/computer incorrectly connected Reconnect the printer cable to the correct port, with the correct cable. See the S520 User's Guide on the Setup Software & User's Guide - Canon S520 | S520 Quick Start Guide - Page 41
20 or "Cleaning the Printhead" on page 22.If cleaning the printhead does not resolve the problem, contact the Customer Care Center to replace it with a new one. Troubleshooting Printed Output Problem Printed colors are incorrect Possible Cause Try This One or more ink tanks installed in the - Canon S520 | S520 Quick Start Guide - Page 42
before it was printed, turn the printer off, then back on again, or Windows 1. Click Start, Settings, Printers. For Windows XP, click Start, then Control Panel, then Printers and Other Hardware, then Printers and Faxes. 2. Double-click Canon S520 and cancel any unfinished print jobs. Mac OS On your - Canon S520 | S520 Quick Start Guide - Page 43
tape has been removed. If re-installing the printhead does not resolve the problem, contact the Customer Care Center to replace it with a new one. 8 orange flashes (waste tank almost full) The printer has a built-in waste ink tank to hold the ink consumed during printhead cleaning. Press the - Canon S520 | S520 Quick Start Guide - Page 44
in the BJ Print Monitor. See the S520 User's Guide on the Setup Software & User's Guide CD-ROM for more information on using the BJ Print Monitor. Error message displays in the BJ Status Monitor Printer is out of paper Ink is low Paper jam Printhead installed incorrectly Windows The BJ Status - Canon S520 | S520 Quick Start Guide - Page 45
Customer Care Center Canon offers a full range of customer technical support* options: • For e-mail technical support, the latest driver downloads and answers to frequently asked questions: www.canontechsupport.com • 24-hour, 7-day-a-week automated support for troubleshooting issues on most - Canon S520 | S520 Quick Start Guide - Page 46
Troubleshooting 42 - Canon S520 | S520 Quick Start Guide - Page 47
on page 44 to remove the existing printer driver before you re-install. To install the printer driver in Windows: For Windows 2000, Windows NT 4.0 or WIndows XP, refer to the README.TXT file on the S520 Setup Software & User's Guide CD-ROM. 1. Turn both the printer and computer off. 2. Make - Canon S520 | S520 Quick Start Guide - Page 48
the on-screen instructions to register you product for future product support. When the registration process is complete, click Exit. 7. Align the printhead. (See "Aligning the Printhead" on page 23.) To install the printer driver in Mac OS: 1. Insert the S520 Setup Software & User's Guide CD-ROM in - Canon S520 | S520 Quick Start Guide - Page 49
to confirm that you want to uninstall the printer driver. 4. Restart your computer. To uninstall the printer driver in Mac OS: 1. Insert the S520 Setup Software & User's Guide CD-ROM in the CD-ROM drive, then click the CD-ROM icon. 2. Open the Printer Driver folder on the CD-ROM, then double-click - Canon S520 | S520 Quick Start Guide - Page 50
10%-90% humidity with no condensation. Never place the printer on a thick carpet or rug. Fibers or dust entering the printer could cause a fire. Keep the power outlet for the printer free electric shock. Never plug the printer power cord into a power outlet (power board, double adapter, etc.) that - Canon S520 | S520 Quick Start Guide - Page 51
. Never subject a printhead or ink tank to shocks or excessive vibration. Shaking could cause ink to leak and stain clothing. Never touch the printhead or electrical contacts on a printhead immediately after removing it from the printer. These metal parts become very hot during printing and could - Canon S520 | S520 Quick Start Guide - Page 52
(specialty media) 2400 x 1200 dpi All print speeds are based on high-speed draft mode. Print speeds will vary depending on system configuration, software, document complexity, print mode and page coverage. Black printing, high: 14 ppm Color printing, high: 9 ppm Bi-directional 8.0 inches max - Canon S520 | S520 Quick Start Guide - Page 53
, Legal, standard #10 and European DL envelopes Custom size: 3.54" to 8.5" (W) x 4.72" x 23" (H) Graphic image printing: Data format: Canon extended mode; raster image format Resolution: Canon extended mode; 600, 1200, 2400 dpi Printhead: Black nozzles: 320 (600 dpi) Color nozzles: 256 (1200 - Canon S520 | S520 Quick Start Guide - Page 54
Appendix Ink Tank BCI-3e: Black ink tank capacity: Ink tank capacities: Resident print control mode: Receiver buffer: Ink colors: Black, Cyan, Magenta, Yellow Approx. 695 sheets (1500 characters per page, normal text, default, plain paper on WIndows 95/98/Me) (Based on ISO JIS-SCID No. 5 Pattern - Canon S520 | S520 Quick Start Guide - Page 55
YOUR EXCLUSIVE REMEDY. Canon offers a full range of customer technical support* options: • For e-mail technical support, the latest driver downloads and answers to frequently asked questions (www.canontechsupport.com) • 24-hour, 7-day-a-week, automated support for troubleshooting issues on most - Canon S520 | S520 Quick Start Guide - Page 56
a pre-paid return waybill), follow the instructions to ship the defective product to a Canon repair facility. You must return the defective product in the shipping carton in which the replacement product was packed (be sure to include your printhead and ink tanks), and you must include the reference - Canon S520 | S520 Quick Start Guide - Page 57
12 C canceling print jobs 7 checking ink levels 19 cleaning the printhead 22 color balance, adjusting 12 color saturation, adjusting 12 customer care center, contacting 41 D default printer, setting 2 driver definition of 2 installing 43 recalling saved settings 17 removing 44 saving - Canon S520 | S520 Quick Start Guide - Page 58
48 T tech support, how to contact 41 thick paper, lever position for 5 troubleshooting 33 error messages 37 installation 34 installing the print driver 34 printer hardware 35 software installation problems 34 turning your printer on and off 2 U uninstalling the print driver 44 V viewing
-
 1
1 -
 2
2 -
 3
3 -
 4
4 -
 5
5 -
 6
6 -
 7
7 -
8
-
9
-
10
-
11
-
12
-
13
-
14
-
15
-
16
-
17
-
18
-
19
-
20
-
21
-
22
-
23
-
24
-
25
-
26
-
27
-
28
-
29
-
30
-
31
-
32
-
33
-
34
-
35
-
36
-
37
-
38
-
39
-
40
-
41
-
42
-
43
-
44
-
45
-
46
-
47
-
48
-
49
-
50
-
51
-
52
-
53
-
54
-
55
-
56
-
57
-
58
 |
 |

S520
S520
S520
S520
Color Bubble Jet
Color Bubble Jet
Color Bubble Jet
Color Bubble Jet
™
Printer
Printer
Printer
Printer
Quick Start Guide
Quick Start Guide
Quick Start Guide
Quick Start Guide