Canon SELPHY CP710 Printer Software Guide Windows (For Canon CP Printer Soluti
Canon SELPHY CP710 Manual
 |
View all Canon SELPHY CP710 manuals
Add to My Manuals
Save this manual to your list of manuals |
Canon SELPHY CP710 manual content summary:
- Canon SELPHY CP710 | Printer Software Guide Windows (For Canon CP Printer Soluti - Page 1
Printer Software Guide (For Canon CP Printer Solution Disk Version 5) Windows 1 - Canon SELPHY CP710 | Printer Software Guide Windows (For Canon CP Printer Soluti - Page 2
Contents Safety Precautions 3 Read This First 4 About the Manuals 4 Printing Flow Diagram 5 Printing ...6 Printing Single Images onto Single Sheets 7 Printing on 8- Correcting and Enhancing Images 18 Printing with Custom Image Layouts 20 Appendix 22 Troubleshooting 22 Error Messages 24 2 - Canon SELPHY CP710 | Printer Software Guide Windows (For Canon CP Printer Soluti - Page 3
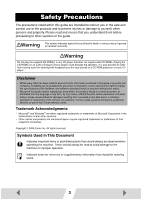
has been made to ensure that the information contained in this guide is accurate and complete, no liability can be accepted for any errors or omissions. Canon reserves the right to change the specifications of the hardware and software described herein at any time without prior notice. • No part of - Canon SELPHY CP710 | Printer Software Guide Windows (For Canon CP Printer Soluti - Page 4
of necessary software and the printer driver, and connection of the printer to your computer. Please read before using the printer. This user guide Describes how to print using the software provided on the supplied CD-ROM (Canon CP Printer Solution Disk). Screen shots from Windows XP are - Canon SELPHY CP710 | Printer Software Guide Windows (For Canon CP Printer Soluti - Page 5
Insert the paper cassette and ink cassette into the printer. See the Printer User Guide. Install the software and printer driver on your computer. Install the necessary software and printer driver on your computer from the CP Printer Solution disk. See the Printer User Guide. Connect the printer to - Canon SELPHY CP710 | Printer Software Guide Windows (For Canon CP Printer Soluti - Page 6
is not a printer problem. • Do not change the spool settings. The status monitor may not function correctly. • For how to install the software, see the Printer User Guide. • Camera information such as scene and photographic conditions are embedded in images captured with cameras compatible with Exif - Canon SELPHY CP710 | Printer Software Guide Windows (For Canon CP Printer Soluti - Page 7
the program. If the [Easy-PhotoPrint] icon does not appear on the desktop, click the [Start] menu and select [Programs] or [All Programs], followed by [Canon Utilities], [Easy-PhotoPrint] and [Easy-PhotoPrint]. 2 Select the folder in which the image you want to print is saved. Follow the displayed - Canon SELPHY CP710 | Printer Software Guide Windows (For Canon CP Printer Soluti - Page 8
around the thumbnail you selected will change to be blue. To change the number of copies, click the [▼] and [▲] buttons under the image. Number of copies 4 Click the [2 Paper Selection] tab, then select the name of the printer model and paper size to use. You can create panoramic images (➡ p.13 - Canon SELPHY CP710 | Printer Software Guide Windows (For Canon CP Printer Soluti - Page 9
the window. Printing starts. If you stop printing while printing is in progress, paper is ejected to the paper handling slot and a printing error may If the ON/OFF button lights red: Temporarily remove paper from the paper handling slot. Turn the printer off and then back on again. Confirm that the - Canon SELPHY CP710 | Printer Software Guide Windows (For Canon CP Printer Soluti - Page 10
the program. If the [Easy-PhotoPrint] icon does not appear on the desktop, click the [Start] menu and select [Programs] or [All Programs], followed by [Canon Utilities], [Easy-PhotoPrint] and [Easy-PhotoPrint]. 2 Select the folder in which the image you want to print is saved. 10 - Canon SELPHY CP710 | Printer Software Guide Windows (For Canon CP Printer Soluti - Page 11
3 Click the image you want to print. The color of the frame around the thumbnail you selected will change to blue. To print the same image on all labels, click the [▼] and [▲] buttons below the image to specify "8". To print different images, make sure the total - Canon SELPHY CP710 | Printer Software Guide Windows (For Canon CP Printer Soluti - Page 12
5 Click the [3 Layout/Print] tab, and then select a layout. 6 Click [Print] in the top right of the window. Printing starts. 12 - Canon SELPHY CP710 | Printer Software Guide Windows (For Canon CP Printer Soluti - Page 13
panoramic images by merging multiple images, and then printing them on wide paper. When you use images captured with a Canon digital camera in Stitch Assist mode, PhotoStitch determines the order and direction of the composition automatically, simplifying the composition process. 1 Click the [Start - Canon SELPHY CP710 | Printer Software Guide Windows (For Canon CP Printer Soluti - Page 14
that is displayed, and then click the [Open] button. 5 Merge the images following the instructions in the guidance panel at the top of the PhotoStitch window. Follow the displayed instructions. 6 Save your panoramic image, and then click the PhotoStitch. 7 Print the panoramic image. to close - Canon SELPHY CP710 | Printer Software Guide Windows (For Canon CP Printer Soluti - Page 15
[Easy-PhotoPrint] icon does not appear on the desktop, click the [Start] menu and select [Programs] or [All Programs], followed by [Canon Utilities], [Easy-PhotoPrint] and [Easy-PhotoPrint]. The Image Selection window is displayed. 2 Select the folder in which the image you want to trim is saved. 15 - Canon SELPHY CP710 | Printer Software Guide Windows (For Canon CP Printer Soluti - Page 16
3 Click the image you want to trim. The color of the frame around the thumbnail you selected will change to blue. 4 Click the [3 Layout/Print] tab, and then click [Trimming]. The trimming dialog box is displayed. 16 - Canon SELPHY CP710 | Printer Software Guide Windows (For Canon CP Printer Soluti - Page 17
5 Select the area you want to print. The area inside the white trimming frame is the area that will be printed. You can drag the edge of the trimming frame to change its size, or drag inside the frame to move it. With borderless printing, a solid red frame indicates the area that will be printed. - Canon SELPHY CP710 | Printer Software Guide Windows (For Canon CP Printer Soluti - Page 18
] icon does not appear on the desktop, click the [Start] menu and select [Programs] or [All Programs], followed by [Canon Utilities], [Easy-PhotoPrint] and [Easy-PhotoPrint]. The Image Selection window is displayed. 2 Select the folder in which the image you want to correct/enhance is saved. 18 - Canon SELPHY CP710 | Printer Software Guide Windows (For Canon CP Printer Soluti - Page 19
/enhancing the selected image is displayed. 4 Correct/enhance the image. Follow the displayed instructions. For details on correction/enhancement, see the [Help] menu. 5 Click [Finish] in the top right of the window to save the corrections/ enhancements and close the corrections/enhancement - Canon SELPHY CP710 | Printer Software Guide Windows (For Canon CP Printer Soluti - Page 20
. 1 Click the [Start] menu and select [Programs] or [All Programs], followed by [Canon PhotoRecord] and [PhotoRecord]. The Fetch Photos window is displayed. 2 Click [Fetch Photos]. Follow the displayed steps. 3 Select an image in the window that is displayed, and then click the [OK] button. 20 - Canon SELPHY CP710 | Printer Software Guide Windows (For Canon CP Printer Soluti - Page 21
Printer properties (for controlling the color and brightness on the Image Adjustment tab) Shows the print image. There are several types of albums. Select the one that suits your needs. Album Type Description One Photo on 8 label sheets. Fixed Size Photo Prints the image at the specified image - Canon SELPHY CP710 | Printer Software Guide Windows (For Canon CP Printer Soluti - Page 22
describes how to troubleshoot problems. If the problem still exists after trying these solutions, restart your computer. If the problem still persists, uninstall the printer driver and then install it again. The printer cannot be selected. Cause : The printer driver is not installed. Correction - Canon SELPHY CP710 | Printer Software Guide Windows (For Canon CP Printer Soluti - Page 23
sure to use the USB cable to connect the printer directly to your computer. If you connect via a USB hub, the printer may not function properly. Cause : To protect is not selected in the [Utilities] tab in the printer driver properties. The color of an image seen on the screen is different from that - Canon SELPHY CP710 | Printer Software Guide Windows (For Canon CP Printer Soluti - Page 24
the information on how to troubleshoot them. • If the error does not go away after you have tried the recommended solutions, consult your nearest Canon Customer Support Help Desk. • Use the information in this section in conjunction with the Printer User Guide. ■ Errors where printing can resume If - Canon SELPHY CP710 | Printer Software Guide Windows (For Canon CP Printer Soluti - Page 25
stop. Cause : The ink cassette is not inserted into the printer. Correction : Insert the ink cassette into the printer. The printer is not ready for printing. Check the printer power and printer connections. Cause : No power is supplied to the printer. Correction : Turn the printer on. Cause : The - Canon SELPHY CP710 | Printer Software Guide Windows (For Canon CP Printer Soluti - Page 26
] to resume, or [Cancel] to stop. Cause : The ink cassette in the printer is not suitable for the print settings. Correction : Insert the correct ink cassette. The specified ink cassette and paper cannot be found. Replace the ink cassette and paper with the specified one. Press [Resume] to resume - Canon SELPHY CP710 | Printer Software Guide Windows (For Canon CP Printer Soluti - Page 27
the printer with the AC adapter (compact power adapter) connected. ■ Errors where printing is canceled If any of the following messages appear, printing is canceled. After using the recommended solution to clear the error, you need to start the print job over again. Paper jammed in printer. Clear - Canon SELPHY CP710 | Printer Software Guide Windows (For Canon CP Printer Soluti - Page 28
USB cable is not properly connected, communication problems may occur. Make sure the USB cable is connected to your computer's root hub port, and then try printing again. Problem with the printer. Turn printer off and back on. Cause : The printer unit was not initialized successfully. Correction
-
 1
1 -
 2
2 -
 3
3 -
 4
4 -
 5
5 -
 6
6 -
 7
7 -
8
-
9
-
10
-
11
-
12
-
13
-
14
-
15
-
16
-
17
-
18
-
19
-
20
-
21
-
22
-
23
-
24
-
25
-
26
-
27
-
28
 |
 |

1
Printer Software Guide
(For Canon CP Printer Solution Disk Version 5)
Windows