Canon SELPHY CP800 SELPHY CP800 Printer User Guide - Page 23
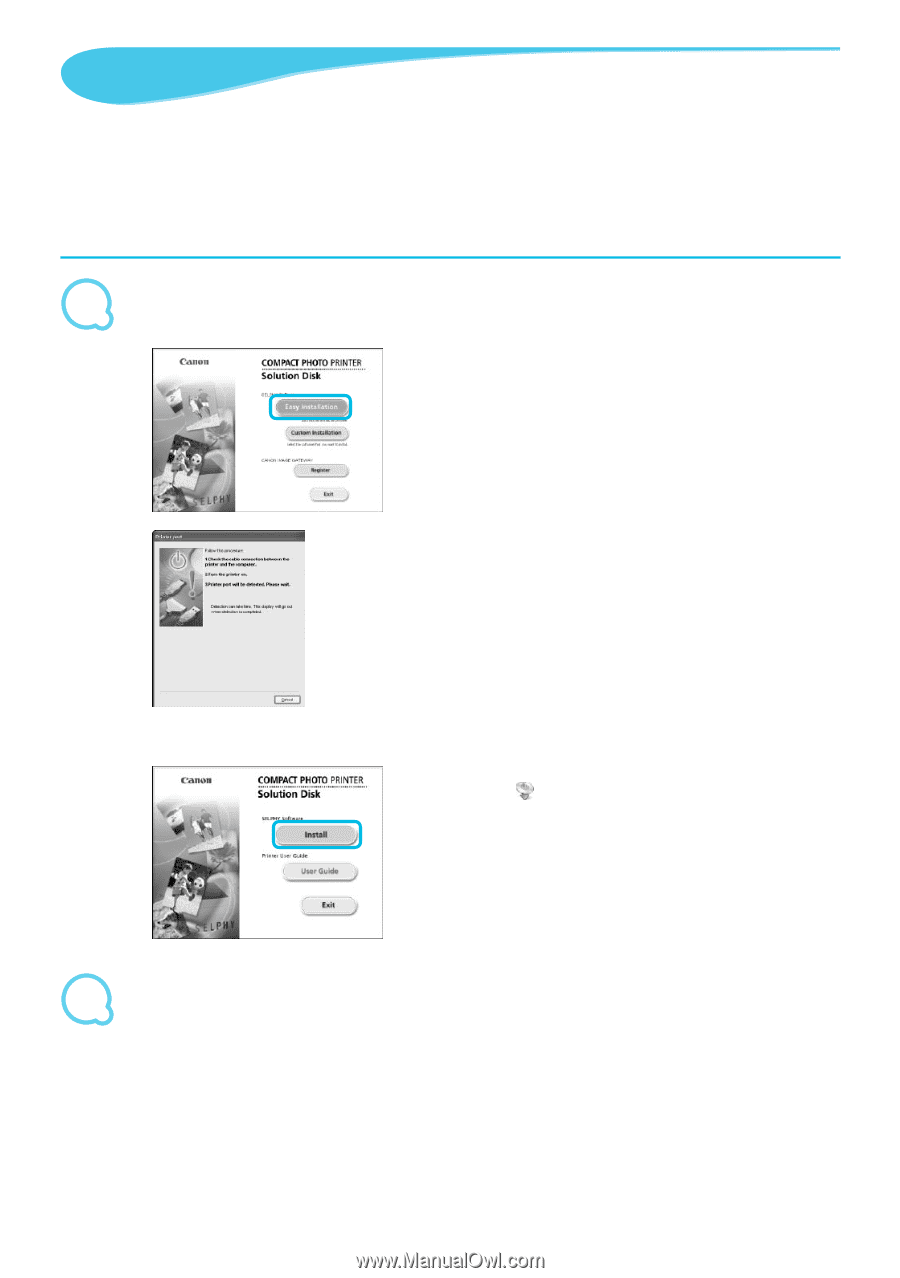
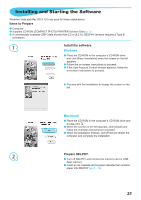
Installing and Starting the Software, Install the software., Prepare SELPHY., Items to Prepare - photo printer
 |
View all Canon SELPHY CP800 manuals
Add to My Manuals
Save this manual to your list of manuals |
Page 23 highlights
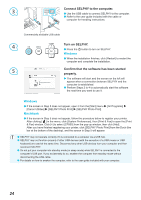
Installing and Starting the Software Windows Vista and Mac OS X 10.5 are used for these explanations. Items to Prepare Computer Supplied CD-ROM (COMPACT PHOTO PRINTER Solution Disk) (p. 2) A commercially available USB Cable shorter than 2.5 m (8.2 ft.) (SELPHY terminal requires a Type B connector). 1 Install the software. Windows Place the CD-ROM in the computer's CD-ROM drive and click [Easy Installation] when the screen on the left appears. Follow the on-screen instructions to proceed. If the User Account Control window appears, follow the on-screen instructions to proceed. Proceed with the installation to display the screen on the left. Macintosh Place the CD-ROM in the computer's CD-ROM drive and double-click . When the screen on the left appears, click [Install] and follow the onscreen instructions to proceed. When the installation finishes, click [Finish] to restart the computer and complete the installation. 2 Prepare SELPHY. Turn off SELPHY and remove the memory card or USB flash memory. Insert an ink cassette and a paper cassette that contains paper into SELPHY (pp. 8 - 10). 23
-
 1
1 -
2
-
3
-
4
-
5
-
6
-
7
-
8
-
9
-
10
-
11
-
12
-
13
-
14
-
15
-
16
-
17
-
 18
18 -
 19
19 -
 20
20 -
 21
21 -
 22
22 -
 23
23 -
 24
24 -
 25
25 -
 26
26 -
 27
27 -
 28
28 -
29
-
30
-
31
-
32
-
33
-
34
-
35
-
36
 |
 |