Canon VIXIA HF R11 VIXIA HF R10/HF R11/HF R100 Instruction Manual - Page 111
Saving and Sharing Yo, r Recording - user manual
 |
View all Canon VIXIA HF R11 manuals
Add to My Manuals
Save this manual to your list of manuals |
Page 111 highlights
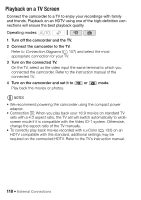
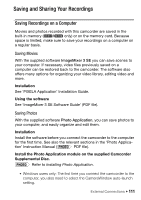
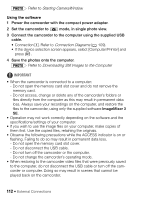
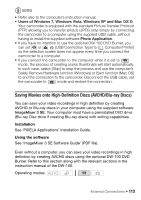
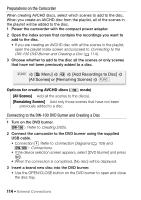
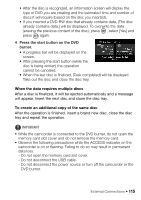
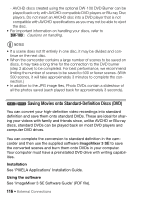
Saving and Sharing Your Recordings Saving Recordings on a Computer Movies and photos recorded with this camcorder are saved in the built-in memory ( / only) or on the memory card. Because space is limited, make sure to save your recordings on a computer on a regular basis. Saving Movies With the supplied software ImageMixer 3 SE you can save scenes to your computer. If necessary, video files previously saved on a computer can be restored back to the camcorder. The software also offers many options for organizing your video library, editing video and more. Installation See 'PIXELA Application' Installation Guide. Using the software See 'ImageMixer 3 SE Software Guide' (PDF file). Saving Photos With the supplied software Photo Application, you can save photos to your computer, and easily organize and edit them. Installation Install the software before you connect the camcorder to the computer for the first time. See also the relevant sections in the 'Photo Application' Instruction Manual ( PHOTO PDF file). Install the Photo Application module on the supplied Camcorder Supplemental Disc. PHOTO Refer to Installing Photo Application. • Windows users only: The first time you connect the camcorder to the computer, you also need to select the CameraWindow auto-launch setting. External Connections Š 111
-
 1
1 -
2
-
3
-
4
-
5
-
6
-
7
-
8
-
9
-
10
-
11
-
12
-
13
-
14
-
15
-
16
-
17
-
18
-
19
-
20
-
21
-
22
-
23
-
24
-
25
-
26
-
27
-
28
-
29
-
30
-
31
-
32
-
33
-
34
-
35
-
36
-
37
-
38
-
39
-
40
-
41
-
42
-
43
-
44
-
45
-
46
-
47
-
48
-
49
-
50
-
51
-
52
-
53
-
54
-
55
-
56
-
57
-
58
-
59
-
60
-
61
-
62
-
63
-
64
-
65
-
66
-
67
-
68
-
69
-
70
-
71
-
72
-
73
-
74
-
75
-
76
-
77
-
78
-
79
-
80
-
81
-
82
-
83
-
84
-
85
-
86
-
87
-
88
-
89
-
90
-
91
-
92
-
93
-
94
-
95
-
96
-
97
-
98
-
99
-
100
-
101
-
102
-
103
-
104
-
105
-
 106
106 -
 107
107 -
 108
108 -
 109
109 -
 110
110 -
 111
111 -
 112
112 -
 113
113 -
 114
114 -
 115
115 -
 116
116 -
117
-
118
-
119
-
120
-
121
-
122
-
123
-
124
-
125
-
126
-
127
-
128
-
129
-
130
-
131
-
132
-
133
-
134
-
135
-
136
-
137
-
138
-
139
-
140
-
141
-
142
-
143
-
144
-
145
-
146
-
147
-
148
-
149
-
150
-
151
-
152
-
153
-
154
-
155
-
156
-
157
-
158
-
159
-
160
-
161
-
162
-
163
-
164
-
165
-
166
-
167
-
168
-
169
-
170
-
171
-
172
-
173
-
174
-
175
-
176
-
177
-
178
-
179
-
180
-
181
-
182
-
183
-
184
 |
 |