Canon VIXIA HF R11 VIXIA HF R10/HF R11/HF R100 Instruction Manual - Page 112
tarting CameraWindow, Connection Diagram, Downloading, till Image, to the Computer - software download
 |
View all Canon VIXIA HF R11 manuals
Add to My Manuals
Save this manual to your list of manuals |
Page 112 highlights
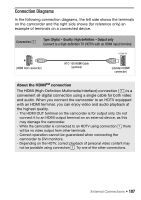
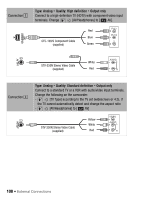
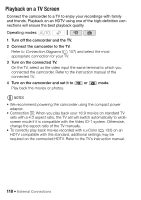
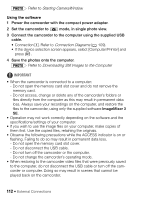
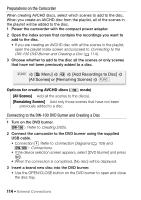
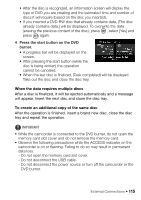
PHOTO Refer to Starting CameraWindow. Using the software 1 Power the camcorder with the compact power adapter. 2 Set the camcorder to mode, in single photo view. 3 Connect the camcorder to the computer using the supplied USB cable. • Connection 4 . Refer to Connection Diagrams ( 109). • If the device selection screen appears, select [Computer/Printer] and press . 4 Save the photos onto the computer. PHOTO Refer to Downloading Still Images to the Computer. IMPORTANT • When the camcorder is connected to a computer: - Do not open the memory card slot cover and do not remove the memory card. - Do not access, change or delete any of the camcorder's folders or files directly from the computer as this may result in permanent data loss. Always save your recordings on the computer, and restore the files to the camcorder, using only the supplied software ImageMixer 3 SE. • Operation may not work correctly depending on the software and the specifications/settings of your computer. • If you wish to use the image files on your computer, make copies of them first. Use the copied files, retaining the originals. • Observe the following precautions while the ACCESS indicator is on or flashing. Failing to do so may result in permanent data loss. - Do not open the memory card slot cover. - Do not disconnect the USB cable. - Do not turn off the camcorder or the computer. - Do not change the camcorder's operating mode. • When restoring to the camcorder video files that were previously saved to the computer, do not disconnect the USB cable or turn off the camcorder or computer. Doing so may result in scenes that cannot be played back on the camcorder. 112 Š External Connections
-
 1
1 -
2
-
3
-
4
-
5
-
6
-
7
-
8
-
9
-
10
-
11
-
12
-
13
-
14
-
15
-
16
-
17
-
18
-
19
-
20
-
21
-
22
-
23
-
24
-
25
-
26
-
27
-
28
-
29
-
30
-
31
-
32
-
33
-
34
-
35
-
36
-
37
-
38
-
39
-
40
-
41
-
42
-
43
-
44
-
45
-
46
-
47
-
48
-
49
-
50
-
51
-
52
-
53
-
54
-
55
-
56
-
57
-
58
-
59
-
60
-
61
-
62
-
63
-
64
-
65
-
66
-
67
-
68
-
69
-
70
-
71
-
72
-
73
-
74
-
75
-
76
-
77
-
78
-
79
-
80
-
81
-
82
-
83
-
84
-
85
-
86
-
87
-
88
-
89
-
90
-
91
-
92
-
93
-
94
-
95
-
96
-
97
-
98
-
99
-
100
-
101
-
102
-
103
-
104
-
105
-
106
-
 107
107 -
 108
108 -
 109
109 -
 110
110 -
 111
111 -
 112
112 -
 113
113 -
 114
114 -
 115
115 -
 116
116 -
 117
117 -
118
-
119
-
120
-
121
-
122
-
123
-
124
-
125
-
126
-
127
-
128
-
129
-
130
-
131
-
132
-
133
-
134
-
135
-
136
-
137
-
138
-
139
-
140
-
141
-
142
-
143
-
144
-
145
-
146
-
147
-
148
-
149
-
150
-
151
-
152
-
153
-
154
-
155
-
156
-
157
-
158
-
159
-
160
-
161
-
162
-
163
-
164
-
165
-
166
-
167
-
168
-
169
-
170
-
171
-
172
-
173
-
174
-
175
-
176
-
177
-
178
-
179
-
180
-
181
-
182
-
183
-
184
 |
 |