Canon VIXIA HF R11 VIXIA HF R10/HF R11/HF R100 Instruction Manual - Page 121
Creating Photo DVD
 |
View all Canon VIXIA HF R11 manuals
Add to My Manuals
Save this manual to your list of manuals |
Page 121 highlights
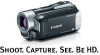
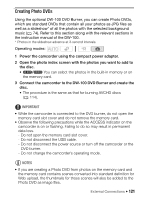
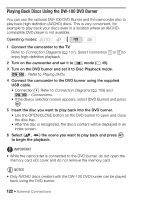
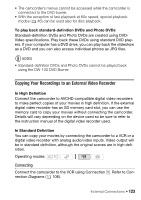
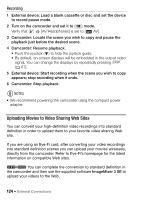
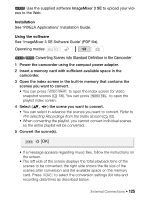
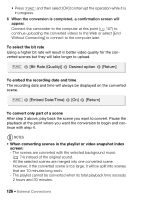
Creating Photo DVDs Using the optional DW-100 DVD Burner, you can create Photo DVDs, which are standard DVDs that contain all your photos as JPG files as well as a slideshow* of all the photos with the selected background music ( 74). Refer to this section along with the relevant sections in the instruction manual of the DW-100. * Photos in the slideshow advance at 3-second intervals. Operating modes: 1 Power the camcorder using the compact power adapter. 2 Open the photo index screen with the photos you want to add to the disc. • / You can select the photos in the built-in memory or on the memory card. 3 Connect the camcorder to the DW-100 DVD Burner and create the disc. • The procedure is the same as that for burning AVCHD discs ( 114). IMPORTANT • While the camcorder is connected to the DVD burner, do not open the memory card slot cover and do not remove the memory card. • Observe the following precautions while the ACCESS indicator on the camcorder is on or flashing. Failing to do so may result in permanent data loss. - Do not open the memory card slot cover. - Do not disconnect the USB cable. - Do not disconnect the power source or turn off the camcorder or the DVD burner. - Do not change the camcorder's operating mode. NOTES • If you are creating a Photo DVD from photos on the memory card and the memory card contains scenes converted into standard definition for Web upload, the thumbnails for those scenes will also be added to the Photo DVD as image files. External Connections Š 121
-
 1
1 -
2
-
3
-
4
-
5
-
6
-
7
-
8
-
9
-
10
-
11
-
12
-
13
-
14
-
15
-
16
-
17
-
18
-
19
-
20
-
21
-
22
-
23
-
24
-
25
-
26
-
27
-
28
-
29
-
30
-
31
-
32
-
33
-
34
-
35
-
36
-
37
-
38
-
39
-
40
-
41
-
42
-
43
-
44
-
45
-
46
-
47
-
48
-
49
-
50
-
51
-
52
-
53
-
54
-
55
-
56
-
57
-
58
-
59
-
60
-
61
-
62
-
63
-
64
-
65
-
66
-
67
-
68
-
69
-
70
-
71
-
72
-
73
-
74
-
75
-
76
-
77
-
78
-
79
-
80
-
81
-
82
-
83
-
84
-
85
-
86
-
87
-
88
-
89
-
90
-
91
-
92
-
93
-
94
-
95
-
96
-
97
-
98
-
99
-
100
-
101
-
102
-
103
-
104
-
105
-
106
-
107
-
108
-
109
-
110
-
111
-
112
-
113
-
114
-
115
-
 116
116 -
 117
117 -
 118
118 -
 119
119 -
 120
120 -
 121
121 -
 122
122 -
 123
123 -
 124
124 -
 125
125 -
 126
126 -
127
-
128
-
129
-
130
-
131
-
132
-
133
-
134
-
135
-
136
-
137
-
138
-
139
-
140
-
141
-
142
-
143
-
144
-
145
-
146
-
147
-
148
-
149
-
150
-
151
-
152
-
153
-
154
-
155
-
156
-
157
-
158
-
159
-
160
-
161
-
162
-
163
-
164
-
165
-
166
-
167
-
168
-
169
-
170
-
171
-
172
-
173
-
174
-
175
-
176
-
177
-
178
-
179
-
180
-
181
-
182
-
183
-
184
 |
 |