Canon VIXIA HF R21 VIXIA HF R20 / HF R21 / HF R200 Instruction Manual
Canon VIXIA HF R21 Manual
 |
View all Canon VIXIA HF R21 manuals
Add to My Manuals
Save this manual to your list of manuals |
Canon VIXIA HF R21 manual content summary:
- Canon VIXIA HF R21 | VIXIA HF R20 / HF R21 / HF R200 Instruction Manual - Page 1
PUB. DIE-0383-000 HD Camcorder Instruction Manual Y - Canon VIXIA HF R21 | VIXIA HF R20 / HF R21 / HF R200 Instruction Manual - Page 2
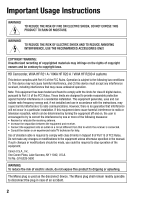
REDUCE ANNOYING INTERFERENCE, USE THE RECOMMENDED ACCESSORIES ONLY. COPYRIGHT WARNING: Unauthorized recording of copyrighted materials may infringe on the rights of copyright owners and be contrary to copyright laws. HD Camcorder, VIXIA HF R21 A / VIXIA HF R20 A / VIXIA HF R200 A systems This device - Canon VIXIA HF R21 | VIXIA HF R20 / HF R21 / HF R200 Instruction Manual - Page 3
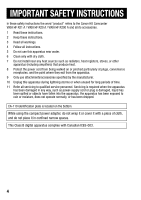
wrong type of batteries are attached. Use only the same type of batteries. • Do not expose batteries or product NO USER-SERVICEABLE PARTS INSIDE. REFER SERVICING TO QUALIFIED SERVICE PERSONNEL. The lightning flash with arrowhead servicing) instructions in the literature accompanying the product. 3 - Canon VIXIA HF R21 | VIXIA HF R20 / HF R21 / HF R200 Instruction Manual - Page 4
the word "product" refers to the Canon HD Camcorder VIXIA HF R21 A / VIXIA HF R20 A / VIXIA HF R200 A and all its accessories. 1 Read these instructions. 2 Keep these instructions. 3 Heed all warnings. 4 Follow all instructions. 5 Do not use this apparatus near water. 6 Clean only with dry - Canon VIXIA HF R21 | VIXIA HF R20 / HF R21 / HF R200 Instruction Manual - Page 5
Microsoft Corporation in the United States and/or other countries. • Macintosh and Mac OS are trademarks of Apple Inc., registered in the U.S. and other UNDER APPLICABLE PATENTS IN THE MPEG-2 PATENT PORTFOLIO, WHICH LICENSE IS AVAILABLE FROM MPEG LA, L.L.C., 250 STEELE STREET, SUITE 300, DENVER, - Canon VIXIA HF R21 | VIXIA HF R20 / HF R21 / HF R200 Instruction Manual - Page 6
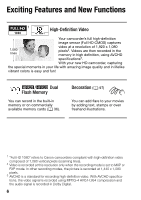
is easy and fun! / Dual Flash Memory You can record in the built-in memory or on commercially available memory cards (0 36). Decoration (0 97) You can add flare to your movies by adding text, stamps or oven freehand illustrations. 1 "Full HD 1080" refers to Canon camcorders compliant with high - Canon VIXIA HF R21 | VIXIA HF R20 / HF R21 / HF R200 Instruction Manual - Page 7
for the scene you want to shoot. You get spectacular recordings every time without worrying about settings. Video Snapshot (0 68) Just point the camcorder and it will automatically select the best settings for your subject Shoot or capture short scenes and arrange them into a video clip set to - Canon VIXIA HF R21 | VIXIA HF R20 / HF R21 / HF R200 Instruction Manual - Page 8
the supplied PIXELA's software (0 119, 125). AVCHD MPEG-2 Convert your HD movies, in the camcorder itself, to standard definition files (0 125). 4 Refer to the instruction manual of the device compatible with the type of card memory used. Depending on the device used, correct playback may not be - Canon VIXIA HF R21 | VIXIA HF R20 / HF R21 / HF R200 Instruction Manual - Page 9
9 - Canon VIXIA HF R21 | VIXIA HF R20 / HF R21 / HF R200 Instruction Manual - Page 10
Exciting Features and New Functions 14 About this Manual 16 Getting to Know the Camcorder 16 Supplied Accessories and CD-ROMs 18 Names of Parts „ Preparations 21 Getting Started 21 Charging the Battery Pack 24 Preparing the Accessories 27 Adjusting the Position and Brightness of the - Canon VIXIA HF R21 | VIXIA HF R20 / HF R21 / HF R200 Instruction Manual - Page 11
64 Image Stabilization 65 Pre-Recording 66 Face Detection 67 Touch & Track 68 Video Snapshot 69 Digital Effects 70 Manual Exposure Adjustment 71 Manual Focus Adjustment 72 Tele-macro 73 White Balance 74 Self Timer 75 Audio Recording Level 77 Using Headphones 80 Selecting - Canon VIXIA HF R21 | VIXIA HF R20 / HF R21 / HF R200 Instruction Manual - Page 12
Recording Mode 108 Selecting Photo Size 109 Slideshow „ External Connections 111 Terminals on the Camcorder 112 Connection Diagrams 114 Playback on a TV Screen 116 Saving and Sharing Your Recordings 116 Copying Recordings to a Memory Card 119 Saving Recordings on a Computer 122 Saving Movies - Canon VIXIA HF R21 | VIXIA HF R20 / HF R21 / HF R200 Instruction Manual - Page 13
147 Appendix: Onscreen Icons and Displays 152 Trouble? 152 Troubleshooting 159 List of Messages 166 Do's and Don'ts 166 Handling Precautions 170 Maintenance/Others 171 Using the Camcorder Abroad 172 General Information 172 Accessories 173 Optional Accessories 176 Product Codes 177 Specifications 182 - Canon VIXIA HF R21 | VIXIA HF R20 / HF R21 / HF R200 Instruction Manual - Page 14
About this Manual Thank you for purchasing the Canon VIXIA HF R21 / VIXIA HF R20 / VIXIA HF R200. Please read this manual carefully before you use the camcorder and retain it for future reference. Should your camcorder fail to operate correctly, refer to Troubleshooting (0 152). Conventions Used - Canon VIXIA HF R21 | VIXIA HF R20 / HF R21 / HF R200 Instruction Manual - Page 15
buttons and switches on the camcorder are indicated within a "button" frame. For example z. The 8 arrow is used to abbreviate menu selections. For a detailed explanation on how to use the menus, refer to Using the Menus (0 32). For a concise summary of all available menu options and settings, refer - Canon VIXIA HF R21 | VIXIA HF R20 / HF R21 / HF R200 Instruction Manual - Page 16
and CD-ROMs The following accessories are supplied with the camcorder: XCA-110 Compact Power Adapter* BP-110 Battery PackW XIFC-300PCU/S USB Cable STV-250N Stereo Video CableW Yellow • Red • White plugs XHTC-100/S HDMI Cable Quick GuideW XStylus Pen * CA-110E including power cord, in Asia. 16 - Canon VIXIA HF R21 | VIXIA HF R20 / HF R21 / HF R200 Instruction Manual - Page 17
Ver.351/Music Data/ Image Mix Data CD-ROM (referred to in this manual as "Camcorder Supplemental Disc") - Instruction Manual - The full-version instruction manual of the camcorder (this PDF file). - Photo Application - Software for saving, managing, and printing photos. - Music data - Music - Canon VIXIA HF R21 | VIXIA HF R20 / HF R21 / HF R200 Instruction Manual - Page 18
(0 125) WEB 3 2 (camera/play) button (0 31) 4 VIDEO SNAP (video snapshot) button (0 68) 5 DISP. (onscreen display) button (0 87)/ BATT. INFO button (0 151) 6 MIC terminal (0 79) 7 USB terminal (0 111, 114) 8 HDMI OUT terminal (0 111, 112) 9 Memory card slot X (0 38) A q Memory card slot - Canon VIXIA HF R21 | VIXIA HF R20 / HF R21 / HF R200 Instruction Manual - Page 19
Front view Top view A k Stereo microphone (0 75) A l Zoom lever (0 47) S q PHOTO button (0 43, 107) S a ACCESS indicator (0 43, 58, 107) S s POWER button S d ON/OFF (CHG) (charge) indicator: Green - ON Orange - Standby (0 49) - Canon VIXIA HF R21 | VIXIA HF R20 / HF R21 / HF R200 Instruction Manual - Page 20
Back view Bottom view S g Speaker (0 52) S h START/STOP button (0 43, 58) S j Tripod socket (0 167) S k Serial number The serial number label is located on the battery compartment cover. S l Battery compartment cover (0 21) D q Battery compartment (0 21) 20 Š Introduction - Canon VIXIA HF R21 | VIXIA HF R20 / HF R21 / HF R200 Instruction Manual - Page 21
with a fully charged battery pack, refer to the tables on page 173. DC IN terminal 1 Plug the compact power adapter into a power outlet. For Asia only: Connect the power cord to the compact power adapter. For Asia only: 2 Connect the compact power adapter to the camcorder's DC IN terminal - Canon VIXIA HF R21 | VIXIA HF R20 / HF R21 / HF R200 Instruction Manual - Page 22
when you turn off the camcorder. After a moment, the ON/OFF (CHG) indicator will start flashing in red (battery pack charging). The red ON/ 4 OFF (CHG) indicator will go out when the battery pack is fully charged. • If the indicator flashes quickly, refer to Troubleshooting (0 152). 5 22 - Canon VIXIA HF R21 | VIXIA HF R20 / HF R21 / HF R200 Instruction Manual - Page 23
and pull out the battery pack. 3 Close the cover and slide it toward the lens until you hear a click. IMPORTANT • Turn off the camcorder before connecting or disconnecting the compact power adapter. After pressing x to turn off the camcorder, important data is updated in the memory. Be sure to wait - Canon VIXIA HF R21 | VIXIA HF R20 / HF R21 / HF R200 Instruction Manual - Page 24
• If remaining battery time is an issue, you can power the camcorder using the compact power adapter so the battery pack will not be consumed. • Charged battery packs continue to discharge naturally. Therefore, charge them on the day of use, or the day before, to ensure a full charge. • We recommend - Canon VIXIA HF R21 | VIXIA HF R20 / HF R21 / HF R200 Instruction Manual - Page 25
Stylus Pen Straps To attach an optional wrist strap Pass the attaching end of the wrist strap through the rear bracket on the camcorder, thread the wrist strap through the loop and fasten. You can also attach the wrist strap to the strap mount on the grip belt to - Canon VIXIA HF R21 | VIXIA HF R20 / HF R21 / HF R200 Instruction Manual - Page 26
To attach an optional shoulder strap Pass the ends of the shoulder strap through the strap mount on the grip belt and adjust the length of the strap. 26 Š Preparations - Canon VIXIA HF R21 | VIXIA HF R20 / HF R21 / HF R200 Instruction Manual - Page 27
Adjusting the Position and Brightness of the LCD Screen Rotating the LCD Panel Open the LCD panel 90 degrees. • You can rotate the panel 90 degrees downward. • You can rotate the panel 180 degrees toward the lens. Rotating the LCD panel 180 degrees can be useful when you wish to include yourself - Canon VIXIA HF R21 | VIXIA HF R20 / HF R21 / HF R200 Instruction Manual - Page 28
With the camcorder on, hold h pressed down for more than 2 seconds. • Repeat this action to switch the LCD backlight between off (normal) Brightness] setting, or dim it with the 6 8 [LCD Screen Dimmer] setting to use in places where the light from the LCD screen can be a nuisance. 28 Š Preparations - Canon VIXIA HF R21 | VIXIA HF R20 / HF R21 / HF R200 Instruction Manual - Page 29
to select a setting from the menus, to select the subject whom the camcorder will recognize as the main subject of the scene, etc. Drag While applying pages or to adjust slider controls like the volume. IMPORTANT • The camcorder uses a pressure-sensitive touch screen. Press firmly when using touch - Canon VIXIA HF R21 | VIXIA HF R20 / HF R21 / HF R200 Instruction Manual - Page 30
Attaching commercially available screen protectors or adhesive film onto the touch screen's surface. Operating Modes Recording The camcorder offers two 43). Recording of movies (0 58) and photos (0 107) while enjoying full access to the menus and advanced functions. * The mode icon displayed - Canon VIXIA HF R21 | VIXIA HF R20 / HF R21 / HF R200 Instruction Manual - Page 31
/play) button to switch the camcorder between camera (recording) mode and playback mode. You can press S when the camcorder is off to turn it on directly in playback mode. Operating mode Onscreen icon Operation Press S Press S, touch [b] and then [2 Photos] Playing back movies (0 50). - Canon VIXIA HF R21 | VIXIA HF R20 / HF R21 / HF R200 Instruction Manual - Page 32
camcorder's functions can be adjusted from the FUNC. panel and the setup menus. In mode, however, most menus can- not be accessed and, except in a few cases, most menu settings will return to their default values. For details about the available operations that are available and then touch - Canon VIXIA HF R21 | VIXIA HF R20 / HF R21 / HF R200 Instruction Manual - Page 33
the desired menu. 4 Drag your finger up and down to bring the setting you want to change into the orange selection bar. • Menu items not available appear grayed out. • When the desired menu item appears, you can touch it to bring it down to the orange bar. 5 When the desired menu - Canon VIXIA HF R21 | VIXIA HF R20 / HF R21 / HF R200 Instruction Manual - Page 34
-hour clock (AM/PM). 6 Touch [OK] to start the clock and close the setup screen. NOTES • When you do not use the camcorder for about 3 months, the built-in rechargeable lithium battery may discharge completely and the date and time setting may be lost. In such case, recharge the built-in lithium - Canon VIXIA HF R21 | VIXIA HF R20 / HF R21 / HF R200 Instruction Manual - Page 35
Changing the Language The default language of the camcorder is English. You can set it to one of 27 languages. Operating modes: [FUNC.]* 8 [MENU] 8 6 8 [Language a] 8 Desired language 8 [OK] 8 [a] * Only when performing the procedure in a - Canon VIXIA HF R21 | VIXIA HF R20 / HF R21 / HF R200 Instruction Manual - Page 36
with the Camcorder You can use commercially available Secure Digital (SD) cards with this camcorder. However, depending on the memory card, - - Recording movies - N* N SDHC memory cards Over 2 GB N SDXC memory cards Over 32 GB N * Depending on the memory card used, it may not be possible to - Canon VIXIA HF R21 | VIXIA HF R20 / HF R21 / HF R200 Instruction Manual - Page 37
), it will take longer to write data on the memory and recording may stop. Save your recordings and initialize the memory. Eye-Fi Cards This product is not guaranteed to support Eye-Fi card functions (including wireless transfer). In case of an issue with an Eye-Fi card, please check with the card - Canon VIXIA HF R21 | VIXIA HF R20 / HF R21 / HF R200 Instruction Manual - Page 38
cards before using them with this camcorder. 1 Turn off the camcorder. Make sure the ON/OFF (CHG) indicator is off. 2 Open the double memory card slot cover. 3 Insert the memory card into one of the memory card slots. • You can also use two memory cards, one in each memory card slot. • Insert the - Canon VIXIA HF R21 | VIXIA HF R20 / HF R21 / HF R200 Instruction Manual - Page 39
card Y)* 8 [a] [FUNC.] 8 [MENU] 8 8 8 [Rec Media for Movies] or [Rec Media for Photos] 8 [4] (memory card X) or [7] (memory card Y)* 8 [a] * When selecting the memory, you can check the approximate available recording time, based on currently used settings. NOTES • / Select to record movies in - Canon VIXIA HF R21 | VIXIA HF R20 / HF R21 / HF R200 Instruction Manual - Page 40
memory you are using becomes full while recording movies, the recording will continue auto- matically on a memory card. When recording on memory card X, you can use memory [a] * The approximate available recording time will now reflect the combined space in the memories used for relay recording. - Canon VIXIA HF R21 | VIXIA HF R20 / HF R21 / HF R200 Instruction Manual - Page 41
camcorder for the first time. You can also initialize a memory card or the built-in memory (/ only) to permanently delete all the recordings it contains. / At the time of purchase, the built-in memory camcorder until the initialization is completed. 2 Initialize the memory of the memory. 3 If - Canon VIXIA HF R21 | VIXIA HF R20 / HF R21 / HF R200 Instruction Manual - Page 42
save important recordings in advance using an external device (0 116). • Initializing a memory card will permanently erase any music and Camcorder Supplemental Disc to a memory card after it is initialized. For details, refer to the Software Guide (PDF file) of the supplied software. - Mac - Canon VIXIA HF R21 | VIXIA HF R20 / HF R21 / HF R200 Instruction Manual - Page 43
to use basic shooting functions like zoom and Quick Start. To enjoy full access to menus and more advanced functions, refer to the relevant chapters for camcorder. • By default, movies and photos are recorded in the built-in memory (/ only) or on memory card X ( ). You can select the memory - Canon VIXIA HF R21 | VIXIA HF R20 / HF R21 / HF R200 Instruction Manual - Page 44
j fully. The ACCESS indicator will flash as the photo is being recorded. When you have finished recording 1 Make sure that the ACCESS indicator is off. 2 Turn off the camcorder. 3 Close the LCD panel. About the Smart AUTO mode • Only the following functions are available in this mode. - Zoom (0 47 - Canon VIXIA HF R21 | VIXIA HF R20 / HF R21 / HF R200 Instruction Manual - Page 45
• When shooting in mode, the camcorder will automatically detect certain characteristics of the subject, background, lighting conditions, etc. It will then adjust various settings (focus, exposure, color, image stabilization, image quality, among others), selecting the best settings for the - Canon VIXIA HF R21 | VIXIA HF R20 / HF R21 / HF R200 Instruction Manual - Page 46
while the ACCESS indicator is on or flashing. Failing to do so may result in permanent data loss or damage to the memory. - Do not open the double memory card slot cover. - Do not disconnect the power source or turn off the camcorder. - Do not change the camcorder's operating mode. • Be sure to save - Canon VIXIA HF R21 | VIXIA HF R20 / HF R21 / HF R200 Instruction Manual - Page 47
[Advanced] [Digital] 20x 28x2 400x 1 When taking photos, only optical zoom is available. 2 24x when [Image Stabilizer] (FUNC. panel) is set to [P Dynamic]. ways you can zoom in and out: using the zoom lever on the camcorder or using the zoom controls on the touch screen. Using the Zoom Lever - Canon VIXIA HF R21 | VIXIA HF R20 / HF R21 / HF R200 Instruction Manual - Page 48
wide angle, you can focus on a subject as close as 1 cm (0.39 in.). • When using tele-macro (0 72) and the camcorder is at full telephoto, you can focus on a subject as close as 40 cm (1.3 ft.). • When recording at maximum advanced zoom, the video quality is equivalent to high - Canon VIXIA HF R21 | VIXIA HF R20 / HF R21 / HF R200 Instruction Manual - Page 49
if the LCD panel is closed while the ACCESS indicator is on or flashing, or while a menu is being displayed. The camcorder may also not enter standby mode if the LCD panel is closed when the battery charge is too low. Check that the ON/ OFF (CHG) indicator changes to orange. • About standby mode - Canon VIXIA HF R21 | VIXIA HF R20 / HF R21 / HF R200 Instruction Manual - Page 50
Video This chapter covers functions related to movies, including playback, advanced shooting, advanced functions and scene operations. For details about basic video shooting, refer to Smart AUTO Mode (0 43). Basic Playback Playing Back the Video To play back scenes based on their rating, see Playing - Canon VIXIA HF R21 | VIXIA HF R20 / HF R21 / HF R200 Instruction Manual - Page 51
page*. D Drag your finger right for the previous index page*. E Select a different index screen to read different content or from a different memory (0 54). F 3D Flip View (0 54) G [Edit] panel H Timeline (0 80) I Divider indicating a change of recording date. * While browsing through index pages - Canon VIXIA HF R21 | VIXIA HF R20 / HF R21 / HF R200 Instruction Manual - Page 52
During playback: A Stop the playback. B Jump to the beginning of the scene. Double-tap to jump to the previous scene. C Pause the playback. D Touch to show volume and audio balance controls. Drag your finger left and right along the bar to adjust. For [Music Balance], adjust toward [c] to increase - Canon VIXIA HF R21 | VIXIA HF R20 / HF R21 / HF R200 Instruction Manual - Page 53
precautions while the ACCESS indicator is on or flashing. Failing to do so may result in permanent data loss. - Do not open the double memory card slot cover. - Do not disconnect the power source or turn off the camcorder. - Do not change the camcorder's operating mode. • You may not be able to - Canon VIXIA HF R21 | VIXIA HF R20 / HF R21 / HF R200 Instruction Manual - Page 54
Content to Play Back From the index selection screen you can select the content you want to play back (original scenes or photos on the memory card, for example). You can also select the memory from which you want to play back your recordings. Operating modes: 54 Š Video - Canon VIXIA HF R21 | VIXIA HF R20 / HF R21 / HF R200 Instruction Manual - Page 55
] Display the photo index screen. [u SD Movies] / only. When a memory card is selected, displays scenes that were converted to standard defini- tion to upload them to the Web (0 125). NOTES • Fast/slow playback modes are not available for scenes converted to standard definition. Scenes in the - Canon VIXIA HF R21 | VIXIA HF R20 / HF R21 / HF R200 Instruction Manual - Page 56
Deleting Scenes You can delete those scenes that you are not interested in keeping. Deleting scenes allows you also to free up space on the memory. See also Deleting Scenes and Stories from the Gallery (0 90). Operating modes: 1 In the date index screen, open the screen that contains the scenes you - Canon VIXIA HF R21 | VIXIA HF R20 / HF R21 / HF R200 Instruction Manual - Page 57
- Do not change the camcorder's operating mode. NOTES • Deleting a scene from the gallery screen or date index screen will delete that scene permanently from the camcorder. • To delete all movies and make all recordable space available again you may prefer to initialize the memory (0 41). Video Š 57 - Canon VIXIA HF R21 | VIXIA HF R20 / HF R21 / HF R200 Instruction Manual - Page 58
[ Review Recording] IMPORTANT • Observe the following precautions while the ACCESS indicator is on or flashing. Failing to do so may result in permanent data loss or damage to the memory. - Do not open the double memory card slot cover. - Do not disconnect the power source or turn off the camcorder - Canon VIXIA HF R21 | VIXIA HF R20 / HF R21 / HF R200 Instruction Manual - Page 59
recordings regularly (0 116), especially after making important recordings. Canon shall not be liable for any loss or corruption of Quality (Recording Mode) The camcorder offers 5 recording modes. Changing the recording mode will change the recording time available on the memory. Select MXP or FXP - Canon VIXIA HF R21 | VIXIA HF R20 / HF R21 / HF R200 Instruction Manual - Page 60
min. memory2 16 GB Memory card 1 hr. 25 min. 2 hr. 5 min. 2 hr. 50 min. 4 hr. 45 min. 6 hr. 5 min. 32 GB Memory card/ Built-in memory contains about 70 MB of music files and 5 MB of image files. 3 A single scene can be recorded continuously for 12 hours; at that point, the camcorder - Canon VIXIA HF R21 | VIXIA HF R20 / HF R21 / HF R200 Instruction Manual - Page 61
and Programmed AE Recording in a very bright ski resort or capturing the full colors of a sunset or a fireworks display becomes as easy as selecting : auto exposure) recording program. With this recording program, the camcorder automatically adjusts the shutter speed and aperture while you are able - Canon VIXIA HF R21 | VIXIA HF R20 / HF R21 / HF R200 Instruction Manual - Page 62
Options ( Default value) [FPortrait] The camcorder uses a large aperture, to achieve a sharp focus on the subject while the subject being underexposed. [KSunset] To record sunsets in vibrant colors. [p Low Light] To record in low-light situations. [LSpotlight] To record spotlit scenes. 62 Š Video - Canon VIXIA HF R21 | VIXIA HF R20 / HF R21 / HF R200 Instruction Manual - Page 63
• [p Low Light]: - Moving subjects may leave a trailing afterimage. - Picture quality may not be as good as in other modes. - White points may appear on the screen. - Autofocus may not work as well as in other modes. In such case, adjust the focus manually. • [M Fireworks]: - To avoid camcorder blur - Canon VIXIA HF R21 | VIXIA HF R20 / HF R21 / HF R200 Instruction Manual - Page 64
Available for movies only. [FUNC.] 8 [Image Stabilizer] 8 Desired IS mode 8 [a] Options ( Default value) [P Dynamic] Compensates for a higher degree of camcorder all blur if the camcorder or subject is moving too much. • The image stabilizer may not work well on subjects with low contrast, with a - Canon VIXIA HF R21 | VIXIA HF R20 / HF R21 / HF R200 Instruction Manual - Page 65
off pre-recording. 2 Press g. The scene recorded in the memory will start 3 seconds before g was pressed. NOTES • While pre-recording is activated, the camcorder will not emit any notifi- cation sounds. • The camcorder will not record the full 3 seconds prior to pressing g if the button was pressed - Canon VIXIA HF R21 | VIXIA HF R20 / HF R21 / HF R200 Instruction Manual - Page 66
Face Detection The camcorder automatically detects people's faces and uses this information to select the optimal settings for beautiful videos and photos. Operating modes: POINTS TO CHECK • Select a recording program other than [q Night Scene], [p Low Light] or [M Fireworks]. By default, face - Canon VIXIA HF R21 | VIXIA HF R20 / HF R21 / HF R200 Instruction Manual - Page 67
zoom. • When face detection is activated, the slowest shutter speed used by the camcorder is 1/30 (1/24 if the frame rate is set to [E PF24]). Touch as your pet, a moving vehicle or people not facing the camera directly, you can use Touch & Track to keep your subject insufficient lighting. Video Š 67 - Canon VIXIA HF R21 | VIXIA HF R20 / HF R21 / HF R200 Instruction Manual - Page 68
video snapshot scenes to 2 or 8 seconds with the 8 8 [Video Snapshot Length] setting. • When the camcorder stops recording, the screen will momentarily turn black as if a camera shutter had released. NOTES • Changing the camcorder's operating mode will deactivate the video snapshot mode. 68 Š Video - Canon VIXIA HF R21 | VIXIA HF R20 / HF R21 / HF R200 Instruction Manual - Page 69
to activate the fader only once, or every time you press g to begin or end a scene. * Only these digital effects are available when taking photos. NOTES • By default, the camcorder fades from or to a black screen but you can change it to a white screen using the 7 8 [Fader Setting] setting. • When - Canon VIXIA HF R21 | VIXIA HF R20 / HF R21 / HF R200 Instruction Manual - Page 70
will flash and the exposure will be adjusted automatically so the area you touched will be correctly exposed. You have the option to further adjust the exposure manually as necessary. • The manual adjustment dial appears and the adjustment value is set at ±0. • Touch [y] to return the camcorder to - Canon VIXIA HF R21 | VIXIA HF R20 / HF R21 / HF R200 Instruction Manual - Page 71
work well on the following subjects. In such case, focus manually. • Reflective surfaces • Subjects with low contrast or without vertical lines • Fast moving subjects • Through wet windows • Night scenes Operating modes: * * Available for movies only. POINTS TO CHECK • Adjust the zoom before - Canon VIXIA HF R21 | VIXIA HF R20 / HF R21 / HF R200 Instruction Manual - Page 72
changes to V. 4 Touch [a] to lock the focus at the selected distance. During manual focus, [MF] will appear on the screen. NOTES • While the optional Wide- [FUNC.] 8 [ZOOM] 8 [ ]* 8 [a] * Touch again to deactivate tele-macro. • The camcorder will zoom to full telephoto automatically. 72 Š Video - Canon VIXIA HF R21 | VIXIA HF R20 / HF R21 / HF R200 Instruction Manual - Page 73
at full telephoto. White Balance The white balance function helps you to accurately reproduce colors under different lighting conditions so camcorder at a white object, so it fills the whole screen, and touch [Set WB]. When the adjustment is completed, g stops flashing and disappears. The camcorder - Canon VIXIA HF R21 | VIXIA HF R20 / HF R21 / HF R200 Instruction Manual - Page 74
Type] to a setting other than [Digital]. - Reset the white balance when you change locations or the lighting or other conditions change. - Depending on the light source, g may keep flashing. The result will still be better than with [Y Automatic]. • Custom white balance may provide better results - Canon VIXIA HF R21 | VIXIA HF R20 / HF R21 / HF R200 Instruction Manual - Page 75
's operating mode. - Setting the camcorder to standby mode. Audio Recording Level You can adjust the audio recording level of the built-in or an external microphone. You can display the audio level indicator while recording. Operating modes: 1 Open the manual audio recording level adjustment screen - Canon VIXIA HF R21 | VIXIA HF R20 / HF R21 / HF R200 Instruction Manual - Page 76
] setting is [A On], an audio level indicator for the built-in microphone ( ) and external audio source ( ) will be displayed. 3 Touch [a] to lock the display it also when the audio level is adjusted automatically. [FUNC.] 8 [c Mic. Level] 8 [z Automatic] 8 [Audio Level Indicator] 8 [a] NOTES • When - Canon VIXIA HF R21 | VIXIA HF R20 / HF R21 / HF R200 Instruction Manual - Page 77
to the AV OUT/X terminal, which is used for both the headphones and the audio/video output. Before connecting the headphones, follow the procedure below to change the function of the terminal from AV output to X (headphones) output. Operating modes: * * Headphones can be used - Canon VIXIA HF R21 | VIXIA HF R20 / HF R21 / HF R200 Instruction Manual - Page 78
by the camcorder's built-in microphone alone. You can also combine the sound from the wireless microphone and built-in microphone as you record. Receiver unit MIcrophone unit For details on operating the WM-V1 Wireless Microphone, refer to the wireless microphone's instruction manual. 78 Š Video - Canon VIXIA HF R21 | VIXIA HF R20 / HF R21 / HF R200 Instruction Manual - Page 79
Using other microphones Connect the external microphone to the MIC terminal. Use commercially available condenser microphones with their own power supply. You can connect almost any stereo microphone with a ∅ 3.5 mm plug but audio recording levels may vary. Selecting the Type of Audio Input Perform - Canon VIXIA HF R21 | VIXIA HF R20 / HF R21 / HF R200 Instruction Manual - Page 80
an external microphone is connected to the camcorder, 7 8 [Wind Screen] will automatically be set to [B Off Z]. • If the audio level is too high and the sound gets distorted, turn on the microphone attenuator with the 7 8 [Microphone Attenuator] setting or adjust the audio recording level manually - Canon VIXIA HF R21 | VIXIA HF R20 / HF R21 / HF R200 Instruction Manual - Page 81
A Touch twice to return to the index screen. B Previous/next scene. C Drag your finger left along the ruler to display the next 5 frames. D Current scene / Total number of scenes. E Scene's recording mode and length. F Recording date and time. G Drag your finger right along the ruler to display the - Canon VIXIA HF R21 | VIXIA HF R20 / HF R21 / HF R200 Instruction Manual - Page 82
music. You can use one of the supplied music tracks or connect an external audio player to use your favorite songs as background music. You the memory cards, you will need to transfer the music tracks to the corresponding memory card in advance. For details, refer to the Software Guide (PDF file) - Canon VIXIA HF R21 | VIXIA HF R20 / HF R21 / HF R200 Instruction Manual - Page 83
A Select the desired music track. B Adjust toward [1] to increase the level of the original audio; adjust toward [b] to increase the level of background music. Set the level in the middle for an equal mix of both. C Delete the music track selected. D Listen to the music track selected. Touch again - Canon VIXIA HF R21 | VIXIA HF R20 / HF R21 / HF R200 Instruction Manual - Page 84
favorite songs as background music by connecting an external player. POINTS TO CHECK • You will need a commercially available audio cable with at least one mini-stereo plug (to connect to the MIC terminal on the camcorder); the other end will depend on external player used). 1 Open the date index - Canon VIXIA HF R21 | VIXIA HF R20 / HF R21 / HF R200 Instruction Manual - Page 85
input as necessary. • Start the music playback on the external player and adjust its volume according to the onscreen indications. When the audio input is in the correct range, stop the music playback and touch [a] on the camcorder. • Touch [External Player Link] to link the video playback to the - Canon VIXIA HF R21 | VIXIA HF R20 / HF R21 / HF R200 Instruction Manual - Page 86
For example, if the volume of external player is too low or if the audio signal contains a lot of noise, etc. - When you connect the MIC terminal to the audio outputs on the external player and cannot adjust the strength of the signal, the camcorder will automatically decrease the volume of the - Canon VIXIA HF R21 | VIXIA HF R20 / HF R21 / HF R200 Instruction Manual - Page 87
automatically but will not remove onscreen displays that were turned on manually (for example, onscreen markers or the audio level meter). ** scene or photo recorded, the camcorder keeps a data code (date/time of recording, information about the camera setup, etc.). You can select memory. Video Š 87 - Canon VIXIA HF R21 | VIXIA HF R20 / HF R21 / HF R200 Instruction Manual - Page 88
Operating modes: [FUNC.] 8 [MENU] 8 [8] 8 [Rate Scenes (Recording)] 8 [A On] 8 [a] • Select [B Off] to deactivate rating scenes after recording. After you finish recording a scene, you can select one of the following rating marks for the scene. [ ], [ ], [ ]: Rates the scene with three, two - Canon VIXIA HF R21 | VIXIA HF R20 / HF R21 / HF R200 Instruction Manual - Page 89
Rating Scenes During Playback 1 Play back from the gallery the story that contains the scenes you want to rate. 2 During playback of a scene you want to rate, pause the playback and rate the scene. Touch the screen 8 [C] 8 [Edit] 8 [Rating] 8 Desired rating 8 [a] 3 Touch [A] to resume the playback - Canon VIXIA HF R21 | VIXIA HF R20 / HF R21 / HF R200 Instruction Manual - Page 90
a new story. [ ] (create new story) 8 [Yes] • Touch [No] to exit without creating a new story. NOTES • Including [Unsorted] and [Video Snapshot], a memory can contain a maximum of 100 stories. • [Unsorted] and [Video Snapshot] cannot be deleted. Deleting Scenes and Stories from the Gallery You can - Canon VIXIA HF R21 | VIXIA HF R20 / HF R21 / HF R200 Instruction Manual - Page 91
To delete individual scenes 1 From the gallery screen, select the story that contains the scene to delete. 2 Delete the scene. [Scene List] 8 Orange frame that appears to the right of the desired scene 8 [d] 8 [Yes] 8 [OK] 8 [f] • The scene is deleted and the gallery screen appears. To delete scenes - Canon VIXIA HF R21 | VIXIA HF R20 / HF R21 / HF R200 Instruction Manual - Page 92
is deleted and the gallery screen appears. IMPORTANT • Deleting a scene from the gallery screen or date index screen will delete that scene permanently from the camcorder. Moving or Copying Scenes in the Gallery Move scenes in the gallery (individually or by rating) to play them back in the order of - Canon VIXIA HF R21 | VIXIA HF R20 / HF R21 / HF R200 Instruction Manual - Page 93
4 Touch [Move] or [Copy]. Thumbnails of each story (except for [Unsorted] and [Video Snapshot]) will appear. 5 Touch the thumbnail of the story where you want to move or copy the scenes. If you are moving or copying scenes to an empty story, skip to step 7. 6 Drag your finger up and down to select - Canon VIXIA HF R21 | VIXIA HF R20 / HF R21 / HF R200 Instruction Manual - Page 94
from which you want to capture the video snapshot scene. 2 Play back the desired scene. 3 Press g to capture the video snapshot scene. The camcorder captures the video snapshot scene for about 4 seconds (the blue frame serves as a visual progress bar), and then enters playback pause mode. You can - Canon VIXIA HF R21 | VIXIA HF R20 / HF R21 / HF R200 Instruction Manual - Page 95
Press j fully. 4 Touch [B] to return to the index screen. IMPORTANT • When capturing photos on an Eye-Fi card in memory card slot Y, photos will be uploaded automatically when the camcorder is in playback mode if you are within the range of a configured network. Always verify that Eye-Fi cards have - Canon VIXIA HF R21 | VIXIA HF R20 / HF R21 / HF R200 Instruction Manual - Page 96
time of recording of the original scene. • Photos captured from a scene with a lot of fast movement may be blurred. • Photos will be recorded on the memory selected for recording photos. Dividing Scenes You can divide scenes in order to leave out the best parts and later cut out the rest. Operating - Canon VIXIA HF R21 | VIXIA HF R20 / HF R21 / HF R200 Instruction Manual - Page 97
that are too short (less than 3 seconds). - Scenes that were edited using the supplied software PIXELA's VideoBrowser and were then written back to the camcorder. • Scenes cannot be divided within 1 second from the beginning or the end of the scene. Decorating Scenes Add a new level of enjoyment to - Canon VIXIA HF R21 | VIXIA HF R20 / HF R21 / HF R200 Instruction Manual - Page 98
when the LCD panel is stowed with the LCD screen facing away from the camcorder. In such case, make sure 6 8 [Autostart Decoration] is set to you can save the canvas. However, only one canvas can be saved per memory. C [Animated Stamps]: You can select animated stamps to include in your decoration - Canon VIXIA HF R21 | VIXIA HF R20 / HF R21 / HF R200 Instruction Manual - Page 99
1 While the canvas is displayed, touch [ ]. 2 Touch [Save] 8 [Yes]. • The current [Pens and Stamps] decorations are saved. • Only one canvas can be saved to the memory. The canvas is saved to the built-in - Canon VIXIA HF R21 | VIXIA HF R20 / HF R21 / HF R200 Instruction Manual - Page 100
a [Pens and Stamps] decoration 1 While the canvas is displayed, touch [ ]. 2 Touch [Load] 8 [Yes]. The [Pens and Stamps] decorations saved to the memory are loaded and appear on the canvas. To use ([Animated Stamps]) 1 Touch [ ]. The [Animated Stamps] screen will appear. 2 Select the desired stamp - Canon VIXIA HF R21 | VIXIA HF R20 / HF R21 / HF R200 Instruction Manual - Page 101
Mixing Your Own Images with Live Video You can use images you make on your computer for the image mix (Chroma Key) function. Make sure that the image you want to use has a blue or green area, which will be replaced by the live video using Chroma Key mixing. Refer to About the image files for the - Canon VIXIA HF R21 | VIXIA HF R20 / HF R21 / HF R200 Instruction Manual - Page 102
palette. 3 Touch [ ]. The screen will return to normal. NOTES • If the memory that contains the canvas is initialized, the canvas will be deleted. • When the [Animated section. • The image mix function is not available when decorating scenes during playback or scenes being converted to standard definition. - Canon VIXIA HF R21 | VIXIA HF R20 / HF R21 / HF R200 Instruction Manual - Page 103
Photos Refer to this chapter for details on taking and viewing photos. For details about basic photo shooting, refer to Smart AUTO Mode (0 43). Basic Playback Viewing Photos Operating modes: 1 Press S. 2 Open the [Photos] index screen. [b] 8 [2 Photos] 3 Look for the photo you want to play back. - Canon VIXIA HF R21 | VIXIA HF R20 / HF R21 / HF R200 Instruction Manual - Page 104
the next index page. D Drag your finger right for the previous index page. E Select a different index screen to read different content or from a different memory (0 54). 4 Touch the photo you wish to view. • The photo is displayed in single photo view. • Drag your finger left/right to browse through - Canon VIXIA HF R21 | VIXIA HF R20 / HF R21 / HF R200 Instruction Manual - Page 105
while the ACCESS indicator is on or flashing. Failing to do so may result in permanent data loss. - Do not open the double memory card slot cover. - Do not disconnect the power source or turn off the camcorder. - Do not change the camcorder's operating mode. • The following image files may - Canon VIXIA HF R21 | VIXIA HF R20 / HF R21 / HF R200 Instruction Manual - Page 106
Deleting Photos from the Index Screen From the index screen, you can delete selected photos or all photos. 1 Open the [Photos] index screen. [b] 8 [Photos] 2 Select the photos to delete. [Edit] 8 [Delete] 8 Desired option If you selected [Select], touch the photos to delete and then touch [OK]. A - Canon VIXIA HF R21 | VIXIA HF R20 / HF R21 / HF R200 Instruction Manual - Page 107
Turn on the camcorder. • / By default, photos are recorded in the built-in memory. You can set the memory card as the recording or more AF frames will appear. 3 Press j fully. The ACCESS indicator will flash as the photo is being recorded. When you have finished recording 1 Make sure that - Canon VIXIA HF R21 | VIXIA HF R20 / HF R21 / HF R200 Instruction Manual - Page 108
flashing. Failing to do so may result in permanent data loss. - Do not open the double memory card slot cover. - Do not disconnect the power source or turn off the camcorder. - Do not change the camcorder digital zoom is activated (light blue area on the Options Large capacity memory cards, like those - Canon VIXIA HF R21 | VIXIA HF R20 / HF R21 / HF R200 Instruction Manual - Page 109
recorded will vary depending on the subject and shooting conditions. • The camcorder retains the last setting used even if you set the cam- . Hide the playback controls if necessary. Slideshow not linked to the external audio 3 Touch the screen to display the playback controls, then touch [A] - Canon VIXIA HF R21 | VIXIA HF R20 / HF R21 / HF R200 Instruction Manual - Page 110
can also use the following functions... The following functions and features of the camcorder can be used either for shooting video or for taking photos. The way Face detection (0 66) • Digital effects (0 69) • Manual exposure adjustment (0 70) • White balance (0 73) • Self timer (0 74) 110 Š - Canon VIXIA HF R21 | VIXIA HF R20 / HF R21 / HF R200 Instruction Manual - Page 111
explains how to connect your camcorder to an external device such as a TV, VCR, or computer. Terminals on the Camcorder 1 USB Terminal Access: Open the LCD panel. 2 HDMI OUT Terminal* Access: Open the LCD panel. The HDMI OUT terminal offers a high-quality digital connection that combines audio - Canon VIXIA HF R21 | VIXIA HF R20 / HF R21 / HF R200 Instruction Manual - Page 112
the highest quality. - The HDMI OUT terminal on the camcorder is for output only. Do not connect it to an HDMI output terminal on an external device, as this may damage the camcorder. - While the camcorder is connected to an HDTV using connection A, there will be no video output from other terminals - Canon VIXIA HF R21 | VIXIA HF R20 / HF R21 / HF R200 Instruction Manual - Page 113
. Change the following settings on the camcorder: - y/z 8 [TV Type] according to the TV set (widescreen or 4:3), if the TV cannot automatically detect and change the aspect ratio - 6 8 [AV/Headphones] to [H AV] STV-250N Stereo Video Cable (supplied) Yellow White Red External Connections Š 113 - Canon VIXIA HF R21 | VIXIA HF R20 / HF R21 / HF R200 Instruction Manual - Page 114
for your TV. 3 Turn on the connected TV. On the TV, select as the video input the same terminal to which you connected the camcorder. Refer to the instruction manual of the connected TV. 4 Turn on the camcorder and set it to or mode. Play back the movies or photos. 114 Š External Connections - Canon VIXIA HF R21 | VIXIA HF R20 / HF R21 / HF R200 Instruction Manual - Page 115
on an HDTV compatible with this standard, additional settings may be required on the connected HDTV. Refer to the TV's instruction manual. • We recommend powering the camcorder using the compact power adapter. • Connection C: When you play back your 16:9 movies on standard TV sets with a 4:3 aspect - Canon VIXIA HF R21 | VIXIA HF R20 / HF R21 / HF R200 Instruction Manual - Page 116
( / only) or the 4 tab to copy scenes from memory card X. • To copy all the scenes recorded on a specific date, select the index page that contains scenes from that date. 2 Touch the scenes to copy. [Edit] 8 [Copy (f97)] ( / (497)] 8 Desired option only) or [Copy 116 Š External Connections - Canon VIXIA HF R21 | VIXIA HF R20 / HF R21 / HF R200 Instruction Manual - Page 117
single photo view, select the photo you want to copy. Check that you are viewing photos recorded in the built-in memory (/ only) or on memory card X. 2 Touch the screen to display the playback controls. 3 Copy the photo. [Edit] 8 [Copy (f97)] ( / (497)] 8 [i Proceed] 8 [Yes] only) or [Copy - Canon VIXIA HF R21 | VIXIA HF R20 / HF R21 / HF R200 Instruction Manual - Page 118
in memory card slot Y, photos will be uploaded automatically when the camcorder is in playback mode if you are within the range of a configured network. Always verify that Eye-Fi cards have been approved in the country/region of use. See also Using an Eye-Fi card (0 131). 118 Š External Connections - Canon VIXIA HF R21 | VIXIA HF R20 / HF R21 / HF R200 Instruction Manual - Page 119
and other information. Installation Install the supplied software before you connect the camcorder to the computer for the first time. See the Installation Guide for PIXELA's software. Using the software Refer to the Software Guide (PDF file) of the supplied software. External Connections Š 119 - Canon VIXIA HF R21 | VIXIA HF R20 / HF R21 / HF R200 Instruction Manual - Page 120
. Installation Install the software before you connect the camcorder to the computer for the first time. See also the relevant sections in the 'Photo Application' Instruction Manual (r PDF file) in the [MANUALS_ENGLISH] folder on the supplied Camcorder Supplemental Disc. 120 Š External Connections - Canon VIXIA HF R21 | VIXIA HF R20 / HF R21 / HF R200 Instruction Manual - Page 121
Diagrams (0 112). 4 Save the photos onto the computer. r Refer to Downloading Still Images to the Computer. IMPORTANT • When the camcorder is connected to a computer: - Do not open the double memory card slot cover and do not remove the memory cards. - Do not access, change or delete any of the - Canon VIXIA HF R21 | VIXIA HF R20 / HF R21 / HF R200 Instruction Manual - Page 122
also to the computer's instruction manual. • Users of Windows 7, Windows Vista, Windows XP and Mac OS X: Your cam- corder is equipped with the standard Picture Transfer Protocol (PTP) allowing you to transfer photos (JPEG only) simply by connecting the camcorder to a computer using the supplied - Canon VIXIA HF R21 | VIXIA HF R20 / HF R21 / HF R200 Instruction Manual - Page 123
other than [All (for PC only)]. • Camcorder: When the connection is successfully established, [USB Connection] appears on the screen. Recording Details will vary depending on the device used so be sure to refer to the instruction manual of the digital video recorder. External Connections Š 123 - Canon VIXIA HF R21 | VIXIA HF R20 / HF R21 / HF R200 Instruction Manual - Page 124
output will be in standard definition, although the original scenes are in high definition. Connecting Connect the camcorder to the VCR using Connection C. Refer to Connection Diagrams (0 112). Recording 1 External device: Load a blank media and set the device to record pause mode. 2 Turn on - Canon VIXIA HF R21 | VIXIA HF R20 / HF R21 / HF R200 Instruction Manual - Page 125
the compact power adapter. 2 Make sure there is a memory card in slot Y with sufficient available space. 3 Open the date index screen. • After pressing [b], select the f tab to convert scenes from the built-in memory or the 4 tab to convert scenes from memory card X. External Connections Š 125 - Canon VIXIA HF R21 | VIXIA HF R20 / HF R21 / HF R200 Instruction Manual - Page 126
screen will appear. Connect the camcorder to the computer Connecting] to connect to the computer later. Options [Date] Converts all scenes recorded on the date displayed on the control button. [Select] Converts all scenes that you select. [All Scenes] Converts all scenes. 126 Š External Connections - Canon VIXIA HF R21 | VIXIA HF R20 / HF R21 / HF R200 Instruction Manual - Page 127
SD Movies] index screen (0 54). 1 Power the camcorder using the compact power adapter. 2 Make sure there is a memory card in slot Y with sufficient available space. 3 From the gallery screen, select the story [All] to convert all the scenes in the story. 7 Touch [f]. External Connections Š 127 - Canon VIXIA HF R21 | VIXIA HF R20 / HF R21 / HF R200 Instruction Manual - Page 128
Without Connecting] in step 7 from Converting Scenes into Standard Definition from the Date Index Screen (0 126), make sure you switch to a date index screen before connecting the camcorder to a computer. See 'PIXELA's VideoBrowser Software Guide' (PDF file) for details. 128 Š External Connections - Canon VIXIA HF R21 | VIXIA HF R20 / HF R21 / HF R200 Instruction Manual - Page 129
SD movies to the Web. For details about using the software, click [Help] to open the Software Guide (PDF file). • VideoBrowser: Click in the menu panel to start transferring files. For details about using the software, click to open the Software Guide (PDF file). External Connections Š 129 - Canon VIXIA HF R21 | VIXIA HF R20 / HF R21 / HF R200 Instruction Manual - Page 130
setup in advance. Refer to the instruction manual of the Eye-Fi card. Please read the IMPORTANT section (0 131) before using an Eye-Fi card. 1 Insert your Eye-Fi card into memory card slot Y and make sure there is sufficient available space on the memory card. 2 Convert the desired movies (0 125 - Canon VIXIA HF R21 | VIXIA HF R20 / HF R21 / HF R200 Instruction Manual - Page 131
an Eye-Fi Card, the ACCESS indicator may flash from time to time. • Wirelessly uploading files is not possible when the Eye-Fi card is in memory card slot X (the Eye-Fi icon will not appear on the screen). Be sure to insert the Eye-Fi card into memory card slot Y. External Connections Š 131 - Canon VIXIA HF R21 | VIXIA HF R20 / HF R21 / HF R200 Instruction Manual - Page 132
], [p Low Light], [L Spotlight], [M Fireworks] [ Decoration]* [ Pens and Stamps], z [ Animated Stamps], [J Date and Time], [ ] (image mix), [ ] (freeze screen), [ ] (minimize toolbar) [m White Balance] [Y Automatic], [a Daylight], - [d Tungsten], [g Custom WB] [X Focus] 2 (manual focus - Canon VIXIA HF R21 | VIXIA HF R20 / HF R21 / HF R200 Instruction Manual - Page 133
control, z Tele-macro: Toggle on or off [c Mic. Level]* [z Automatic], [y Manual] - [Audio Level Indicator]: Toggle on or off [ Pre REC]* [A On], [B Off] - [ Review Recording]* Play back the last 4 seconds of the last - movie recorded. * Not available for photos. 0 z 70 z 47, 72 z - Canon VIXIA HF R21 | VIXIA HF R20 / HF R21 / HF R200 Instruction Manual - Page 134
>, [Select], - [Convert HDUSD [All Scenes] (f97)]* - 125 [Convert HDUSD (497)]* [Delete] [Divide] , [Select], [This Scene], [This Scene] 56 [All Scenes] [All Scenes] - - z 96 * Not available for recordings on memory card B (7 tab). 134 Š Additional Information - Canon VIXIA HF R21 | VIXIA HF R20 / HF R21 / HF R200 Instruction Manual - Page 135
rating> - - 93 [Copy] - z - 92 [Move] - z - 92 [Divide] - - z 96 [Rating] - [ ], [ ], [ ], 87 unrated), [ ] 1 Not available for recordings on memory card B (7 tab). 2 Not available for [Unsorted] or [Video Snapshot]. Edit Panel - Mode Control Button / [Copy (f97 - Canon VIXIA HF R21 | VIXIA HF R20 / HF R21 / HF R200 Instruction Manual - Page 136
Setup Menus 7 Camera Setup Menu item Setting options 0 [Zoom Type] [Optical], [Advanced], [Digital Microphone [O Automatic], [A On V] - Attenuator]* [MIC Terminal Input]* [ External Audio], [ Microphone] 79 [Audio Mix]* [B Off], [A On] 75 When [A On] - audio balance bar * Not available - Canon VIXIA HF R21 | VIXIA HF R20 / HF R21 / HF R200 Instruction Manual - Page 137
by wind or if you want to record low-frequency sounds, we recommend setting the wind screen to [B Off Z]. [Microphone Attenuator]: Helps prevent audio distortions. [O Automatic]: The camcorder will automatically activate the microphone attenuator as necessary for optimal audio recording levels - Canon VIXIA HF R21 | VIXIA HF R20 / HF R21 / HF R200 Instruction Manual - Page 138
TV], [G Wide TV] 120 z z 82 z z 84 zz - - z 109 zz - * Option not available when the camcorder is connected to an HDTV using the supplied HDMI cable. [Data Code]: Displays the date and/or time when the scene was recorded. [L Camera Data]: Displays the aperture (f-stop) and shutter speed used when - Canon VIXIA HF R21 | VIXIA HF R20 / HF R21 / HF R200 Instruction Manual - Page 139
8 Recording & Connections Setup Menu item [Self Timer] [Video Snapshot Length]* [Rate Scenes (Recording)]* [Rec Media for Movies]* Setting options [A On n], [B Off] [i 2 sec], [j 4 sec], [l 8 sec] [A On], [B Off] / [f] (built-in memory), [4] (memory card X), [7] (memory card Y) 120 z - - 74 z z - - Canon VIXIA HF R21 | VIXIA HF R20 / HF R21 / HF R200 Instruction Manual - Page 140
memory capacity listed in the Specifications. [x.v.Color]: Uses a color space with an extended gamut to achieve deeper colors, closer to real life. • Use this function to record video only when you intend to play back your recordings on an HDTV compatible with x.v.Color, connected to the camcorder - Canon VIXIA HF R21 | VIXIA HF R20 / HF R21 / HF R200 Instruction Manual - Page 141
Photo numbers will restart from 101-0101 every time you insert a new memory card. [b Continuous]: Photo numbers will continue from the number following that of the last photo recorded with the camcorder. • If the memory card you insert already contains a photo with a larger number, a new photo will - Canon VIXIA HF R21 | VIXIA HF R20 / HF R21 / HF R200 Instruction Manual - Page 142
Off] [LCD Mirror Image] [AV/Headphones]1 [A On], [B Off] [H AV], [J Headphones] [Volume]1 Speaker: , r Headphone: , e [Notification Sounds] [N High Volume], [M Low Volume], [B Off] [Autostart Decoration]1 [A On], [B Off] [Power Saving Mode] [Auto Power Off]: [B Off], [A On] [Quick Start - Canon VIXIA HF R21 | VIXIA HF R20 / HF R21 / HF R200 Instruction Manual - Page 143
Date/Time] [Date/Time]: - z z z 34 [Battery Info] [Control for HDMI]2 [Date Format]: [Y.M.D], [M.D,Y], available for photos. 2 Option not available when the camcorder is connected to an HDTV using the sup- plied HDMI cable. 3 Option available only after having inserted an Eye-Fi card in memory - Canon VIXIA HF R21 | VIXIA HF R20 / HF R21 / HF R200 Instruction Manual - Page 144
appear also on the screen of a TV or monitor connected to the camcorder. [LCD Brightness]: Adjusts the brightness of the LCD Saving Mode]: Controls the camcorder's automatic power off settings. [Auto Power Off]: In order to save power when the camcorder is powered by a battery pack, it will - Canon VIXIA HF R21 | VIXIA HF R20 / HF R21 / HF R200 Instruction Manual - Page 145
to the TV's instruction manual. • Correct operation of the HDMI-CEC function cannot be guaranteed even when connecting the camcorder to compatible TV sets Output]: When the camcorder is connected using an HDMI connection to a television that supports 1080p output, the camcorder will convert 1080i - Canon VIXIA HF R21 | VIXIA HF R20 / HF R21 / HF R200 Instruction Manual - Page 146
power adapter if you leave it turned on without a memory card for more than 5 minutes. • To cancel the demo mode once it has started, press any button or turn off the camcorder. [Firmware]: You can verify the current version of the camcorder's firmware. This menu option is usually unavailable. 146 - Canon VIXIA HF R21 | VIXIA HF R20 / HF R21 / HF R200 Instruction Manual - Page 147
mode) 1 Control button: Open the FUNC. panel (0 32) 2 Smart AUTO mode (0 43) 3 Onscreen zoom controls (0 48) 4 Operating mode (0 30) 5 In record pause mode: Total number of scenes 6 Memory operation (0 151) 7 Image stabilizer (0 64) 8 Remaining battery time (0 151) 9 Zoom (0 47) A q Recording mode - Canon VIXIA HF R21 | VIXIA HF R20 / HF R21 / HF R200 Instruction Manual - Page 148
pause mode gA Recording program (0 61, 63) A h Manual exposure (0 70) jA N Autofocus, MF Manual focus (0 71) A k Face detection (0 66) A time 4, 7 On memory card X or Y f In the built-in memory* 3*, 5 Relay recording (0 40) * / only. S j Tele-macro (0 72) S k Microphone attenuator (0 137) - Canon VIXIA HF R21 | VIXIA HF R20 / HF R21 / HF R200 Instruction Manual - Page 149
Recording Photos (in Flexible Recording mode) D d Self timer (0 74) fD Number of available photos 4, 7 On memory card X or Y / f In the built-in memory D g Displays the aperture (f-stop) and shutter speed used. D h Focus and exposure lock (0 43, 107) Playing Movies (during playback) D j - Canon VIXIA HF R21 | VIXIA HF R20 / HF R21 / HF R200 Instruction Manual - Page 150
Viewing Photos gF Control button: Open the setup menus (0 136) hF Current photo / Total number of photos jF Photo number (0 141) F k Photo jump (0 104) F l Slideshow (0 109) G q Switch to [Photos] index screen (0 103) 150 Š Additional Information - Canon VIXIA HF R21 | VIXIA HF R20 / HF R21 / HF R200 Instruction Manual - Page 151
reverse playback, E Frame advance*, F Frame reverse*. * Available only when dividing scenes. 7 Remaining battery time • The icon shows a rough estimate of the remaining charge as a 100% 75% 50% 25% 0% percentage of the full charge of the battery pack. The remaining recording/playback time - Canon VIXIA HF R21 | VIXIA HF R20 / HF R21 / HF R200 Instruction Manual - Page 152
be charged using this camcorder. - This can occur when attaching and attempting to charge a battery pack that is not recommended by Canon. - When using a battery pack recommended by Canon, there may be a problem with the battery pack or camcorder. Consult a Canon Service Center. 152 Š Additional - Canon VIXIA HF R21 | VIXIA HF R20 / HF R21 / HF R200 Instruction Manual - Page 153
the end of its battery life. Buy a new battery pack. Recording Pressing g will not start recording. - You cannot record while the camcorder is writing previous recordings onto the memory (while the ACCESS indicator is on or flashing). Wait until the camcorder has finished. - The memory is full or it - Canon VIXIA HF R21 | VIXIA HF R20 / HF R21 / HF R200 Instruction Manual - Page 154
the gallery. - The memory is full. Delete some recordings (0 memory card used is too slow. Use a recommended memory card (0 36). When playing scenes/a slideshow linked to external audio, the video playback is not correctly linked to the external player. - The volume of external player may be too low - Canon VIXIA HF R21 | VIXIA HF R20 / HF R21 / HF R200 Instruction Manual - Page 155
so the remaining battery time cannot be displayed. 4 / 7 lights up in red. - A memory card error occurred. Turn off the camcorder. Remove and reinsert the memory card. Initialize the memory card if the display does not change back to normal. - The memory card is full. Replace the memory card or - Canon VIXIA HF R21 | VIXIA HF R20 / HF R21 / HF R200 Instruction Manual - Page 156
the microphone attenuator (0 137) or adjust the audio recording level manually (0 75). The picture is displayed correctly but there is no sound from the built-in speaker. - Speaker volume is turned off. Adjust the volume. - If the STV-250N Stereo Video Cable is connected to the camcorder, disconnect - Canon VIXIA HF R21 | VIXIA HF R20 / HF R21 / HF R200 Instruction Manual - Page 157
Memory Card and Accessories Cannot insert the memory card. - The memory card was not facing the correct direction. Turn the memory card over and insert it. Cannot record on the memory card. - The memory card is full. Delete some recordings (0 56, 105) to free some space or replace the memory card. - Canon VIXIA HF R21 | VIXIA HF R20 / HF R21 / HF R200 Instruction Manual - Page 158
TV sets compatible with HDMI-CEC the range of functions available differs depend- ing on the type of TV. Refer to the instruction manual of the connected TV. The computer does not recognize the camcorder even though the camcorder is connected correctly. - Disconnect the USB cable and turn off the - Canon VIXIA HF R21 | VIXIA HF R20 / HF R21 / HF R200 Instruction Manual - Page 159
for use with this camcorder. - If you are using a battery pack recommended by Canon for use with this camcorder, there may be a problem with the camcorder or battery pack. Consult a Canon Service Center. / Cannot convert - Cannot access the memory card. Check the memory card and make sure it - Canon VIXIA HF R21 | VIXIA HF R20 / HF R21 / HF R200 Instruction Manual - Page 160
from the story (0 90). Cannot enter standby mode now - The camcorder cannot enter standby mode if the remaining battery charge is too low. Charge or replace the battery pack (0 21). Cannot load canvas - The canvas data in the memory is corrupted. - Cannot load canvas data saved with another device - Canon VIXIA HF R21 | VIXIA HF R20 / HF R21 / HF R200 Instruction Manual - Page 161
card with this camcorder (0 41). Cannot record - You cannot capture video snapshot scenes from scenes recorded or edited using another device. - There is a problem with the memory. If this message appears often without apparent reason, contact a Canon Service Center. / Cannot record Cannot access - Canon VIXIA HF R21 | VIXIA HF R20 / HF R21 / HF R200 Instruction Manual - Page 162
card (0 105) or initialize it (0 41). Initialize only using the camcorder - There is a problem with the file system that prevents accessing the selected memory. Initialize the memory with this camcorder (0 41). LCD Screen has been dimmed - Hold h pressed for 2 seconds to restore the LCD screen - Canon VIXIA HF R21 | VIXIA HF R20 / HF R21 / HF R200 Instruction Manual - Page 163
There are no scenes in the memory selected. Have fun shooting some video (0 43). Not enough available space - Delete some recordings on the memory card (0 56, 105) or Scenes recorded using another device cannot be divided with this camcorder. Select the desired scene number - A number of scenes - Canon VIXIA HF R21 | VIXIA HF R20 / HF R21 / HF R200 Instruction Manual - Page 164
cannot be copied. Task in progress. Do not disconnect the power source. - The camcorder is updating the memory. Wait until the operation ends and do not disconnect the compact power adapter or remove the battery pack. There are no scenes with the selected rating - The story does not contain - Canon VIXIA HF R21 | VIXIA HF R20 / HF R21 / HF R200 Instruction Manual - Page 165
Delete gallery data? - The gallery data on the selected memory is not supported by this camcorder. Playback is possible but you recording and editing is not. end the connection. - When the camcorder is in mode and is connected to the computer with the supplied USB cable, the camcorder cannot be - Canon VIXIA HF R21 | VIXIA HF R20 / HF R21 / HF R200 Instruction Manual - Page 166
to an external device such as a computer or digital video recorder (0 116) and save them on a regular basis. This will protect your important recordings in case of damage and create more free space on the memory. Canon shall not be liable for any data loss. • Do not carry the camcorder by the LCD - Canon VIXIA HF R21 | VIXIA HF R20 / HF R21 / HF R200 Instruction Manual - Page 167
as necessary. Long-term storage If you do not intend to use the camcorder for a long time, store it in a place free of dust, in low humidity, and at temperatures not higher than 30 °C (86 °F). Battery Pack DANGER! Treat the battery pack with care. • Keep it away from fire (or it might explode - Canon VIXIA HF R21 | VIXIA HF R20 / HF R21 / HF R200 Instruction Manual - Page 168
optional CG-110 Battery Charger. • We recommend using genuine Canon battery packs bearing the Intelligent System mark. • If you attach to the camcorder battery packs that are not genuine Canon battery packs, will appear and the remaining battery time will not be displayed. Memory Card • We recommend - Canon VIXIA HF R21 | VIXIA HF R20 / HF R21 / HF R200 Instruction Manual - Page 169
for about 3 months. To recharge the built-in lithium battery: Connect the compact power adapter to the camcorder and leave it connected for 24 hours with the camcorder off. Disposal When you delete movies or initialize the memory, only the file allocation table is altered and stored data - Canon VIXIA HF R21 | VIXIA HF R20 / HF R21 / HF R200 Instruction Manual - Page 170
humid room • When a cold room is heated rapidly To avoid condensation • Do not expose the camcorder to sudden or extreme changes in tem- perature. • Remove the memory card and battery pack. Then, place the camcorder in an airtight plastic bag and let it adjust gradually to temperature changes before - Canon VIXIA HF R21 | VIXIA HF R20 / HF R21 / HF R200 Instruction Manual - Page 171
Abroad Power Sources You can use the compact power adapter to operate the camcorder and to charge battery packs in any country with power supply between 100 and 240 V AC, 50/60 Hz. Consult a Canon Service Center for information on plug adapters for overseas use. Playback on a TV Screen You can - Canon VIXIA HF R21 | VIXIA HF R20 / HF R21 / HF R200 Instruction Manual - Page 172
-100 D Terminal Cable 6 CA-110 Compact Power Adapter Ag CTC-100 Component Cable Aa IFC-300PCU/S USB Cable* Ah STV-250N Stereo Video Cable As Memory card * Supplied with the camcorder; not available as an optional accessory. 172 Š Additional Information - Canon VIXIA HF R21 | VIXIA HF R20 / HF R21 / HF R200 Instruction Manual - Page 173
of non-genuine Canon accessories, although you may request such repairs on a chargeable basis. 4 Battery Packs When you need extra battery packs, select the BP-110. When you use battery packs bearing the Intelligent System mark, the camcorder will communicate with the battery and display the - Canon VIXIA HF R21 | VIXIA HF R20 / HF R21 / HF R200 Instruction Manual - Page 174
battery pack may decrease when recording in cold surroundings, when using the brighter screen settings, etc. / Using the built-in memory 85 min. 50 min. 140 min. Using a memory card Usage time Recording (maximum) Recording (typical)* the focal length of the camcorder lens by a factor of - Canon VIXIA HF R21 | VIXIA HF R20 / HF R21 / HF R200 Instruction Manual - Page 175
subjects at a distance. The microphone is conveniently equipped with a clothing clip and the receiver can be attached to the camcorder's grip belt. This mark identifies genuine Canon video accessories. When you use Canon video equipment, we recommend Canon-brand accessories or products bearing the - Canon VIXIA HF R21 | VIXIA HF R20 / HF R21 / HF R200 Instruction Manual - Page 176
CA-110 Compact Power Adapter BP-110 Battery Pack STV-250N Stereo Video Cable Optional Accessories CG-110 Battery Charger TL-H34 II Tele-converter WD-H34 II Wide-converter WM-V1 Wireless Microphone HTC-100 HDMI Cable CTC-100 Component Cable IFC-300PCU USB Cable SS-650 Shoulder Strap SS-600 - Canon VIXIA HF R21 | VIXIA HF R20 / HF R21 / HF R200 Instruction Manual - Page 177
Specifications VIXIA HF R21 / VIXIA HF R20 / VIXIA HF R200 - Values given are approximate figures. System • Recording System Movies: AVCHD Video compression: MPEG-4 AVC/H.264; Audio compression: Dolby Digital 2ch Photos: DCF (Design rule for Camera File system), compatible with Exif* Ver. 2.2 - Canon VIXIA HF R21 | VIXIA HF R20 / HF R21 / HF R200 Instruction Manual - Page 178
Minimum Illumination 0.4 lx ([Low Light] recording program, Shutter speed at 1/2) 5 lx ([Programmed AE] recording program, Shutter speed at 1/30, Auto slow shutter [On]) • Recommended Illumination: More than 100 lx • Image Stabilization: Electronic ([Dynamic] setting available when recording movies - Canon VIXIA HF R21 | VIXIA HF R20 / HF R21 / HF R200 Instruction Manual - Page 179
HDMI mini connector; output only; compatible with HDMI-CEC and x.v.Color • MIC Terminal ∅ 3.5 mm stereo minijack -57 dBV (with 600 Ω microphone) / 5 kΩ or more Power/Others • Power supply (rated) 3.7 V DC (battery pack), 5.3 V DC (compact power adapter) • Power consumption 2.5 W (SP mode, AF on - Canon VIXIA HF R21 | VIXIA HF R20 / HF R21 / HF R200 Instruction Manual - Page 180
°C (32 - 104 °F) • Battery capacity: 1,120 mAh (typical) 3.9 Wh / 1,050 mAh (minimum) • Dimensions: 33 x 10 x 51 mm (1.3 x 0.39 x 2.0 in.) • Weight: 28 g (0.99 oz.) Weight and dimensions are approximate. Errors and omissions excepted. The information in this manual is verified as of January 2011 - Canon VIXIA HF R21 | VIXIA HF R20 / HF R21 / HF R200 Instruction Manual - Page 181
files for the image mix function compatible with the camcorder are as follows. Size: 1920x1080 File type: Baseline memory under the following folder structure. / In the built-in memory: CANON MY_MUSIC MUSIC_01.WAV to MUSIC_99.WAV MY_PICT MIX_01.JPG to MIX_99.JPG On the memory card: CANON - Canon VIXIA HF R21 | VIXIA HF R20 / HF R21 / HF R200 Instruction Manual - Page 182
(recording program 62 Built-in backup battery 169 C Camcorder Supplemental Disc . . . .17 Capturing photos/video snapshot scenes from a movie 94 Cine Mode (recording program) . . .63 COMPONENT OUT terminal 111, 113 Condensation 170 Connections to external devices . 112 Converting scenes to - Canon VIXIA HF R21 | VIXIA HF R20 / HF R21 / HF R200 Instruction Manual - Page 183
L Language 35 LCD screen dimmer 144 LCD touch screen 27, 29 Low light (recording program) . . . . 62 M Maintenance 170 Manual exposure 70 Manual focus 71 Markers 137 Memory card 36, 168 MIC terminal 79 Microphone attenuator 137 Mixing audio 79, 82 N Night scene (recording program) . . 62 - Canon VIXIA HF R21 | VIXIA HF R20 / HF R21 / HF R200 Instruction Manual - Page 184
V Video snapshot 68 Volume 52, 77 W White balance 73 Wide angle 47 Wind screen 137 Z Zoom 47 184 Š Additional Information - Canon VIXIA HF R21 | VIXIA HF R20 / HF R21 / HF R200 Instruction Manual - Page 185
or for other commercial, industrial, or institutional applications. These uses are covered only by such specific warranty as Canon may issue with such sales. This Limited Warranty does not apply to accessories or consumables for the Equipment, which are sold "AS IS", without warranty of any kind by - Canon VIXIA HF R21 | VIXIA HF R20 / HF R21 / HF R200 Instruction Manual - Page 186
PROPERTY AND TO OTHERS AND THEIR PROPERTY ARISING OUT OF USE, MISUSE OR INABILITY TO USE THE EQUIPMENT NOT CAUSED DIRECTLY BY THE NEGLIGENCE OF CANON USA. (SOME STATES DO NOT ALLOW THE EXCLUSION OR LIMITATION OF INCIDENTAL OR CONSEQUENTIAL DAMAGES, SO THE ABOVE LIMITATION MAY NOT APPLY TO YOU).THIS - Canon VIXIA HF R21 | VIXIA HF R20 / HF R21 / HF R200 Instruction Manual - Page 187
the instruction manual; ii) the use of accessories, attachments, products, supplies, parts or devices with the Equipment that do not conform to Canon specifications or that cause abnormally frequent service problems; iii) repairs or services performed by any party other than a Canon Service Facility - Canon VIXIA HF R21 | VIXIA HF R20 / HF R21 / HF R200 Instruction Manual - Page 188
, Kowloon, Hong Kong Tel: +852 3191 2333, Fax: +852 2428 3963 For support concerning the supplied PIXELA's software, please call PIXELA customer support (details in the Installation Guide for PIXELA's software). © 2011 CANON INC. PUB. DIE-0383-000 30-2, Shimomaruko 3-chome, Ohta-ku, Tokyo 146
-
 1
1 -
 2
2 -
 3
3 -
 4
4 -
 5
5 -
 6
6 -
 7
7 -
8
-
9
-
10
-
11
-
12
-
13
-
14
-
15
-
16
-
17
-
18
-
19
-
20
-
21
-
22
-
23
-
24
-
25
-
26
-
27
-
28
-
29
-
30
-
31
-
32
-
33
-
34
-
35
-
36
-
37
-
38
-
39
-
40
-
41
-
42
-
43
-
44
-
45
-
46
-
47
-
48
-
49
-
50
-
51
-
52
-
53
-
54
-
55
-
56
-
57
-
58
-
59
-
60
-
61
-
62
-
63
-
64
-
65
-
66
-
67
-
68
-
69
-
70
-
71
-
72
-
73
-
74
-
75
-
76
-
77
-
78
-
79
-
80
-
81
-
82
-
83
-
84
-
85
-
86
-
87
-
88
-
89
-
90
-
91
-
92
-
93
-
94
-
95
-
96
-
97
-
98
-
99
-
100
-
101
-
102
-
103
-
104
-
105
-
106
-
107
-
108
-
109
-
110
-
111
-
112
-
113
-
114
-
115
-
116
-
117
-
118
-
119
-
120
-
121
-
122
-
123
-
124
-
125
-
126
-
127
-
128
-
129
-
130
-
131
-
132
-
133
-
134
-
135
-
136
-
137
-
138
-
139
-
140
-
141
-
142
-
143
-
144
-
145
-
146
-
147
-
148
-
149
-
150
-
151
-
152
-
153
-
154
-
155
-
156
-
157
-
158
-
159
-
160
-
161
-
162
-
163
-
164
-
165
-
166
-
167
-
168
-
169
-
170
-
171
-
172
-
173
-
174
-
175
-
176
-
177
-
178
-
179
-
180
-
181
-
182
-
183
-
184
-
185
-
186
-
187
-
188
 |
 |
PUB. DIE-0383-000
HD Camcorder
Instruction Manual
Y