Canon VIXIA HF R21 VIXIA HF R20 / HF R21 / HF R200 Instruction Manual - Page 145
Battery Info], Control for HDMI], HDMI 1080p Output], HDMI Status], Distance Units] - remote control
 |
View all Canon VIXIA HF R21 manuals
Add to My Manuals
Save this manual to your list of manuals |
Page 145 highlights
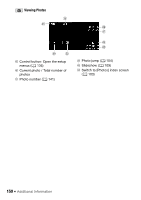
• You can set Quick Start to [B Off], for example, if the camcorder is set on a fixed position and you want to keep recording video with the LCD panel closed in order to conserve the battery's power. [Battery Info]: Displays a screen where you can verify the battery charge (as a percentage) and the remaining recording time ( mode) or play- back time ( , mode). [Control for HDMI]: Activates the HDMI-CEC (Consumer Electronics Con- trol) function. When you connect the camcorder to an HDTV compatible with HDMI-CEC using the supplied HDMI cable, you can control the cam- corder's playback using the remote control of the TV. • If set to [A On], when the camcorder is connected to a compatible HDTV using the supplied HDMI cable, the video input on the TV will automatically be set to the camcorder's video input. Then, you can use the up/down/left/right buttons and the OK or SET button on the TV's remote control to play back your recordings. • Depending on the TV set, additional settings may be required on the TV itself to activate the HDMI-CEC function. Refer to the TV's instruction manual. • Correct operation of the HDMI-CEC function cannot be guaranteed even when connecting the camcorder to compatible TV sets. If you cannot use the remote control of the TV, set [Control for HDMI] to [B Off] and operate the camcorder directly. • The remote control of the TV can only be used to play back movies or photos ( or mode only). If the camcorder is connected to the TV while it is set to recording mode, depending on the TV used, turning off the TV will automatically turn off the camcorder even if it is recording at the time. • We recommend not connecting more than 3 HDMI-CEC compatible devices at a time. [HDMI 1080p Output]: When the camcorder is connected using an HDMI connection to a television that supports 1080p output, the camcorder will convert 1080i video and output it as 1080p. [HDMI Status]: Displays a screen where you can verify the standard of the output signal from the HDMI OUT terminal. [Distance Units]: Selects the units to use for the focusing distance display during manual focus. Additional Information Š 145
-
 1
1 -
2
-
3
-
4
-
5
-
6
-
7
-
8
-
9
-
10
-
11
-
12
-
13
-
14
-
15
-
16
-
17
-
18
-
19
-
20
-
21
-
22
-
23
-
24
-
25
-
26
-
27
-
28
-
29
-
30
-
31
-
32
-
33
-
34
-
35
-
36
-
37
-
38
-
39
-
40
-
41
-
42
-
43
-
44
-
45
-
46
-
47
-
48
-
49
-
50
-
51
-
52
-
53
-
54
-
55
-
56
-
57
-
58
-
59
-
60
-
61
-
62
-
63
-
64
-
65
-
66
-
67
-
68
-
69
-
70
-
71
-
72
-
73
-
74
-
75
-
76
-
77
-
78
-
79
-
80
-
81
-
82
-
83
-
84
-
85
-
86
-
87
-
88
-
89
-
90
-
91
-
92
-
93
-
94
-
95
-
96
-
97
-
98
-
99
-
100
-
101
-
102
-
103
-
104
-
105
-
106
-
107
-
108
-
109
-
110
-
111
-
112
-
113
-
114
-
115
-
116
-
117
-
118
-
119
-
120
-
121
-
122
-
123
-
124
-
125
-
126
-
127
-
128
-
129
-
130
-
131
-
132
-
133
-
134
-
135
-
136
-
137
-
138
-
139
-
 140
140 -
 141
141 -
 142
142 -
 143
143 -
 144
144 -
 145
145 -
 146
146 -
 147
147 -
 148
148 -
 149
149 -
 150
150 -
151
-
152
-
153
-
154
-
155
-
156
-
157
-
158
-
159
-
160
-
161
-
162
-
163
-
164
-
165
-
166
-
167
-
168
-
169
-
170
-
171
-
172
-
173
-
174
-
175
-
176
-
177
-
178
-
179
-
180
-
181
-
182
-
183
-
184
-
185
-
186
-
187
-
188
 |
 |