Canon VIXIA HF R400 Instruction Manual - Page 105
Playback on a TV Screen - software
 |
View all Canon VIXIA HF R400 manuals
Add to My Manuals
Save this manual to your list of manuals |
Page 105 highlights
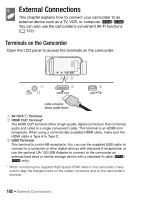
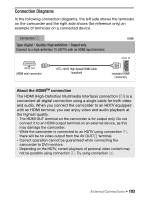
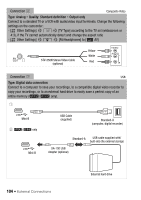
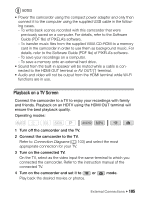
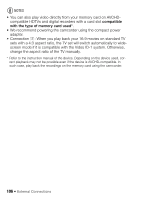
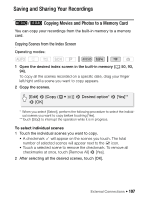
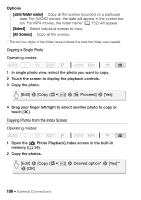
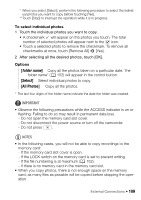
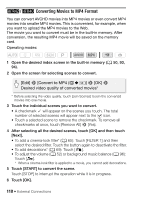
NOTES • Power the camcorder using the compact power adapter and only then connect it to the computer using the supplied USB cable in the following cases. - To write back scenes recorded with this camcorder that were previously saved on a computer. For details, refer to the Software Guide (PDF file) of PIXELA's software. - To transfer music files from the supplied VIXIA CD-ROM to a memory card in the camcorder in order to use them as background music. For details, refer to the Software Guide (PDF file) of PIXELA's software. - To save your recordings on a computer. - To save a memory onto an external hard drive. • Sound from the built-in speaker will be muted while a cable is connected to the HDMI OUT terminal or AV OUT/× terminal. • Audio and video will not be output from the HDMI terminal while Wi-Fi functions are in use. Playback on a TV Screen Connect the camcorder to a TV to enjoy your recordings with family and friends. Playback on an HDTV using the HDMI OUT terminal will ensure the best playback quality. Operating modes: SCN 1 Turn off the camcorder and the TV. 2 Connect the camcorder to the TV. Refer to Connection Diagrams (A 103) and select the most appropriate connection for your TV. 3 Turn on the connected TV. On the TV, select as the video input the same terminal to which you connected the camcorder. Refer to the instruction manual of the connected TV. 4 Turn on the camcorder and set it to or Play back the desired movies or photos. mode. External Connections Š 105
-
 1
1 -
2
-
3
-
4
-
5
-
6
-
7
-
8
-
9
-
10
-
11
-
12
-
13
-
14
-
15
-
16
-
17
-
18
-
19
-
20
-
21
-
22
-
23
-
24
-
25
-
26
-
27
-
28
-
29
-
30
-
31
-
32
-
33
-
34
-
35
-
36
-
37
-
38
-
39
-
40
-
41
-
42
-
43
-
44
-
45
-
46
-
47
-
48
-
49
-
50
-
51
-
52
-
53
-
54
-
55
-
56
-
57
-
58
-
59
-
60
-
61
-
62
-
63
-
64
-
65
-
66
-
67
-
68
-
69
-
70
-
71
-
72
-
73
-
74
-
75
-
76
-
77
-
78
-
79
-
80
-
81
-
82
-
83
-
84
-
85
-
86
-
87
-
88
-
89
-
90
-
91
-
92
-
93
-
94
-
95
-
96
-
97
-
98
-
99
-
 100
100 -
 101
101 -
 102
102 -
 103
103 -
 104
104 -
 105
105 -
 106
106 -
 107
107 -
 108
108 -
 109
109 -
 110
110 -
111
-
112
-
113
-
114
-
115
-
116
-
117
-
118
-
119
-
120
-
121
-
122
-
123
-
124
-
125
-
126
-
127
-
128
-
129
-
130
-
131
-
132
-
133
-
134
-
135
-
136
-
137
-
138
-
139
-
140
-
141
-
142
-
143
-
144
-
145
-
146
-
147
-
148
-
149
-
150
-
151
-
152
-
153
-
154
-
155
-
156
-
157
-
158
-
159
-
160
-
161
-
162
-
163
-
164
-
165
-
166
-
167
-
168
-
169
-
170
-
171
-
172
-
173
-
174
-
175
-
176
-
177
-
178
-
179
-
180
-
181
-
182
-
183
-
184
-
185
-
186
-
187
-
188
-
189
-
190
-
191
-
192
-
193
-
194
-
195
-
196
 |
 |