Canon VIXIA HF R400 Instruction Manual - Page 139
Searching for Access Points
 |
View all Canon VIXIA HF R400 manuals
Add to My Manuals
Save this manual to your list of manuals |
Page 139 highlights
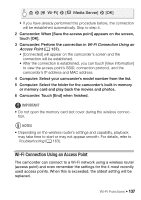
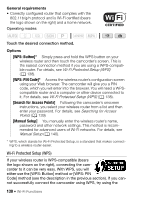
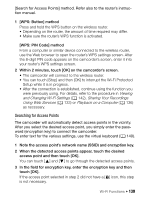
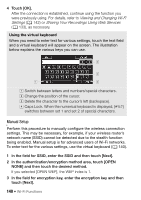
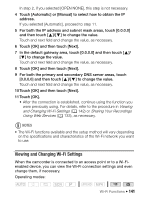
[Search for Access Points] method. Refer also to the router's instruction manual. 1 [WPS: Button] method Press and hold the WPS button on the wireless router. • Depending on the router, the amount of time required may differ. • Make sure the router's WPS function is activated. [WPS: PIN Code] method From a computer or similar device connected to the wireless router, use the Web browser to open the router's WPS settings screen. After the 8-digit PIN code appears on the camcorder's screen, enter it into your router's WPS settings screen. 2 Within 2 minutes, touch [OK] on the camcorder's screen. • The camcorder will connect to the wireless router. • You can touch [Stop] and then [OK] to interrupt the Wi-Fi Protected Setup while it is in progress. • After the connection is established, continue using the function you were previously using. For details, refer to the procedure in Viewing and Changing Wi-Fi Settings (A 142), Sharing Your Recordings Using Web Services (A 133) or Playback on a Computer (A 136) as necessary. Searching for Access Points The camcorder will automatically detect access points in the vicinity. After you select the desired access point, you simply enter the password (encryption key) to connect the camcorder. To enter text for the various settings, use the virtual keyboard (A 140). 1 Note the access point's network name (SSID) and encryption key. 2 When the detected access points appear, touch the desired access point and then touch [OK]. You can touch [Í] and [Î] to go through the detected access points. 3 In the field for encryption key, enter the encryption key and then touch [OK]. If the access point selected in step 2 did not have a [C] icon, this step is not necessary. Wi-Fi Functions Š 139
-
 1
1 -
2
-
3
-
4
-
5
-
6
-
7
-
8
-
9
-
10
-
11
-
12
-
13
-
14
-
15
-
16
-
17
-
18
-
19
-
20
-
21
-
22
-
23
-
24
-
25
-
26
-
27
-
28
-
29
-
30
-
31
-
32
-
33
-
34
-
35
-
36
-
37
-
38
-
39
-
40
-
41
-
42
-
43
-
44
-
45
-
46
-
47
-
48
-
49
-
50
-
51
-
52
-
53
-
54
-
55
-
56
-
57
-
58
-
59
-
60
-
61
-
62
-
63
-
64
-
65
-
66
-
67
-
68
-
69
-
70
-
71
-
72
-
73
-
74
-
75
-
76
-
77
-
78
-
79
-
80
-
81
-
82
-
83
-
84
-
85
-
86
-
87
-
88
-
89
-
90
-
91
-
92
-
93
-
94
-
95
-
96
-
97
-
98
-
99
-
100
-
101
-
102
-
103
-
104
-
105
-
106
-
107
-
108
-
109
-
110
-
111
-
112
-
113
-
114
-
115
-
116
-
117
-
118
-
119
-
120
-
121
-
122
-
123
-
124
-
125
-
126
-
127
-
128
-
129
-
130
-
131
-
132
-
133
-
 134
134 -
 135
135 -
 136
136 -
 137
137 -
 138
138 -
 139
139 -
 140
140 -
 141
141 -
 142
142 -
 143
143 -
 144
144 -
145
-
146
-
147
-
148
-
149
-
150
-
151
-
152
-
153
-
154
-
155
-
156
-
157
-
158
-
159
-
160
-
161
-
162
-
163
-
164
-
165
-
166
-
167
-
168
-
169
-
170
-
171
-
172
-
173
-
174
-
175
-
176
-
177
-
178
-
179
-
180
-
181
-
182
-
183
-
184
-
185
-
186
-
187
-
188
-
189
-
190
-
191
-
192
-
193
-
194
-
195
-
196
 |
 |