Canon VIXIA HF R400 Instruction Manual - Page 140
Manual Setup
 |
View all Canon VIXIA HF R400 manuals
Add to My Manuals
Save this manual to your list of manuals |
Page 140 highlights
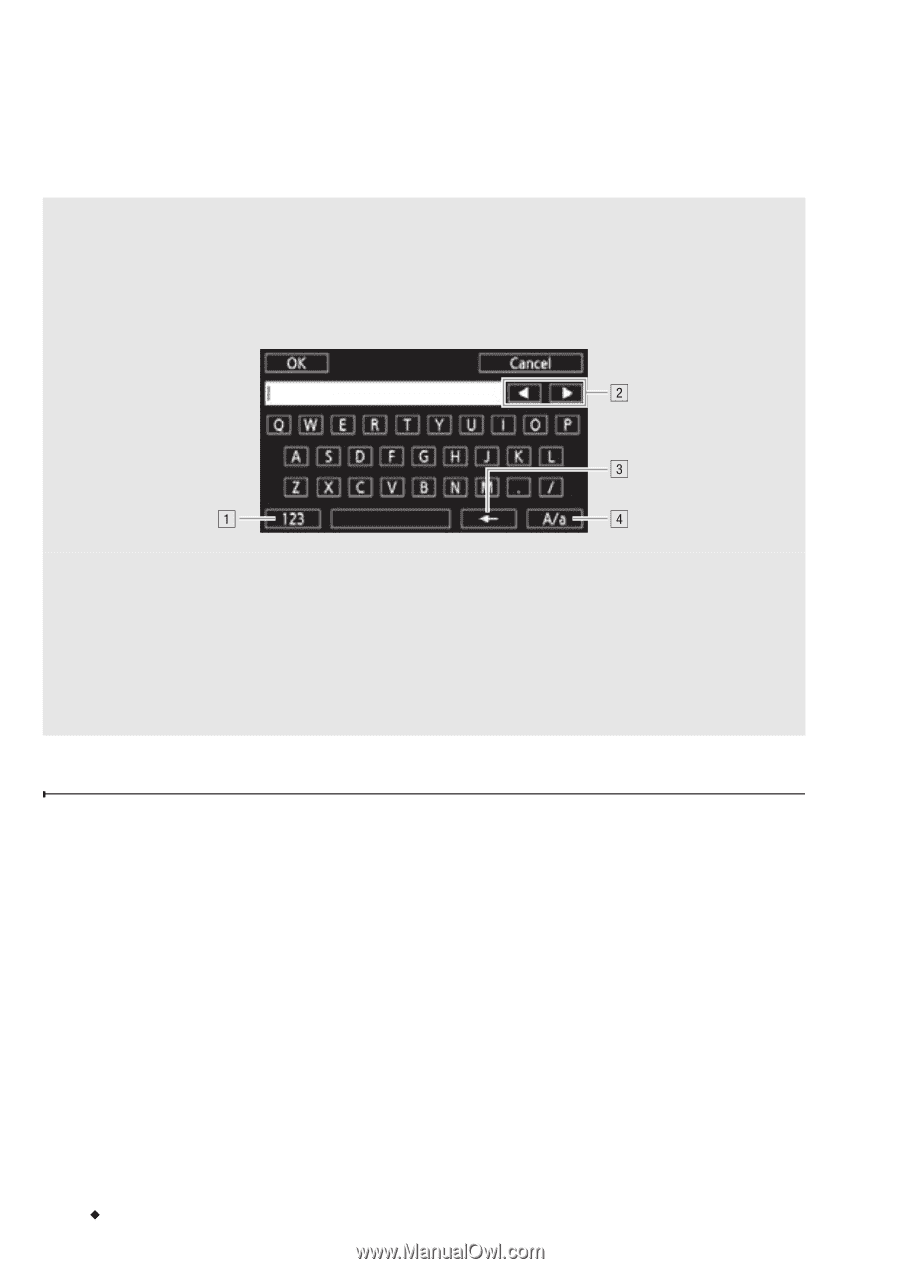
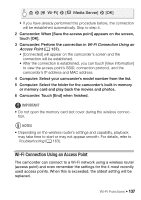
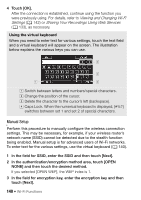
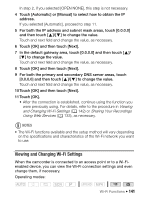
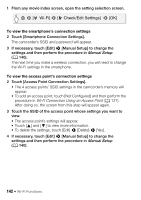
4 Touch [OK]. After the connection is established, continue using the function you were previously using. For details, refer to Viewing and Changing Wi-Fi Settings (A 142) or Sharing Your Recordings Using Web Services (A 133), as necessary. Using the virtual keyboard When you need to enter text for various settings, touch the text field and a virtual keyboard will appear on the screen. The illustration below explains the various keys you can use. ! Switch between letters and numbers/special characters. " Change the position of the cursor. # Delete the character to the cursor's left (backspace). $ Caps Lock. When the numerical keyboard is displayed, [#%?] switches between set 1 and set 2 of special characters. Manual Setup Perform this procedure to manually configure the wireless connection settings. This may be necessary, for example, if your wireless router's network name (SSID) cannot be detected due to the stealth function being enabled. Manual setup is for advanced users of Wi-Fi networks. To enter text for the various settings, use the virtual keyboard (A 140). 1 In the field for SSID, enter the SSID and then touch [Next]. 2 In the authentication/encryption method area, touch [OPEN NONE] and then touch the desired method. If you selected [OPEN WEP], the WEP index is 1. 3 In the field for encryption key, enter the encryption key and then touch [Next]. 140 Š Wi-Fi Functions
-
 1
1 -
2
-
3
-
4
-
5
-
6
-
7
-
8
-
9
-
10
-
11
-
12
-
13
-
14
-
15
-
16
-
17
-
18
-
19
-
20
-
21
-
22
-
23
-
24
-
25
-
26
-
27
-
28
-
29
-
30
-
31
-
32
-
33
-
34
-
35
-
36
-
37
-
38
-
39
-
40
-
41
-
42
-
43
-
44
-
45
-
46
-
47
-
48
-
49
-
50
-
51
-
52
-
53
-
54
-
55
-
56
-
57
-
58
-
59
-
60
-
61
-
62
-
63
-
64
-
65
-
66
-
67
-
68
-
69
-
70
-
71
-
72
-
73
-
74
-
75
-
76
-
77
-
78
-
79
-
80
-
81
-
82
-
83
-
84
-
85
-
86
-
87
-
88
-
89
-
90
-
91
-
92
-
93
-
94
-
95
-
96
-
97
-
98
-
99
-
100
-
101
-
102
-
103
-
104
-
105
-
106
-
107
-
108
-
109
-
110
-
111
-
112
-
113
-
114
-
115
-
116
-
117
-
118
-
119
-
120
-
121
-
122
-
123
-
124
-
125
-
126
-
127
-
128
-
129
-
130
-
131
-
132
-
133
-
134
-
 135
135 -
 136
136 -
 137
137 -
 138
138 -
 139
139 -
 140
140 -
 141
141 -
 142
142 -
 143
143 -
 144
144 -
 145
145 -
146
-
147
-
148
-
149
-
150
-
151
-
152
-
153
-
154
-
155
-
156
-
157
-
158
-
159
-
160
-
161
-
162
-
163
-
164
-
165
-
166
-
167
-
168
-
169
-
170
-
171
-
172
-
173
-
174
-
175
-
176
-
177
-
178
-
179
-
180
-
181
-
182
-
183
-
184
-
185
-
186
-
187
-
188
-
189
-
190
-
191
-
192
-
193
-
194
-
195
-
196
 |
 |