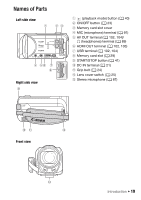
Canon VIXIA HF R400 Instruction Manual - Page 22
To remove the battery pack - flash memory camcorder
 |
View all Canon VIXIA HF R400 manuals
Add to My Manuals
Save this manual to your list of manuals |
Page 22 highlights
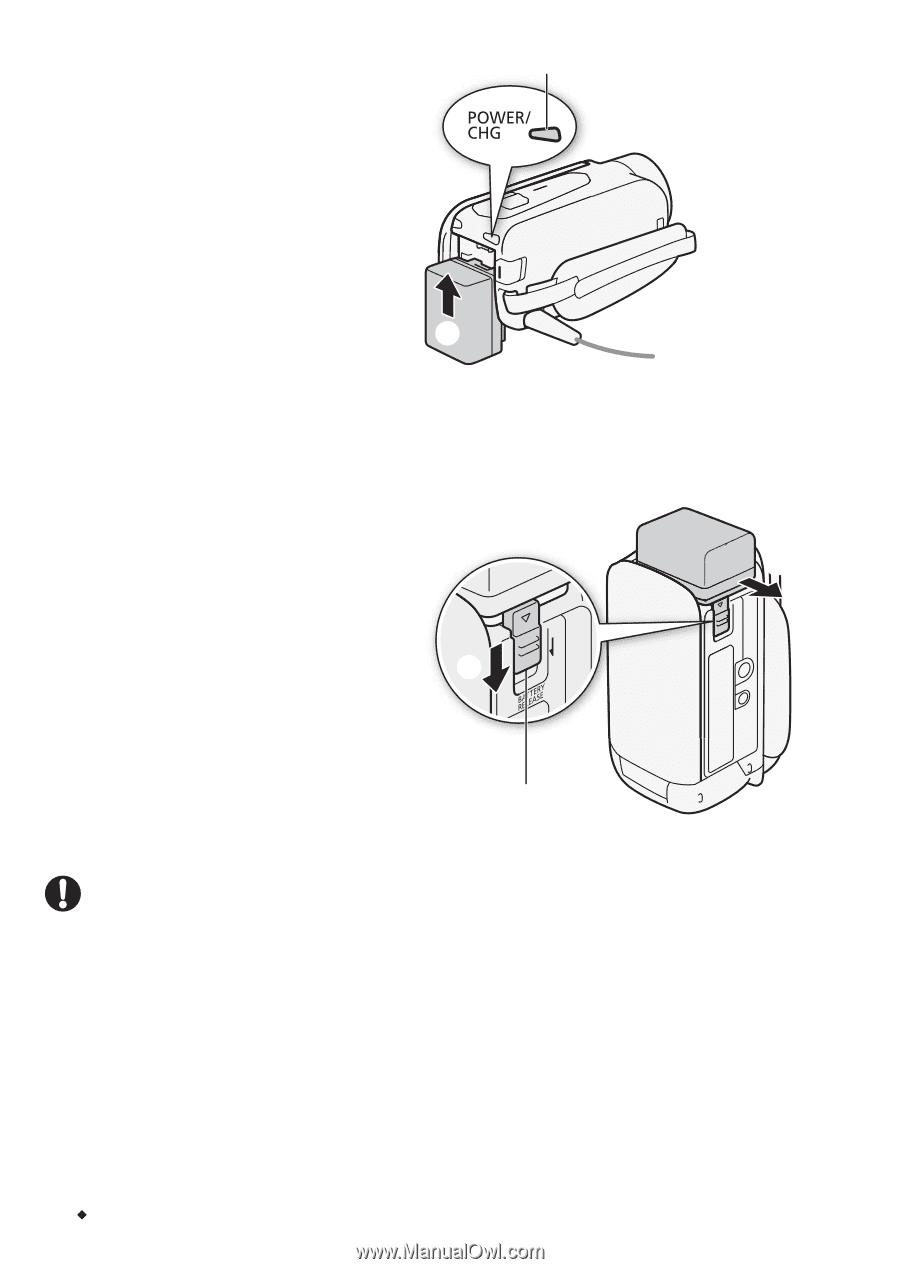
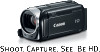
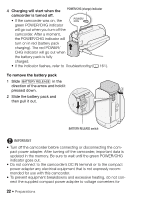
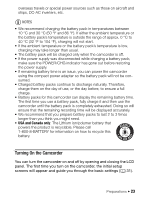
4 Charging will start when the camcorder is turned off. POWER/CHG (charge) indicator • If the camcorder was on, the green POWER/CHG indicator will go out when you turn off the camcorder. After a moment, the POWER/CHG indicator will turn on in red (battery pack charging). The red POWER/ CHG indicator will go out when ᕅ the battery pack is fully charged. • If the indicator flashes, refer to Troubleshooting (A 161). To remove the battery pack 1 Slide d in the direction of the arrow and hold it pressed down. ᕄ 2 Slide the battery pack and then pull it out. ᕃ BATTERY RELEASE switch IMPORTANT • Turn off the camcorder before connecting or disconnecting the compact power adapter. After turning off the camcorder, important data is updated in the memory. Be sure to wait until the green POWER/CHG indicator goes out. • Do not connect to the camcorder's DC IN terminal or to the compact power adapter any electrical equipment that is not expressly recommended for use with this camcorder. • To prevent equipment breakdowns and excessive heating, do not connect the supplied compact power adapter to voltage converters for 22 Š Preparations
-
 1
1 -
2
-
3
-
4
-
5
-
6
-
7
-
8
-
9
-
10
-
11
-
12
-
13
-
14
-
15
-
16
-
 17
17 -
 18
18 -
 19
19 -
 20
20 -
 21
21 -
 22
22 -
 23
23 -
 24
24 -
 25
25 -
 26
26 -
 27
27 -
28
-
29
-
30
-
31
-
32
-
33
-
34
-
35
-
36
-
37
-
38
-
39
-
40
-
41
-
42
-
43
-
44
-
45
-
46
-
47
-
48
-
49
-
50
-
51
-
52
-
53
-
54
-
55
-
56
-
57
-
58
-
59
-
60
-
61
-
62
-
63
-
64
-
65
-
66
-
67
-
68
-
69
-
70
-
71
-
72
-
73
-
74
-
75
-
76
-
77
-
78
-
79
-
80
-
81
-
82
-
83
-
84
-
85
-
86
-
87
-
88
-
89
-
90
-
91
-
92
-
93
-
94
-
95
-
96
-
97
-
98
-
99
-
100
-
101
-
102
-
103
-
104
-
105
-
106
-
107
-
108
-
109
-
110
-
111
-
112
-
113
-
114
-
115
-
116
-
117
-
118
-
119
-
120
-
121
-
122
-
123
-
124
-
125
-
126
-
127
-
128
-
129
-
130
-
131
-
132
-
133
-
134
-
135
-
136
-
137
-
138
-
139
-
140
-
141
-
142
-
143
-
144
-
145
-
146
-
147
-
148
-
149
-
150
-
151
-
152
-
153
-
154
-
155
-
156
-
157
-
158
-
159
-
160
-
161
-
162
-
163
-
164
-
165
-
166
-
167
-
168
-
169
-
170
-
171
-
172
-
173
-
174
-
175
-
176
-
177
-
178
-
179
-
180
-
181
-
182
-
183
-
184
-
185
-
186
-
187
-
188
-
189
-
190
-
191
-
192
-
193
-
194
-
195
-
196
 |
 |