Canon VIXIA HF R400 Instruction Manual - Page 83
White Balance
 |
View all Canon VIXIA HF R400 manuals
Add to My Manuals
Save this manual to your list of manuals |
Page 83 highlights
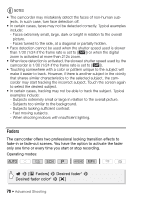
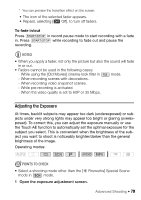
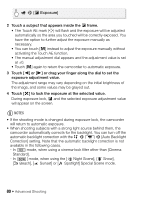
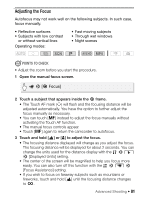
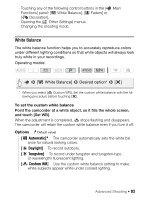
- Touching any of the following control buttons in the [ Functions] panel: [Ä White Balance], [R Faders] or [Ò Decoration]. - Opening the [ Other Settings] menus. - Changing the shooting mode. Main White Balance The white balance function helps you to accurately reproduce colors under different lighting conditions so that white objects will always look truly white in your recordings. Operating modes: SCN > [Ä White Balance] > Desired option* > [X] * When you select [Å Custom WB], set the custom white balance with the following procedure before touching [X]. To set the custom white balance Point the camcorder at a white object, so it fills the whole screen, and touch [Set WB]. When the adjustment is completed, Å stops flashing and disappears. The camcorder will retain the custom white balance even if you turn it off. Options ( Default value) [Ã Automatic] The camcorder automatically sets the white balance for natural looking colors. [¼ Daylight] To record outdoors. [É Tungsten] To record under tungsten and tungsten-type (3-wavelength) fluorescent lighting. [Å Custom WB] Use the custom white balance setting to make white subjects appear white under colored lighting. Advanced Shooting Š 83
-
 1
1 -
2
-
3
-
4
-
5
-
6
-
7
-
8
-
9
-
10
-
11
-
12
-
13
-
14
-
15
-
16
-
17
-
18
-
19
-
20
-
21
-
22
-
23
-
24
-
25
-
26
-
27
-
28
-
29
-
30
-
31
-
32
-
33
-
34
-
35
-
36
-
37
-
38
-
39
-
40
-
41
-
42
-
43
-
44
-
45
-
46
-
47
-
48
-
49
-
50
-
51
-
52
-
53
-
54
-
55
-
56
-
57
-
58
-
59
-
60
-
61
-
62
-
63
-
64
-
65
-
66
-
67
-
68
-
69
-
70
-
71
-
72
-
73
-
74
-
75
-
76
-
77
-
 78
78 -
 79
79 -
 80
80 -
 81
81 -
 82
82 -
 83
83 -
 84
84 -
 85
85 -
 86
86 -
 87
87 -
 88
88 -
89
-
90
-
91
-
92
-
93
-
94
-
95
-
96
-
97
-
98
-
99
-
100
-
101
-
102
-
103
-
104
-
105
-
106
-
107
-
108
-
109
-
110
-
111
-
112
-
113
-
114
-
115
-
116
-
117
-
118
-
119
-
120
-
121
-
122
-
123
-
124
-
125
-
126
-
127
-
128
-
129
-
130
-
131
-
132
-
133
-
134
-
135
-
136
-
137
-
138
-
139
-
140
-
141
-
142
-
143
-
144
-
145
-
146
-
147
-
148
-
149
-
150
-
151
-
152
-
153
-
154
-
155
-
156
-
157
-
158
-
159
-
160
-
161
-
162
-
163
-
164
-
165
-
166
-
167
-
168
-
169
-
170
-
171
-
172
-
173
-
174
-
175
-
176
-
177
-
178
-
179
-
180
-
181
-
182
-
183
-
184
-
185
-
186
-
187
-
188
-
189
-
190
-
191
-
192
-
193
-
194
-
195
-
196
 |
 |