Canon XA10 XA10 Instruction Manual - Page 139
Uploading Movies to Video Sharing Web Sites - camcorder review
 |
View all Canon XA10 manuals
Add to My Manuals
Save this manual to your list of manuals |
Page 139 highlights
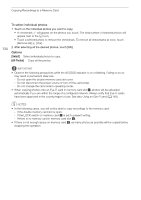
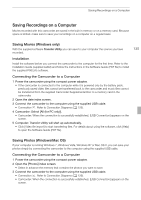
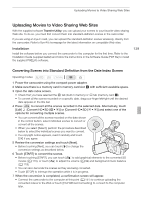
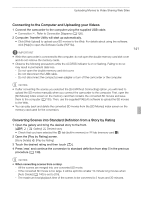
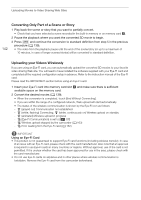
Uploading Movies to Video Sharing Web Sites Uploading Movies to Video Sharing Web Sites With the supplied software Transfer Utility, you can upload your scenes to your favorite video sharing Web site. To do so, you must first convert them into standard-definition scenes in the camcorder. If you are using an Eye-Fi card, you can upload the standard-definition scenes wirelessly, directly from the camcorder. Refer to Eye-Fi's homepage for the latest information on compatible Web sites. Installation Install the software before you connect the camcorder to the computer for the first time. Refer to the Installation Guide (supplied leaflet) and follow the instructions in the Software Guide (PDF file) to install the supplied PIXELA's software. 139 Converting Scenes into Standard Definition from the Date Index Screen Operating modes: 1 Power the camcorder using the compact power adapter. 2 Make sure there is a memory card in memory card slot Y with sufficient available space. 3 Open the date index screen. • Check that you have selected the f tab (built-in memory) or 4 tab (memory card X). • To convert all the scenes recorded on a specific date, drag your finger left/right until the desired date appears in the title bar. 4 Press Z to convert all the scenes recorded in the selected date. Alternatively, touch [Edit] [Convert HD9SD (f97)] or [Convert HD9SD (497)] and select one of the options for converting multiple scenes. • You can convert all the scenes recorded on the date shown in the control button, select individual scenes to convert or convert all the scenes. • When you select [Select], perform the procedure described below to select the individual scenes you want to convert. • If a copyright notice appears, read it carefully and touch [OK] if you agree. 5 Review the conversion settings and touch [Next]. • Before touching [Next], you can touch [5] to change the conversion settings as described below. 6 Touch [START] to convert the scenes. • Before touching [START], you can touch [ ] to add graphical elements to the converted SD movies (0 110), or touch [ ] to adjust the volume (0 94) and background music balance (0 119). • You can also decorate the scenes as they are being converted. • Touch [STOP] to interrupt the operation while it is in progress. 7 When the conversion is completed, a confirmation screen will appear. • Connect the camcorder to the computer at this point (0 141) to continue uploading the converted videos to the Web or touch [End Without Connecting] to connect to the computer later.
-
 1
1 -
2
-
3
-
4
-
5
-
6
-
7
-
8
-
9
-
10
-
11
-
12
-
13
-
14
-
15
-
16
-
17
-
18
-
19
-
20
-
21
-
22
-
23
-
24
-
25
-
26
-
27
-
28
-
29
-
30
-
31
-
32
-
33
-
34
-
35
-
36
-
37
-
38
-
39
-
40
-
41
-
42
-
43
-
44
-
45
-
46
-
47
-
48
-
49
-
50
-
51
-
52
-
53
-
54
-
55
-
56
-
57
-
58
-
59
-
60
-
61
-
62
-
63
-
64
-
65
-
66
-
67
-
68
-
69
-
70
-
71
-
72
-
73
-
74
-
75
-
76
-
77
-
78
-
79
-
80
-
81
-
82
-
83
-
84
-
85
-
86
-
87
-
88
-
89
-
90
-
91
-
92
-
93
-
94
-
95
-
96
-
97
-
98
-
99
-
100
-
101
-
102
-
103
-
104
-
105
-
106
-
107
-
108
-
109
-
110
-
111
-
112
-
113
-
114
-
115
-
116
-
117
-
118
-
119
-
120
-
121
-
122
-
123
-
124
-
125
-
126
-
127
-
128
-
129
-
130
-
131
-
132
-
133
-
 134
134 -
 135
135 -
 136
136 -
 137
137 -
 138
138 -
 139
139 -
 140
140 -
 141
141 -
 142
142 -
 143
143 -
 144
144 -
145
-
146
-
147
-
148
-
149
-
150
-
151
-
152
-
153
-
154
-
155
-
156
-
157
-
158
-
159
-
160
-
161
-
162
-
163
-
164
-
165
-
166
-
167
-
168
-
169
-
170
-
171
-
172
-
173
-
174
-
175
-
176
-
177
-
178
-
179
-
180
-
181
-
182
-
183
-
184
-
185
-
186
-
187
-
188
-
189
-
190
-
191
 |
 |