Canon ZR60 DV Messenger Ver 1.0 Instruction Manual
Canon ZR60 - MiniDV Digital Camcorder Manual
 |
UPC - 490561400607
View all Canon ZR60 manuals
Add to My Manuals
Save this manual to your list of manuals |
Canon ZR60 manual content summary:
- Canon ZR60 | DV Messenger Ver 1.0 Instruction Manual - Page 1
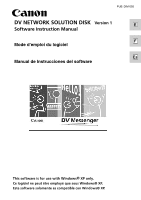
-555 DV NETWORK SOLUTION DISK Version 1 E Software Instruction Manual F Mode d'emploi du logiciel Es Manual de Instrucciones del software This software is for use with Windows® XP only. Ce logiciel ne peut être employé que sous Windows® XP. Este software solamente es compatible con Windows® XP - Canon ZR60 | DV Messenger Ver 1.0 Instruction Manual - Page 2
single computer solely for use with Canon's digital video camcorder products. You may physically transfer the SOFTWARE from one computer to another, provided that the SOFTWARE is used on only one computer at a time. You shall not install or use the SOFTWARE on a network, multiple CPU, multiple site - Canon ZR60 | DV Messenger Ver 1.0 Instruction Manual - Page 3
TO THE USE OF OR INABILITY TO USE THE SOFTWARE, THE PROVISION OF OR FAILURE TO PROVIDE SUPPORT SERVICES, OR OTHERWISE UNDER OR IN CONNECTION WITH ANY PROVISION THE COMPLETE AND EXCLUSIVE STATEMENT OF AGREEMENT BETWEEN YOU AND CANON CONCERNING THE SUBJECT MATTER HEREOF AND SUPERSEDES ALL PROPOSALS OR - Canon ZR60 | DV Messenger Ver 1.0 Instruction Manual - Page 4
43 In [CAMERA] Mode ...44 In [VCR] Mode ...45 In [CARD] Mode (File Transfer 47 Changing the Mode of the Camcorder 49 Ending DV Messenger 50 Ending the Communication with your Contact 50 Ending DV Messenger 50 Troubleshooting ...51 AV/C Camera Storage Subunit-WIA Driver 51 DV Messenger ...51 - Canon ZR60 | DV Messenger Ver 1.0 Instruction Manual - Page 5
complies with the "AV/C Camera Storage Subunit Version 1.0" by the IEEE1394 Trade Association. ¡ WIA stands for Windows Image Acquisition. WIA is a driver software for downloading images from digital devices onto a computer. WIA is preinstalled on Windows XP. Copyright © Canon Inc. 2003 All rights - Canon ZR60 | DV Messenger Ver 1.0 Instruction Manual - Page 6
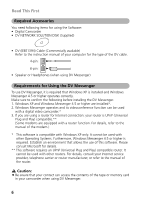
Read This First Required Accessories You need following items for using the Software: • Digital Camcorder • DV NETWORK SOLUTION DISK (Supplied) • DV (IEEE1394) Cable (Commercially available) Refer to the instruction manual of your computer for the type of the DV cable. 4-pin: 6-pin: • Speaker or - Canon ZR60 | DV Messenger Ver 1.0 Instruction Manual - Page 7
recommended) Free Hard Disk Space: • AV/C Camera Storage Subunit-WIA Driver: 1 MB or more • DV Messenger: 100 MB or more Display: 800 × 600 pixels/High Color (16 bit) or better Interface: IEEE1394 (OHCI compliant) Others: Windows Messenger Version 4.5 or higher, sound function, Internet - Canon ZR60 | DV Messenger Ver 1.0 Instruction Manual - Page 8
the main features of the software contained on the DV NETWORK SOLUTION DISK. AV/C Camera Storage Subunit-WIA Driver Canon camcorders only (refer to the table on the next page) The AV/C Camera Storage Subunit-WIA Driver is a software that allows you to use your camcorder as a card reader/writer by - Canon ZR60 | DV Messenger Ver 1.0 Instruction Manual - Page 9
communicate with does not have DV Messenger, it can be downloaded from the Canon Homepage. http://www.canondv.com/ Read Carefully ¡ If you leave the camcorder turned on for a long time, heat generation may cause damage to the camcorder. Turn off the camcorder after use. ¡ Tapes may be damaged if - Canon ZR60 | DV Messenger Ver 1.0 Instruction Manual - Page 10
if necessary. Please consult Microsoft for details. ¡ Do not connect the camcorder to the computer when installing from the DV NETWORK SOLUTION DISK. ¡ Close all programs that are running before copying the driver files. ¡ Users of Windows XP Professional must first log in as an Administrator to - Canon ZR60 | DV Messenger Ver 1.0 Instruction Manual - Page 11
your information and click [Next]. 7 Confirm the target folder and click [Next]. • If a dialog appears asking you whether you wish to create a shortcut of the DV Messenger on the desktop, click [Yes]. 11 - Canon ZR60 | DV Messenger Ver 1.0 Instruction Manual - Page 12
the computer. 2 Connect the power adapter to the camcorder. 3 Set the camcorder to CARD PLAY (VCR) mode. 4 Connect the camcorder to the computer using the DV cable ( 22). • The driver installation starts automatically. • Depending on the setting of your computer, a video editing program may start - Canon ZR60 | DV Messenger Ver 1.0 Instruction Manual - Page 13
these files first before working on them on your computer. I If the Driver Has Been Installed Properly ¡ If a memory card is inserted into the camcorder, the [Scanner and Camera Wizard] opens automatically. Proceed to step 5 "Downloading Still images/Movies to a Computer" ( 23). ¡ If no memory card - Canon ZR60 | DV Messenger Ver 1.0 Instruction Manual - Page 14
the setting. 1 Connect the power adapter to the camcorder. 2 Set the camcorder to CARD PLAY (VCR) mode. 3 Connect the camcorder to the computer using the DV cable ( 22). 4 From the [start] menu, select [My Computer]. 5 Right-click the mouse button on the camera icon and select [Properties - Canon ZR60 | DV Messenger Ver 1.0 Instruction Manual - Page 15
Notes: ¡ To start a WIA-compliant application automatically, select [Start this program] and click [OK]. E ¡ If the started application displays a message such as [TWAIN data source not found. Reinstall the scanner software.], select [WIA-Canon Camera Storage] and use the WIA-TWAIN Driver. 15 - Canon ZR60 | DV Messenger Ver 1.0 Instruction Manual - Page 16
[Yes]. • The uninstall utility starts and removes DV Messenger. Uninstalling the AV/C Camera Storage Subunit-WIA Driver 1 Connect the power adapter to the camcorder. 2 Set the camcorder to CARD PLAY (VCR) mode 3. Connect the camcorder to the computer using the DV cable ( 22). • If [Scanner and - Canon ZR60 | DV Messenger Ver 1.0 Instruction Manual - Page 17
4. From the [start] menu, select [Control panel]. E 5. Click [Printers and Other Hardware]. 6. Click [Scanners and Cameras]. 17 - Canon ZR60 | DV Messenger Ver 1.0 Instruction Manual - Page 18
dialog, click [Yes]. • [#(number)] may appear after [Canon Camera Storage Device]. This does not affect the uninstall process. • The uninstall process is complete. I Troubleshooting the Driver Uninstall If you had problems uninstalling the driver, use the following procedures to remove it. Notes - Canon ZR60 | DV Messenger Ver 1.0 Instruction Manual - Page 19
3. Click [System]. E 4. Click the [Hardware] tab on the [System Properties]. 5. Click the [Device Manager] button. 6. If [Canon Camera Storage Device] appears under [Imaging devices] and/or [Other devices] categories, use the following procedures to delete it. 1. Right-click the mouse - Canon ZR60 | DV Messenger Ver 1.0 Instruction Manual - Page 20
]. • Remove all copies of the [Canon Camera Storage Device] icon that appear in the [Other devices] or [Imaging devices] categories, or that appear more than once in one category. 7. From the [start] menu, select [My Computer] and double-click the [C:], [WINDOWS] and [INF] folders in succession - Canon ZR60 | DV Messenger Ver 1.0 Instruction Manual - Page 21
one set. There may be many file sets starting with "Oem". • The Windows Notepad program will start and show the file contents. Click each [Oem*] file until you find the one that contains "; AV/C Camera Storage WIA driver" in its first line. When you have found the correct file, delete the - Canon ZR60 | DV Messenger Ver 1.0 Instruction Manual - Page 22
cable and set it to CARD PLAY (VCR) mode, [Canon Camera Storage Device] (camera icon) or [Canon DV Camcorder] (camcorder icon) appears in the explorer view. If the driver is not installed, only the [camcorder] icon appears. Camera icon: You can download still images/movies from a memory card to the - Canon ZR60 | DV Messenger Ver 1.0 Instruction Manual - Page 23
of the POWER switch or the TAPE/CARD switch. ¡ Format the memory card with the camcorder. ¡ If numerous still images/movies are contained in the memory card, it may take a while until the [Scanner and Camera Wizard] opens. ¡If still images not recorded with Canon digital camcorders are contained - Canon ZR60 | DV Messenger Ver 1.0 Instruction Manual - Page 24
Downloading Still Images/Movies to a Computer 4 Connect the camcorder to the computer using the DV cable ( 22). • The [Scanner and Camera Wizard] starts automatically. • If the program does not start automatically, select [My computer] on the [start] menu, right-click the mouse button in the camera - Canon ZR60 | DV Messenger Ver 1.0 Instruction Manual - Page 25
AV/C Camera Storage Subunit-WIA Driver 7 Specify file name and destination and click the [Next] button. • Downloading of the selected still E images starts. • When download is complete, a dialog confirming to finish appears. 8 If you wish to end the program, select [Nothing. I'm finished - Canon ZR60 | DV Messenger Ver 1.0 Instruction Manual - Page 26
/movies appear. With images not recorded with Canon digital camcorders, their thumbnails may not be displayed correctly. • Double-clicking a still image on Windows Explorer displays it in bigger size. • Double-clicking a file other than a still image downloads the file to the [My Pictures] folder - Canon ZR60 | DV Messenger Ver 1.0 Instruction Manual - Page 27
AV/C Camera Storage Subunit-WIA Driver 5 Keep the mouse clicked on the thumbnail and move it to the desired folder (drag and drop). E OR 5 Right-click the mouse on the image and select [Copy]. 6 Open a folder, right-click the mouse in the folder and select [Paste]. 27 - Canon ZR60 | DV Messenger Ver 1.0 Instruction Manual - Page 28
and size. ¡ Still image/movies uploaded to the memory card may not be played back on the camcorder depending on file type and size. ¡ If you download a still image/movie from the camcorder to the computer and upload it again to the camcorder: - The still image/movies may not be played back on the - Canon ZR60 | DV Messenger Ver 1.0 Instruction Manual - Page 29
. Checking the Camcorder Connection 1 Connect the power adapter to the camcorder. 2 Set the camcorder to TAPE CAMERA mode. 3 Connect the camcorder to the computer using the DV cable ( 22). 4 From the [start] menu, select [All Programs] and [Windows Messenger]. • [Windows Messenger] appears - Canon ZR60 | DV Messenger Ver 1.0 Instruction Manual - Page 30
If you are using a Canon camcorder, check if [Canon DV Device] is displayed. • If [Canon DV Device] does not appear, click to display the device list and check if [Canon DV Device] is listed. • If [Canon DV Device] is not listed, perform [Windows Messenger Audio Update] from [Windows Update]. Please - Canon ZR60 | DV Messenger Ver 1.0 Instruction Manual - Page 31
1 From the [start] menu, select [Control Panel]. E 2 Click [Network and Internet Connections]. 3 Click [Network Connections]. 31 DV Messenger - Canon ZR60 | DV Messenger Ver 1.0 Instruction Manual - Page 32
Preparations for the DV Messenger 4 Select the network you are using, right-click the mouse button and select [Properties]. • You can identify the network you are using by checking which [Status] is [Enabled]. • If [1394 Connection] is listed, select a connection other than [1394 Connection]. If [ - Canon ZR60 | DV Messenger Ver 1.0 Instruction Manual - Page 33
Messenger. In such case, sign out of Windows first and start DV Messenger. ¡ Do not update Windows Messenger while DV Messenger is started. ¡ Do not connect two or more digital camcorders to the computer. 1 Set the camcorder to TAPE CAMERA mode. 2 Connect to the Internet. 3 Double-click the - Canon ZR60 | DV Messenger Ver 1.0 Instruction Manual - Page 34
Videoconferencing • To use the DV Messenger, both you and your contact need to be online. the camcorder and adjust the volume of the speaker and microphone. 1 Set the camcorder to TAPE CAMERA mode or TAPE PLAY (VCR) mode. • When you have set the camcorder to TAPE PLAY (VCR) mode, play back the tape. - Canon ZR60 | DV Messenger Ver 1.0 Instruction Manual - Page 35
E 4 Select your camcorder and click [Next]. • If you are using a Canon camcorder, select [Canon DV Device]. 5 When the video picture appears, click [Next]. • The live video recording of the camcorder appears in TAPE CAMERA mode. In TAPE PLAY (VCR) mode, the playback video appears. 35 DV Messenger - Canon ZR60 | DV Messenger Ver 1.0 Instruction Manual - Page 36
the explanation for speaker and microphone settings and click [Next]. 7 Set [Microphone] and click [Next]. • If you are using a Canon camcorder, select [Canon DV Device]. • The installed sound device appears for [Speaker]. Proceed with the setting unchanged. 8 Connect speakers or headphones to the - Canon ZR60 | DV Messenger Ver 1.0 Instruction Manual - Page 37
TAPE CAMERA mode: Direct your voice into the microphone of your camcorder and check if the volume indicator operates correctly. • In TAPE PLAY (VCR) mode: Play back the tape camcorder is in CARD CAMERA mode. 10 Click [Finish]. • The settings for speaker and microphone are complete. DV Messenger - Canon ZR60 | DV Messenger Ver 1.0 Instruction Manual - Page 38
videoconference with members who have a camcorder connected and are using DV Messenger. • The [Conversation] window appears. • A connecting request is window appears on his screen. If your contact then clicks on [Accept], the videoconference starts. Video picture of your contact's camcorder Video - Canon ZR60 | DV Messenger Ver 1.0 Instruction Manual - Page 39
message appears, click on the message. • The [Conversation] window appears on your computer screen. • If it does not appear, click the task flashing on the taskbar. 3 Click [Accept]. • The videoconference starts. DV Messenger Video picture of your contact's camcorder Video picture of your - Canon ZR60 | DV Messenger Ver 1.0 Instruction Manual - Page 40
button cannot be selected if your contact is not using DV Messenger or a non-Canon camcorder. 3 [Local] Section The mode of your camcorder is highlighted (only if a Canon camcorder is connected). 4 [Remote] Section The mode of the camcorder of your contact is highlighted (only if your contact is - Canon ZR60 | DV Messenger Ver 1.0 Instruction Manual - Page 41
from the displayed menu. This does not end the DV Messenger ( 50). Taskbar When DV Messenger is started, the [DV Messenger] task and [DV Messenger] icon appear on the taskbar. 1 2 1 DV Messenger task 2 DV Messenger icon Appears when the DV Messenger panel is displayed or minimized. If it is - Canon ZR60 | DV Messenger Ver 1.0 Instruction Manual - Page 42
3 Control Panel Open 4 Disconnect 5 Exit Displays the version of the DV Messenger. Displays the DV Messenger's help topics. Displays the DV Messenger panel on the screen. Disconnects the communication between you and your contact. The [Conversation] window disappears. Exits the DV Messenger. 42 - Canon ZR60 | DV Messenger Ver 1.0 Instruction Manual - Page 43
or sound may be delayed. Note: ¡ If the camcorder is set to a mode other than TAPE CAMERA, you cannot send video or sound to your contact. In such case, use instant messaging on the lower part of the [Conversation] window to communicate with your contact. The instant messaging conversation is - Canon ZR60 | DV Messenger Ver 1.0 Instruction Manual - Page 44
DV Messenger In [CAMERA] Mode If the camcorder connected to your computer is set to TAPE CAMERA mode, you can send live video recording to your contact and perform a videoconference ( 33). You can also adjust the camcorder's zoom and focus from the DVM panel. 1 Set your camcorder to TAPE CAMERA - Canon ZR60 | DV Messenger Ver 1.0 Instruction Manual - Page 45
is set to TAPE PLAY (VCR) mode, you can send video and sound recorded on a tape to your contact. You can also adjust the tape speed from the DVM panel while monitoring the picture in the [Conversation] window. If the camcorder of your contact is set to TAPE PLAY (VCR) mode, click the [Remote - Canon ZR60 | DV Messenger Ver 1.0 Instruction Manual - Page 46
Operating the Camcorders With DV Messenger I The [VCR] Operating Buttons 2 1 34 8 7 Video picture from the tape in your or your contact's camcorder 9 56 1 Playback Plays back the tape. 2 Reversed Playback Plays back the tape in reverse. 3 Playback Pause Pauses the playback. 4 Stop Stops - Canon ZR60 | DV Messenger Ver 1.0 Instruction Manual - Page 47
of your contact first before transferring files. ¡ File transfer can only be used with Canon camcorders equipped with the file transfer function ( 9), and the AV/C Camera Storage Subunit-WIA Driver contained in the DV NETWORK SOLUTION DISK ( 10) needs to be installed in the computer. ¡ If your - Canon ZR60 | DV Messenger Ver 1.0 Instruction Manual - Page 48
Operating the Camcorders With DV Messenger 4 Select the file you wish to transfer by placing the thumbnail, the file information appears. • Thumbnails may not appear with images not recorded with the camcorder of your contact. 5 When you have selected the files you wish to transfer, click [Fetch]. - Canon ZR60 | DV Messenger Ver 1.0 Instruction Manual - Page 49
Wizard] before clicking [Start Camera]. 1 On the [Conversation] window, click [Stop Camera]. 2 Change the mode of the camcorder. 3 Wait until the video picture and camcorder information such as the tape counter appear in the display and click [Start Camera]. DV Messenger • A message with the - Canon ZR60 | DV Messenger Ver 1.0 Instruction Manual - Page 50
the mouse on the [Remote] button of the DVM panel. OR Click the DV Messenger icon on the taskbar and select [Disconnect] from the displayed menu. • The communication with your contact ends and the [Conversation] window closes. If you wish to communicate with another contact, select the contact after - Canon ZR60 | DV Messenger Ver 1.0 Instruction Manual - Page 51
Troubleshooting AV/C Camera Storage Subunit-WIA Driver E Regarding Installation of the AV/C Camera Storage Subunit-WIA Driver ? The Canon camcorder is connected to the computer via a DV cable, but is not recognized by the computer. ➜ Check if the camcorder is set to CARD PLAY (VCR) mode. ➜ If the - Canon ZR60 | DV Messenger Ver 1.0 Instruction Manual - Page 52
to the computer with an DV cable. ➜ Windows Messenger may not be able to receive video and sound if you have changed the operating mode of the camcorder during videoconference. Click [Stop Camera] and then [Start Camera] to restart the videoconference. ➜ Some Canon camcorders are equipped with - Canon ZR60 | DV Messenger Ver 1.0 Instruction Manual - Page 53
➜ Check the position of the speaker volume lever in the [Conversation] window. Move E the lever to the right until the volume indicator on the right operates. ➜ Check if the sound device is set to [Mute] in the [ - Canon ZR60 | DV Messenger Ver 1.0 Instruction Manual - Page 54
camcorder, click [Stop Camera] and check whether [Canon DV Device] is selected in the [Audio Tuning Wizard]. Click [Start Camera] to restart the videoconference. ➜ Ask your contact to check the settings of the speakers. See "I receive the video picture of my contact in the [Conversation] window - Canon ZR60 | DV Messenger Ver 1.0 Instruction Manual - Page 55
adjusted manually. Set the program selector to Q (program AE). ? The camcorder turns off during use in TAPE CAMERA mode. ➜ If the Canon camcorder set to TAPE CAMERA mode and a recordable tape is inserted, the camcorder automatically turns off after a certain time to protect the tape and video heads - Canon ZR60 | DV Messenger Ver 1.0 Instruction Manual - Page 56
. In such case, deactivate the firewall function of the software. For details, refer to the instruction manual of the respective software. ➜ If the Canon camcorder is set to TAPE CAMERA mode, some camcorders will enter the demonstration mode after a certain time. During demonstration, you may not be - Canon ZR60 | DV Messenger Ver 1.0 Instruction Manual - Page 57
Customer Care Center Tel (US): 1-800-828-4040 (Mon.-Fri., 9 AM to 8 PM Eastern Time) Canon Canada Inc. Tel (Canada): 1-800-OK-CANON (1-800-652-2666) Canon Hong Kong Co., Ltd. 9/F, The Hong Kong Club Building, 3A Chater Road, Central, Hong Kong Phone: 852-2739-0802 Fax: 852-2369-7701 PUB. DIM-
-
 1
1 -
 2
2 -
 3
3 -
 4
4 -
 5
5 -
 6
6 -
 7
7 -
8
-
9
-
10
-
11
-
12
-
13
-
14
-
15
-
16
-
17
-
18
-
19
-
20
-
21
-
22
-
23
-
24
-
25
-
26
-
27
-
28
-
29
-
30
-
31
-
32
-
33
-
34
-
35
-
36
-
37
-
38
-
39
-
40
-
41
-
42
-
43
-
44
-
45
-
46
-
47
-
48
-
49
-
50
-
51
-
52
-
53
-
54
-
55
-
56
-
57
 |
 |
DV NETWORK SOLUTION DISK
Version 1
Software Instruction Manual
PUB. DIM-555
This software is for use with Windows
®
XP only.
Ce logiciel ne peut être employé que sous Windows® XP.
Este software solamente es compatible con Windows® XP.
E
F
Es
Mode d’emploi du logiciel
Manual de Instrucciones del software