Canon imageCLASS MF4350d imageCLASS MF4380dn/MF4370dn/MF4350d Basic Operation - Page 118
Using the One-Touch Keys, Using Coded Dial Codes, Place documents., Press, FAX].
 |
UPC - 013803092097
View all Canon imageCLASS MF4350d manuals
Add to My Manuals
Save this manual to your list of manuals |
Page 118 highlights
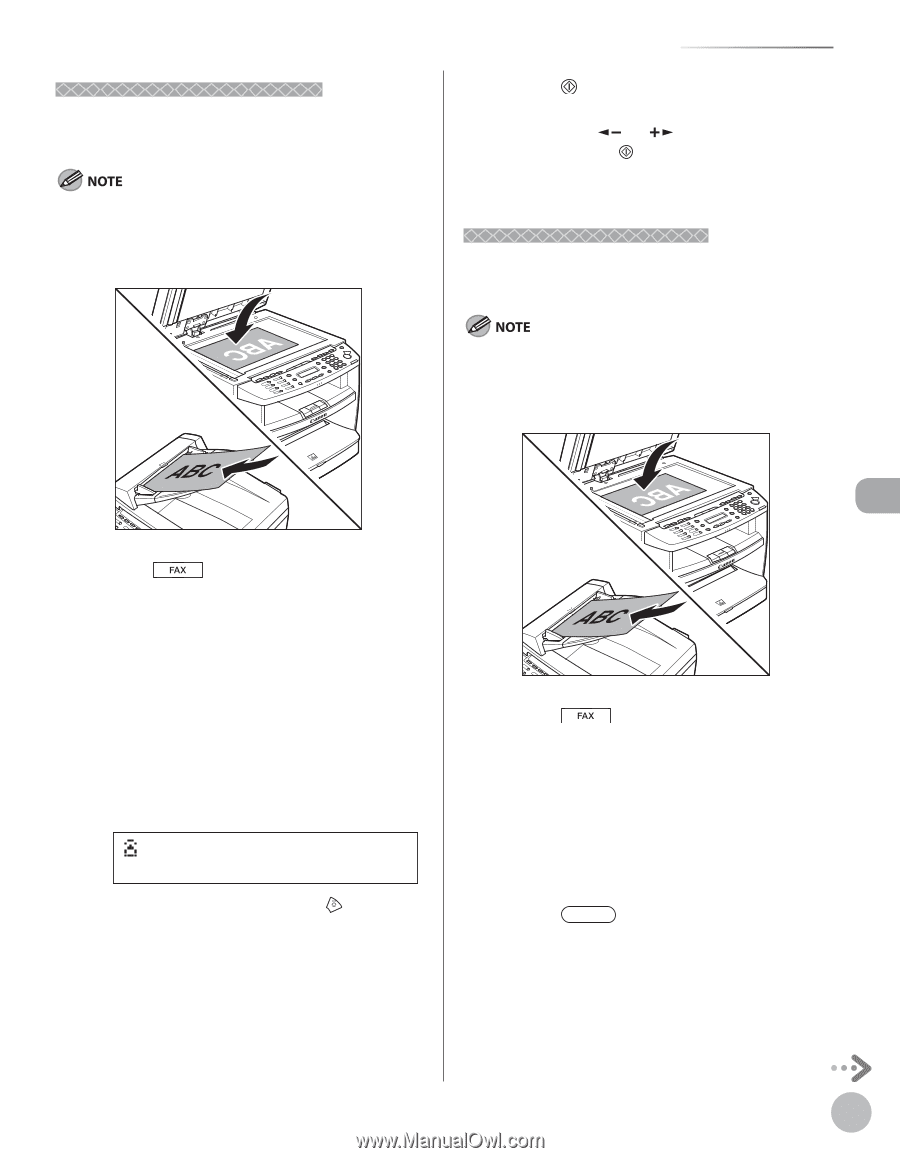
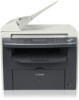
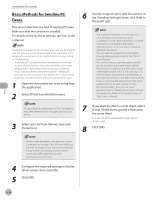
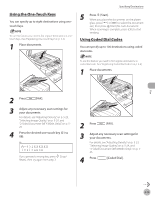
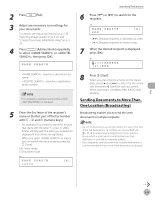
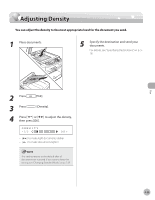
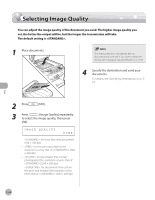
Using the One-Touch Keys You can specify up to eight destinations using onetouch Keys. To use this feature, you need to first register destinations in onetouch Keys. (See "Registering One-Touch Keys," on p. 3-3.) 1 Place documents. Specifying Destinations 5 Press [Start]. When you place the documents on the platen glass, press [ ] or [ ] to select the document size, then press [Start] for each document. When scanning is complete, press [OK] to start sending. Using Coded Dial Codes You can specify up to 100 destinations using coded dial codes. To use this feature, you need to first register destinations in coded dial code. (See "Registering Coded Dial Codes," on p. 3-6.) 1 Place documents. 2 Press [FAX]. 3 Adjust any necessary scan settings for your documents. For details, see "Adjusting Density," on p. 5-23, "Selecting Image Quality," on p. 5-24, and "2-Sided Document (MF4380dn Only)," on p. 525. 4 Press the desired one-touch key (01 to 08). Ex. =031XXXXXX [01]canon If you pressed a wrong key, press [Stop/ Reset], then try again from step 3. 2 Press [FAX]. 3 Adjust any necessary scan settings for your documents. For details, see "Adjusting Density," on p. 5-23, "Selecting Image Quality," on p. 5-24, and "2-Sided Document (MF4380dn Only)," on p. 525. 4 Press [Coded Dial] . Fax 5-19
-
 1
1 -
2
-
3
-
4
-
5
-
6
-
7
-
8
-
9
-
10
-
11
-
12
-
13
-
14
-
15
-
16
-
17
-
18
-
19
-
20
-
21
-
22
-
23
-
24
-
25
-
26
-
27
-
28
-
29
-
30
-
31
-
32
-
33
-
34
-
35
-
36
-
37
-
38
-
39
-
40
-
41
-
42
-
43
-
44
-
45
-
46
-
47
-
48
-
49
-
50
-
51
-
52
-
53
-
54
-
55
-
56
-
57
-
58
-
59
-
60
-
61
-
62
-
63
-
64
-
65
-
66
-
67
-
68
-
69
-
70
-
71
-
72
-
73
-
74
-
75
-
76
-
77
-
78
-
79
-
80
-
81
-
82
-
83
-
84
-
85
-
86
-
87
-
88
-
89
-
90
-
91
-
92
-
93
-
94
-
95
-
96
-
97
-
98
-
99
-
100
-
101
-
102
-
103
-
104
-
105
-
106
-
107
-
108
-
109
-
110
-
111
-
112
-
 113
113 -
 114
114 -
 115
115 -
 116
116 -
 117
117 -
 118
118 -
 119
119 -
 120
120 -
 121
121 -
 122
122 -
 123
123 -
124
-
125
-
126
-
127
-
128
-
129
-
130
-
131
-
132
-
133
-
134
-
135
-
136
-
137
-
138
-
139
-
140
-
141
-
142
-
143
-
144
-
145
-
146
-
147
-
148
-
149
-
150
-
151
-
152
-
153
-
154
-
155
-
156
-
157
-
158
-
159
-
160
-
161
-
162
-
163
-
164
-
165
-
166
-
167
-
168
-
169
-
170
-
171
-
172
-
173
-
174
-
175
-
176
-
177
-
178
-
179
-
180
-
181
-
182
-
183
-
184
-
185
-
186
-
187
-
188
-
189
-
190
-
191
-
192
-
193
-
194
-
195
-
196
-
197
-
198
-
199
-
200
-
201
-
202
-
203
-
204
-
205
-
206
-
207
-
208
-
209
-
210
-
211
-
212
-
213
-
214
-
215
-
216
-
217
-
218
-
219
-
220
-
221
-
222
-
223
-
224
-
225
-
226
-
227
-
228
-
229
-
230
-
231
-
232
-
233
-
234
-
235
-
236
-
237
-
238
-
239
-
240
-
241
-
242
-
243
-
244
-
245
-
246
-
247
-
248
-
249
-
250
-
251
-
252
 |
 |