Canon imageFORMULA CR-L1 User Manual
Canon imageFORMULA CR-L1 Manual
 |
View all Canon imageFORMULA CR-L1 manuals
Add to My Manuals
Save this manual to your list of manuals |
Canon imageFORMULA CR-L1 manual content summary:
- Canon imageFORMULA CR-L1 | User Manual - Page 1
User Manual ♦ Please read this manual before operating this scanner. - Canon imageFORMULA CR-L1 | User Manual - Page 2
in accordance with the instructions, may cause harmful CR-L1: 6130110 CR-L1 UV: 6130120 Trademarks • Canon and the Canon logo are registered trademarks, of Canon Inc. in the United States and may also be trademarks or registered trademarks in other countries. • imageFORMULA is a trademark of CANON - Canon imageFORMULA CR-L1 | User Manual - Page 3
AND VERIFYING THAT THE DATA IS INTACT. THE MAXIMUM LIABILITY OF CANON ELECTRONICS INC. UNDER THIS WARRANTY IS LIMITED TO THE PURCHASE PRICE authorized Canon dealer. CR-L1 Disc Marking Labels for Thickness Adjustment Dial Power Cord*1 USB Cable AC Adapter Warranty Card*2 Setup & Operation Guide - Canon imageFORMULA CR-L1 | User Manual - Page 4
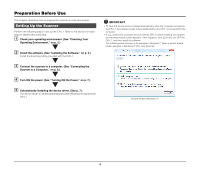
when Windows recognizes the CR-L1. IMPORTANT • To have the device drivers installed automatically when the computer recognizes the CR-L1, the software needs to be installed before the CR-L1 is connected to the computer. • If you connect the computer and turn ON the CR-L1 before installing the - Canon imageFORMULA CR-L1 | User Manual - Page 5
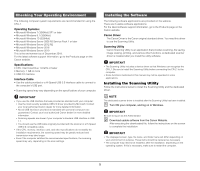
includes a device driver so that Windows can recognize the CR-L1. Be sure to install the Scanning Utility before connecting the CR-L1 to the computer. • Some functions mentioned in this manual may not be operated in some applications. Installing the Scanning Utility Follow the instructions below to - Canon imageFORMULA CR-L1 | User Manual - Page 6
with the length less than 5 m. • When the application is running, do not turn the scanner OFF or unplug the interface cable. • Do not connect multiple CR-L1 scanners to one computer. CAUTION • Do not turn OFF the scanner or remove the interface cable when an application is running. • Turn OFF the - Canon imageFORMULA CR-L1 | User Manual - Page 7
as "CANON CR-L1 USB" in the Imaging Device directory. (ON) IMPORTANT • When you turn ON the power, the power LED flashes slowly, and then turns solid. • If the scanner does not work, there is a problem with the scanner. Turn OFF the power, and contact your local authorized Canon dealer or service - Canon imageFORMULA CR-L1 | User Manual - Page 8
& Operation Guide. For details on the CR-L1, refer to the User Manual (electronic manual). User Manual (Electronic Manual): This Manual Describes how to use the scanner, and includes instructions for configuring the scanner settings, as well as handling, maintenance, and troubleshooting information - Canon imageFORMULA CR-L1 | User Manual - Page 9
OFF the Power 7 INTRODUCTION 8 Manuals for the CR-L1 8 Symbols Used in This Manual 8 Important Safety Instructions 10 Handling 10 Disposal 10 27 Troubleshooting 28 When the Scanner Is Not Recognized 28 Clearing Paper Jams 28 The Scanner Does Not Turn ON 30 Feeding Trouble 30 - Canon imageFORMULA CR-L1 | User Manual - Page 10
Important Safety Instructions Handling WARNING ■ Never install and operate the scanner near flammable the power cord from the power outlet. Contact your local authorized Canon dealer or service representative to have the scanner serviced. ■ Before you move the scanner, always turn OFF the power - Canon imageFORMULA CR-L1 | User Manual - Page 11
with any other product. • If you have any questions about the AC adapter, contact your local authorized Canon dealer or service representative for further information. Moving the Scanner When you move the CR-L1, hold it firmly with both hands and carry it carefully. Do not hold the scanner by the - Canon imageFORMULA CR-L1 | User Manual - Page 12
and functions of parts on the scanner. Features of the CR-L1 The Canon Check Reader CR-L1 is a scanner with magnetic heads that can read checks writer are recognized as characters by the OCR function. Supports UV scanning (UV model only) CR-L1 UV can scan images that are printed with UV fluorescent - Canon imageFORMULA CR-L1 | User Manual - Page 13
Part Names This section describes the names and functions of each part. Before you connect the CR-L1, familiarize yourself with its parts and their functions. Front View Document Eject Opening Document Feed Opening Imprinter Cover Eject Stopper Adjust to match the length - Canon imageFORMULA CR-L1 | User Manual - Page 14
Ink Cartridge The ink cartridge is not included, and must be purchased separately. (See "About the Ink Cartridge," on p. 16.) Print Position Adjustment Lever Adjusts the print position. (See "Setting the Ink Cartridge and Adjusting the Print Position," on p. 16.) Lock Lever Locks the ink cartridge - Canon imageFORMULA CR-L1 | User Manual - Page 15
Rear View Connectors/ Power Switch Reading Unit (Access Hatch) Open to clear paper jams or clean the scanner. (See "Clearing Paper Jams," on p. 28.) Exterior Dimensions Units: millimeters (units in parenthesis are inches) 140 mm (5.5") 188 mm (7.4") Connectors/Power Switch Power Switch Slide to - Canon imageFORMULA CR-L1 | User Manual - Page 16
an ink cartridge separately, as shown below. Manufacturer : Hewlett Packard Ink Cartridge Blue : C6602B (Canon#3693A002) Ink Cartridge Red : C6602R (Canon#3693A003) Ink Cartridge Green: C6602G (Canon#3693A004) Setting the Ink Cartridge and Adjusting the Print Position The ink cartridge needs - Canon imageFORMULA CR-L1 | User Manual - Page 17
D Grasp the tag and then peel off the tape covering the ink jet nozzle. E Place the ink cartridge shown in the diagram below. IMPORTANT Do not touch the ink jet nozzle or contacts after peeling off the tag and tape. CAUTION Do not touch the electrical contact on the carriage. Doing so may cause a - Canon imageFORMULA CR-L1 | User Manual - Page 18
G Squeeze the Print Position Adjustment Lever and move it to adjust the print position. Top: 50.5 mm (1.99") from the bottom edge of the document Middle: 47 mm (1.85") from the bottom edge of the document Bottom: 43.5 mm (1.71") from the bottom edge of the document If the ink head drops back when - Canon imageFORMULA CR-L1 | User Manual - Page 19
the Scanning Utility is noted in the Scanning Utility help file. On the [Help] menu, click [Help] to view the explanation. B Click [Scanning Utility for CR-50&80&L1]. D Select [Scanner Setting] from the [File] menu. The Settings dialog box appears. 19 - Canon imageFORMULA CR-L1 | User Manual - Page 20
sure to log on as the Administrator. • The procedure in Windows 8.1/10 is different from the ones described in this manual. Refer to the Windows 8.1/10 "Help and Support Center" to uninstall the software. A Click [Start], and then click [Control Panel]. G When scanning is finished, click [Exit] on - Canon imageFORMULA CR-L1 | User Manual - Page 21
need to uninstall "Canon Driver for CR-50/ 80/ L1 (or CR-50&80&L1)." D The [Confirm File Deletion] dialog box appears. If you selected "Canon Driver for CR-50/ 80/ L1 (or CR-50&80&L1)", the above dialog box appears. E Click [Yes], and the uninstaller starts. Follow the instructions on the screen - Canon imageFORMULA CR-L1 | User Manual - Page 22
of documents that can be used and how to place them. CAUTION Treat the documents carefully. The paper edges may cut your fingers. Document The CR-L1 can feed a wide variety of document sizes. The ranges of height and length for a document are: Height : 50 to 108 mm (2.0" to 4.3") Length : 95 to - Canon imageFORMULA CR-L1 | User Manual - Page 23
for CR-50/80/L1 (or CR50&80&L1): You can disable the double feed detection function from [Scanner Setting] in the Scanning Utility. • For more details about how to configure scanning parameters, click the [Help] button in the settings dialog box to view the Canon driver - Canon imageFORMULA CR-L1 | User Manual - Page 24
scanning to start from the software application. NOTE • When Using the Accompanying Scanning Utility for CR-50/80/L1 (or CR50&80&L1): There are three scanning methods as follows. Follow the each instruction. Scan 1 page Click [Scan Page] from the [File] menu. Scan Batch to File A Click [Scan - Canon imageFORMULA CR-L1 | User Manual - Page 25
mode. A Start the Scanning Utility. ("How to Use the Scanning Utility" on p. 19.) B Click [Scanner Setting] from the [File] menu. The scanner driver's Detail Settings screen will open. IMPORTANT When the scanner settings screen is opened by the application, the below screen is displayed, in which - Canon imageFORMULA CR-L1 | User Manual - Page 26
on the length of the document. E Click [OK] to close the scanner driver settings screen. F Pull out the document feed tray. I Load the document. a time. Otherwise, it may damage the documents. • When feeding the document, support it to keep the same height between the document and the feed path. If - Canon imageFORMULA CR-L1 | User Manual - Page 27
J Instruct scanning to start from the software application. IMPORTANT • Set the [Page the Start button, and then click [All Programs], [CANON CR-L1], and [Canon imageFORMULA Utility]. imageFORMULA Utility starts. C Click [CANON CR-L1 USB] and click [Properties]. Scanner properties are displayed. - Canon imageFORMULA CR-L1 | User Manual - Page 28
Troubleshooting This chapter describes the problems that might occur in the CR-L1, and how to remedy them. interfaces provided as standard with personal computers are guaranteed. Contact your local authorized Canon dealer for more detailed information. (See "Checking Your Operating Environment," on - Canon imageFORMULA CR-L1 | User Manual - Page 29
C Remove the paper that has jammed. If the paper is jammed at the pickup area: Pull the paper forward and clear the jam from the Maintenance Cover. E Gently close the Maintenance Cover until it clicks into place. If the paper is jammed at any other area: Pull the paper forward and clear the jam - Canon imageFORMULA CR-L1 | User Manual - Page 30
your local authorized Canon dealer or service representative to have the scanner serviced. • The problem. The imprinter is not printing correctly (missing imprint dots). Ink is clogged in the ink jet nozzle. Clean the ink jet nozzle. Cleaning the ink jet nozzle is recommended before using the CR-L1 - Canon imageFORMULA CR-L1 | User Manual - Page 31
, and the driver and the application is installed correctly, scanning may not be performed correctly. If this happens, the interface card is not compatible. Use the recommended interface card. If the above remedies do not rectify the problem, contact your local authorized Canon dealer or service - Canon imageFORMULA CR-L1 | User Manual - Page 32
Maintenance This chapter describes how to clean and maintain the scanner. Daily Cleaning To ensure high-quality image scanning, regularly clean your CR-L1 as described below. CAUTION • Before you clean the scanner, turn OFF the scanner and computer, and disconnect the power cord from the power - Canon imageFORMULA CR-L1 | User Manual - Page 33
marks on the images and could cause feeding errors. If there are scratches on the scanning glass, contact your local authorized Canon dealer or service representative. E Gently close the reading unit until it clicks into place. ԧ Ԣ ԙԛ Ԝ F Gently close the maintenance cover until it clicks into - Canon imageFORMULA CR-L1 | User Manual - Page 34
your documents are stained and smudged from printing even after you clean the ink absorber, you should replace the ink absorber. Contact your local authorized Canon dealer or service representative. C Remove the ink cartridge. For more information, (See "Replacing the Ink Cartridge," on p. 37.) 34 - Canon imageFORMULA CR-L1 | User Manual - Page 35
paper documents upon scanning or for preventative measures, we recommend that you clean your Canon CR-Series scanner as needed with a cleaning card. Using a cleaning card will minimize the frequent cleaning as instructed in this manual. It is best to perform a cleaning at beginning or end of the day - Canon imageFORMULA CR-L1 | User Manual - Page 36
file shown below. G The Cleaning Card will then proceed through the paper path as shown below. E From the drop-down menu, please select CR-50/ 80/ L1 and click [OK]. F With the Cleaning Card already in the feed pocket of the scanner, please click Clean. H Please repeat steps 3 and 6. A typical - Canon imageFORMULA CR-L1 | User Manual - Page 37
cleaning your scanner, please click on the Close button to exit out of the Canon Check Scanner Cleaning Tool. NOTE Upon completion, please allow 1 to 2 minutes for the moisture on the Canon CRSeries scanner from the Cleaning Card to thoroughly dry before scanning documents. Maintenance Make - Canon imageFORMULA CR-L1 | User Manual - Page 38
C Squeeze in both sides of the print position adjustment lever and move the print cartridge carriage to its lowest position. NOTE Do not use more than one cartridge by rotation. If you do so, applications cannot check the ink level precisely. F Push down the ink cartridge until it clicks into place - Canon imageFORMULA CR-L1 | User Manual - Page 39
as a user with administrator privileges. L Click the Start button, and then click [All Programs], [CANON CR-L1], and [Canon imageFORMULA Utility]. imageFORMULA Utility starts. M Click [CANON CR-L1 USB] and click [Properties]. Scanner properties are displayed. N Click the [Maintenance] tab and then - Canon imageFORMULA CR-L1 | User Manual - Page 40
O Click [OK] to close the scanner properties. NOTE You can reset the Residual ink from the Scanning Utility. Click [About], and then click [Reset] on the setting dialog box. (See Step 5 on p. 20) B Pull out the document feed tray. Adjusting the Separation Roller Gap If double feed should occur too - Canon imageFORMULA CR-L1 | User Manual - Page 41
the document feeds properly. See "Confirming Proper Document Feeding," on p. 24. If additional assistance is required, contact your local authorized Canon dealer or service representative. I Place a marking label on the unit pointing to the adjustment dial as illustrated below. This will serve as - Canon imageFORMULA CR-L1 | User Manual - Page 42
UV Scan 100 x 100 dpi, 120 x 120 dpi, 200 x 200 dpi, 300 x 300 dpi CR-L1: 45 cpm CR-L1 UV: 45 cpm (UV Scan mode) Load limit of less than 5 mm (0.2") (within the load . ■ You can use the functions noted above if your software supports them. ■ These functions may not work depending on your computer's - Canon imageFORMULA CR-L1 | User Manual - Page 43
Detection 23 E Eject Stopper 13 Exterior Dimensions 15 F Features of the CR-L1 12 Feeding Roller 14 Feeding Trouble 30 H Handling 10 I Imprinter Cover 13 Ink Absorber 14 Ink Cartridge T The Scanner Does Not Turn ON 30 Troubleshooting 27 Turning OFF the Power 7 Turning ON the Power 7 43 - Canon imageFORMULA CR-L1 | User Manual - Page 44
U Unpacking the scanner 3 USB Connections 6, 28 USB Connector 15 UV scanning 12 44 - Canon imageFORMULA CR-L1 | User Manual - Page 45
Safety-related markings on the machine Marquages de sécurité sur la machine Marcature di sicurezza sulla macchina Sicherheitshinweise auf der Maschine Marcas de la máquina relacionadas con la seguridad Veiligheidsmarkeringen op de machine Makine üzerindeki güvenlik i㶆aretleri [English] [Français] [ - Canon imageFORMULA CR-L1 | User Manual - Page 46
[English] [Français] [Italiano] [Deutsch] [Español] [Nederlands] [Türkçe] Switch (Push-On/Push-Off) Commutateur (Appuyer pour mettre en marche/Appuyer pour arrêter) Interruttore a pulsante bistabile (On/Off) Schalter (Ein- und Ausschalten durch Drücken) Interruptor (pulsado para encendido/apagado) - Canon imageFORMULA CR-L1 | User Manual - Page 47
[English] [Français] [Italiano] [Deutsch] [Español] [Nederlands] [Türkçe] DC symbol Indicates direct current Symbole CC Indique qu'il s'agit de courant continu Simbolo corrente continua (C.C.) Indica la corrente continua Gleichstrom-Symbol Kennzeichnet Gleichstrom Símbolo CC Indica - Canon imageFORMULA CR-L1 | User Manual - Page 48
AUSTRALIA PTY. LTD. BUILDING A, THE PARK ESTATE, 5 TALAVERA ROAD, MACQUARIE PARK, NSW 2113, AUSTRALIA CANON SINGAPORE PTE. LTD. 1 FUSIONOPOLIS PLACE, #15-10, GALAXIS, SINGAPORE 138522 CANON INDIA PVT. LTD 7TH FLOOR, TOWER B DLF CYBER TERRACES DLF PHASE III GURGAON - 122002 HARYANA, INDIA PUB
-
 1
1 -
 2
2 -
 3
3 -
 4
4 -
 5
5 -
 6
6 -
 7
7 -
8
-
9
-
10
-
11
-
12
-
13
-
14
-
15
-
16
-
17
-
18
-
19
-
20
-
21
-
22
-
23
-
24
-
25
-
26
-
27
-
28
-
29
-
30
-
31
-
32
-
33
-
34
-
35
-
36
-
37
-
38
-
39
-
40
-
41
-
42
-
43
-
44
-
45
-
46
-
47
-
48
 |
 |

♦
Please read this manual before operating this scanner.
User Manual