Canon imagePROGRAF GP-4000 imagePROGRAF SD-21 Printer Stand Setup Guide
Canon imagePROGRAF GP-4000 Manual
 |
View all Canon imagePROGRAF GP-4000 manuals
Add to My Manuals
Save this manual to your list of manuals |
Canon imagePROGRAF GP-4000 manual content summary:
- Canon imagePROGRAF GP-4000 | imagePROGRAF SD-21 Printer Stand Setup Guide - Page 1
SD-21 Printer Stand Setup Guide Guide d'installation du socle de l'imprimante Guía de configuración del Soporte de la impresora Guia de configuração de suporte da impressora Setup-Handbuch für das Druckergestell Guida - Canon imagePROGRAF GP-4000 | imagePROGRAF SD-21 Printer Stand Setup Guide - Page 2
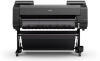
SD-21 printer stand is a printer stand exclusively for the Canon TX-2000, TX-2100, PRO2000, PRO-2100, and GP-2000 printer. Follow the instructions in the manual to securely attach the printer to the stand. Using a stand not listed above or not attaching the printer securely to the stand may be - Canon imagePROGRAF GP-4000 | imagePROGRAF SD-21 Printer Stand Setup Guide - Page 3
-Schlüssel Chiave a brugola M4 M4-inbussleutel Klucz imbusowy M4 Es sind ggf. weitere Dokumentationen in der Packung enthalten. È possibile che la confezione includa altre guide. De verpakking kan ook nog andere documentatie bevatten. W zestawie może znajdować się również inna dokumentacja. 2 - Canon imagePROGRAF GP-4000 | imagePROGRAF SD-21 Printer Stand Setup Guide - Page 4
(x 2) Soporte de la varilla (x 2) Suporte da haste (x 2) Stangenhalter (x 2) Supporto dell'asta (x 2) Stanghouder (x 2) Uchwyt pręta (x 2) 2) Basket locking support (x 2) Support de verrouillage de panier (x 2) Soporte de bloqueo de cesta (x 2) Suporte de bloqueio da cesta (x 2) Korbstützensperre - Canon imagePROGRAF GP-4000 | imagePROGRAF SD-21 Printer Stand Setup Guide - Page 5
of the stand. ● Lift the printer with 6 people. For details on the number of lifters and the position they hold, refer to the Setup Guide "Handling Cautions" (P. 3). Attention ● Le montage du socle demande au moins 2 personnes. L'assemblage du socle seul pose un risque de blessure ou de torsion - Canon imagePROGRAF GP-4000 | imagePROGRAF SD-21 Printer Stand Setup Guide - Page 6
3 A B C B Align the positions of the ▲ (A) stamped on the left and right of the stand stay to overlap with the ▲ (B) stamped C on the inner sides of the stand legs, and hook the hook-shaped parts of the stand stay (C) onto the stand legs. Alignez les positions du ▲ (A) estampées à gauche - Canon imagePROGRAF GP-4000 | imagePROGRAF SD-21 Printer Stand Setup Guide - Page 7
legs. Attach with the protrusions (A) on the basket rod facing towards you. Lors de l'utilisation du panier Fixez la tige du panier aux plaques de support sur les jambes du socle. Fixez avec les parties saillantes (A) sur la tige du panier face à vous. Cuando se utilice la cesta Acople la varilla - Canon imagePROGRAF GP-4000 | imagePROGRAF SD-21 Printer Stand Setup Guide - Page 8
TX series only) Check the positions of the alignment protrusions (A) on the back of the printer and the holes in rod 2 (B). Use (A) and (B) as guide markings when placing the printer on the stand in step 9. Lors de l'utilisation de l'empileur (série TX uniquement) Vérifiez les positions des parties - Canon imagePROGRAF GP-4000 | imagePROGRAF SD-21 Printer Stand Setup Guide - Page 9
8 6 Have 6 people lift the printer and move it to the stand. Ayez recours à 6 personnes pour soulever l'imprimante et le mettre sur le socle. Levante la impresora entre 6 personas y muévala hasta el soporte. São necessárias 6 pessoas para levantar a impressora e movê-la ao suporte. Heben Sie den - Canon imagePROGRAF GP-4000 | imagePROGRAF SD-21 Printer Stand Setup Guide - Page 10
wrench to securely affix the printer by using 3 M4 hex screws each on the left and right sides from the bottom of the stand supporting plate ( ② ). Retirez la tige du panier utilisée pour l'alignement de la position ( ① ) et utilisez une clé Allen M4 pour fixer solidement l'imprimante à l'aide de - Canon imagePROGRAF GP-4000 | imagePROGRAF SD-21 Printer Stand Setup Guide - Page 11
zetten Aufbauen des Staplers Montaż układarki P.11 When using the stacker, assemble the stacker at this point. Refer to the "Stacker Setup Guide" included with the stacker for details. Note that when you are using the stacker, you do not need the "Attaching the Basket" procedure (p.11 - Canon imagePROGRAF GP-4000 | imagePROGRAF SD-21 Printer Stand Setup Guide - Page 12
Attaching the Basket Montage du panier Conexión de la cesta Fixação da cesta Befestigung des Korbs Fissaggio del raccoglitore De opvangmand bevestigen Dołączanie kosza 1 A B Align the protrusions (A) on the side of the basket arm with the holes (B) on the inner side of the stand leg, and - Canon imagePROGRAF GP-4000 | imagePROGRAF SD-21 Printer Stand Setup Guide - Page 13
be able to assemble the basket as described below. Fixez toujours les supports de tige dans les trous latéraux intérieurs du socle. Si tez les étapes 3 et 4 pour l'autre jambe du socle afin de fixer les supports de tige gauche et droit. Fije el soporte de la varilla al soporte utilizando 1 tornillo - Canon imagePROGRAF GP-4000 | imagePROGRAF SD-21 Printer Stand Setup Guide - Page 14
5 A Spread out the basket cloth with the surface that does not have the white tag (A) facing up, and feed the basket rod (cord side) through the cylindrical part of the basket cloth. Etalez le tissu du panier avec la surface sur laquelle ne figure pas l'étiquette blanche (A) orientée vers le - Canon imagePROGRAF GP-4000 | imagePROGRAF SD-21 Printer Stand Setup Guide - Page 15
deux extrémités de la tige du panier (côté cordon) aux côtés intérieurs des supports de tige, comme indiqué sur le schéma. Acople los dos extremos de la . Accrochez le cordon noir du tissu du panier aux crochets (A) en haut des supports de tige. Enganche el cable negro de la tela de la cesta a los - Canon imagePROGRAF GP-4000 | imagePROGRAF SD-21 Printer Stand Setup Guide - Page 16
10 Lift up the basket. ᶃ Grasp the thick parts of the basket arms and pull out until they stop. ᶄ Lift up the basket rod (tag side). Soulevez le panier. ᶃ Saisissez les parties épaisses des bras du panier et tirez jusqu'à ce qu'elles s'arrêtent. ᶄ Soulevez la tige du panier (côté étiquette - Canon imagePROGRAF GP-4000 | imagePROGRAF SD-21 Printer Stand Setup Guide - Page 17
If the basket falls open, affix the basket arms using the basket locking supports. Refer to "Using the Basket" in the Online Manual for details. Si le panier tombe ouvert, fixez les bras du panier à l'aide des supports de verrouillage du panier. Reportez-vous à "Utilisation du panier" dans le Manuel - Canon imagePROGRAF GP-4000 | imagePROGRAF SD-21 Printer Stand Setup Guide - Page 18
konfiguracje kosza The position of the basket can be changed depending on the application. Refer to "Example Basket Configurations" in the Online Manual for details. La position du panier peut être modifiée en fonction de l'application. Reportez-vous à "Exemple de configurations du panier" dans
-
 1
1 -
 2
2 -
 3
3 -
 4
4 -
 5
5 -
 6
6 -
 7
7 -
8
-
9
-
10
-
11
-
12
-
13
-
14
-
15
-
16
-
17
-
18
 |
 |

QT6-4357-V01
PRINTED IN XXXXXXXX
IMPRIMÉ XX XXXXXXXX
© CANON INC. 2021
XXXXXXXX
プリンタースタンド セットアップガイド
Printer Stand Setup Guide
Guide d’installation du socle de l’imprimante
Guía de configuración del Soporte de la impresora
Guia de configuração de suporte da impressora
Setup-Handbuch für das Druckergestell
Guida all’installazione del supporto della stampante
Installatiehandleiding printerstandaard
Przewodnik konfiguracji podstawki drukarki
目次
同梱品一覧
.....................................................................................
2
スタンドを組み立てる
............................................................
4
ロールユニットを取り付ける
..........................................
10
スタッカーを組み立てる
....................................................
10
バスケットを取り付ける
....................................................
11
バスケットのポジション例
...............................................
17
Contents
Package Contents
.......................................................................
2
Assembling the Stand
..............................................................
4
Attaching the Roll Unit
.........................................................
10
Assembling the Stacker
........................................................
10
Attaching the Basket
..............................................................
11
Example Basket Positions
....................................................
17
Sommaire
Contenu du colis
.........................................................................
2
Assemblage du socle
................................................................
4
Montage de l’unité de rouleau
........................................
10
Assemblage de l'empileur
..................................................
10
Montage du panier
.................................................................
11
Exemple de positions du panier
.....................................
17
Índice
Contenido de la caja
.................................................................
2
Montaje del soporte
..................................................................
4
Conexión de la unidad de rollo
.......................................
10
Montaje del apilador
..............................................................
10
Conexión de la cesta
..............................................................
11
Ejemplo de posiciones de la cesta
................................
17
Conteúdo
Conteúdos da embalagem
...................................................
2
Montagem do suporte
............................................................
4
Fixação da unidade em rolo
..............................................
10
Montagem do empilhador
................................................
10
Fixação da cesta
........................................................................
11
Exemplos de posições da cesta
......................................
17
Inhalt
Paketinhalt
.......................................................................................
2
Aufbau des Gestells
...................................................................
4
Befestigung der Rolleneinheit
..........................................
10
Aufbauen des Staplers
..........................................................
10
Befestigung des Korbs
..........................................................
11
Beispielkorbkonfigurationen
.............................................
17
Sommario
Contenuto della confezione
.................................................
2
Assemblaggio del supporto
.................................................
4
Montaggio dell’unità rotolo
..............................................
10
Assemblaggio dell'impilatrice
..........................................
10
Fissaggio del raccoglitore
...................................................
11
Esempi di configurazioni del raccoglitore
................
17
Inhoud
Inhoud van de verpakking
....................................................
2
De standaard in elkaar zetten
..............................................
4
De roleenheid bevestigen
..................................................
10
De stapelaar in elkaar zetten
.............................................
10
De opvangmand bevestigen
............................................
11
Voorbeeld van opvangmandposities
..........................
17
Spis treści
Zawartość zestawu
.....................................................................
2
Montaż podstawki
......................................................................
4
Dołączanie modułu rolki
......................................................
10
Montaż układarki
......................................................................
10
Dołączanie kosza
......................................................................
11
Przykładowe konfiguracje kosza
.....................................
17
SD-21