Casio KL60L User Guide
Casio KL60L Manual
 |
View all Casio KL60L manuals
Add to My Manuals
Save this manual to your list of manuals |
Casio KL60L manual content summary:
- Casio KL60L | User Guide - Page 1
KL-60 User's Guide ESGFISw - Casio KL60L | User Guide - Page 2
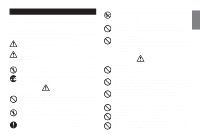
label printer for the first time. Keep these safety precautions and operating instructions on hand for future reference. About safety precaution symbols The following symbols are used in this manual power off. Request servicing from your original Tape Cutter • Never touch the tape cutter while a tape - Casio KL60L | User Guide - Page 3
inside the battery compartment cover with your fingers while loading or replacing batteries. The springs have sharp areas and can cut your fingers. Introduction Congratulations on your selection of the CASIO KL-60 Label Printer. This CASIO Label Printer makes it possible for you to print adhesive - Casio KL60L | User Guide - Page 4
Guide E-4 Label Printer Menus E-4 Part 2 Getting Ready E-5 Power Supply E-5 Replacing Batteries E-5 To load the batteries E-5 Turning Power On and Off E-6 Resetting the Memory E-6 To reset the memory E-6 Auto Power Off Function E-6 Tape Cartridges E-6 To load a tape cartridge E-6 Tape - Casio KL60L | User Guide - Page 5
to a television or radio may interfere with reception. General Guide 1 5 2 4 3 6 1 Power ON/OFF Key Turn power on and off. 2 Function key 3 Letter keys 4 Tape cutter button 5 Liquid crystal display (LCD) 6 Tape outlet Label Printer Menus Label Printer operation is designed to be as simple as - Casio KL60L | User Guide - Page 6
manual tells you how to load batteries and the tape cartridge, and how to perform other basic setups for the Label Printer. Important! • Be sure to read this section before attempting to use the Label Printer. Power Supply The Label Printer can be powered by six AA-size alkaline batteries. Replacing - Casio KL60L | User Guide - Page 7
to wind it back in. Trying to do so can cause operational problems with the Label Printer. • The following are the tape widths that can be used with this printer: 6mm, 9mm, 12mm. To load a tape cartridge 1. Make sure that the Label Printer is turned off. 2. Open the back cover while pressing down on - Casio KL60L | User Guide - Page 8
become acquainted with the symbols and indicators used on the Label Printer display. Function indicator Effect indicators Shift indicator Code indicator AAA FUNCTION SHIFT CODE CAPS CAS KL-60 MIRROR 6mm TAPE:6~12mm Mirror image printing indicator Caps indicator Cursor Character position - Casio KL60L | User Guide - Page 9
, and box. • Mirror image printing indicator This indicator appears when the Label Printer is set up for mirror image printing. Normal (non mirror image) printing is performed when this indicator is not shown. E-8 • 6mm tape indicator This indicator appears when you use the procedure on page E-7 to - Casio KL60L | User Guide - Page 10
About the CODE key... The CODE key makes it possible to input punctuation needed for a number of different languages. The following shows the key operations you should use for each of the characters formed using the CODE key. Key Operation Input CODE U Ü CODE O Œ CODE P Å CODE A Æ CODE S* - Casio KL60L | User Guide - Page 11
this time the message CLS? appears on This part of the manual explains how to change 5×5 5×7.5 *These sizes are not supported when using 6mm tape. They are automatically converted as shown Label Printer automatically adjusts the character size whenever you input a B symbol to create a 2-line label - Casio KL60L | User Guide - Page 12
Note that you cannot input a B symbol if you are using 6mm wide tape. • The Label Printer automatically adjusts the character size whenever you delete a B symbol to change a two-line label to a 1-line label. Initial Size AUTO Size After Delete of B 2×2 To change the character size Example: To - Casio KL60L | User Guide - Page 13
of times, the Label Printer may stop printing for about five seconds. This is not a malfunction, and normal printing should resume shortly (indicated by the message "P R N T" on the display). • Maximum printing width is 5mm. Important! • Never touch the tape cutter while a tape cut operation is - Casio KL60L | User Guide - Page 14
tape 19mm. Part 7 Memory This part of the manual tells you how to store text in memory for instant recall when you need it. You can have one block of text (containing up 63 characters) stored in memory. Important! • Text stored in memory is deleted whenever batteries go dead and when you replace - Casio KL60L | User Guide - Page 15
swab dipped in alcohol to clean the printer head and roller as shown in the illustration. Printer head Roller 5. Replace the tape cartridge and close the back cover. E-14 Initial Power On Settings The following are the initial settings of the Label Printer whenever you turn it power on. Item - Casio KL60L | User Guide - Page 16
close the back cover. No more tape left in the cartridge. Replace the tape cartridge with a new one. Tape jam Remove the tape cartridge and pull out the jammed tape by hand. Cut off excess tape with scissors, and carefully replace the cartridge into the label printer. Important! Never allow the - Casio KL60L | User Guide - Page 17
has become • Initialize the Label corrupted for some Printer. reason. Perr (Printer Error) • Tape jam during printing. • Turn off power, remove the tape cartridge, and clear the tape jam. If the printer error message reappears after you clear the tape jam, request servicing from your original - Casio KL60L | User Guide - Page 18
Alpha Characters Symbols E-17 - Casio KL60L | User Guide - Page 19
Specifications Model: KL-60 Input Keyboard Layout: tape); 1×1, 1×2, 1×3, 2×1, 2×2, 2×3 (other tapes) Number of lines: 1 (6mm tape); 1 or 2 (other tapes) Memory Text: One block (up to 63 characters) General Power supply: Six AA-size alkaline batteries Battery life: Approximately 10 tape cartridges - Casio KL60L | User Guide - Page 20
CASIO COMPUTER CO., LTD. 6-2, Hon-machi 1-chome Shibuya-ku, Tokyo 151-8543, Japan MO0105-A Printed in China/Imprimé en Chine A344043-1
-
 1
1 -
 2
2 -
 3
3 -
 4
4 -
 5
5 -
 6
6 -
 7
7 -
8
-
9
-
10
-
11
-
12
-
13
-
14
-
15
-
16
-
17
-
18
-
19
-
20
 |
 |
KL-60
ESGFISw
User’s Guide