Cisco 1760 Hardware Installation Guide - Page 96
Installing the VPN Module in a Cisco 1760 Router, Opening the Cisco 1760 Chassis
 |
UPC - 746320684857
View all Cisco 1760 manuals
Add to My Manuals
Save this manual to your list of manuals |
Page 96 highlights
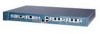
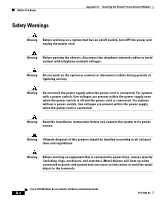
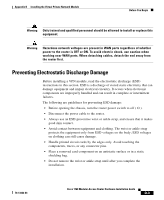
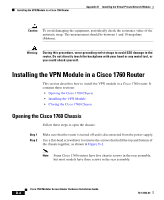
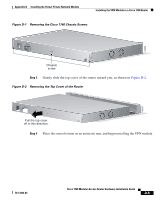
Installing the VPN Module in a Cisco 1760 Router Appendix D Installing the Virtual Private Network Module Caution To avoid damaging the equipment, periodically check the resistance value of the antistatic strap. The measurement should be between 1 and 10 megohms (Mohms). Warning During this procedure, wear grounding wrist straps to avoid ESD damage to the router. Do not directly touch the backplane with your hand or any metal tool, or you could shock yourself. Installing the VPN Module in a Cisco 1760 Router This section describes how to install the VPN module in a Cisco 1760 router. It contains these sections: • Opening the Cisco 1760 Chassis • Installing the VPN Module • Closing the Cisco 1760 Chassis Opening the Cisco 1760 Chassis Follow these steps to open the chassis: Step 1 Step 2 Make sure that the router is turned off and is disconnected from the power supply. Use a flat-head screwdriver to remove the screws that hold the top and bottom of the chassis together, as shown in Figure D-1. Note Some Cisco 1760 routers have five chassis screws in the rear assembly, but most models have three screws in the rear assembly. Cisco 1760 Modular Access Router Hardware Installation Guide D-4 78-13342-03
-
 1
1 -
2
-
3
-
4
-
5
-
6
-
7
-
8
-
9
-
10
-
11
-
12
-
13
-
14
-
15
-
16
-
17
-
18
-
19
-
20
-
21
-
22
-
23
-
24
-
25
-
26
-
27
-
28
-
29
-
30
-
31
-
32
-
33
-
34
-
35
-
36
-
37
-
38
-
39
-
40
-
41
-
42
-
43
-
44
-
45
-
46
-
47
-
48
-
49
-
50
-
51
-
52
-
53
-
54
-
55
-
56
-
57
-
58
-
59
-
60
-
61
-
62
-
63
-
64
-
65
-
66
-
67
-
68
-
69
-
70
-
71
-
72
-
73
-
74
-
75
-
76
-
77
-
78
-
79
-
80
-
81
-
82
-
83
-
84
-
85
-
86
-
87
-
88
-
89
-
90
-
 91
91 -
 92
92 -
 93
93 -
 94
94 -
 95
95 -
 96
96 -
 97
97 -
 98
98 -
 99
99 -
 100
100 -
 101
101 -
102
-
103
-
104
-
105
-
106
-
107
-
108
-
109
-
110
-
111
-
112
 |
 |