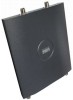
Cisco AIR-AP1242AG-E-K9 Hardware Installation Guide - Page 103
Obtaining the Access Point Image File - firmware download
 |
View all Cisco AIR-AP1242AG-E-K9 manuals
Add to My Manuals
Save this manual to your list of manuals |
Page 103 highlights
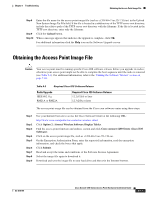
Chapter 9 Troubleshooting Obtaining the Access Point Image File Step 8 Step 9 Step 10 Enter the file name for the access point image file (such as c1200-k9w7-tar.123-7.JA.tar) in the Upload New System Image Tar File field. If the file is located in a subdirectory of the TFTP server root directory, include the relative path of the TFTP server root directory with the filename. If the file is located in the TFTP root directory, enter only the filename. Click the Upload button. When a message appears that indicates the upgrade is complete, click OK. For additional information click the Help icon on the Software Upgrade screen. Obtaining the Access Point Image File Caution Your access point must be running specific Cisco IOS software releases before you upgrade its radios; otherwise your access point might not be able to complete the boot sequence until the radio is removed (see Table 9-3). For additional information, refer to the "Finding the Software Version" section on page 7-10. Table 9-3 Required Cisco IOS Software Release Radio Upgrade IEEE 802.11g RM21A or RM22A Required Cisco IOS Software Release 12.2(13)JA or later 12.3(2)JA or later The access point image file can be obtained from the Cisco.com software center using these steps: Step 1 Step 2 Step 3 Step 4 Step 5 Step 6 Step 7 Step 8 Step 9 Use your Internet browser to access the Cisco Software Center at the following URL: http://www.cisco.com/public/sw-center/sw-wireless.shtml Click Option 2: Aironet Wireless Software Display Tables. Find the access point firmware and utilities section and click Cisco Aironet 1200 Series (Cisco IOS Software). Click on the access point image file, such as c1200-k9w7-tar.123-7.JA.tar. On the Encryption Authorization Form, enter the requested information, read the encryption information, and check the boxes that apply. Click Submit. Read and accept the terms and conditions of the Software License Agreement. Select the image file again to download it. Download and save the image file to your hard drive and then exit the Internet browser. OL-4310-05 Cisco Aironet 1200 Series Access Point Hardware Installation Guide 9-11
-
 1
1 -
2
-
3
-
4
-
5
-
6
-
7
-
8
-
9
-
10
-
11
-
12
-
13
-
14
-
15
-
16
-
17
-
18
-
19
-
20
-
21
-
22
-
23
-
24
-
25
-
26
-
27
-
28
-
29
-
30
-
31
-
32
-
33
-
34
-
35
-
36
-
37
-
38
-
39
-
40
-
41
-
42
-
43
-
44
-
45
-
46
-
47
-
48
-
49
-
50
-
51
-
52
-
53
-
54
-
55
-
56
-
57
-
58
-
59
-
60
-
61
-
62
-
63
-
64
-
65
-
66
-
67
-
68
-
69
-
70
-
71
-
72
-
73
-
74
-
75
-
76
-
77
-
78
-
79
-
80
-
81
-
82
-
83
-
84
-
85
-
86
-
87
-
88
-
89
-
90
-
91
-
92
-
93
-
94
-
95
-
96
-
97
-
 98
98 -
 99
99 -
 100
100 -
 101
101 -
 102
102 -
 103
103 -
 104
104 -
 105
105 -
 106
106 -
 107
107 -
 108
108 -
109
-
110
-
111
-
112
-
113
-
114
-
115
-
116
-
117
-
118
-
119
-
120
-
121
-
122
-
123
-
124
-
125
-
126
-
127
-
128
-
129
-
130
-
131
-
132
-
133
-
134
-
135
-
136
-
137
-
138
-
139
-
140
-
141
-
142
-
143
-
144
-
145
-
146
-
147
-
148
-
149
-
150
-
151
-
152
-
153
-
154
-
155
-
156
-
157
-
158
-
159
-
160
 |
 |