Cisco AIR-LAP1131G-A-K9 Hardware Installation Guide - Page 32
Mounting Above a Suspended Ceiling on, Using the Security
 |
View all Cisco AIR-LAP1131G-A-K9 manuals
Add to My Manuals
Save this manual to your list of manuals |
Page 32 highlights
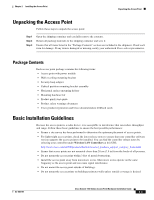
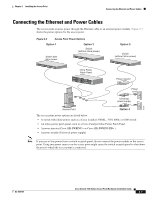
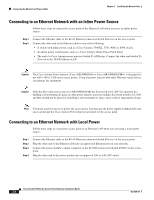
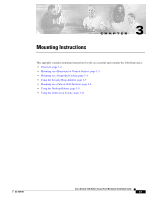
Deploying the Access Points on the Wireless Network Chapter 2 Installing the Access Point Step 4 b. Mount the access point at the indicated destination using the specified mounting method. For specific instructions, see these sections: - Horizontal or vertical surface, such as a ceiling or wall (refer to the Mounting on a Horizontal or Vertical Surface, page 3-3). - Below a suspended ceiling (refer to the "Mounting on a Suspended Ceiling" section on page 3-4). - Above a suspended ceiling (refer to the "Mounting Above a Suspended Ceiling" section on page 3-6). - On a cubicle wall (refer to the "Mounting on a Cubical Wall Partition" section on page 3-8). - On a desktop (see the "Using the Desktop Holster" section on page 3-9). c. Optionally secure the access point using a padlock or security cable (refer to the "Using the Security Hasp Adapter" section on page 3-7 and the "Using the Cable Lock Feature" section on page 3-11). d. Connect the access point cables (Ethernet, optional power, optional antennas). For instructions see the "Connecting the Ethernet and Power Cables" section on page 2-7. e. On power up, verify that the access point is operating normally by checking the LEDs. For additional information, refer to the "Checking the Autonomous Access Point LEDs" section on page 5-2 or the "Checking the Lightweight Access Point LEDs" section on page 6-3. For lightweight access points, after your access points are deployed, ensure that your controller is not configured as a master controller. A master controller should only be used for configuring access points and not in a working network. Cisco Aironet 1100 Series Access Point Hardware Installation Guide 2-6 OL-4309-07
-
 1
1 -
2
-
3
-
4
-
5
-
6
-
7
-
8
-
9
-
10
-
11
-
12
-
13
-
14
-
15
-
16
-
17
-
18
-
19
-
20
-
21
-
22
-
23
-
24
-
25
-
26
-
 27
27 -
 28
28 -
 29
29 -
 30
30 -
 31
31 -
 32
32 -
 33
33 -
 34
34 -
 35
35 -
 36
36 -
 37
37 -
38
-
39
-
40
-
41
-
42
-
43
-
44
-
45
-
46
-
47
-
48
-
49
-
50
-
51
-
52
-
53
-
54
-
55
-
56
-
57
-
58
-
59
-
60
-
61
-
62
-
63
-
64
-
65
-
66
-
67
-
68
-
69
-
70
-
71
-
72
-
73
-
74
-
75
-
76
-
77
-
78
-
79
-
80
-
81
-
82
-
83
-
84
-
85
-
86
-
87
-
88
-
89
-
90
-
91
-
92
-
93
-
94
-
95
-
96
-
97
-
98
-
99
-
100
-
101
-
102
-
103
-
104
-
105
-
106
-
107
-
108
-
109
-
110
-
111
-
112
-
113
-
114
-
115
-
116
 |
 |
