Cisco E2500 User Manual - Page 43
System preferences, Network, Ethernet, Internet, To use their DNS, Setup, Basic Setup, Double NAT - router problems
 |
View all Cisco E2500 manuals
Add to My Manuals
Save this manual to your list of manuals |
Page 43 highlights
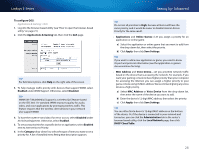
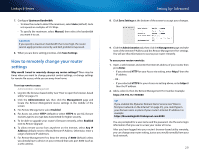
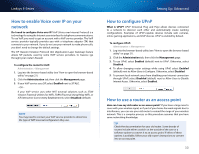
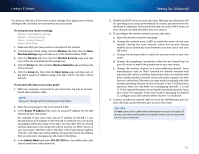
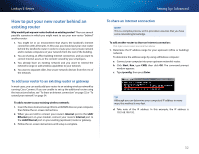
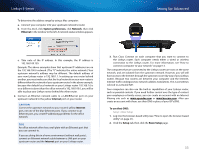
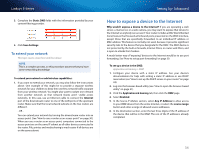
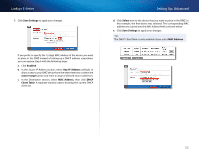
Linksys E-Series To determine the address range by using a Mac computer: a. Connect your computer into your upstream network's router. b. From the Dock, click System preferences, click Network, then click Ethernet in the window to the left. A network status window appears. Setting Up: Advanced c. Take note of the IP address. In this example, the IP address is 192.168.100.139. Example: The above examples show that upstream IP addresses are on the 192.168.100.0 network. (The "0" indicates the entire network.) Your upstream network's address may be different. The default address of your new Linksys router is 192.168.1.1. In setting up one router behind another, you must make sure that the local network on your new router is different than the network of your upstream router. In the above example, because the default local network on your Linksys router 192.168.1.0 is on a different subnet than the office network's 192.168.100.0, you will be able to place your Linksys router behind the other router. 2. Connect an Ethernet network cable to a LAN/Ethernet port on your upstream network to the yellow Internet port on your router. CAUTION Connect the upstream network to your router's yellow Internet port, not one of the blue Ethernet ports. If you connect to an Ethernet port, you create IP addressing problems for the office network. TIPS An office network often has a wall plate with an Ethernet port that you can connect to. If you are doing this in a home environment (without wall ports), connect an Ethernet network cable between a LAN port on your upstream router and the Internet port on your Linksys router. 3. Run Cisco Connect on each computer that you want to connect to the Linksys router. Each computer needs either a wired or wireless connection to the Linksys router. For more information, see "How to connect a computer to your network" on page 13. The computers that are connected to the Linksys router are now on the same network, and are isolated from the upstream network. However, you will still have access to the Internet through the upstream router (by way of your Linksys router). Because two routers are between your computer and the Internet, Internet traffic undergoes two network address translations. This is sometimes referred to as Double NAT. Your computers can also use the built-in capabilities of your Linksys router, such as parental controls. If you need further control over the type of content your employees or family access, you can create an account with an Internet filtering site such as www.opendns.com or www.bsecure.com. After you create an account with them, use their DNS in place of your ISP's DNS. To use their DNS: Setup > Basic Setup 1. Log into the browser-based utility (see "How to open the browser-based utility" on page 21). 2. Click the Setup tab, then click the Basic Setup page. 33
-
 1
1 -
2
-
3
-
4
-
5
-
6
-
7
-
8
-
9
-
10
-
11
-
12
-
13
-
14
-
15
-
16
-
17
-
18
-
19
-
20
-
21
-
22
-
23
-
24
-
25
-
26
-
27
-
28
-
29
-
30
-
31
-
32
-
33
-
34
-
35
-
36
-
37
-
 38
38 -
 39
39 -
 40
40 -
 41
41 -
 42
42 -
 43
43 -
 44
44 -
 45
45 -
 46
46 -
 47
47 -
 48
48 -
49
-
50
-
51
-
52
-
53
-
54
-
55
-
56
-
57
-
58
-
59
-
60
-
61
-
62
-
63
-
64
-
65
-
66
-
67
-
68
-
69
-
70
-
71
-
72
-
73
-
74
-
75
-
76
-
77
-
78
-
79
-
80
 |
 |
