Cisco E2500 User Manual - Page 45
Save Settings, Enabled, Any IP Address, source range, MAC Address, Client Table, Select - default ip
 |
View all Cisco E2500 manuals
Add to My Manuals
Save this manual to your list of manuals |
Page 45 highlights
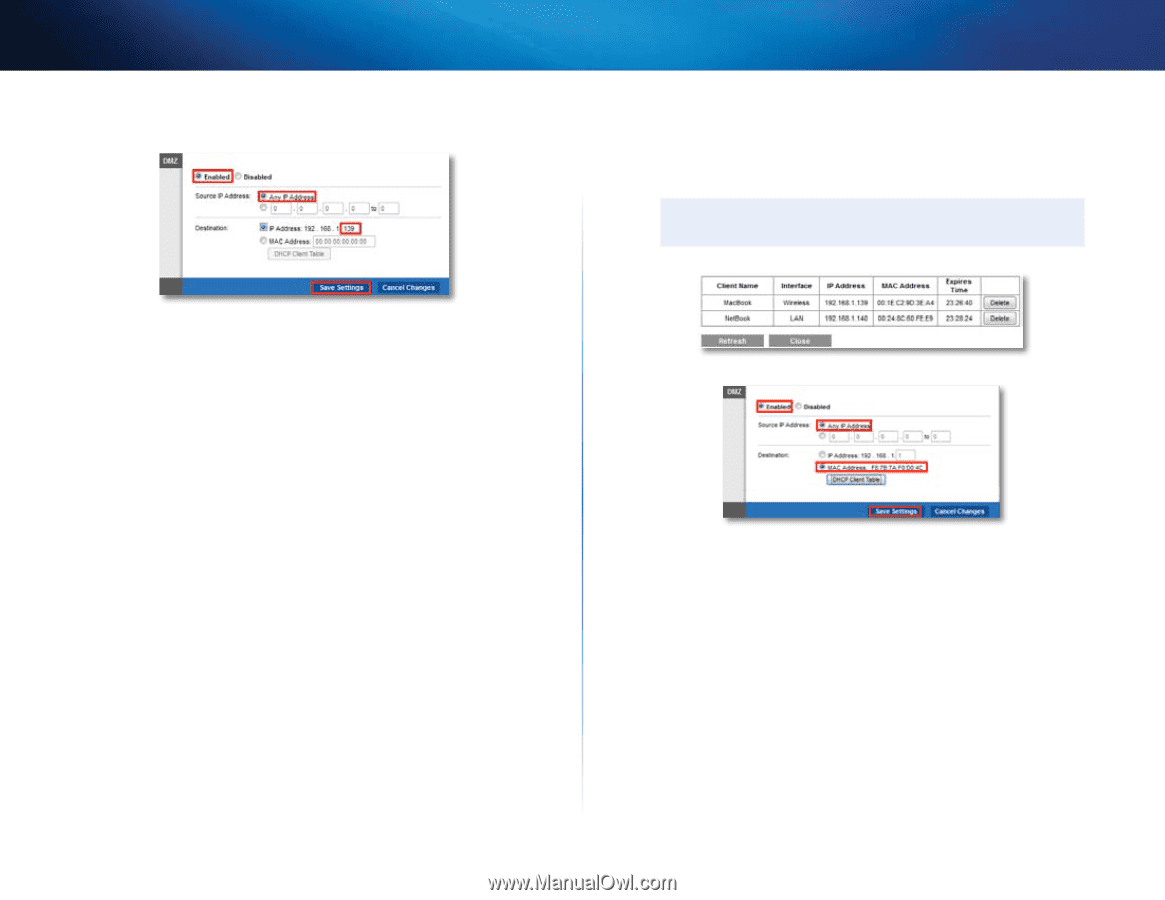
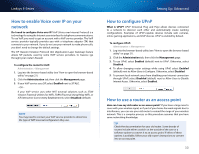
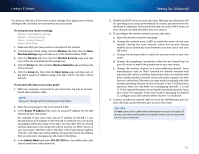
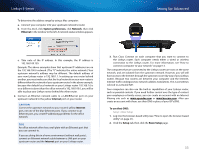
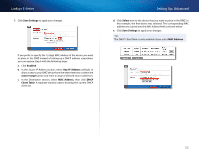
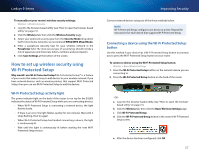
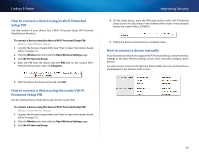
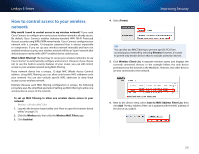
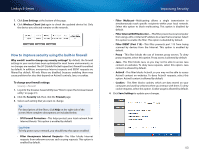
Linksys E-Series 7. Click Save Settings to apply your changes. If you prefer to specify the 12-digit MAC address of the device you want to place in the DMZ instead of setting up a DHCP address reservation, you can replace Step 6 with the following steps: a. Click Enabled. b. In the Source IP Address section, select Any IP Address (default) to allow access to your DMZ device from the entire Internet, or select the source range button and enter a range of allowed source addresses. c. In the Destination section, select MAC Address, then click DHCP Client Table. A separate window opens showing the current DHCP client list. Setting Up: Advanced d. Click Select next to the device that you want to place in the DMZ. In this example, the first device was selected. The corresponding MAC address was copied into the MAC Address field as shown below. e. Click Save Settings to apply your changes. TIP The DHCP Client Table is only available if you select MAC Address. 35
-
 1
1 -
2
-
3
-
4
-
5
-
6
-
7
-
8
-
9
-
10
-
11
-
12
-
13
-
14
-
15
-
16
-
17
-
18
-
19
-
20
-
21
-
22
-
23
-
24
-
25
-
26
-
27
-
28
-
29
-
30
-
31
-
32
-
33
-
34
-
35
-
36
-
37
-
38
-
39
-
 40
40 -
 41
41 -
 42
42 -
 43
43 -
 44
44 -
 45
45 -
 46
46 -
 47
47 -
 48
48 -
 49
49 -
 50
50 -
51
-
52
-
53
-
54
-
55
-
56
-
57
-
58
-
59
-
60
-
61
-
62
-
63
-
64
-
65
-
66
-
67
-
68
-
69
-
70
-
71
-
72
-
73
-
74
-
75
-
76
-
77
-
78
-
79
-
80
 |
 |