Cisco E3200 User Manual - Page 56
How to share folders and set access rights, Return to Upper Folder
 |
View all Cisco E3200 manuals
Add to My Manuals
Save this manual to your list of manuals |
Page 56 highlights
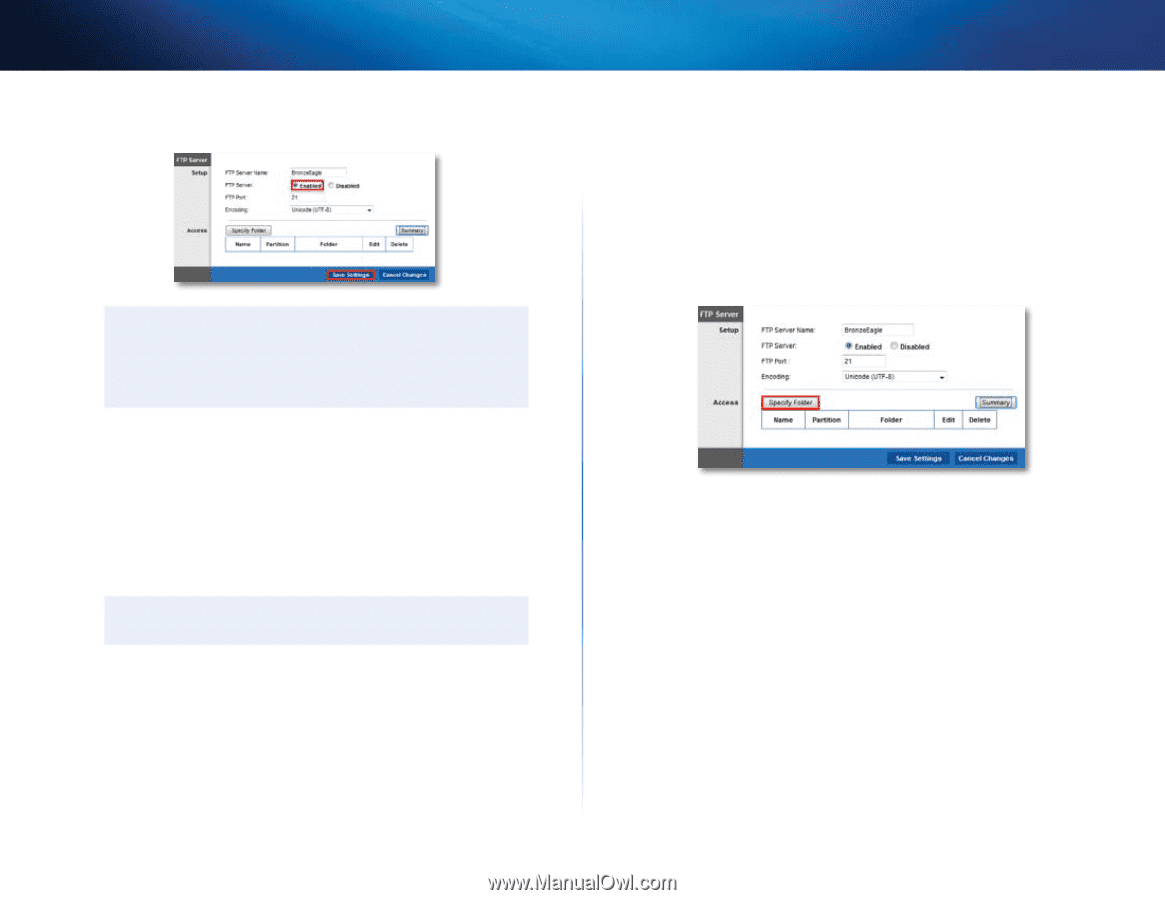
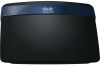
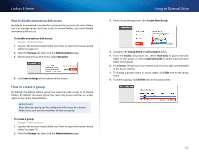
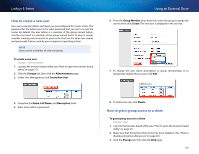
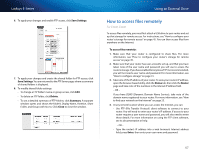
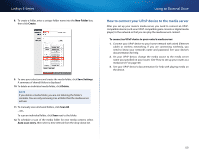
Linksys E-Series 3. Next to FTP Server, click Enabled. TIP If you used Cisco Connect to set up your router, the FTP Server Name field is already completed with the name of your wireless network. If you set up your router manually, the default name is Cisco followed by the last five digits of the router's serial number. 4. You can also: •• Change the FTP Port (default is 21) for the FTP server •• Change the Encoding (character set) for the transfer of files in other languages. The router supports: •• Unicode (UTF-8) (default) •• Chinese Simplified (GB18030) •• Vietnamese (CP1258) •• ISO 8859_1. TIP For field descriptions, click Help on the right side of the screen. 5. To apply your changes, click Save Settings. Using an External Drive How to share folders and set access rights You can select which folders to share. You can also select which users can access the folders. For more information on managing access rights, see "How to configure storage" on page 41. To configure FTP and control folder access: Storage > FTP Server 1. In the Storage tab's FTP Server page, click Specify Folder. The FTP Folder screen opens in a separate window. 2. In the Display Name field, enter a unique name for the FTP folder. The name must use only alphanumeric characters (letters A to Z and numbers 0 to 9) and can be up to 15 characters long. 3. To share the entire drive, click Share Entire Partition. - OR To share only specific folders: •• Click Select next to the folder you want to share. •• To navigate to a previous folder, click Return to Upper Folder. •• To view and select folders within a folder, click Enter into Folder next to the folder name. 4. To create a folder, enter a unique folder name into the New Folder box, then click Create. 5. To change group access, select a group in the Available Groups or Groups with Access column, then click >> or
-
 1
1 -
2
-
3
-
4
-
5
-
6
-
7
-
8
-
9
-
10
-
11
-
12
-
13
-
14
-
15
-
16
-
17
-
18
-
19
-
20
-
21
-
22
-
23
-
24
-
25
-
26
-
27
-
28
-
29
-
30
-
31
-
32
-
33
-
34
-
35
-
36
-
37
-
38
-
39
-
40
-
41
-
42
-
43
-
44
-
45
-
46
-
47
-
48
-
49
-
50
-
 51
51 -
 52
52 -
 53
53 -
 54
54 -
 55
55 -
 56
56 -
 57
57 -
 58
58 -
 59
59 -
 60
60 -
 61
61 -
62
-
63
-
64
-
65
-
66
-
67
-
68
-
69
-
70
-
71
-
72
-
73
-
74
-
75
-
76
-
77
-
78
-
79
-
80
 |
 |