Cisco E4200 User Guide - Page 25
Allow, Every Day, Hours, >>, Modify, Delete, Save Settings, Cancel Changes, of PCs, List of PCs - range
 |
View all Cisco E4200 manuals
Add to My Manuals
Save this manual to your list of manuals |
Page 25 highlights
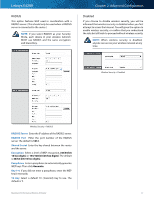
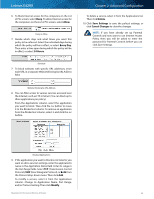
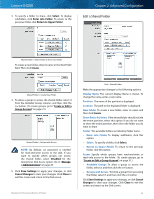
Linksys E4200 6. To block Internet access for the computers on the List of PCs screen, select Deny. To allow Internet access for the computers on the List of PCs screen, select Allow. Deny or Allow 7. Decide which days and what times you want this policy to be enforced. Select the individual days during which the policy will be in effect, or select Every Day. Then enter a time span during which the policy will be in effect, or select 24 Hours. Schedule 7. To block websites with specific URL addresses, enter each URL in a separate Website Blocking by URL Address field. Chapter 2: Advanced Configuration To delete a service, select it from the Applications list. Then click Delete. 10. Click Save Settings to save the policy's settings, or click Cancel Changes to clear the changes. NOTE: If you have already set up Parental Controls and now want to use Internet Access Policy, then you will be asked to enter the password for Parental Controls before you can click Save Settings. Website Blocking by URL Address 8. You can filter access to various services accessed over the Internet, such as FTP or telnet. (You can block up to three applications per policy.) From the Applications column, select the application you want to block. Then click the >> button to move it to the Blocked List column. To remove an application from the Blocked List column, select it and click the
-
 1
1 -
2
-
3
-
4
-
5
-
6
-
7
-
8
-
9
-
10
-
11
-
12
-
13
-
14
-
15
-
16
-
17
-
18
-
19
-
 20
20 -
 21
21 -
 22
22 -
 23
23 -
 24
24 -
 25
25 -
 26
26 -
 27
27 -
 28
28 -
 29
29 -
 30
30 -
31
-
32
-
33
-
34
-
35
-
36
-
37
-
38
-
39
-
40
-
41
-
42
-
43
-
44
-
45
-
46
-
47
-
48
-
49
-
50
-
51
-
52
-
53
-
54
-
55
-
56
-
57
-
58
-
59
-
60
-
61
-
62
-
63
-
64
-
65
 |
 |
