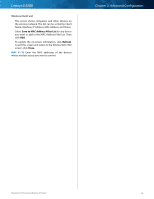
Cisco E4200 User Guide - Page 26
Storage > Disk, Overview, Storage > Administration, Disabled, Storage, Safely Remove Disk - usb speed
 |
View all Cisco E4200 manuals
Add to My Manuals
Save this manual to your list of manuals |
Page 26 highlights
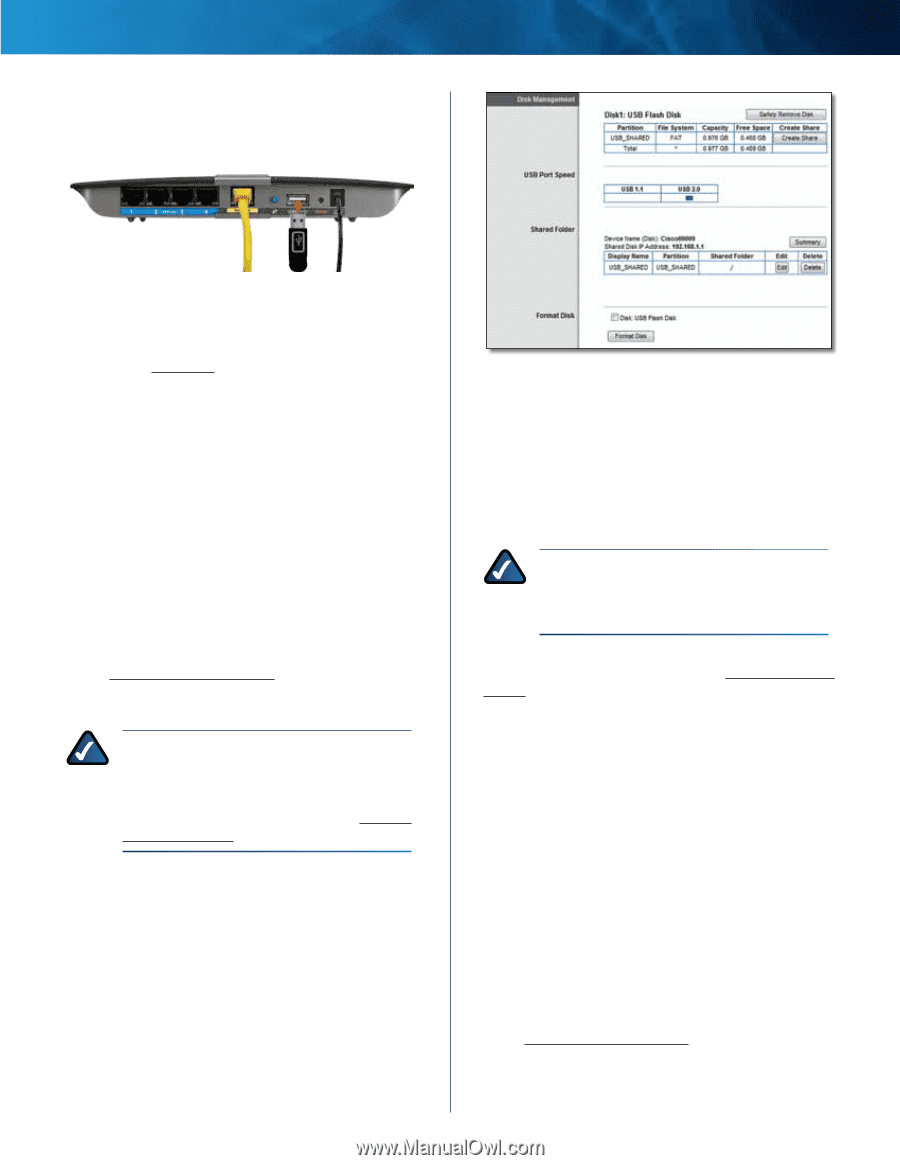
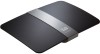
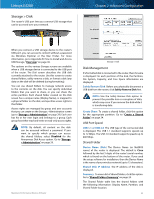
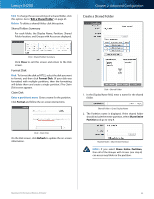
Linksys E4200 Storage > Disk The router's USB port lets you connect USB storage that can be accessed over your network. Chapter 2: Advanced Configuration When you connect a USB storage device to the router's USB port, you can access its content without a password via Windows Explorer or the Mac Finder. For more information, go to Appendix B: How to Install and Access USB Storage, "Overview" on page 49. The options on the various Storage screens are available when a USB storage device is connected to the USB port of the router. The Disk screen describes the USB disk currently attached to the router. Use this screen to create shared folders, safely remove a disk, or format a disk (any data on the disk will be deleted during formatting). You can use shared folders to manage network access to the contents on the disk. You can specify individual folders that you want to share, or you can share the entire partition. Each shared folder created on the Disk screen has a unique name (Display Name), is mapped to a physical folder on the disk, and specifies access rights to that folder. Access rights are managed by group and user accounts that you can create on the Storage > Administration screen (go to "Storage > Administration" on page 29). Each user has his or her own login and belongs to a group. Each group has either read-and-write or read-only access rights. NOTE: By default, all content on the disk can be accessed without a password. If you want to specify which groups can access the shared folders, select Disabled for the Anonymous Disk Access option. Go to "Storage > Administration" on page 29. Maximum Performance Wireless-N Router Storage > Disk Disk Management If a formatted disk is connected to the router, then its name is displayed. For each partition of the disk, the Partition, File System, Capacity, and Free Space information are displayed. Safely Remove Disk Before you physically disconnect a USB disk from the router, click Safely Remove Disk first. NOTE: Use the Safely Remove Disk option to prevent the possible loss or corruption of data, which may occur if you remove the disk while it is transferring data. Create Share To create a shared folder, click this option for the appropriate partition. Go to "Create a Shared Folder" on page 24. USB Port Speed USB 1.1 or USB 2.0 The USB type of the connected disk is displayed. The USB 1.1 standard supports speeds up to 12 Mbps. The USB 2.0 standard supports speeds up to 480 Mbps. Shared Folder Device Name (Disk) The Device Name (or NetBIOS name) of the router is displayed. The default is Cisco followed by the last 5 digits of the router's serial number, which is found on the bottom of the router. If you used the setup software for installation, then the Device Name is the name of your wireless network (up to 15 characters). Shared Disk IP Address The IP address of the disk is displayed. Summary To view a list of shared folders, click this option. Go to "Shared Folders Summary" on page 24. The Shared Folder table lists the shared folders with the following information: Display Name, Partition, and Shared Folder location. 23
-
 1
1 -
2
-
3
-
4
-
5
-
6
-
7
-
8
-
9
-
10
-
11
-
12
-
13
-
14
-
15
-
16
-
17
-
18
-
19
-
20
-
 21
21 -
 22
22 -
 23
23 -
 24
24 -
 25
25 -
 26
26 -
 27
27 -
 28
28 -
 29
29 -
 30
30 -
 31
31 -
32
-
33
-
34
-
35
-
36
-
37
-
38
-
39
-
40
-
41
-
42
-
43
-
44
-
45
-
46
-
47
-
48
-
49
-
50
-
51
-
52
-
53
-
54
-
55
-
56
-
57
-
58
-
59
-
60
-
61
-
62
-
63
-
64
-
65
 |
 |