Cisco E4200 User Guide - Page 6
Advanced Configuration, How to Access the Browser-Based Utility - default password
 |
View all Cisco E4200 manuals
Add to My Manuals
Save this manual to your list of manuals |
Page 6 highlights
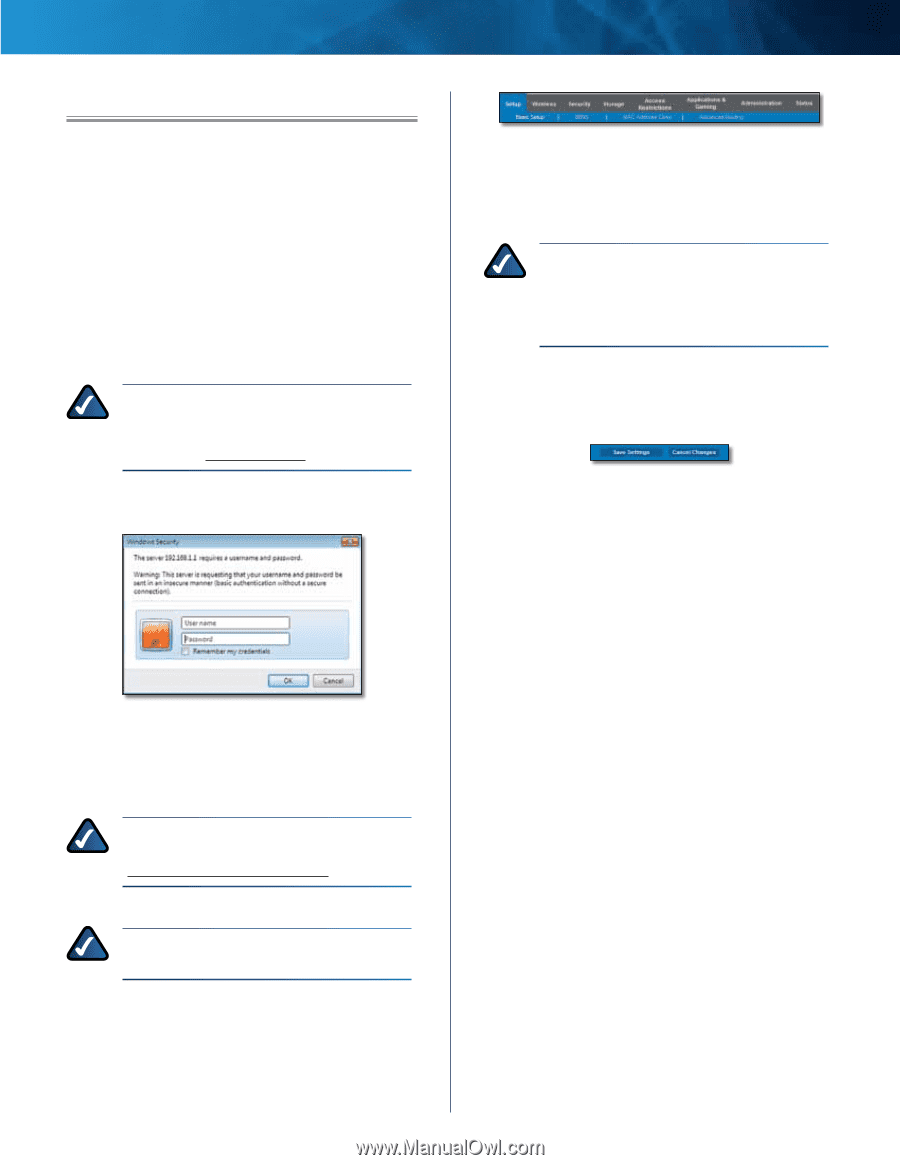
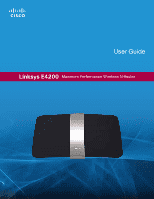
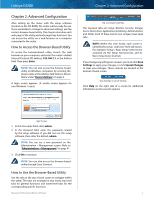
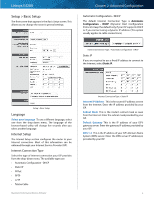
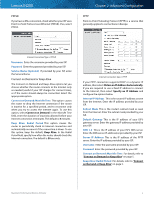
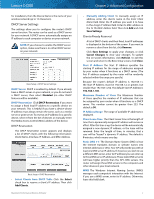
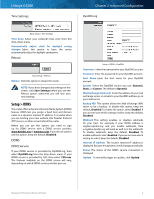
Linksys E4200 Chapter 2: Advanced Configuration After setting up the router with the setup software (located on the CD-ROM), the router will be ready for use. If you would like to change its advanced settings, use the router's browser-based utility. This chapter describes each web page of the utility and each page's key functions. You can access the utility via a web browser on a computer connected to the router. How to Access the Browser-Based Utility To access the browser-based utility, launch the web browser on your computer, and enter the router's default Internet Protocol (IP) address, 192.168.1.1, in the Address field. Then press Enter. NOTE: You can also access the browser‑based utility on Windows computers by entering the device name in the Address field. Refer to Device Name under "Router Address" on page 6. A login screen appears. (A similar screen appears for non‑Windows 7 users.) Chapter 2: Advanced Configuration Top- and Lower-Level Tabs The top-level tabs are: Setup, Wireless, Security, Storage, Access Restrictions, Applications & Gaming, Administration, and Status. Each of these has its own unique, lower-level tabs. NOTE: Within this User Guide, each screen is identified by its top- and lower-level tab names. For example, "Setup > Basic Setup" is the screen accessed via the Setup top-level tab, and its Basic Setup lower-level tab. If you change any settings on a screen, you must click Save Settings to apply your changes, or click Cancel Changes to clear your changes. These controls are located at the bottom of each screen. Save Settings or Cancel Settings Click Help on the right side of a screen for additional information on the screen's options. Login Screen 1. In the User name field, enter admin. 2. In the Password field, enter the password created by the setup software. If you did not run the setup software, then enter the default, admin. NOTE: You can set a new password on the Administration > Management screen. Refer to "Administration > Management" on page 41. 3. Click OK to continue. NOTE: You can also access the browser‑based utility through Cisco Connect. How to Use the Browser-Based Utility Use the tabs at the top of each screen to navigate within the utility. The tabs are arranged in two levels, top-level tabs for general functions and lower-level tabs for the corresponding specific functions. Maximum Performance Wireless-N Router 3
-
 1
1 -
 2
2 -
 3
3 -
 4
4 -
 5
5 -
 6
6 -
 7
7 -
 8
8 -
 9
9 -
 10
10 -
 11
11 -
 12
12 -
13
-
14
-
15
-
16
-
17
-
18
-
19
-
20
-
21
-
22
-
23
-
24
-
25
-
26
-
27
-
28
-
29
-
30
-
31
-
32
-
33
-
34
-
35
-
36
-
37
-
38
-
39
-
40
-
41
-
42
-
43
-
44
-
45
-
46
-
47
-
48
-
49
-
50
-
51
-
52
-
53
-
54
-
55
-
56
-
57
-
58
-
59
-
60
-
61
-
62
-
63
-
64
-
65
 |
 |