Cisco E4200V2 User Manual - Page 56
How to create a new user
 |
View all Cisco E4200V2 manuals
Add to My Manuals
Save this manual to your list of manuals |
Page 56 highlights
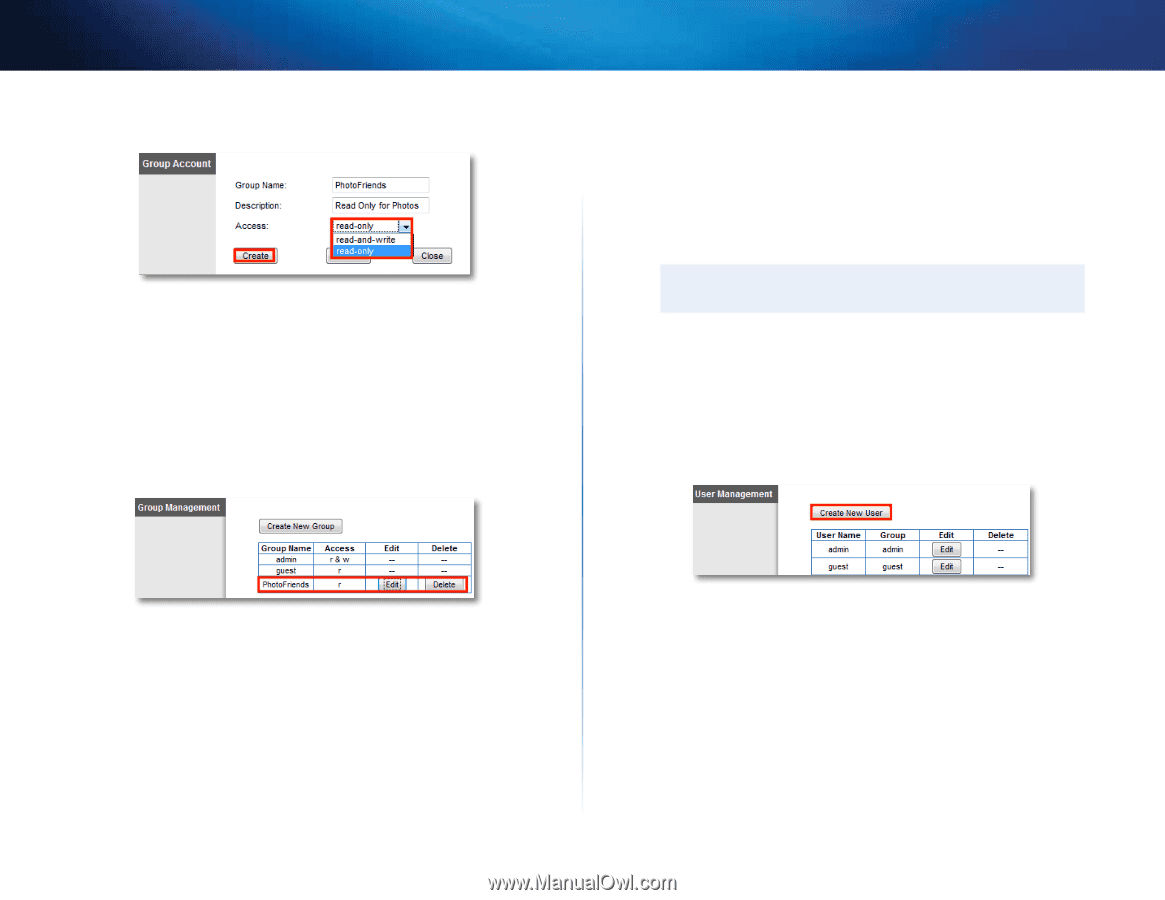
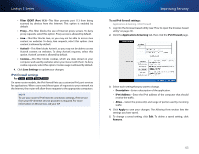
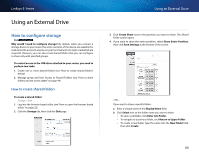
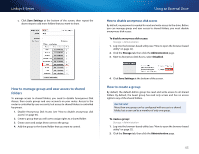
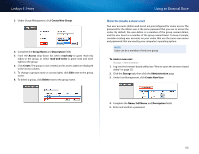
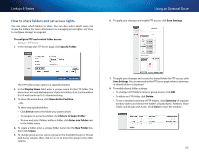
Linksys E-Series 3. Under Group Management, click Create New Group. 4. Complete the Group Name and Description fields. 5. From the Access drop-down list, select read-only to grant read-only rights to the group, or select read-and-write to grant read and write rights to the group. 6. Click Create. The group is now created, and its access rights are displayed in the Access column. 7. To change a group's name or access rights, click Edit next to the group name. 8. To delete a group, click Delete next to the group name. Using an External Drive How to create a new user Two user accounts (Admin and Guest) are preconfigured for router access. The password for the Admin user is the same password that you use to access the router. By default, the user Admin is a member of the group named Admin, and the user Guest is a member of the group named Guest. To keep it simple, consider creating user accounts on your router that use the same user names and passwords that are used by your computer's operating system. Note Users can be a member of only one group. To create a new user: Storage > Administration 1. Log into the browser-based utility (see "How to open the browser-based utility" on page 22). 2. Click the Storage tab, then click the Administration page. 3. Under User Management, click Create New User. 4. Complete the Name, Full Name, and Description fields. 5. Enter and confirm a password. 46
-
 1
1 -
2
-
3
-
4
-
5
-
6
-
7
-
8
-
9
-
10
-
11
-
12
-
13
-
14
-
15
-
16
-
17
-
18
-
19
-
20
-
21
-
22
-
23
-
24
-
25
-
26
-
27
-
28
-
29
-
30
-
31
-
32
-
33
-
34
-
35
-
36
-
37
-
38
-
39
-
40
-
41
-
42
-
43
-
44
-
45
-
46
-
47
-
48
-
49
-
50
-
 51
51 -
 52
52 -
 53
53 -
 54
54 -
 55
55 -
 56
56 -
 57
57 -
 58
58 -
 59
59 -
 60
60 -
 61
61 -
62
-
63
-
64
-
65
-
66
-
67
-
68
-
69
-
70
-
71
-
72
-
73
-
74
-
75
-
76
-
77
-
78
-
79
-
80
-
81
-
82
-
83
 |
 |