Cisco EA4500 User Manual - Page 35
How to put your new router behind an existing router - access point
 |
View all Cisco EA4500 manuals
Add to My Manuals
Save this manual to your list of manuals |
Page 35 highlights
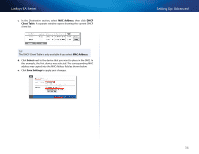
Linksys EA-Series 2. Open the setup page for the local network (LAN). 3. In the Router IP address field, enter an unused IP address for the LAN network of your new router. For example, if your new router has an IP address of 192.168.1.1, you should choose an IP address on the 192.168.1.0 network. You can choose any address within the range of 192.168.1.2 to 192.168.1.254. You should exclude addresses in the range that will be used by the DHCP Server of your new router (192.168.1.100 to 192.168.1.149). A safe choice might be 192.168.1.250. Take note of this address, because this will be the address that you will use to manage your old router in the future. 4. In the Subnet Mask field, enter 255.255.255.0 or, if available, select that subnet mask from a drop-down list. 5. Disable the DHCP server on your old router. (Because your old router will be operating as an access point instead of a router, you don't want it to distribute IP addresses. There should be only one active DHCP server on your network, and that should be your new router.) 6. To reconfigure the wireless network on your old router: a. Open the wireless network setup page. b. Change the network name (SSID) to match the name of your new network. Having the same network name and security settings enables you to seamlessly roam between your new router and your old router. c. Change the security mode to match the security mode on your new router. d. Change the passphrase (sometimes called the pre-shared key) on your old router to match the passphrase on your new router. e. Change the wireless channel to a non-conflicting channel. Some manufacturers have an "Auto" function for channel selection that automatically selects a wireless channel that does not interfere with other nearby wireless networks. If your old router supports an Auto function, select that. Otherwise, you may need to manually select the wireless operating channel on your old router. In the 2.4 GHz wireless spectrum, there are only three non-overlapping channels: 1, 6, and 11. Pick a channel that does not overlap the operating channel of your new router. For example, if your new router is operating on channel 11, configure your old router for either channel 1 or channel 6. 7. Connect an Ethernet network cable to one of the LAN/Ethernet ports on your old router and an Ethernet port on your new router. Setting Up: Advanced Caution Do not connect the cable to the Internet port on your old router. If you do, you may not be able to set up the router as an access point on the current network. How to put your new router behind an existing router For ALL Why would I put my new router behind an existing router? There are several possible scenarios in which you might want to use your new router "behind" another router: 1. You might be in an environment that shares the landlord's Internet connection with all tenants. In this case, you should put your own router behind the landlord's router in order to create your own private network and to isolate computers on your network from the rest of the building. 2. You are sharing an office building Internet connection, and you want to control Internet access or the content viewed by your employees. 3. You already have an existing network and you want to extend the network's range or add wireless capabilities to your network. 4. You want to separate older, less secure network devices from the rest of the network. To add your router to an existing router or gateway In most cases, you can easily add your router to an existing wireless network by running Cisco Connect. If you are unable to set up the additional router using the instructions below, see "To share an Internet connection" on page 33 or "To extend your network" on page 34. To add a router to your existing wireless network: 1. Insert the Cisco Connect setup CD into a CD/DVD drive on your computer, then follow the on-screen instructions. 2. When you are told to connect your router's Internet port to the LAN/ Ethernet port on your modem, connect your router's Internet port to the LAN/Ethernet port on your existing (upstream) router or gateway. 32
-
 1
1 -
2
-
3
-
4
-
5
-
6
-
7
-
8
-
9
-
10
-
11
-
12
-
13
-
14
-
15
-
16
-
17
-
18
-
19
-
20
-
21
-
22
-
23
-
24
-
25
-
26
-
27
-
28
-
29
-
 30
30 -
 31
31 -
 32
32 -
 33
33 -
 34
34 -
 35
35 -
 36
36 -
 37
37 -
 38
38 -
 39
39 -
 40
40 -
41
-
42
-
43
-
44
-
45
-
46
-
47
-
48
-
49
-
50
-
51
-
52
-
53
-
54
-
55
-
56
-
57
-
58
-
59
-
60
-
61
-
62
-
63
-
64
-
65
-
66
-
67
-
68
-
69
-
70
-
71
 |
 |