Cisco EA4500 User Manual - Page 47
How to manage group and user access to shared folders, How to create a group - router default password
 |
View all Cisco EA4500 manuals
Add to My Manuals
Save this manual to your list of manuals |
Page 47 highlights
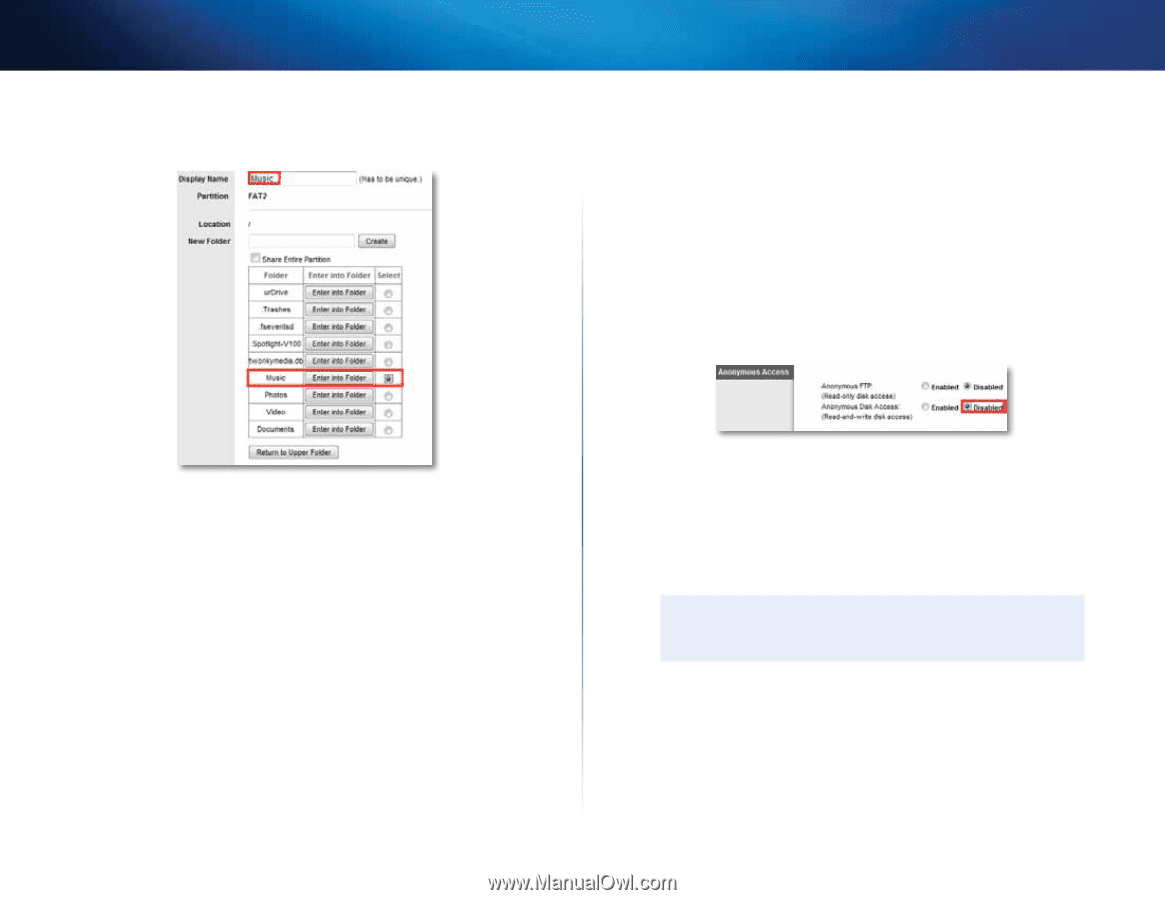
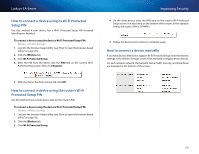
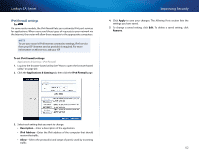
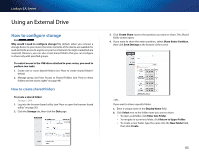
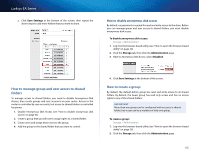
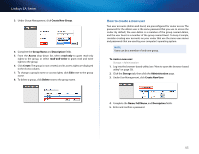
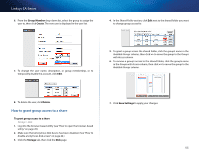
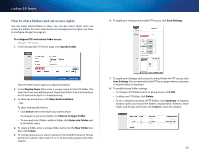
Linksys EA-Series c. Click Save Settings at the bottom of the screen, then repeat the above steps to add more folders that you want to share. How to disable anonymous disk access By default, no password is needed for read and write access to the drive. Before you can manage group and user access to shared folders, you must disable anonymous disk access. To disable anonymous disk access: Storage > Administration 1. Log into the browser-based utility (see "How to open the browser-based utility" on page 20). 2. Click the Storage tab, then click the Administration page. 3. Next to Anonymous Disk Access, select Disabled. How to manage group and user access to shared folders To manage access to shared folders, you need to disable Anonymous Disk Access, then create groups and user accounts on your router. Access to the router is controlled by user accounts, but access to shared folders is controlled by groups. 1. Disable Anonymous Disk Access (see "How to disable anonymous disk access" on page 44). 2. Create a group that you will use to assign rights to a shared folder. 3. Create users and assign those users to the group. 4. Add the group to the shared folder that you want to control. 4. Click Save Settings at the bottom of the screen. How to create a group By default, the default Admin group has read and write access to all shared folders. By default, the Guest group has read only access and has no access rights to any of the shared folders. Important More than one group can be configured with access to a shared folder, but a user can be a member of only one group. To create a group: Storage > Administration 1. Log into the browser-based utility (see "How to open the browser-based utility" on page 20). 2. Click the Storage tab, then click the Administration page. 44
-
 1
1 -
2
-
3
-
4
-
5
-
6
-
7
-
8
-
9
-
10
-
11
-
12
-
13
-
14
-
15
-
16
-
17
-
18
-
19
-
20
-
21
-
22
-
23
-
24
-
25
-
26
-
27
-
28
-
29
-
30
-
31
-
32
-
33
-
34
-
35
-
36
-
37
-
38
-
39
-
40
-
41
-
 42
42 -
 43
43 -
 44
44 -
 45
45 -
 46
46 -
 47
47 -
 48
48 -
 49
49 -
 50
50 -
 51
51 -
 52
52 -
53
-
54
-
55
-
56
-
57
-
58
-
59
-
60
-
61
-
62
-
63
-
64
-
65
-
66
-
67
-
68
-
69
-
70
-
71
 |
 |