Cisco EA4500 User Manual - Page 49
How to grant group access to a share
 |
View all Cisco EA4500 manuals
Add to My Manuals
Save this manual to your list of manuals |
Page 49 highlights
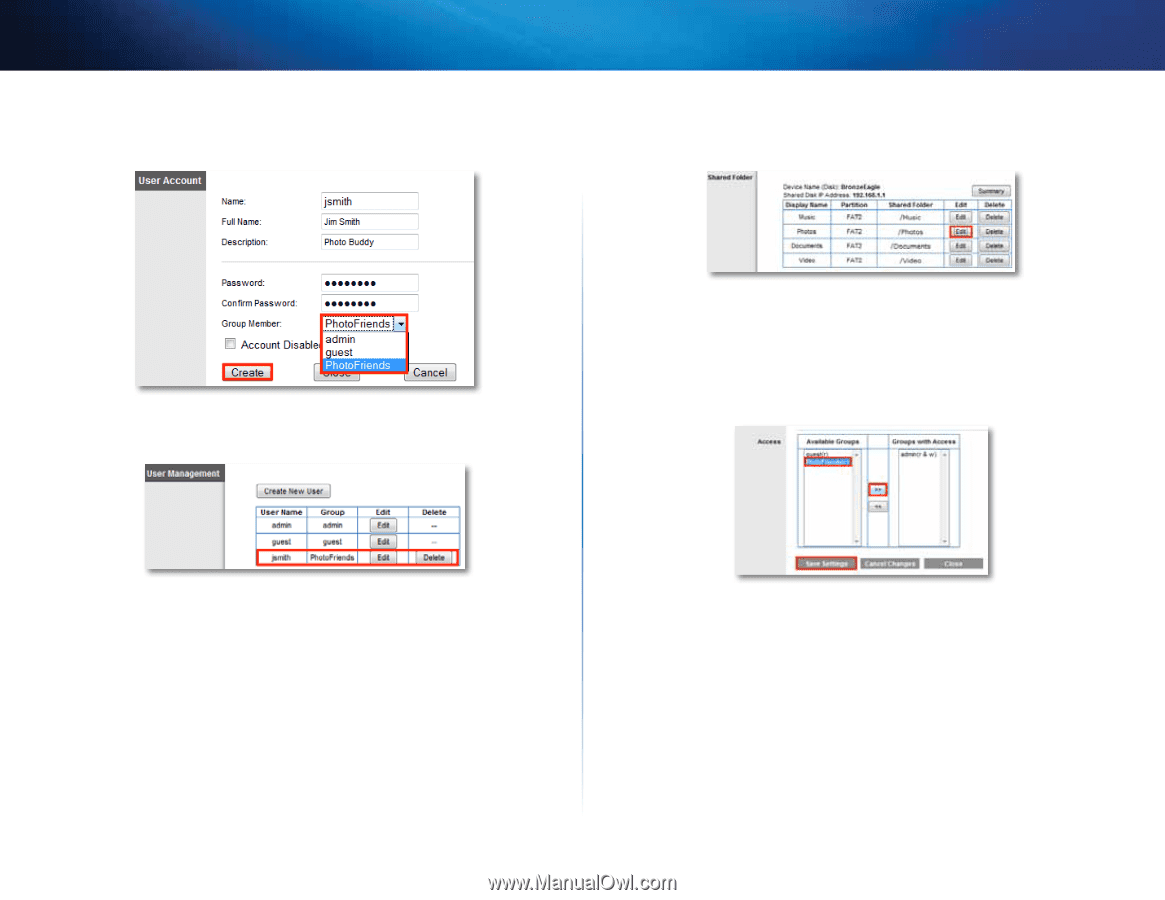
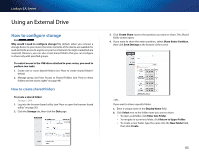
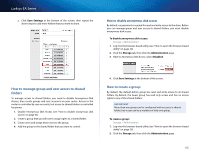
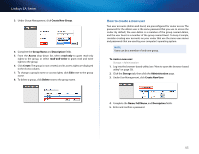
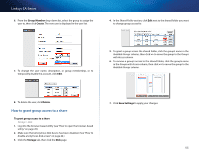
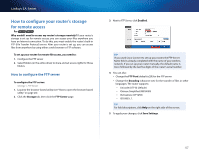
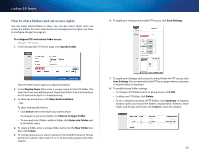
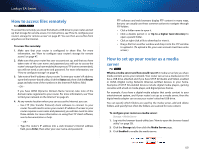
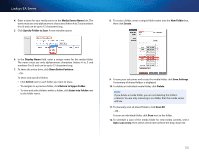
Linksys EA-Series 6. From the Group Member drop-down list, select the group to assign the user to, then click Create. The new user is displayed in the user list. 4. In the Shared Folder section, click Edit next to the shared folder you want to change group access for. 7. To change the user name, description, or group membership, or to temporarily disable the account, click Edit. 5. To grant a group access the shared folder, click the group's name in the Available Groups column, then click >> to move the group to the Groups with Access column. 6. To remove a group's access to the shared folder, click the group's name in the Groups with Access column, then click Disk 1. Log into the browser-based utility (see "How to open the browser-based utility" on page 20). 2. Make sure that Anonymous Disk Access has been disabled. (See "How to disable anonymous disk access" on page 44.) 3. Click the Storage tab, then click the Disk page. 46
-
 1
1 -
2
-
3
-
4
-
5
-
6
-
7
-
8
-
9
-
10
-
11
-
12
-
13
-
14
-
15
-
16
-
17
-
18
-
19
-
20
-
21
-
22
-
23
-
24
-
25
-
26
-
27
-
28
-
29
-
30
-
31
-
32
-
33
-
34
-
35
-
36
-
37
-
38
-
39
-
40
-
41
-
42
-
43
-
 44
44 -
 45
45 -
 46
46 -
 47
47 -
 48
48 -
 49
49 -
 50
50 -
 51
51 -
 52
52 -
 53
53 -
 54
54 -
55
-
56
-
57
-
58
-
59
-
60
-
61
-
62
-
63
-
64
-
65
-
66
-
67
-
68
-
69
-
70
-
71
 |
 |