Cisco MDS-9124 Troubleshooting Guide - Page 58
Installing SAN-OS Software Using Fabric Manager, Skip Image Download, Finish, Cancel
 |
View all Cisco MDS-9124 manuals
Add to My Manuals
Save this manual to your list of manuals |
Page 58 highlights
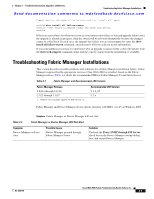
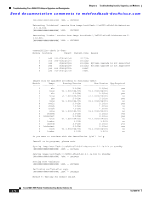
Troubleshooting Cisco SAN-OS Software Upgrades and Downgrades Chapter 2 Troubleshooting Installs, Upgrades, and Reboots Send documentation comments to [email protected] Installing SAN-OS Software Using Fabric Manager To use the Software Install Wizard to install a new software image using Fabric Manager, follow these steps: Step 1 Open the Software Install Wizard by clicking its icon in the toolbar (see Figure 2-1). Figure 2-1 Software Install Wizard Icon Step 2 Step 3 Step 4 Step 5 Step 6 Step 7 You see the Software Install Wizard. Select the switches you want to install images on. You must select at least one switch in order to proceed. Click Next. Optionally, check the Skip Image Download check box and click Next to use images that are already downloaded (the file is already on the bootflash: file system). Proceed to Step 7. Click the row under the System, Kickstart, Asm-sfn, or ssi columns to enter image URIs.You must specify at least one image for each switch to proceed. Check the active (and standby, if applicable) bootflash: file system on each switch to see if there is enough space for the new images. You can see this information in the Flash Space column. This screen shows the active (and standby, if applicable) bootflash: memory space on each switch, and shows the status (whether there is enough space for the new images). If any switch has insufficient space, you cannot proceed. Deselect the switch without enough bootflash: memory by going back to the first screen and unchecking the check box for that switch. Click Next. You see the Select Download Image screen. Double-click the table cell under System, Kickstart, Asm-sfn, or Ssi and select from a drop-down list of images available in the bootflash: file system on each switch. You must select at least one image for each switch to proceed. Note There is no limit on the number of switches you can upgrade. However, the upgrade is a serial process; that is, only a single switch is upgraded at a time. Step 8 Step 9 Click Next. You see the final verification screen. Click Finish to start the installation or click Cancel to leave the installation wizard without installing new images. Note On hosts where the TFTP server cannot be started, a warning is displayed. The TFTP server may not start because an existing TFTP server is running or because access to the TFTP port 69 has been denied for security reasons (the default setting on LINUX). In these cases, you cannot transfer files from the local host to the switch. 2-10 Cisco MDS 9000 Family Troubleshooting Guide, Release 3.x OL-9285-05
-
 1
1 -
2
-
3
-
4
-
5
-
6
-
7
-
8
-
9
-
10
-
11
-
12
-
13
-
14
-
15
-
16
-
17
-
18
-
19
-
20
-
21
-
22
-
23
-
24
-
25
-
26
-
27
-
28
-
29
-
30
-
31
-
32
-
33
-
34
-
35
-
36
-
37
-
38
-
39
-
40
-
41
-
42
-
43
-
44
-
45
-
46
-
47
-
48
-
49
-
50
-
51
-
52
-
 53
53 -
 54
54 -
 55
55 -
 56
56 -
 57
57 -
 58
58 -
 59
59 -
 60
60 -
 61
61 -
 62
62 -
 63
63 -
64
-
65
-
66
-
67
-
68
-
69
-
70
-
71
-
72
-
73
-
74
-
75
-
76
-
77
-
78
-
79
-
80
-
81
-
82
-
83
-
84
-
85
-
86
-
87
-
88
-
89
-
90
-
91
-
92
-
93
-
94
-
95
-
96
-
97
-
98
-
99
-
100
-
101
-
102
-
103
-
104
-
105
-
106
-
107
-
108
-
109
-
110
-
111
-
112
-
113
-
114
-
115
-
116
-
117
-
118
-
119
-
120
-
121
-
122
-
123
-
124
-
125
-
126
-
127
-
128
-
129
-
130
-
131
-
132
-
133
-
134
-
135
-
136
-
137
-
138
-
139
-
140
-
141
-
142
-
143
-
144
-
145
-
146
-
147
-
148
-
149
-
150
-
151
-
152
-
153
-
154
-
155
-
156
-
157
-
158
-
159
-
160
-
161
-
162
-
163
-
164
-
165
-
166
-
167
-
168
-
169
-
170
-
171
-
172
-
173
-
174
-
175
-
176
-
177
-
178
-
179
-
180
-
181
-
182
-
183
-
184
-
185
-
186
-
187
-
188
-
189
-
190
-
191
-
192
-
193
-
194
-
195
-
196
-
197
-
198
-
199
-
200
-
201
-
202
-
203
-
204
-
205
-
206
-
207
-
208
-
209
-
210
-
211
-
212
-
213
-
214
-
215
-
216
-
217
-
218
-
219
-
220
-
221
-
222
-
223
-
224
-
225
-
226
-
227
-
228
-
229
-
230
-
231
-
232
-
233
-
234
-
235
-
236
-
237
-
238
-
239
-
240
-
241
-
242
-
243
-
244
-
245
-
246
-
247
-
248
-
249
-
250
-
251
-
252
-
253
-
254
-
255
-
256
-
257
-
258
-
259
-
260
-
261
-
262
-
263
-
264
-
265
-
266
-
267
-
268
-
269
-
270
-
271
-
272
-
273
-
274
-
275
-
276
-
277
-
278
-
279
-
280
-
281
-
282
-
283
-
284
-
285
-
286
-
287
-
288
-
289
-
290
-
291
-
292
-
293
-
294
-
295
-
296
-
297
-
298
-
299
-
300
-
301
-
302
-
303
-
304
-
305
-
306
-
307
-
308
-
309
-
310
-
311
-
312
-
313
-
314
-
315
-
316
-
317
-
318
-
319
-
320
-
321
-
322
-
323
-
324
-
325
-
326
-
327
-
328
-
329
-
330
-
331
-
332
-
333
-
334
-
335
-
336
-
337
-
338
-
339
-
340
-
341
-
342
-
343
-
344
-
345
-
346
-
347
-
348
-
349
-
350
-
351
-
352
-
353
-
354
-
355
-
356
-
357
-
358
-
359
-
360
-
361
-
362
-
363
-
364
-
365
-
366
-
367
-
368
-
369
-
370
-
371
-
372
-
373
-
374
-
375
-
376
-
377
-
378
-
379
-
380
-
381
-
382
-
383
-
384
-
385
-
386
-
387
-
388
-
389
-
390
-
391
-
392
-
393
-
394
-
395
-
396
-
397
-
398
-
399
-
400
-
401
-
402
-
403
-
404
-
405
-
406
-
407
-
408
-
409
-
410
-
411
-
412
-
413
-
414
-
415
-
416
-
417
-
418
-
419
-
420
-
421
-
422
-
423
-
424
-
425
-
426
-
427
-
428
-
429
-
430
-
431
-
432
-
433
-
434
-
435
-
436
-
437
-
438
-
439
-
440
-
441
-
442
-
443
-
444
-
445
-
446
-
447
-
448
-
449
-
450
-
451
-
452
-
453
-
454
-
455
-
456
-
457
-
458
-
459
-
460
-
461
-
462
-
463
-
464
-
465
-
466
-
467
-
468
-
469
-
470
-
471
-
472
-
473
-
474
-
475
-
476
-
477
-
478
-
479
-
480
-
481
-
482
-
483
-
484
-
485
-
486
-
487
-
488
-
489
-
490
-
491
-
492
-
493
-
494
-
495
-
496
-
497
-
498
-
499
-
500
-
501
-
502
-
503
-
504
-
505
-
506
-
507
-
508
-
509
-
510
-
511
-
512
-
513
-
514
-
515
-
516
-
517
-
518
-
519
-
520
-
521
-
522
-
523
-
524
-
525
-
526
-
527
-
528
-
529
-
530
-
531
-
532
-
533
-
534
-
535
-
536
-
537
-
538
-
539
-
540
-
541
-
542
-
543
-
544
-
545
-
546
-
547
-
548
-
549
-
550
-
551
-
552
-
553
-
554
-
555
-
556
-
557
-
558
-
559
-
560
 |
 |