Cisco SPA525G Administration Guide - Page 55
Spa525g, Step 3 - display is blank
 |
UPC - 882658261688
View all Cisco SPA525G manuals
Add to My Manuals
Save this manual to your list of manuals |
Page 55 highlights
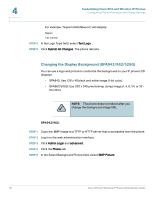
Customizing Cisco SPA and Wireless IP Phones Configuring Phone Information and Display Settings 4 STEP 3 Click the Phone tab. STEP 4 In the General section, in the Screen Saver Enable field, choose yes. STEP 5 In the Screen Saver Wait field, enter the number of seconds of idle time to elapse before the screen saver starts. STEP 6 In the Screen Saver Icon field, choose the display type: • A background picture. • The station time in the middle of the screen. • A moving padlock icon. When the phone is locked, the status line displays a scrolling message "Press any key to unlock your phone." • A moving phone icon. • The station date and time in the middle of the screen. • A blank "power save" screen." STEP 7 Click Submit All Changes. SPA525G STEP 1 Log in to the web administration interface. STEP 2 Click Admin Login and advanced. STEP 3 Click the User tab. STEP 4 Under Screen, in the Screen Saver Enable field, choose yes. STEP 5 In the Screen Saver Type field, choose the display type: • Black Background-Displays a black screen. • Gray Background-Displays a gray screen. • Black/Gray Rotation-The screen incrementally cycles from black to gray. • Picture Rotation-The screen rotates through available pictures on the phone. • Digital Frame-Shows the background picture. STEP 6 In the Screen Saver Trigger Time field, enter the number of seconds that the phone remains idle before the screen saver turns on. Cisco SPA and Wireless IP Phone Administration Guide 53
-
 1
1 -
2
-
3
-
4
-
5
-
6
-
7
-
8
-
9
-
10
-
11
-
12
-
13
-
14
-
15
-
16
-
17
-
18
-
19
-
20
-
21
-
22
-
23
-
24
-
25
-
26
-
27
-
28
-
29
-
30
-
31
-
32
-
33
-
34
-
35
-
36
-
37
-
38
-
39
-
40
-
41
-
42
-
43
-
44
-
45
-
46
-
47
-
48
-
49
-
 50
50 -
 51
51 -
 52
52 -
 53
53 -
 54
54 -
 55
55 -
 56
56 -
 57
57 -
 58
58 -
 59
59 -
 60
60 -
61
-
62
-
63
-
64
-
65
-
66
-
67
-
68
-
69
-
70
-
71
-
72
-
73
-
74
-
75
-
76
-
77
-
78
-
79
-
80
-
81
-
82
-
83
-
84
-
85
-
86
-
87
-
88
-
89
-
90
-
91
-
92
-
93
-
94
-
95
-
96
-
97
-
98
-
99
-
100
-
101
-
102
-
103
-
104
-
105
-
106
-
107
-
108
-
109
-
110
-
111
-
112
-
113
-
114
-
115
-
116
-
117
-
118
-
119
-
120
-
121
-
122
-
123
-
124
-
125
-
126
-
127
-
128
-
129
-
130
-
131
-
132
-
133
-
134
-
135
-
136
-
137
-
138
-
139
-
140
-
141
-
142
-
143
-
144
-
145
-
146
-
147
-
148
-
149
-
150
-
151
-
152
-
153
-
154
-
155
-
156
-
157
-
158
-
159
-
160
-
161
-
162
-
163
-
164
-
165
-
166
-
167
-
168
-
169
-
170
-
171
-
172
-
173
-
174
-
175
-
176
-
177
-
178
-
179
-
180
-
181
-
182
-
183
-
184
-
185
-
186
-
187
-
188
-
189
-
190
-
191
-
192
-
193
-
194
-
195
-
196
-
197
-
198
-
199
-
200
-
201
-
202
-
203
-
204
-
205
-
206
-
207
-
208
-
209
-
210
-
211
-
212
-
213
-
214
-
215
-
216
-
217
-
218
-
219
-
220
-
221
-
222
-
223
-
224
-
225
-
226
-
227
-
228
-
229
-
230
-
231
-
232
-
233
-
234
-
235
-
236
-
237
-
238
-
239
-
240
-
241
-
242
-
243
-
244
-
245
-
246
-
247
-
248
-
249
-
250
-
251
-
252
-
253
-
254
-
255
-
256
-
257
-
258
-
259
-
260
-
261
-
262
-
263
-
264
-
265
-
266
-
267
-
268
-
269
-
270
-
271
-
272
-
273
-
274
-
275
-
276
-
277
-
278
-
279
-
280
 |
 |